5.4 Drawing Multisided Figures: The Polygon Command
5.4 Drawing Multisided Figures: The Polygon Command
The polygon has long been one of the foundations on which our world is designed. Everything from the simple triangles of the pyramids to the hex head bolts that hold our automobiles together relies on the mathematics associated with multisided objects. Fortunately, I can leave the mathematics to those better qualified to confuse. All I must do is explain the three simple methods for drawing polygons.
Consider the chart in Figure 5.4a. it's really as simple to draw polygons as this chart suggests. Let's look at the command sequence:
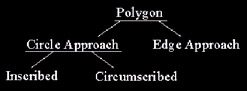
Figure 5.4a:
Command: polygon (or pol )
Enter number of sides <4>: [enter the desired number of equal sides “ from 3 to 1024]
Specify center of polygon or [Edge]: [either identify the location of the center of the polygon (the Circle Approach), or type E to use the Edge Approach]
Enter an option [Inscribed in circle/Circumscribed about circle] <I>: [let AutoCAD know if you'll draw your polygon inside (inscribed) or outside (circumscribed an imaginary circle)
Specify radius of circle: [tell AutoCAD the radius of the imaginary circle in which or around which you want to draw the polygon]
You see the first branch of the chart at the second command prompt. Find the second branch at the third prompt.
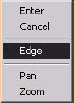
| Note | You can also access the Polygon command under the Draw pull-down menu. Polygon command options are also available on cursor menus once the command has been entered. |
Do This: 5.4.1 Drawing Polygons
-
Open the polygons drawing in the C:\Steps\Lesson05 folder. It looks like Figure 5.4.1a.

Figure 5.4.1a: -
Follow these steps.
Tools
Command Sequence
Steps

Polygon Button
Command: pol
1. Enter the Polygon command by typing polygon or pol at the command prompt. Alternately, you can pick the Polygon button on the Draw toolbar.
Enter number of sides <4>: 6
2. AutoCAD asks for the number of sides needed to create the polygon. Type 6 .

Specify center of polygon or [Edge]: _cen of
3. Now AutoCAD needs to know how to draw the polygon. We'll accept the center of polygon default option. Use OSNAPs to select the center of the larger upper circle.
(Note: The circle isn't necessary for drawing the polygon. We just use it for demonstration purposes.)
Enter an option [Inscribed in circle/ Circumscribed about circle] <I>: [enter]
4. We'll draw our polygon inside the circle ( Inscribed ).
Hit enter .
Specify radius of circle: 1.5
5. Type 1.5 as the radius of the circle. Your drawing should look like Figure 5.4.1.5a.
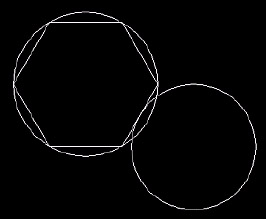
Figure 5.4.1.5a: Command: pol
6. Repeat the Polygon command.
POLYGON Enter number of sides <6>: [enter]
7. This time AutoCAD defaults to six sides, as that was the last number used. Hit enter .
Specify center of polygon or [Edge]: _cen of
8. Use OSNAPs to select the center of the smaller circle.
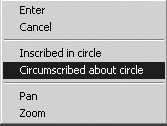
Enter an option [Inscribed in circle/ Circumscribed about circle] <I>: c
9. Type c (or select Circumscribed about circle on the cursor menu) to draw our polygon circumscribed (outside the circle).
Specify radius of circle: _qua of
10. When prompted for the radius, use the OSNAP to select the bottom quadrant of the circle. Your drawing looks like Figure 5.4.1.10a.
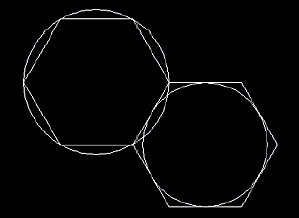
Figure 5.4.1.10a: Command: pol
11. Now let's look at the Edge option. Repeat the Polygon command.
Enter number of sides <6>: [enter]
12. Hit enter to accept six as the number of sides.
Specify center of polygon or [Edge]: e
13. Type e (or select Edge on the cursor menu) to select the Edge option.
Specify first endpoint of edge: _endp of
14. Select Point 1 as indicated in Figure 5.4.1.14a. (Use the endpoint OSNAP).
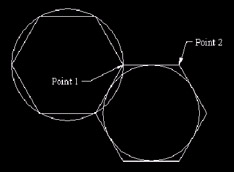
Figure 5.4.1.14a:Specify second endpoint of edge: _endp of
15. Select Point 2 . Your drawing looks like Figure 5.4.1.15a.
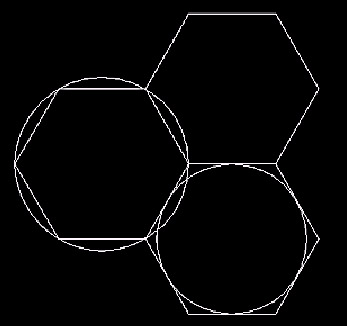
Figure 5.4.1.15a:
Command: qsave
16. Save and close the drawing.
That's it for polygons! Remember, you can draw polygons with anything from 3 to 1024 sides and you don't need an actual circle to guide you!