16.5 Exercises
I've modified an earlier project for our first Lesson 17 exercise. This should give you some frame of reference when you compare different modifying commands and methods .
-
Open the Cabin-adv.dwg file in the C:\Steps\Lesson16 folder.
1.1
Using the objects provided, the Grips commands, and your preferences in the Options dialog box, complete the drawing shown in Figure 16.5.1a.
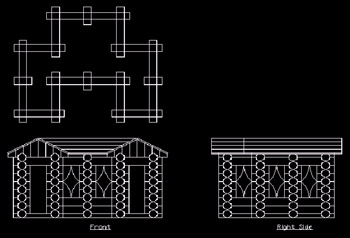
Figure 16.5.1a:1.2
Save the drawing as MyCabin-adv.dwg in the C:\Steps\Lesson16 folder.
-
Start a new drawing from scratch.
2.1
Use the following setup:
2.1.1
Grid: ½
2.1.2
Snap and Layers : as needed
2.1.3
Font: Times New Roman
2.1.4
Dimension styles: as needed
2.2
Save the drawing as MyGasket in the C:\Steps\Lesson16 folder.
2.3
Create the drawing shown in Figure 16.5.2a.

Figure 16.5.2a: -
Start a new drawing from scratch.
3.1
Use the setup described in 2.1.
3.2
Save the drawing as MySlottedGuide in the C:\Steps\Lesson16 folder.
3.3
Create the drawing shown in Figure 16.5.3a.
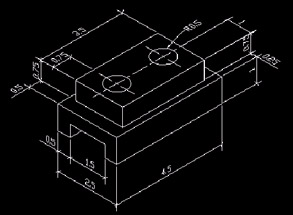
Figure 16.5.3a: -
Start a new drawing from scratch.
4.1
Repeat the setup you did in Exercises 2 and 3.
4.2
Save the drawing as MySpring in the C:\Steps\Lesson16 folder.
4.3
Create the drawing shown in Figure 16.5.4a.
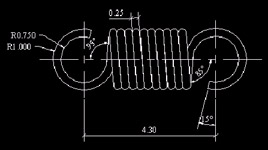
Figure 16.5.4a: -
Create and dimension the drawing in Figure 16.5.5a. The grid is set to ¼". Use appropriate layers.
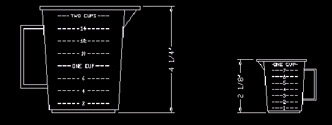
Figure 16.5.5a: -
Using the bottle detail shown in Figure 16.5.6a, create the drawing of the spice rack in Figure 16.5.6b. The grid is 1/8". Fully dimension the drawing (not the bottles) and use appropriate layers.
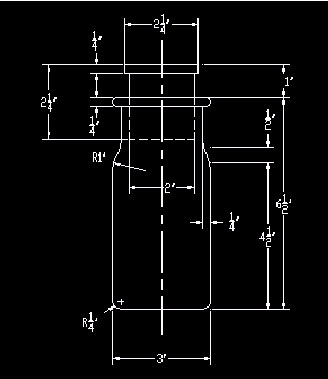
Figure 16.5.6a: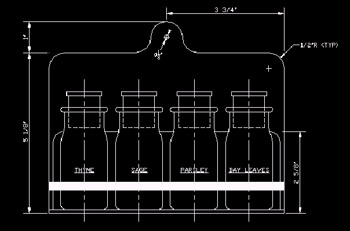
Figure 16.5.6b: