9.6. CDS 9.6.1. Package for CD Uses Incorrect Drive THE ANNOYANCE: I can't get PowerPoint 2003 to recognize my second CD drive when I select File  Package for CD. It keeps trying to write to my DVD drive. Is there any way to change this? Package for CD. It keeps trying to write to my DVD drive. Is there any way to change this? THE FIX: You would have to re-cable your CD and DVD drives, because PowerPoint automatically uses the drive cabled as the "master" drive when you use File  Package for CD. If you dont want to re-cable your CD drives so they have different drive letters, you can always just put the CD in the DVD drive and let it burn the CD. Better yet, choose File Package to Folder and burn the files in the folder to the CD using your CD-burning software. Package for CD. If you dont want to re-cable your CD drives so they have different drive letters, you can always just put the CD in the DVD drive and let it burn the CD. Better yet, choose File Package to Folder and burn the files in the folder to the CD using your CD-burning software.
Note: In PowerPoint 2003, the Package for CD option relies on Windows XP's CD burning functionality to create CDs. If you're not using Windows XP, or can't get Package for CD to work, choose File Package for CD Copy to Folder instead. You can then burn the files in the folder to CD using your usual CD burning software. Do not burn the folder itselfyou want to burn the contents of the packaged folder.
Package for CD, walk through the wizard, and be done with it. If you have any other version of PowerPoint, youll have to do it the long, involved, manual way. Choose your instructions based on the PowerPoint version and the type of animations and transitions you used to create your file (see Table 9-1). Table 9-4. Use this table to help you determine which technique and Viewer to use when creating files for an Autorun CD.Version | Viewer | Notes |
|---|
PowerPoint 2003 | PowerPoint Viewer 2003 | Select File Package for CD. | | PowerPoint 2002 | PowerPoint Viewer 2003 | Use PowerPoint Viewer 2003 if the file includes "new" animations and transitions not available in PowerPoint 97 and 2000. You must, however, set it up manually. Alternatively, select File Pack and Go and choose to include the Viewer (PowerPoint Viewer 97 by default). Test the file in the Viewer before you start the Pack and Go process. | | PowerPoint 2000 | PowerPoint Viewer 97 | Select File Pack and Go and choose to include the Viewer (PowerPoint Viewer 97 by default). You can also use PowerPoint Viewer 2003, but you must set it up manually. Test the file in the Viewer before you burn it to CD. | | PowerPoint 97 | PowerPoint Viewer 97 | Select File Pack and Go and choose to include the Viewer (PowerPoint Viewer 97 by default). You can also use PowerPoint Viewer 2003, but you must set it up manually. Test the file in the Viewer before you start the Pack and Go process. |
The following sections show you how to create an Autorun CD with different versions of PowerPoint and PowerPoint Viewer. 9.6.2.1. PowerPoint 2003 To create a CD that runs your presentation in PowerPoint Viewer 2003 without installing anything on the recipient's computer, follow these steps: Save your PowerPoint file and select File Package for CD. In the Options dialog box, check the boxes to include the PowerPoint Viewer and any linked files (see Figure 9-35). Generally, you want to leave the Play option set to "Play all presentations in the specified order." If you want, embed TrueType fonts and add passwords. A Modify password helps keep people from making changes to your files. An Open password prevents users without the password from viewing the file. Click OK to close the dialog. Figure 9-35. Here you can opt to include PowerPoint Viewer 2003 and any files linked to your presentation. 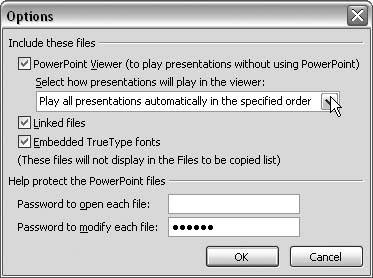 Click the Copy to Folder button and click OK (see Figure 9-36). Figure 9-36. Click the Copy to Folder button to open another dialog box where you can specify the folder to save the Package for CD files to. Click OK here when you've made all your selections to begin processing the files. 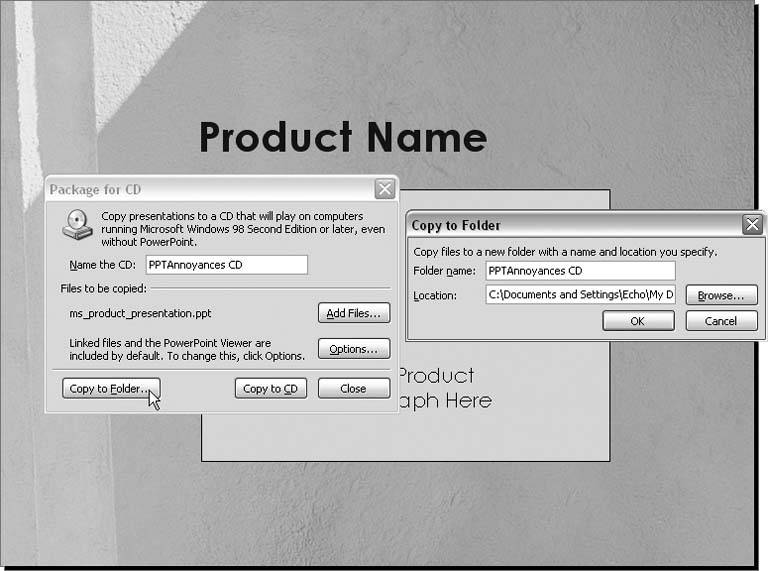 Click the Close button when the packaging process is complete. Your files will be saved to a folder with the name you specified in Step 4. If you chose to include PowerPoint Viewer 2003, you'll see pptview.exe, pvreadme.htm, and a number of .dll files. You should also see your presentation file and any linked media, along with files the CD uses when it autoruns (play.bat, playlist.txt, and autorun.inf). Burn all of these files to CD. Don't burn the folder itself, just burn the contents of the folder and leave the files "loose" on the CD.
9.6.2.2. PowerPoint 97 and 2000 with PowerPoint Viewer 97 To create a CD that runs your presentation in PowerPoint Viewer 97 without installing anything on the recipient's computer, follow these steps: Download and install PowerPoint Viewer 97 from Microsoft (http://www.microsoft.com/downloads/details.aspx?FamilyID=7c404e8e-5513-46c4-aa4f-058a84a37df1&DisplayLang=en). Save your PowerPoint file and select File Pack and Go. -
Make sure you check the "Include linked files" box and choose the "Viewer for Windows 95 or NT" option (see Figure 9-38). Click Finish to complete the wizard and begin Pack and Go processing. Figure 9-38. As you walk through the Pack and Go wizard, click to include linked files (left) and PowerPoint Viewer 97, which is referred to as "Viewer for Windows 95 or NT" (right). 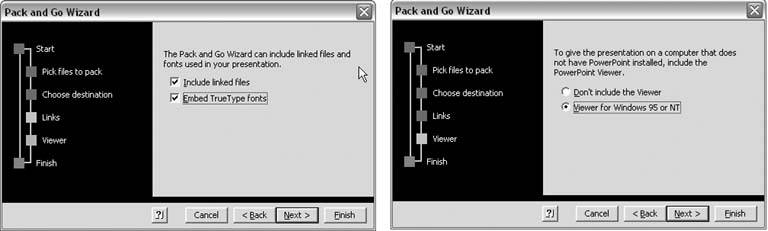 Double-click the PNGSetup.exe file created by the Pack and Go process. It should be located in the folder you created in step 3. Type a name for the folder where you want to unpack the files (see Figure 9-39). A folder will be created automatically if it doesn't already exist. If you look at the unpacked files, you will see ppview32.exe, 15 .dll files, an .olb file, your presentation file, any linked files such as audio or video, and a playlist.lst file. Figure 9-39. Double-click PNGSetup.exe to unpack your presentation and resolve links to any files. Type the name of the folder where you want to unpack the files. 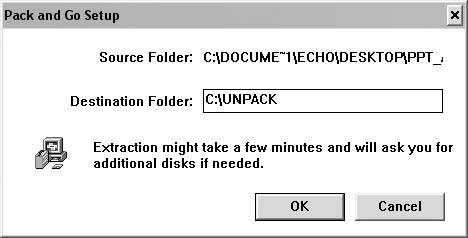 Create an autorun.inf file and save it in the same folder with the unpacked files. Open Notepad. In Windows XP, select Start All Programs Accessories Notepad. Select File Save As, type autorun.inf in the "File name box, navigate to the same folder with the unpacked files, and click the Save button.
Inside the folder with the unpacked files, create a folder called present and another called setup (select File New Folder). Search your hard drive and copy all the other files the PowerPoint Viewer needs to run from the CD to the unpacked folder (see the list below). The Pack and Go process did not include these files because Pack and Go was never intended to run directly from CD. You will need to set your search options to search hidden and system files. Table 9-5. • base.srg | • msorfs.dll | • rappt.dll | • docobj.dll | • msppt8vr.olb | • selfreg.dll | • hlink.dll | • msv7enu.dll | • servrdep.srg | • hlinkprx.dll | • pp4x322.dll | • servrind.srg | • msimrt.dll | • pp7x32.dll | • sshow.srg | • msimrt16.dll | • ppintlv.dll | • t2embed.dll | • msimrt32.dll | • ppview.dll | • urlmon.dll | • msimusic.dll | • ppview32.exe | • wininet.dll | • mso97v.dll | | |
Drag the ppview.dll file to the setup folder. Burn the setup folder (and the file inside it), the present folder (and the files inside it), and all the files inside the unpacked folder to your CD (see Figure 9-40). Do not burn the unpacked folder itself to the CD.
Figure 9-40. Burn the setup folder, the present folder, and all of the remaining "loose" files inside the unpacked folder to the CD to create your Autorun CD using PowerPoint Viewer 97. 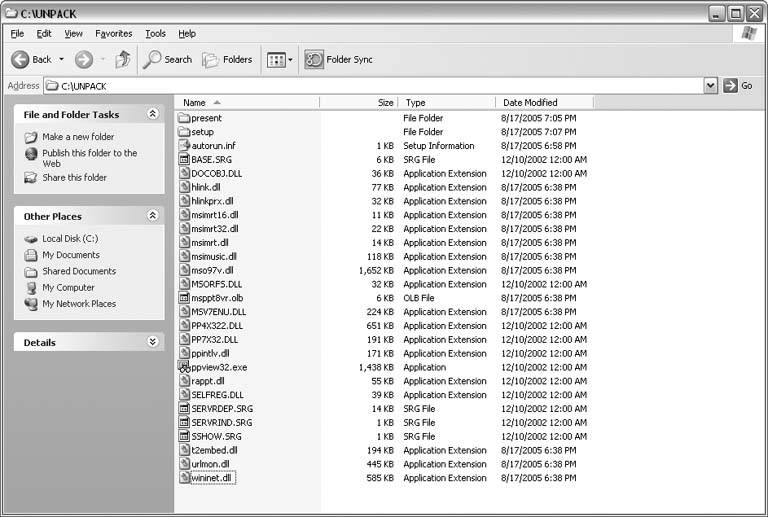
9.6.2.3. PowerPoint 2002 with PowerPoint Viewer 2003 To create a CD that runs your presentation in PowerPoint Viewer 2003 without installing anything on the recipient's computer, follow these steps: Download and install PowerPoint Viewer 2003 from Microsoft (http://www.microsoft.com/downloads/details.aspx?FamilyId=428D5727-43AB-4F24-90B7-A94784AF71A4&displaylang=en). Save your PowerPoint file and select File Pack and Go. Make sure you check the "Include linked files" box (see Figure 9-38). Choose the "Do not include the Viewer" option when prompted. Pack and Go only recognizes PowerPoint Viewer 97. Since you want to include PowerPoint Viewer 2003 to run your PowerPoint 2002 animations correctly, you will have to manually add its files later. Click Finish to complete the wizard and begin Pack and Go processing. Double-click the PNGSetup.exe file created by the Pack and Go process. It should be located in the folder you created in step 3. Type a name for the folder where you want to unpack the files (see Figure 9-39). A folder will be created automatically if it doesn't already exist. If you look at the unpacked files, you will only see your presentation file, any linked files such as audio or video, and a playlist.lst file. Locate the PowerPoint Viewer 2003 files on your hard drive and copy them to the unpacked folder (see the list below): gdiplus.dll intidate.dll pptview.exe ppvwintl.dll pvreadme.htm saext.dll unicows.dll
Create a playlist.txt file and save it in the folder with the unpacked files: Open Notepad. In Windows XP, select Start All Programs Accessories Notepad. Select File Save As, type playlist.txt in the "File name box, navigate to the folder with the unpacked files, and click the Save button.
Delete the playlist.lst file from your unpacked folder. PowerPoint Viewer 2003 uses a playlist.txt file instead of a *.lst file. Create an autorun.inf file and save it in the folder with the unpacked files. Open Notepad again. Type the following: [autorun] open=pptview.exe /L "playlist.txt"
The /L tells PowerPoint Viewer 2003 to read the playlist, which is contained in the file playlist.txt. Select File Save As, type autorun.inf in the "File name box, navigate to the folder with the unpacked files, and click the Save button.
Create a play.bat file save it in the folder with the unpacked files. Open Notepad again. Type the following: @pptview.exe /L "playlist.txt"
Select File Save As, type play.bat in the "File name box, navigate to the folder with the unpacked files, and click the Save button. You don't absolutely have to have a .bat file on your Autorun CD. The .bat file will actually run your CD automatically, even if autorun has been turned off on the recipient's CD drivewhich may irritate the recipient. You can double-click the play.bat file to test your files before you burn them to CD.
Burn all of the files in the unpacked folder to CD. Don't burn the folder itself, just burn the contents of this folder and leave them "loose" on the CD (see Figure 9-41).
You can use this technique with PowerPoint 97 and 2000, if you want to show those files with PowerPoint Viewer 2003. Make sure you test them with the Viewer before you create the Autorun CD files. Figure 9-41. When you're done, your folder should look something like this. Burn allof these files to CD. 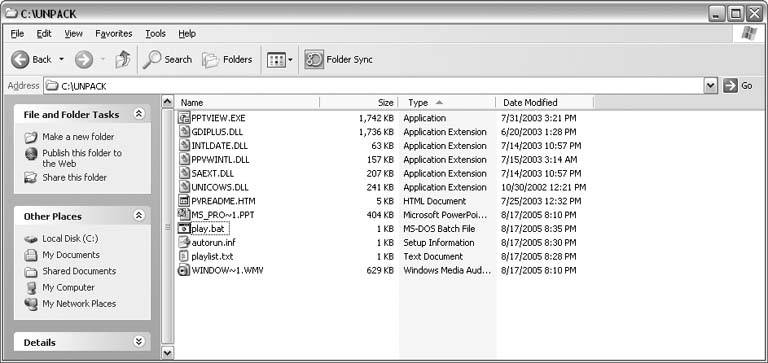
Note: Not into do-it-yourself Autorun PowerPoint CD creation? PowerLink Plus ($50; http://www.soniacoleman.com/Tutorials/PowerPoint/acdpc.htm) resolves all your linked files, copies all the files to a folder, adds the necessary PowerPoint Viewer files, and generates the autorun.inf file. All you have to do is burn the files to CD.
9.6.3. Make an EXE File THE ANNOYANCE: Can I just create an .exe file from my PowerPoint file? THE FIX: Follow the steps to create an Autorun CD using PowerPoint Viewer 2003 (see "Make an Autorun CD"), but don't burn the files to CD. Click Start Run and type When you reach the "Packaged Files" screen, click the Add button, navigate to the folder with your autorun CD files, select all the files, and click the Open button to add them to the IExpress package (see Figure 9-42). In the Install Program to Launch screen, type PPTVIEW.EXE /L /S playlist.txt in the Install Program box. The /L tells the Viewer to read the playlist, and the /S eliminates the splash screen. Figure 9-42. Add the files for an Autorun CD when you reach this screen of the IExpress wizard. 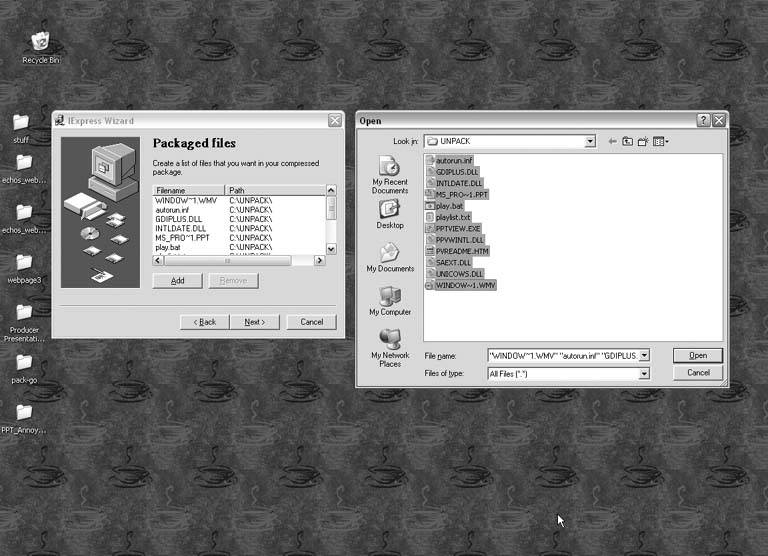
Microsoft PowerPoint MVP Geetesh Bajaj developed this technique. You can find more specific instructions on his web site (http://www.indezine.com/products/powerpoint/pp2003/ppt2exe.html). |