Chapter 2. Dumb Defaults
1.3. THINGS THAT DRIVE PRESENTERS CRAZY1.3.1. Change Note Size in Presenter ViewTHE ANNOYANCE: I'm using Presenter view, and I swear, I think I'm blind as a bat! How can I change the size of the notes area in Presenter view? THE FIX: Presenter view on the PC cannot be changed. (It can be changed on PowerPoint 2004 for the Mac, though.) If you need this capability, download the PowerShow add-in from Microsoft PowerPoint MVP Chirag Dalal (http://officeone.mvps.org/powershow/powershow.html). This add-in lets you use PowerPoint's views during a presentation, and it keeps the view on the "presenter monitor" synchronized with the view on the "presentation monitor." To set it up, simply install the add-in, select Slide Show Figure 1-9. PowerShow lets you increase the font size on speaker notes, plus a whole lot more.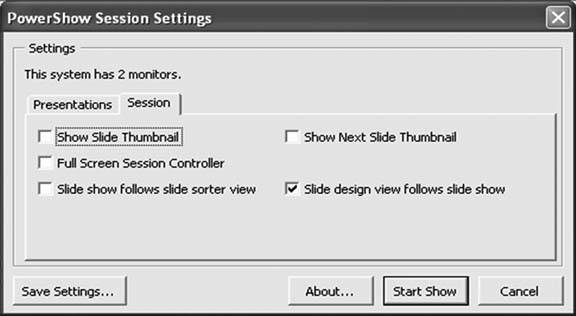 Since PowerShow uses PowerPoint's own design views, you can increase the size of your speaker notes by zooming in on them or increasing the font size in PowerPoint. You might also want to download the Shortcut Manager (http://officeone.mvps.org/ppsctmgr/ppsctmgr.html), which lets you assign the up and down arrow keys to navigate slides during a PowerShow session. 1.3.2. Practice with Only One MonitorTHE ANNOYANCE: I'd really like to practice with Presenter view, but PowerPoint won't let me use it unless I have a second monitor attached. I don't have a second monitor. Any suggestions? THE FIX: Select View Figure 1-10. Hold down the Ctrl key while you click the slide show icon to open a slide show that takes up only 1/4 of your screen.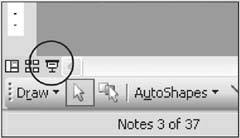 1.3.3. Start Slide Show from the Current SlideTHE ANNOYANCE: I'm working on creating a presentation, and it would sure be nice if there were a keyboard shortcut to start the presentation from the current slide! Otherwise, it takes forever to navigate to the slide I really want to see. THE FIX: Plain ol' F5 will still begin the slide show on the first slide, but Shift+F5 will, as of PowerPoint 2003, begin the presentation from the current slide. As a matter of fact, if you happen to have the Custom Animation task pane open in either PowerPoint 2002 or 2003, you can press the Slide Show button at the bottom to start the show on the current slide (see Figure 1-11). Figure 1-11. Press the Slide Show button at the bottom of the Custom Animation task pane to begin the slide show on the current slide.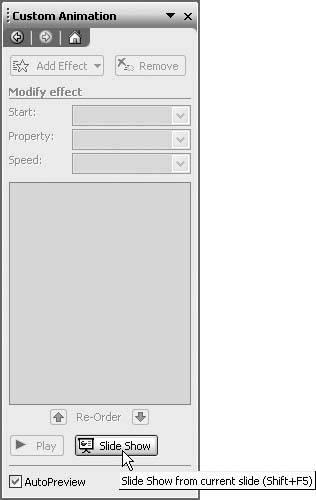 1.3.4. Create a Self-Running PresentationTHE ANNOYANCE: I want to have a presentation running in our booth at an upcoming trade show. How can I create a self-running presentation? THE FIX: Select Slide Show Kiosk mode renders the keyboard useless, so make sure you provide some kind of navigation for the users. You can either set all the slide transitions to automatic, or you can provide buttons with Action Settings so the users can navigate through the presentation at their leisure. You can add action buttons to the slide and title master so they're available on every slide. Select View Did I say Kiosk mode makes the keyboard useless? Well, I lied. The Esc key will still work, so you'll want to remove the keyboard from the trade show system after you get the kiosk going. Or you can use Microsoft PowerPoint MVP Shyam Pillai's free No ESCape add-in (http://skp.mvps.org/noesc.htm) to disable the Esc key. 1.3.5. Kiosk Mode Is BrokenTHE ANNOYANCE: I created a presentation to run at a kiosk, and it should return to the first slide after five minutes of inactivity. However, now it just sits there on the slide and never goes back to the beginning. How'd I manage to break my presentation? THE FIX: Oh, you didn't break anything, PowerPoint did. Kiosk mode is broken in PowerPoint 2002; it doesn't reset after five minutes of inactivity. It does reset as expected in PowerPoint 97, 2000, and 2003, though. If you need to use Kiosk mode in PowerPoint 2002, or if you simply want to extend the capabilities of Kiosk mode in PowerPoint 2000 or 2003, download the Kiosk Assistant (http://officeone.mvps.org/kioskassist/kioskassist.html) from Microsoft PowerPoint MVP Chirag Dalal. It lets you specify the time interval before the presentation resets, as well as which slide the presentation will reset to. 1.3.6. Loop Your Presentation ContinuouslyTHE ANNOYANCE: I have this computer running a presentation in our lobby, but I want it to start over automatically when it gets to the end. THE FIX: Select Slide Show Figure 1-12. Specify various presentation settings in the Set Up Show dialog box. You must have two monitors attached for the Multiple Monitors options to be available. 1.3.7. Show a Range of SlidesTHE ANNOYANCE: My presentation has 20 slides in it, but it stops after showing only half the slides. What's wrong? THE FIX: There are two common culprits here: hidden slides or a specific slide range. The easiest way to check for hidden slides is to select View If hidden slides aren't the problem, select Slide Show 1.3.8. Add Current Date and TimeTHE ANNOYANCE: I have a welcome presentation running continuously on a computer in our lobby. I'd like to add the current date and time, but I can't find a way to do it. I tried using Insert THE FIX: You need to download the free AutoDateTime add-in from Microsoft PowerPoint MVP Chirag Dalal (http://officeone.mvps.org/autodatetime/autodatetime.html). As with any add-in, before you can install it, you must select Tools Figure 1-13. Choose Format |
 PowerShow, click the Session tab, and check the "Slide design view follows slide show box (see Figure 1-9).
 Slide Master, and then select AutoShapes
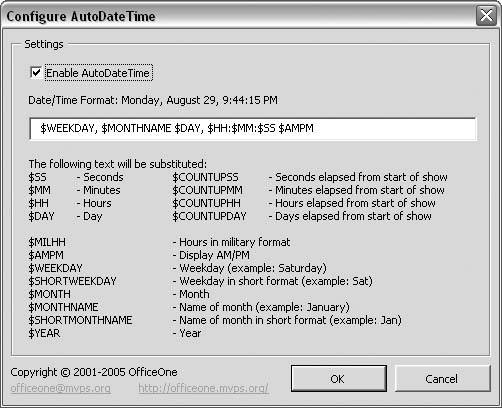
| Customize Your Presentation with Custom Shows |
You already created your presentation, but now you want to add a three-slide, "side" presentation that goes into more depth on a particular subject, in case the audience asks questions. One easy solution is to create a custom show within your presentation. Select Slide Show Figure 1-14. Custom shows let you create "branches" or specific groups of slides in your presentation. Press Shift or Ctrl while clicking on slides in the list to add or remove more than one slide at a time.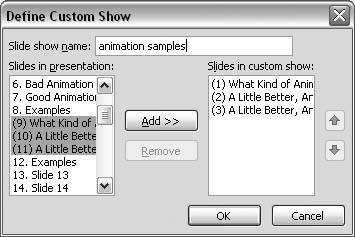 After you've created a custom show, use the following steps to enable access to it:
The "Show and return" option returns you to the slide you started on when the custom show finishes. If you don't check this box, the presentation will just end after you finish showing the slides in the custom show. Figure 1-15. When you create the Action Setting link to access a custom show, make sure you check the "Show and return" box so you return to the original slide when you finish the custom show. |
| Create an Intro Loop |
Many users need to have a couple of slides loop at the beginning of a presentation while the audience is seated. They then need to move to the main presentation easily without the audience noticing. One way to create such an intro loop is to make a custom show that includes just the first few slides you need to loop. (You can even create a custom show containing just one slide.) Create another custom show that includes the slides in the main presentation. See the "Customize Your Presentation with Custom Shows" sidebar. Next, select Slide Show Finally, add a button to each of the slides in the intro loop; you'll click this button to begin the main presentation. Draw an object on an intro slide, right-click it, and choose Action Settings. Choose the "Hyperlink to" option and select Custom Show from the drop-down list. Select the custom show representing the main presentation. Copy the button and paste it on all the intro slides. Microsoft PowerPoint MVP Taj Simmons has an even more seamless method of looping slides. Check out his tutorial at http://www.awesomebackgrounds.com/powerpointlooping.htm. Figure 1-16. Set custom shows to "Loop continuously until 'Esc'" in the Set Up Show dialog box. To loop a custom show, you must specify the slide numbers in the Show Slides area, which is rather counterintuitive.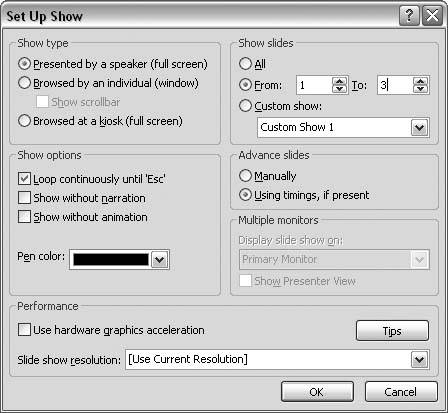 |
EAN: 2147483647
Pages: 83