Using Application Deployment Investigation
| < Day Day Up > |
| Application Deployment Investigation is a new feature available as of CSA version 4.5. Understanding this feature enables administrators of the CSA product to better understand the applications installed and running on the systems they are attempting to protect. Remember, the ultimate goal of CSA is to maximize system and end-user efficiency by preventing outages and unauthorized application use while protecting corporate assets and information. The two components used during application deployment investigation are the CSA Management Console (MC) and CSA agent. Both of these components are inherent in the base installation of the CSA products and require no further licensing for this feature to function. The CSA MC is where you configure investigation parameters and view reports regarding the collected data. The CSA agent performs application investigation on the local host and reports back the findings to the CSA MC for correlation and further analysis. On the Application Deployment Investigation menu, you have the following four options:
The next sections describe each option in more detail. Group SettingsChoosing the Group Settings menu option brings you to a screen that lists currently configured group sets configured for application deployment investigation, as shown in Figure 10-2. Figure 10-2. Application Investigation Group Settings List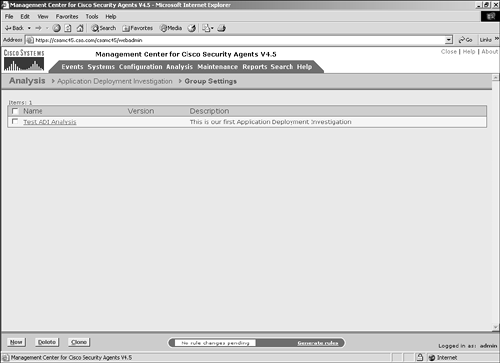 To configure an application deployment investigation, follow these steps, which correspond to Figure 10-3:
Figure 10-3. Application Deployment Investigation Configuration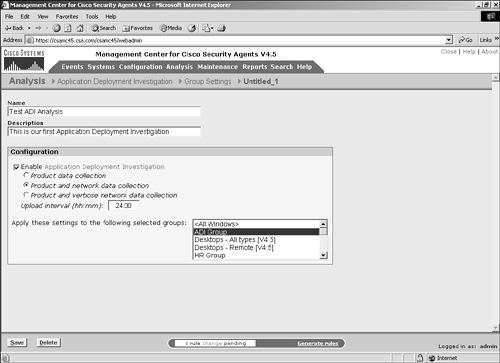 NOTE Application deployment investigation does not prevent agent protective mechanisms during the reporting process. All protective rules in an agent local policy continue to run as centrally defined. It is important to understand the preceding settings when deploying application deployment investigation to agents within the architecture. The three collection options impact the amount of data stored and transmitted. Product data collection is the least-intensive method of data collection and only reports installed products. Product and network data collection requires more storage capacity because it also reports applications that connect to the network as clients and servers. Product and verbose network data collection is the most intensive approach to data collection because it also collects and reports IP address information with regard to the network interaction. You should only use the verbose method when you require IP address information, because it dramatically increases the storage requirements. NOTE When an application deployment investigation process is working on an agent, you can see two files in the local agent \CSAgent\log directory with names starting with trackdb and the date of the analysis. The two files will have .dir and .pag extensions. After you have completed all the steps, you can begin to collect data on the agent endpoints. The agents begin collecting data only after they have been instructed via their normal polling communication. To verify the group selected is running an application deployment investigation job or has reported information back to the CSA MC, view the group configuration page. (See Figure 10-4.) The group configuration page has a section that states whether the investigation is enabled. If so, you can click the Reports link to get a pop-up page that displays available reports. Also, clicking the Yes link redirects your browser to the application deployment investigation configuration page that impacts this specific group. Figure 10-4. Application Investigation Group Indication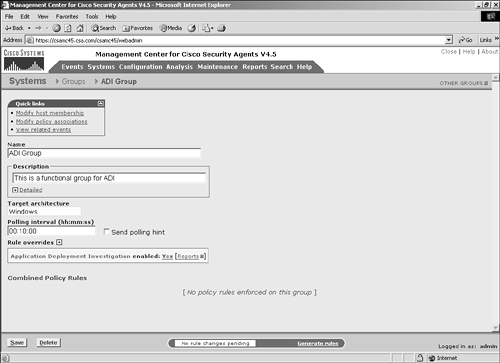 You can also view information regarding the job from a specific host page, as in Figure 10-5. From the host-specific page, you can link to the reports available and view the date and time the host transmitted information as a result of the job. You can also click the Detailed Status and Diagnostic link within the Status pane to view information about the agent, as seen in Figure 10-6. The information you will receive from this link includes the last poll time current IP address, Cisco Trust Agent (CTA) posture, and the current Remote Security slider bar state. Figure 10-5. Application Investigation Host Indication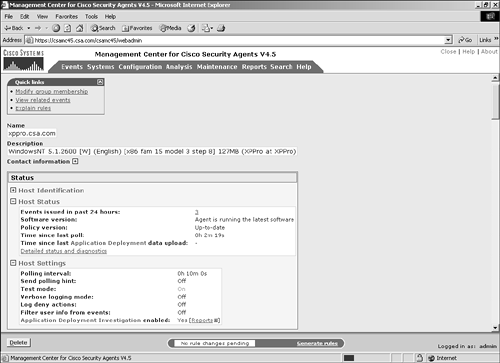 Figure 10-6. Host Detailed Status and Diagnostic Screen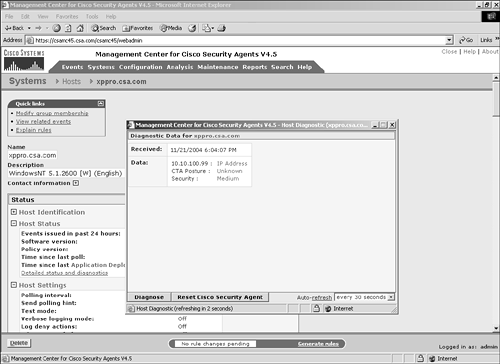 The Reset Cisco Security Agent button in the Host Diagnostics window enables you to reset the agent to factory default settings. This button has the same effect as the local agent option to reset the agent to factory defaults but enables you to perform this action from anywhere in the world. This process includes clearing locally defined firewall policies, file protection policies, and cached responses to query messages. Product AssociationsAfter you have received a data upload from the remote agents as a result of a configured application deployment investigation, you can choose the Product Associations option. This screen lists the applications installed on the agent systems along with a description and whether the application is configured, as shown in Figure 10-7. The CSA MC server needs to understand which processes or executables are part of which application as reported by the agents so that certain reports will provide the desired information. Figure 10-7. Sample Product Associations Screen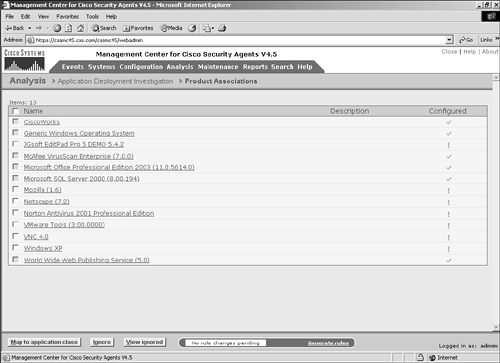 From the Product Associations screen, you have a few options, as follows:
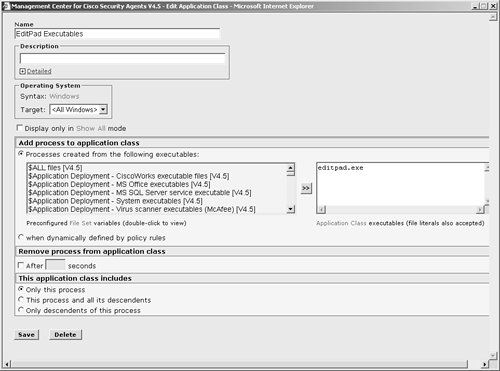
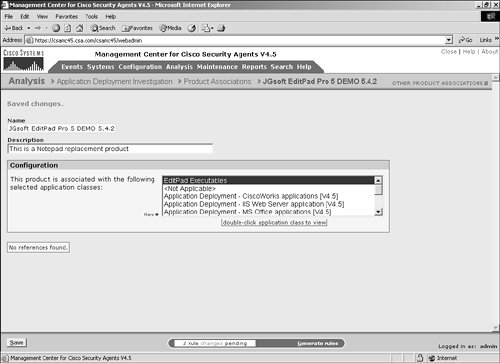
After an application has been mapped appropriately, it displays as configured with a check in the Configured column as opposed to an exclamation point, which denotes an unconfigured application. To configure an application mapping, follow these steps:
You have now configured a simple product mapping within the CSA MC. To verify successful configuration, return to the Product Associations screen and make sure the check box has appeared next to the application you were configuring, as in Figure 10-10. Now that you know how to configure product associations, you can move on to the unknown applications. Figure 10-10. Successfully Configured Application Mapping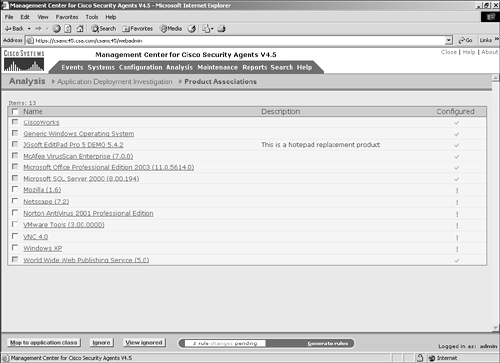 Unknown ApplicationsThe products that had displayed within the Product Associations list were applications that were listed in the Add/Remove Programs list in the control panel of the remote systems. The other applications that you need to understand when protecting the systems are unknown applications. Unknown applications are applications that were witnessed running on the remote systems that are not associated with any product on the CSA MC. To view the list of unknown applications, choose Application Deployment Investigation > Unknown Applications to display a screen similar to Figure 10-11. Figure 10-11. Unknown Application List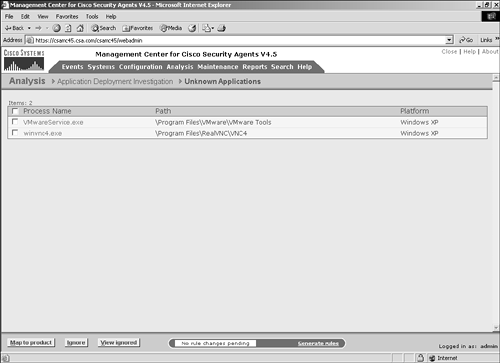 From this screen, you have a few options:
To map a product, check the check box in front of the application you want to map and click Map to Product. The example maps winvnc4.exe. After you click the Map to Product button, a small pop-up screen displays with configuration options, as shown in Figure 10-12. You can create a new application class that includes this file by entering a name for the application class, or you can select an existing application class that includes the unknown application. After you select or create the appropriate application class, you need to select the correct product from the drop-down selection. These are products that are currently unconfigured in the Product Associations screen. Click the OK button to continue after you have correctly selected the options. At this point, the process is removed from the list of unknown applications and the application displays as Configured on the Product Associations screen. Figure 10-12. Process-to-Product Mapping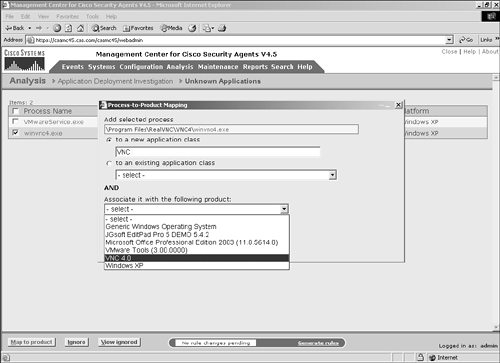 Data ManagementCollecting application deployment investigation data can consume a great deal of disk space. To control the amount of information collected, you can configure a data management plan. Figure 10-13 displays the data management configuration screen. From this screen, you have the following options:
Figure 10-13. Data Management Configuration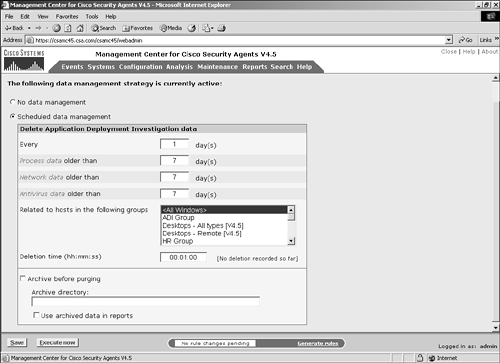 |
| < Day Day Up > |
