Implementing Windows Server Update Services (WSUS)
| Objective: Install and configure software update infrastructure.
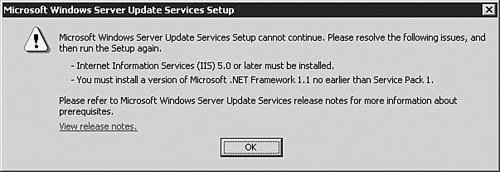
So far in this chapter, we have examined how you can implement a baseline server and network security program through the use of security templates and auditing. To keep a network secure as time goes by, you need to keep your servers and client workstations up-to-date with the latest patches and hot fixes. WSUS can handle this for you in an easy-to-use and easy-to-manage format. Although Windows Server 2003 provides native support for the Windows Server Update Service (WSUS) and the older Server Update Service (SUS), it does not by default include WSUS. It's easy enough, however, to acquire the WSUS installation package and get to work configuring and implementing WSUS on a network. But what, really, is WSUS? WSUS is nothing more than a locally controlled and managed Windows Update server. Instead of allowing the Automatic Updates client on your client workstations and servers to download updates directly from the Microsoft Windows Update servers, you can install and configure one or more WSUS servers on your internal network and point your client workstations and servers toward those WSUS servers. As you might imagine, the ability to have your client workstations use an internal server for Windows Update can be a tremendous benefit to you because it means decreased bandwidth usage. As important as bandwidth savings might be, there is actually a larger benefit to be realized by implementing a WSUS solution on your internal network: the ability to approve specific updates that are to be installed on your clients. When you use Windows Update, your client computers install any available update that matches their needs, but with WSUS, you can specify which of the available updates are authorized to be pushed to the clients after you are satisfied that the update will pose no problems for your clients. This is a tremendous benefit that often goes unrealized. The requirements to install WSUS on a Windows Server 2003 computer are as follows:
Note: NET Framework 1.1 Even though the .NET Framework is currently in version 2.0 for Windows Server 2003, WSUS installs only when using the .NET Framework 1.1 SP1 for Windows Server 2003. As of the time of this writing, WSUS did not support the .NET Framework 2.0, but that will likely change in the future. You can download the .NET Framework 1.1 and .NET Framework 1.1 SP1 for Windows Server 2003 from MSDN at the following location: http://msdn.microsoft.com/netframework/downloads/updates/version1/default.aspx. Clients to be updated by WSUS must meet one of the following requirements:
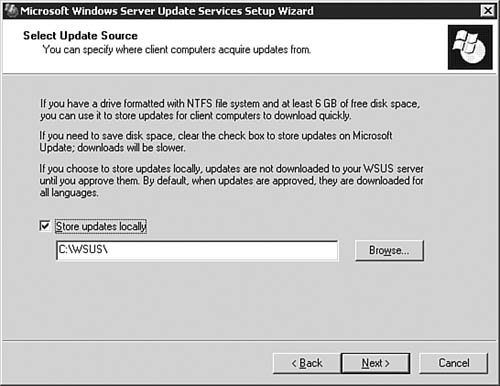
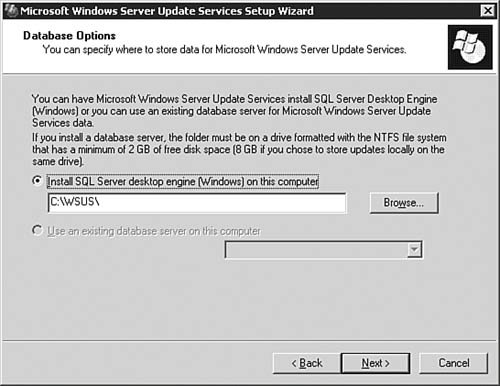
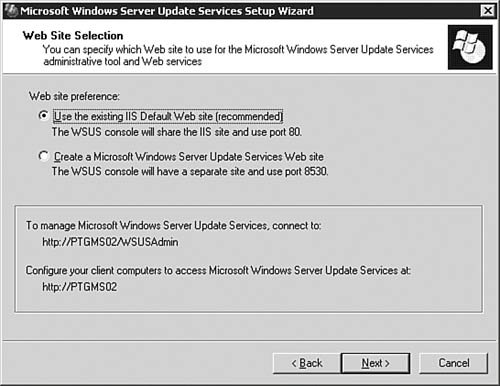
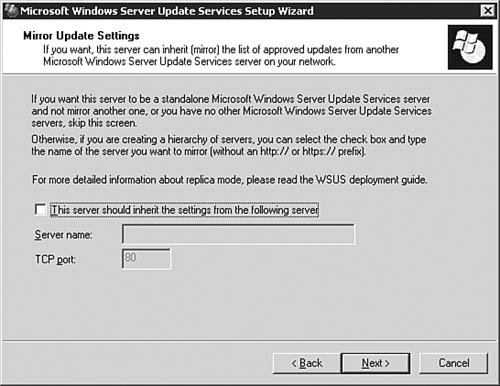
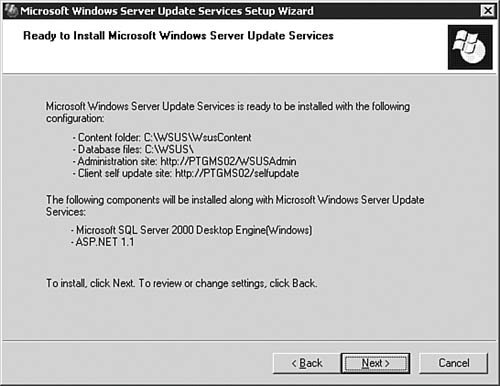
With the formalities out of the way, we can now get down to the business of installing and configuring a WSUS server. After that, we examine how you can take care of the client end of your business. Installing the WSUS ServerTo begin the process of installing and configuring WSUS, you need to first ensure that you have met the guidelines presented in the previous section. After that, you need to download the WSUS installation package from http://www.microsoft.com/windowsserversystem/updateservices/default.mspx. Step by Step 5.8 outlines the process you follow to get WSUS installed on a server. Note: Installing IIS 6.0 Exam 70-291 covers the basic installation and configuration of IIS 6.0 on a Windows Server 2003 computer; thus we will not duplicate that coverage here. You will be expected to perform the installation of IIS that is required in order to install WSUS on your server. If you need a review, see this Web site for more information: http://www.microsoft.com/WindowsServer2003/iis/default.mspx. Step By Step5.8. Installing a WSUS Server
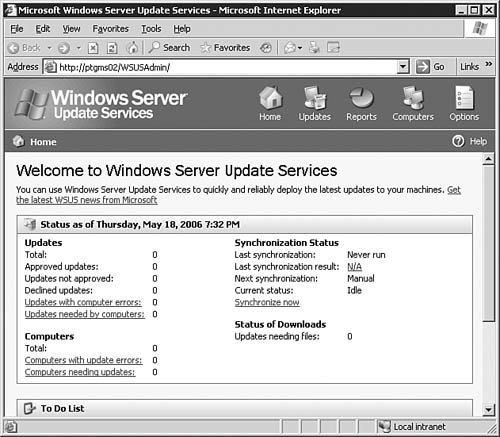
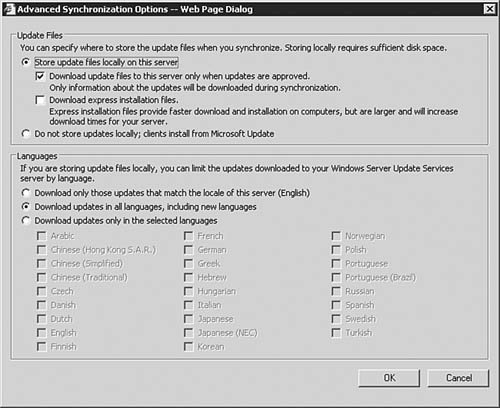
Congratulations, you've just installed a WSUS serverbut your job is not done yet. Before you can start pushing updates to clients in need, you've got some more configuration work to do. We'll now move on to examining the different configuration areas you will need to work with in order to get the WSUS server up to speed. Configuring the WSUS ServerThe process of configuring a WSUS is fairly straightforward and shouldn't take all that long to complete. We'll examine each configuration area in the following sections. To access the WSUS server options page, simply click the Options link located in the top-right corner of the main window. This opens the Options page, shown in Figure 5.64. Figure 5.64. You will need to spend a little time ensuring that all options are set and configured as required.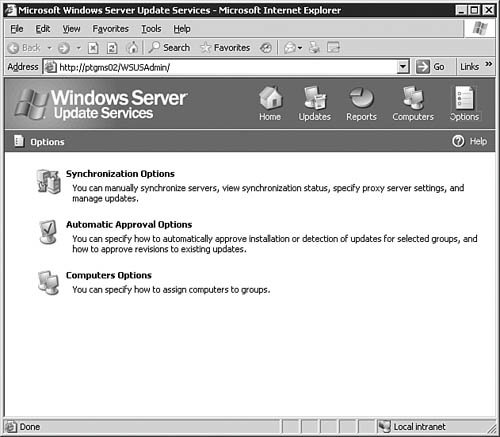 Synchronization OptionsClicking the Synchronization Options link seen in Figure 5.64 will bring you to the Synchronization Options page, as seen in Figure 5.65. From here you will configure basic networking information and synchronization schedulesall important items if your WSUS server is to work properly. Figure 5.65. The Synchronization Options page allows you to get your server connected to the Internet and tell it how to process the downloading of updates.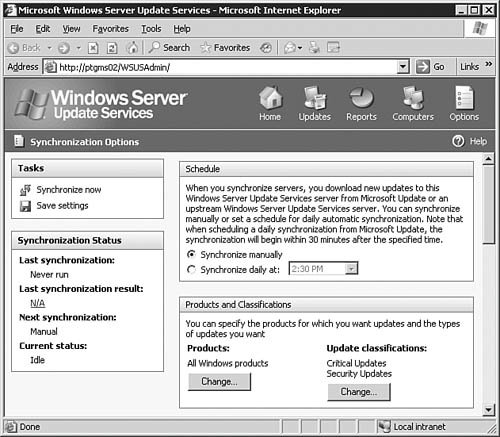 Starting at the top of the page, you will need to configure the WSUS server with the correct information in the following areas:
After you're done making changes on the Synchronization Options page, be sure to click the Save Settings link at the top of the page. After that, click the Options button to get back to the main Options page. Automatic Approval OptionsBy clicking the Automatic Approval Options link seen previously in Figure 5.64, you will be brought to the Synchronization Options page, as seen in Figure 5.67. From here you will configure how the WSUS server will handle updates. Figure 5.67. The Automatic Approval Options page allows you to configure how your WSUS server will handle updates.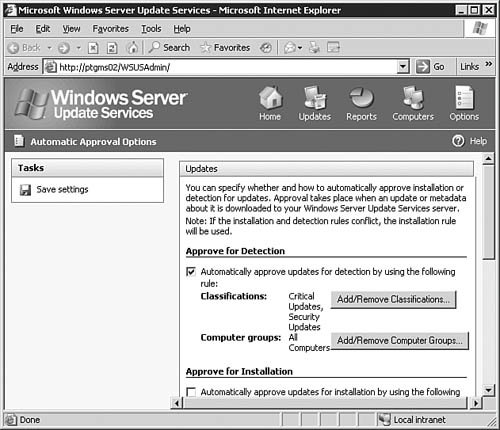 Starting at the top of the page, you will need to configure the WSUS server in the following areas:
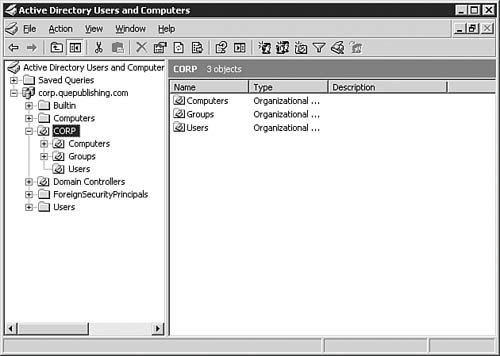
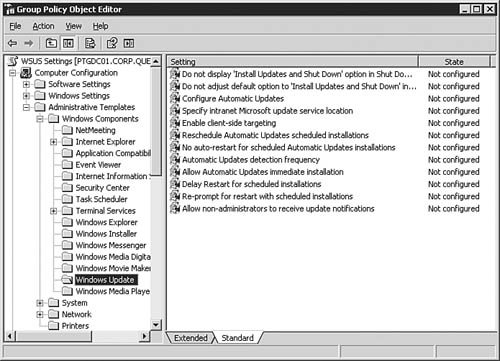
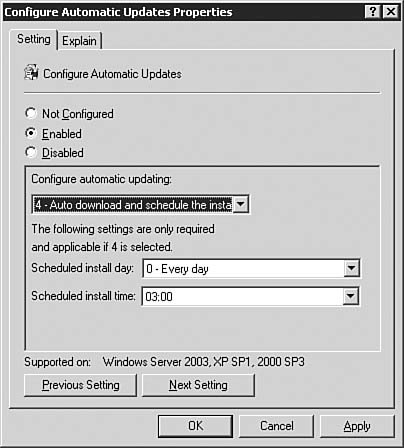
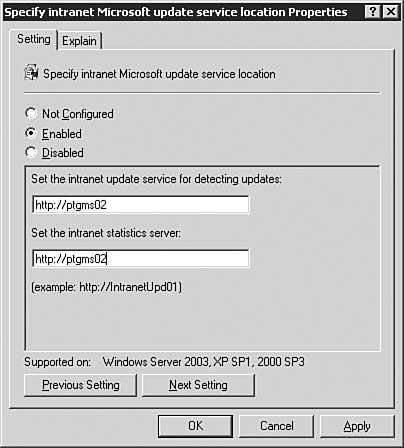
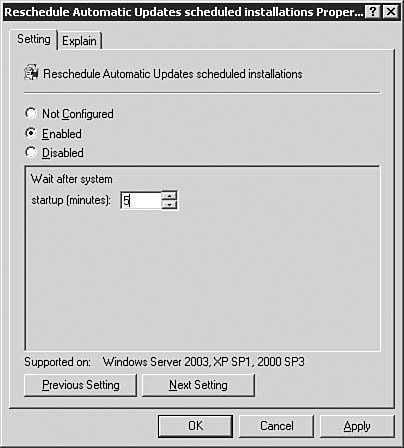
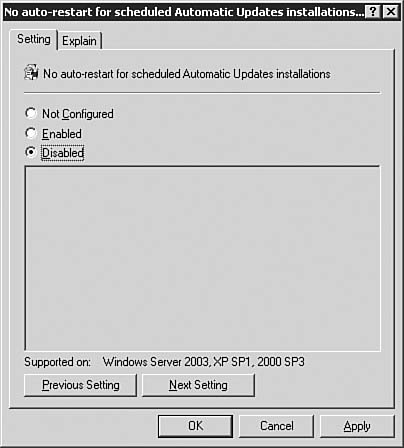
After you're done making changes on the Automatic Approval Options page, be sure to click the Save Settings link at the top of the page. After that, click the Options button to get back to the main Options page. Computers OptionsIf you click the Computers Options link seen previously in Figure 5.64, you will be brought to the Computers Options page, as seen in Figure 5.68. From here you will configure how the WSUS server groups computers. Figure 5.68. The Computer Groups page allows you to configure how WSUS groups computers.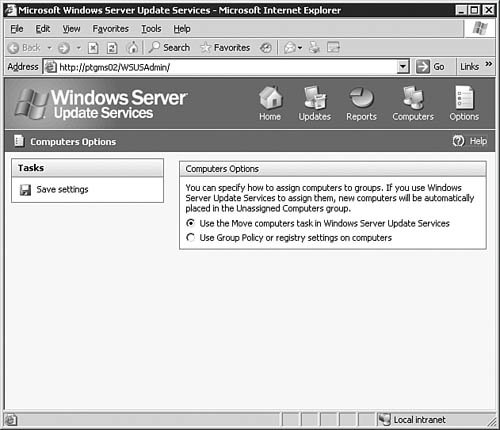 You can opt to group computers within WSUS, or you can group computers by using Group Policy. To group them by Group Policy, click the Help icon and follow the instructions in the help document. After you're done making changes on the Automatic Approval Options page, be sure to click the Save Settings link at the top of the page. After that, click the Home button to get back to the main WSUS page. The Computers PageBy clicking the Computers link at the top of any WSUS page, you will be brought to the Computers page, as seen in Figure 5.69. Figure 5.69. The Computers page allows you to configure computer groups within WSUS.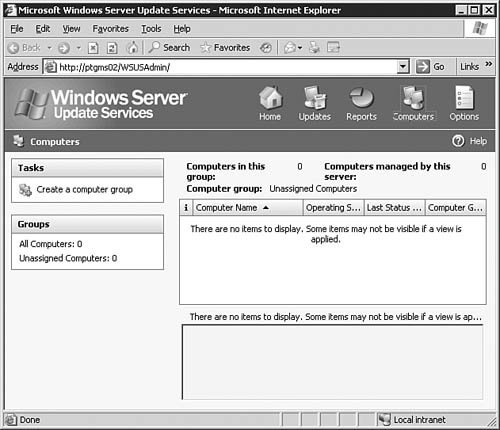 The Computers page is the management location from which all computer grouping is done. Only computers that have been configured to receive updates from this WSUS server will be shown on this page; that is there are no computers listed (yet) in Figure 5.69. We'll examine this page in more detail after Group Policy has been configured for WSUS. If you want to, you can create new computer groups at this time by clicking the Create a Computer Group link to open the dialog box seen in Figure 5.70. Figure 5.70. The creation of computer groups is fairly easy in WSUS. The Reports PageBy clicking the Reports link at the top of any WSUS page, you will be brought to the Reports page, as seen in Figure 5.71. Figure 5.71. The Reports page is your central location for WSUS reporting.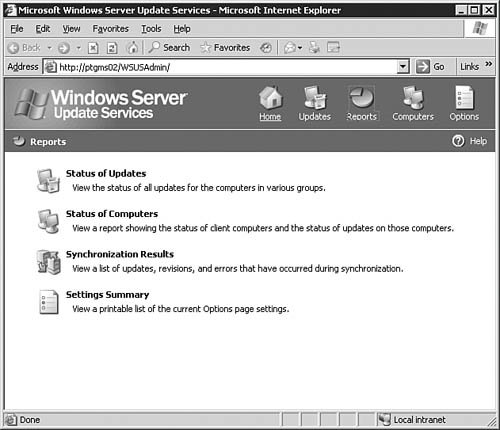 Once you've synchronized the WSUS server and started updating clients with it, you can come back to the Reports page to run reports that will help you keep tabs on what the WSUS server is doing. The Updates PageBy clicking the Updates link at the top of any WSUS page, you will be brought to the Updates page, as seen in Figure 5.72. Figure 5.72. The Updates page details the status of all updates. Once you've synchronized the WSUS server and started approving updates, you can come back to the Updates page to see the status of each update. Notice the fairly granular filtering options available to you on the left side of the page. Updating Clients with WSUSNow that you've performed all of the basic configuration required after the installation of WSUS, you're ready to take the next stepssynchronizing the server with the Windows Update servers, configuring Group Policy to push WSUS settings to your clients, and approving updates and having client computers download them. We explore these tasks in this section. Synchronizing the WSUS ServerTo get your initial WSUS server synchronization accomplished, you'll want to use the Synchronization Options page, as seen previously in 5.65, and click the Synchronize Now link in the top-left corner of the page. Note how the page changes after you start synchronization, as seen in Figure 5.73. Figure 5.73. Once you start a synchronization event, you'll need to wait for it to finish before doing anything else.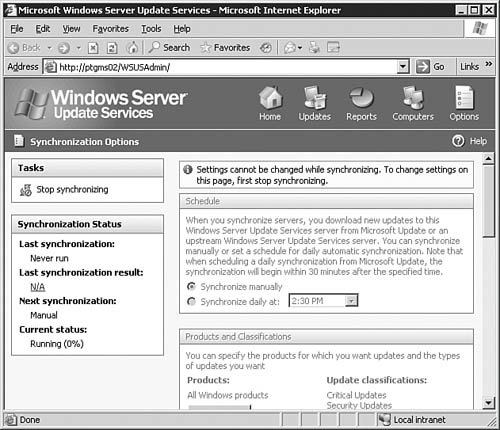 If you go back to the Home page, you will be able to see the percent complete progress on the synchronization event. Note: Sit Back and Relax Once you start the initial synchronization event, you may be waiting for several hours (depending on how many languages you've selected) for all available updates to be downloaded. Of course, this is a good time to get your Group Policy Object created and in place. Configuring Group Policy for WSUSOnce you've gotten WSUS installed and configured to your liking on your server, you need to configure Automatic Updates on your client workstations. Windows Server 2003 includes the administrative templates that allow you to start managing Automatic Updates from within Group Policy. In addition, in smaller organizations where Active Directory may not be in use, you can configure Automatic Updates directly on each local computer. Step by Step 5.9 examines the process of configuring Automatic Updates through Group Policy in Windows Server 2003. Step By Step5.9. Configuring the Automatic Updates via Group Policy
Configuring Local Group Policy for WSUSIn organizations where Active Directory is not in use, you can still easily configure the Automatic Updates client to download and install available updates from the Microsoft Windows Update Web servers. The options are available from either the Automatic Updates tab of the System applet or from the Automatic Updates applet, both of which are located in the Control Panel. Alternatively, you can configure the local group policy on these computers to point towards an installed and configured WSUS server. To open the Local Computer Policy console, simply click Start, Run, enter gpedit.msc, and click OK. The Automatic Updates settings will be found in the same location as seen previously in Figure 5.75: Computer Configuration, Administrative Templates, Windows Components, Windows Update. Approving WSUS Updates and Updating Client ComputersAfter you've completed all of the WSUS installation and configuration steps up to this point, only one basic task remainsactually getting the updates onto your client computers in need. This task encompasses three steps: having Group Policy apply to the clients, approving updates for download and/or installation, and verifying that the updates have been applied. You can verify that Group Policy has taken effect on the server or workstation by examining the Automatic Updates applet or Automatic Updates tab in the System applet. Figure 5.80 shows that all options have been grayed out, thus indicating that some policy is configuring them and you cannot make changes to them directly. Figure 5.80. Automatic Updates on this computer has been set by a policy and cannot be changed directly. To approve an update, you need only select it in the listing on the Updates page, as seen previously in Figure 5.72, and click the Change approval link found in the top-right corner of the page. You should not typically approve updates until you've conducted enough testing to verify that the update will not cause any problems in your environment under most conditions (because you can never, unfortunately, plan for everything). Clicking the Change Approval link will cause the Approve Updates page to open as seen in Figure 5.81, which allows you to change the approval status of the update. Note that you can select multiple updates to approve at a single time if desired. Figure 5.81. You will need to approve updates to install after you've tested them.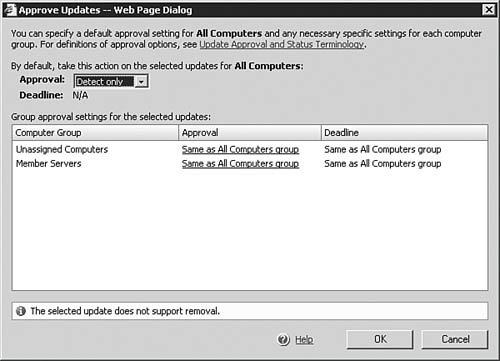 If you ever need a reminder of what you should be doing next when it comes to administering your WSUS implementation, look no further than the bottom of the Home page. The To Do List, as seen in Figure 5.82, will keep you on top of your WSUS game. Figure 5.82. The WSUS To Do List helps keep you on top of required management tasks.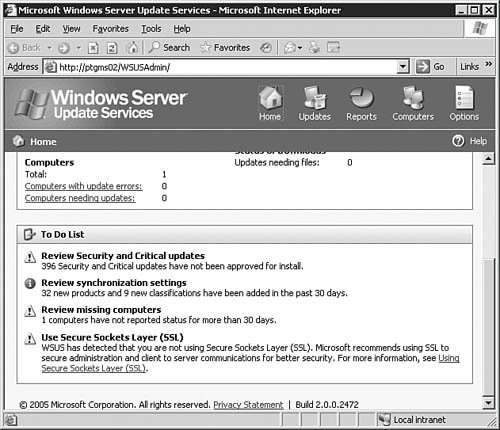 You can verify update installation by checking the Add or Remove Programs applet on client computers or by examining the logs within WSUS. Managing Updates for Legacy Operating SystemsObjective: Install and configure software update infrastructure.
The reality of your network may dictate that you provide support for legacy desktop clients such as Windows 98 clients. These older operating systems cannot participate in a WSUS server environment for multiple reasons, one of which is their inability to receive GPO settings. For clients such as these, you have a few options available when it comes to keeping them up-to-date. Microsoft offers the old standby Windows Update that any of these legacy computers can use, regardless of their network status. Anyone who has used any version of Windows past Windows 95 is most likely familiar with Windows Update. You can connect to the Windows Update Web site at http://windowsupdate.microsoft.com. Another Microsoft-provided option is to implement and use the Systems Management Server (SMS) application, which you can use to manage and monitor legacy versions of Windows, including rolling out updates and patches. A recent addition to the SMS package provides support for more easily determining and installing required updates on client computers; in addition, SMS provides some of the same support that WSUS does. You can find more information about SMS, currently in version 2003, at www.microsoft.com/smserver. A new version is coming shortly that promises even more powerful management features for administrators; you can find out more about it at http://www.microsoft.com/smserver/evaluation/2003/smsv4.mspx. |


EAN: 2147483647
Pages: 196