| The Security Configuration Wizard (SCW) is a new, more advanced, security hardening tool for Windows Server 2003 SP1 and Windows Server 2003 R2. If you have servers running these latest versions of Windows Server 2003, the SCW is worth taking a look at. By default, the SCW is not installed on your Windows Server 2003 computer. Before we can work with it, you'll need to install it as detailed in Step by Step 5.5. Step By Step 5.5. Installing the Security Configuration Wizard 1. | Log on to Windows Server 2003 using the Administrator account or another account that has administrator privileges.
| 2. | Open the Control Panel and then open the Add/Remove Programs applet. The Add or Remove Programs dialog box appears, as seen in Figure 5.23.
Figure 5.23. The Add or Remove Programs dialog box provides useful information about installed applications, including application size and, in some cases, the frequency of use of an installed application. 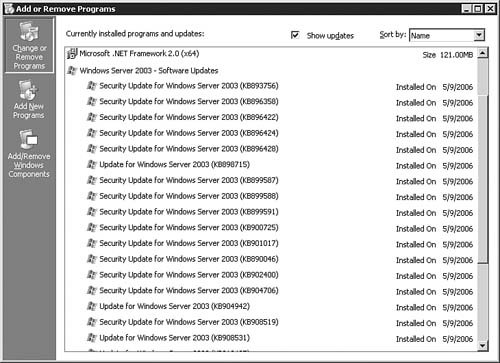
| | | 3. | Click Add/Remove Windows Components on the left side of the Add or Remove Programs dialog box. The Windows Components Wizard dialog box appears, as seen in Figure 5.24.
Figure 5.24. The Windows Components Wizard allows you to install, remove, or configure the various components of Windows Server 2003. 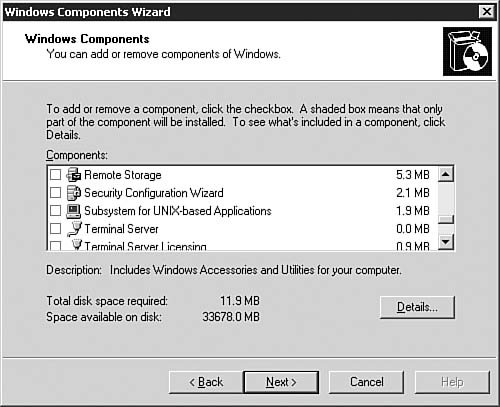
| 4. | Select the Security Configuration Wizard option and then click OK.
| 5. | On )the next dialog box that appears, click Next to complete the installation. The Windows Component Wizard prompts you for the Windows Server 2003 CD-ROM if it needs to copy files.
| 6. | When the wizard is finished, it displays a summary of the changes to be made. Click Finish to complete the installation.
|
Exam Alert: The Security Configuration Wizard The Security Configuration Wizard is a new tool added to Windows Server 2003 with SP1. If your servers are Windows Server 2003 SP1 or Windows Server 2003 R2, then the SCW is available for you. As a new tool, and a security-related one at that, you should expect that it will likely make an appearance on your 70-291 exam, although it's not likely that you will need to have expert-level experience in using the SCW.
Using the Security Configuration Wizard Now that the Security Configuration Wizard has been installed on your server, we'll examine its usage in this section. Step by Step 5.6 details the steps to be followed to use the SCW to create a new policy. Step By Step 5.6. Using the Security Configuration Wizard to Create a Policy 1. | Select Start, Control Panel, Administrative Tools, Security Configuration Wizard. The Welcome to the Security Configuration Wizard dialog box appears as seen in Figure 5.25. After )reading the information presented, click Next to continue.
Figure 5.25. This Welcome screen presents some important and useful information. 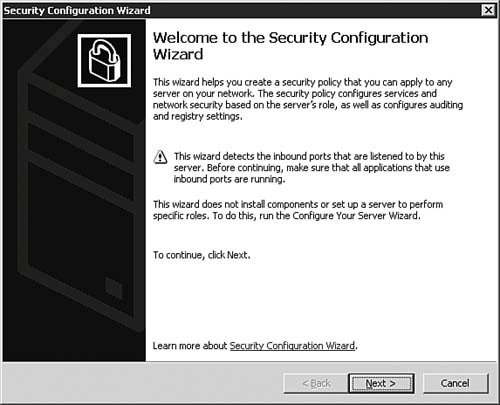
| 2. | On the Configuration Action dialog box, as seen in Figure 5.26, you will need to tell the SCW what to do. For this exercise, we want to Create a New Security Policy. After making your selection, click Next to continue.
Figure 5.26. The Configure Action dialog box allows you to tell the SCW what to do. 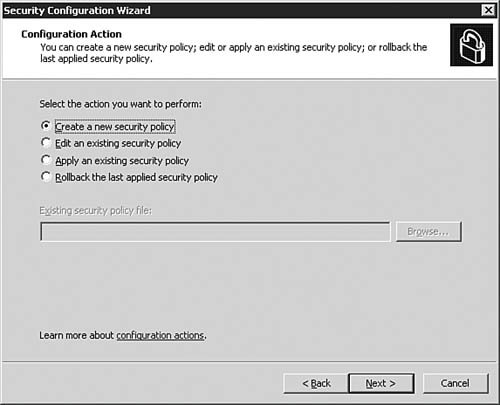
| | | 3. | On the Select Server page, as seen in Figure 5.27, you will select a server that will serve as the baseline by which the security policy is created. By default, the server the SCW is being run on will be populated for you. After making your selection, click Next to continue.
Figure 5.27. You'll need to specify a server to act as the baseline. 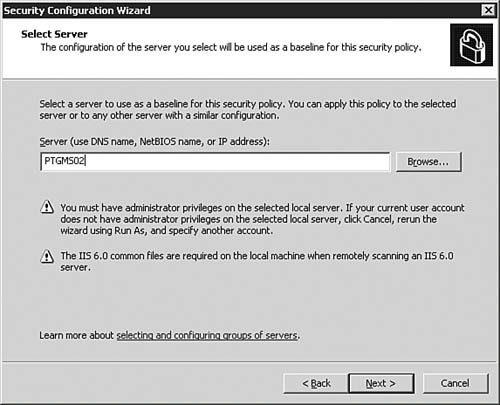
| 4. | On the Processing Security Configuration Database dialog box, as seen in Figure 5.28, the configuration will be processed briefly before you will be able to click Next to continue. When the processing is complete, click Next to continue. If you want to examine the Security Configuration Database first, you can click the View Configuration Database button before clicking Next.
Figure 5.28. The security configuration will be analyzed and processed by SCW. 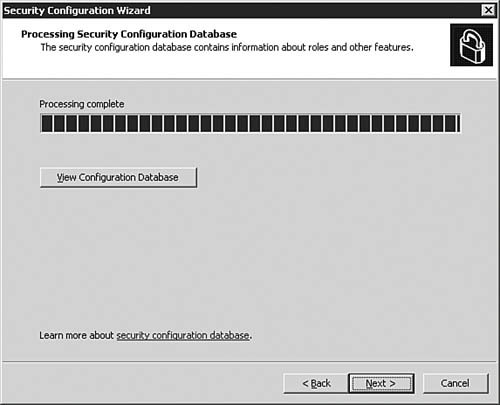
| | | 5. | The SCW now moves to the next phase of the configuration process. On the Role-Based Service Configuration dialog box, as seen in Figure 5.29, you will again be presented with critical information. After reading the information, click next to continue on with the Security Configuration Wizard.
Figure 5.29. More critical information is presented to you before continuing. 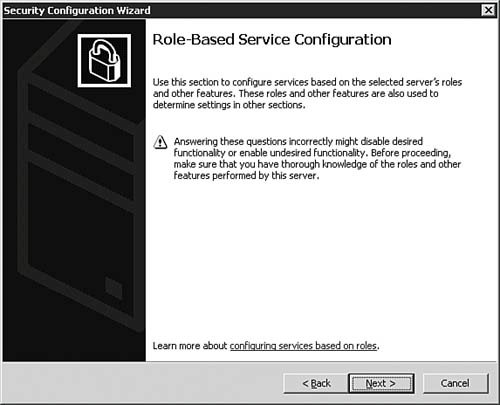
| 6. | On the Select Server Roles dialog box, as seen in Figure 5.30, you view the currently installed and roles the server has. Clicking the View drop-down arrow changes the view, allowing you to examine all roles, uninstalled roles, installed roles (but not necessarily active roles), and selected roles (both installed and active). Clicking the arrow next to a role opens a small informational box below the role. If you want to add or remove a role, which only configures the ports and services but does actually install any required files, you can do so. Click Next to continue after making any changes (typically none if the server is already configured correctly beforehand).
Figure 5.30. The SCW displays the current roles the server is fulfilling and allows you to change them. 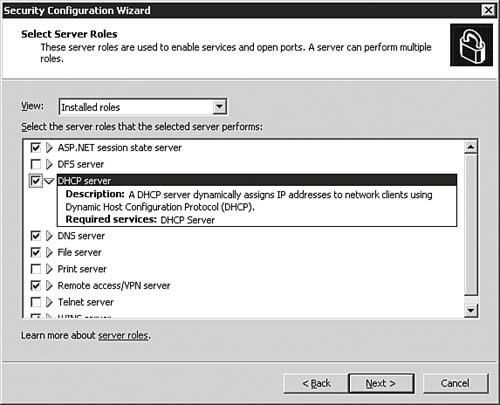
| | | 7. | On the Select Client Features dialog) box, as seen in Figure 5.31, you can view the server's currently installed client features. The View drop-down arrow works the same as on the Select Server Roles page to change the features list. Click Next to continue after making any changes (typically none if the server is already configured correctly beforehand).
Figure 5.31. The SCW displays the current client features the server is using and allows you to change them. 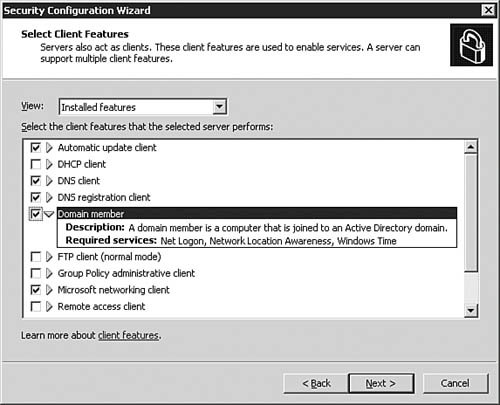
| 8. | On the Select Administration and Other Options dialog box, as seen in Figure 5.32, you can get granular (and thus dangerous) with the configuration changes you make on a server. Note the option selected in Figure 5.32. If you need to make any changes, do so, but be sure to understand the implications that the changes may have. Click Next to continue.
Figure 5.32. The SCW allows you to make very granular and otherwise difficult changes to the security posture of a server. 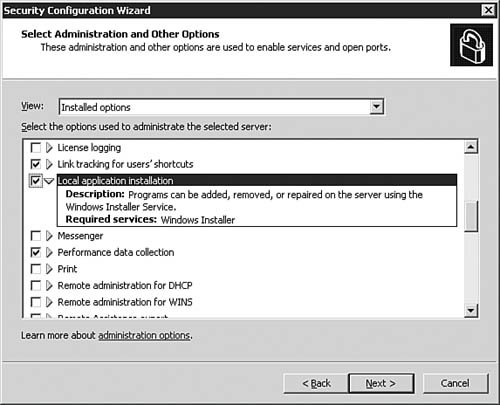
| | | 9. | On the Select Additional Services dialog box, as seen in Figure 5.33, you will be presented with any additional services the SCW encountered during its analysis. Click Next to continue after making any changes (typically none if the server is already configured correctly beforehand).
Figure 5.33. The SCW alerts you to any other services it found during the analysis. 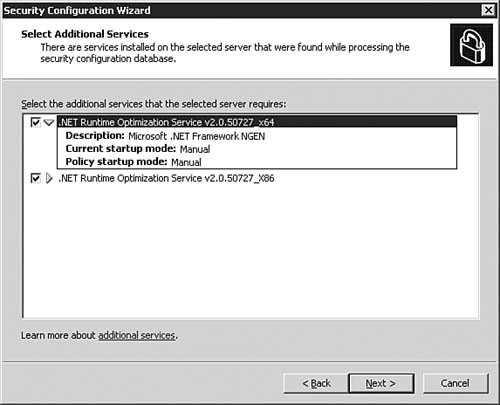
| 10. | On the Handling Unspecified Services dialog box, as seen in Figure 5.34, the SCW asks you what to do if it finds services on the target server that were not on the baseline server. In most cases, it's usually safer to leave the default selection of Do Not Change the Startup Mode of the Service as your selection. If you know for a fact that you want to have unspecified services disabled, and you are willing to take that risk, select that option. After making your choice, click Next to continue.
Figure 5.34. The SCW wants to know what to do about unspecified services it finds. 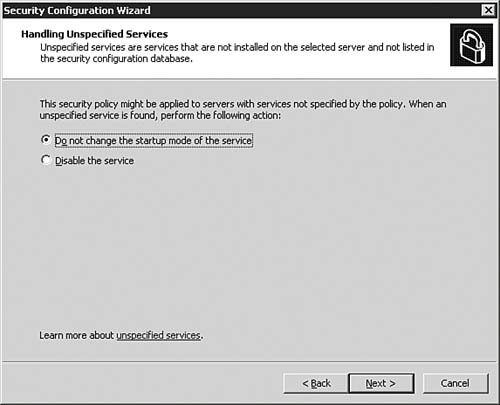
| | | 11. | On the Confirm Service Changes) dialog box, as seen in Figure 5.35, you are given a last look at how the server services will be modified by the creation and implementation of the policy. If you need to make changes, you'll need to go back to the applicable page of the Wizard. Once you're ready to continue, click Next.
Figure 5.35. The SCW shows you all of the service changes that it will make as a result of the newly created policy. 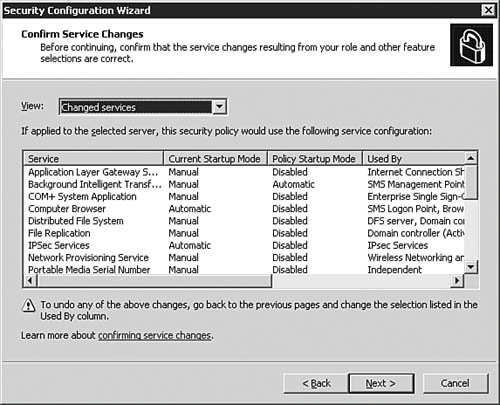
| 12. | The SCW now moves to the next phase of the configuration process. On the Network Security dialog box, as seen in Figure 5.36, you are once again given important information to read. You can opt to skip the Network Security portion of the Wizard by leaving the Skip This Section option selected and clicking Next. If you want to continue on to the Network Security portion of the SCW, unselect the Skip option and click Next.
Figure 5.36. The SCW now moves into the Network Security portion of the policy creation. 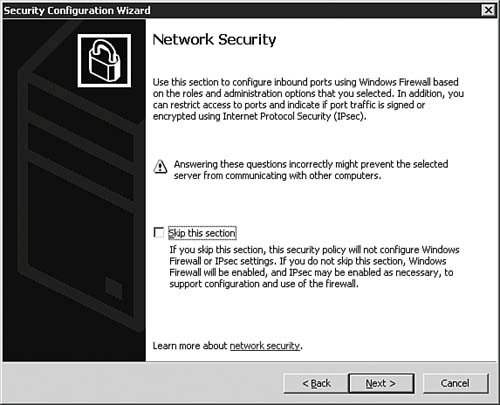
Note: No Security for RRAS and VPN Servers The Security Configuration Wizard will not process the Network Security section on servers that are configured with Routing and Remote Access. You will be forced to skip ahead to the next section of the Wizard, the Registry Settings section. | | | 13. | On the Open Ports and Approve Applications dialog box, as seen in Figure 5.37, you are given the option to open or close ports in the policy. Click Next to continue after making any changes (typically none if the server is already configured correctly beforehand).
Figure 5.37. The SCW allows you to configure which ports will and will not be opened as part of the policy; this is another area that can get you into trouble if you are not careful. 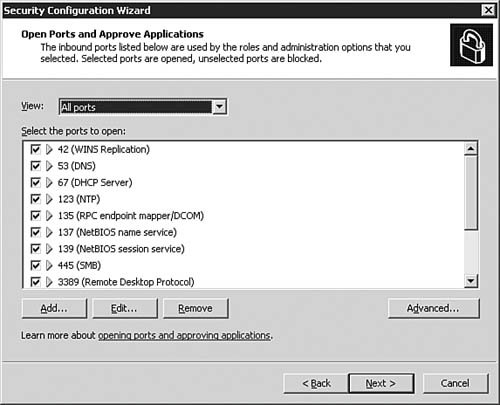
| 14. | On the Confirm Port Configuration dialog box, as seen in Figure 5.38, you are presented with a summary of what the SCW will do to the ports on the server as part of the policy. If you need to make a change, click Back; otherwise, click Next to continue to the next part of the Wizard.
Figure 5.38. The SCW summarizes the port changes that it will make as part of the policy. 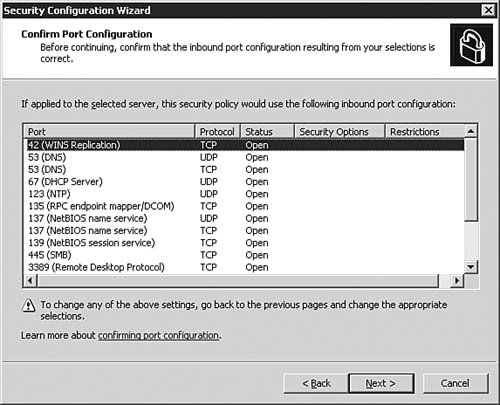
| | | 15. | The SCW now moves to the next) phase of the configuration process. On the Registry Settings dialog box, as seen in Figure 5.39, you are once again given important information to read. You can opt to skip the Registry Settings portion of the Wizard by leaving the Skip This Section option selected and clicking Next. If you want to continue on to the Registry Settings portion of the SCW, unselect the Skip option and click Next.
Figure 5.39. The SCW now moves into the Registry Settings portion of the policy creation. 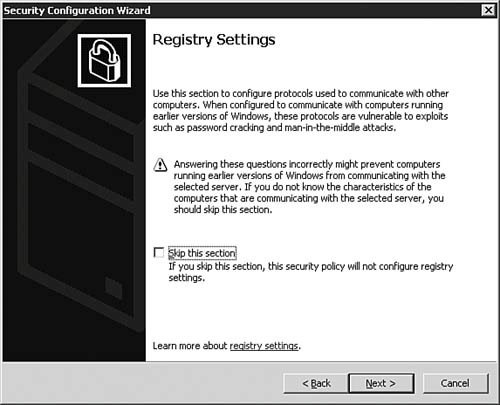
Caution: Beware the Registry The upcoming Registry Settings section of the Security Configuration Wizard is easy to misunderstand. As such, it can be difficult to make sound decisions about the options presented. Tread carefully and make sure you understand the options presented before you move on to the next dialog box. Of course, the SCW is always ready to help you understand what you're about to configure. It helps you by providing an informational link on each page. | 16. | On the Require SMB Security Signatures dialog box, as seen in Figure 5.40, you are asked to make two choices about how to enable and configure SMB signing. Click Next to continue after making your choices.
Figure 5.40. SMB signing will strengthen network communications security on your network. 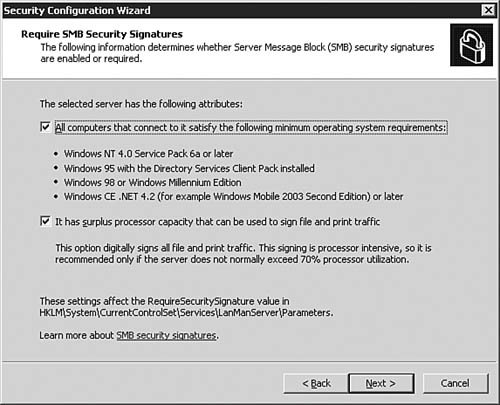
| | | 17. | On the Outbound Authentication Methods dialog box, as seen in Figure 5.41, you are asked to make choices about how the server to be configured with the policy will be allowed to authenticate with remote servers. Note the default selection of Domain Accounts provides the highest level of authentication security. Click Next to continue after making your choices.
Figure 5.41. Typically, for maximum security, you should allow only Domain Accounts authentication for the server. 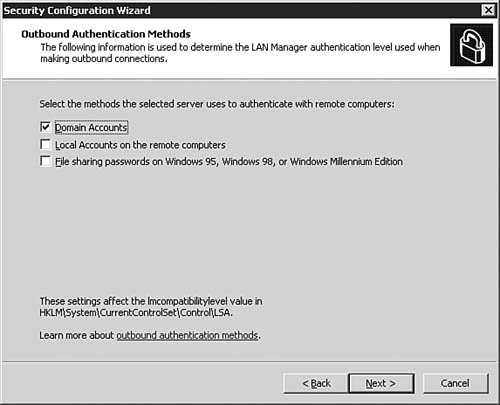
| 18. | On the Outbound )Authentication Using Domain Accounts dialog box, as seen in Figure 5.42, you are presented with two options that describe the Domain Controllers in your environment. By default, only the first option is selected. However, the second option should be selected in an Active Directory domain because time synchronization from the server configured as the time master should keep all computers within five minutes of each other. Click Next to continue after making your choices.
Figure 5.42. For maximum security, make sure that all computers are in synchronization with the server's clock. 
| | | 19. | On the Inbound Authentication Methods dialog box, as seen in Figure 5.43, both options are selected by default. For maximum security, you will want to unselect both options. However, before implementing this policy on a server, make sure you understand the implications of requiring NTLMv2 authentication. Click Next to continue after making your choices.
Figure 5.43. The SCW allows you to configure the security level of inbound authentication. 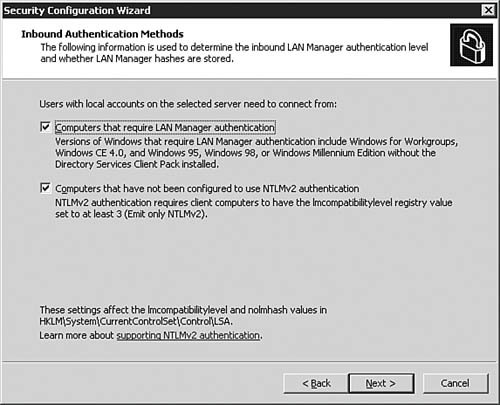
| 20. | On the Registry Settings Summary dialog box, as seen in Figure 5.44, you are presented with a summary of what the SCW will do to the registry on the server as part of the policy. If you need to make a change, click Back; otherwise, click Next to continue to the next part of the Wizard.
Figure 5.44. The SCW gives you a chance to see how the registry will be modified as a result of the policy being created. 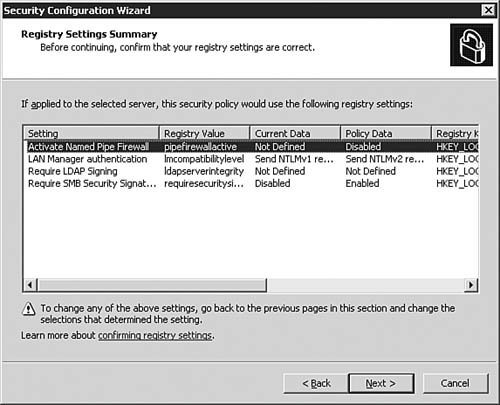
| | | 21. | The SCW now moves to the next phase of the configuration process. On the Audit Policy dialog box, as seen in Figure 5.45, you are once again given important information to read. You can opt to skip the Audit Policy portion of the Wizard by leaving the Skip This Section option selected and clicking Next. If you want to continue on to the Audit Policy portion of the SCW, unselect the Skip option and click Next.
Figure 5.45. The SCW now moves into the Audit Policy portion of the policy creation. 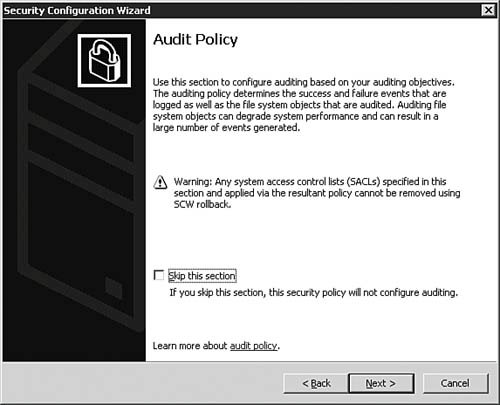
| 22. | On the System Audit Policy dialog box, as seen in Figure 5.46, you are asked to decide what type of auditing you will configure. The default setting is to Audit Successful Activities; however, for maximum auditing (which will fill your security log up even faster), you can opt for the Audit Successful and Unsuccessful Activities option. Click Next to continue after making your choice.
Figure 5.46. The SCW will help you to configure auditing via the policy being created. 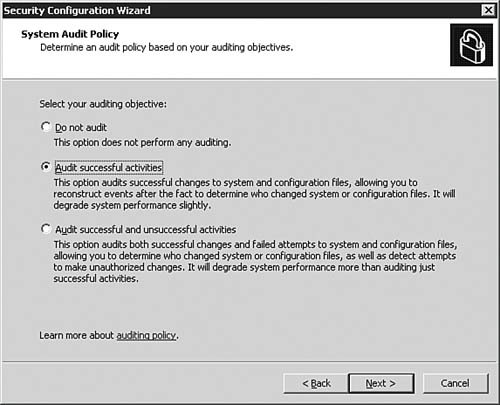
| | | 23. | On the Audit Policy )Summary dialog box, as seen in Figure 5.47, you are presented with a summary of your auditing choices. Note that even though we selected to audit success events on the previous page only, the SCW has implemented a best practice for us and enabled both success and failure auditing for key security events. If you need to make a change, click Back; otherwise, click Next to continue to the next part of the Wizard.
Figure 5.47. The SCW shows you what the auditing policy will be like after the policy is applied. 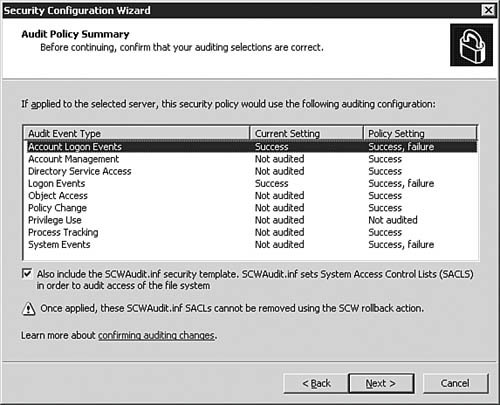
| 24. | The Save Security Policy dialog box now appears. There are no configuration choices to make on this page. Click Next to dismiss it and continue.
| 25. | On the Security Policy File Name dialog box, as seen in Figure 5.48, you are asked to enter a file name for the policy and also a useful description. Note that path is provided by default; however, in a larger environment, you might consider saving the policies to a central share so that they can be used by multiple administrators.
Figure 5.48. Finally…you get to save the policy. 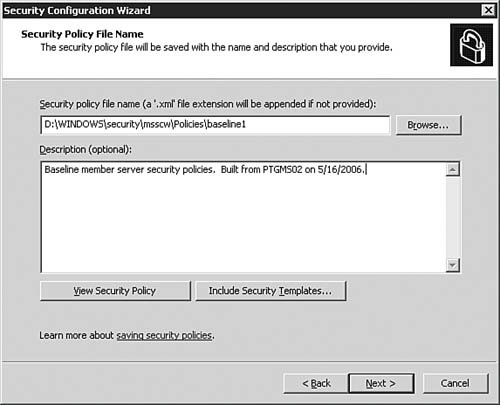
| | | 26. | If you want to examine the complete policy and its settings, click the View Security Policy button to SCW Viewer, as seen in Figure 5.49. Otherwise, click Next to continue.
Figure 5.49. The SCW Viewer allows you to get an all-at-once look at the policy you've just created. 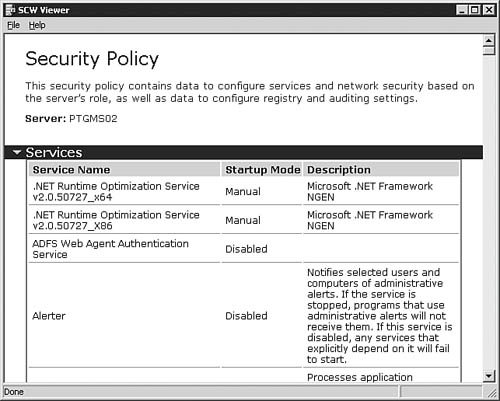
| 27. | You will be prompted with a warning dialog, as seen in Figure 5.50. Click OK to acknowledge the warning and continue.
Figure 5.50. The server will need to be restarted after you apply the settings in an SCW policy. 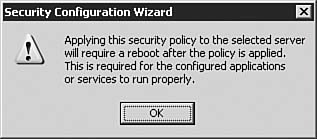
| 28. | On the Apply Security Policy dialog box, as seen in Figure 5.51, you will be asked to make one last decision. Select the Apply Later option and click Next.
Figure 5.51. Save the policy for application later. 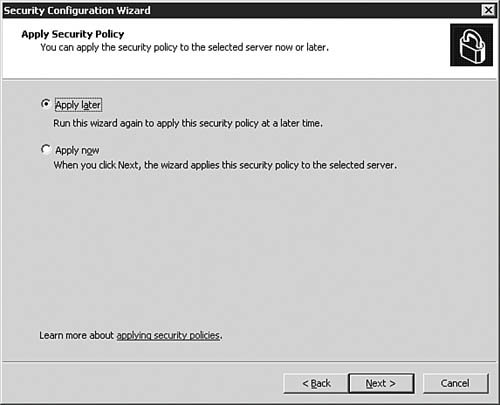
| | | 29. | The Completing the Security Configuration Wizard dialog box appears, signaling the end of the policy creation process. Click Finish to close the Security Configuration Wizard.
|
Now that the Security Configuration) Wizard has been used to create a policy, you can use the SCW on other servers to implement that policy. Alternatively, you can use the SCW to implement policies on remote servers if the SCW is already installed on that server and you have administrative credentials to that server. Step by Step 5.7 details the steps to be followed to use the SCW to create a new policy. Step By Step 5.7. Using the Security Configuration Wizard to Implement a Policy 1. | Select Start, Control Panel, Administrative Tools, Security Configuration Wizard. The Welcome to the Security Configuration Wizard screen appears. After reading the information presented, click Next to continue.
| | | 2. | On the Configuration Action dialog box, as seen in Figure 5.52, you will need to tell the SCW what to do. For this exercise, we want to Apply an Existing Security Policy. If you need to locate the policy, click the Browse button to open the Open dialog box seen in Figure 5.53. After making your selection, click Next to continue.
Figure 5.52. The Configure Action page allows you to tell the SCW what to do. 
Figure 5.53. The Open dialog box helps you find the policy to be applied. 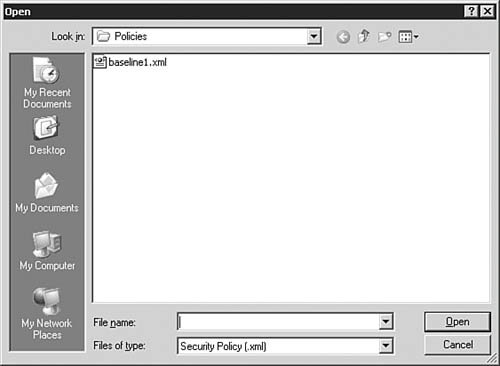
| | | 3. | On the Select Server dialog box, as seen in Figure 5.54, you will select a server that will serve as the baseline by which the security policy is created. By default, the server on which the SCW is being run will be populated for you. Enter the server name and server credentials, as seen in Figure 5.55, if you are implementing the policy on a remote server. After making your selection, click Next to continue.
Figure 5.54. You need to tell the SCW the server on which to implement the policy. 
Figure 5.55. For remote servers, you'll need to provide credentials. 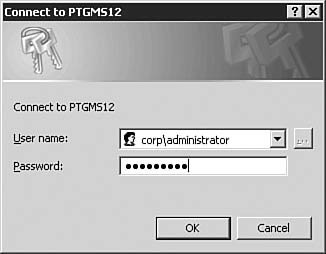
| | | 4. | On the Apply Security) Policy dialog box, as seen in Figure 5.56, you will be given a final chance to review the policy being applied by clicking the View Security Policy button (seen previously in Figure 5.49). When you are ready to implement the policy, click Next.
Figure 5.56. You have one last chance to avoid implementing the policy. 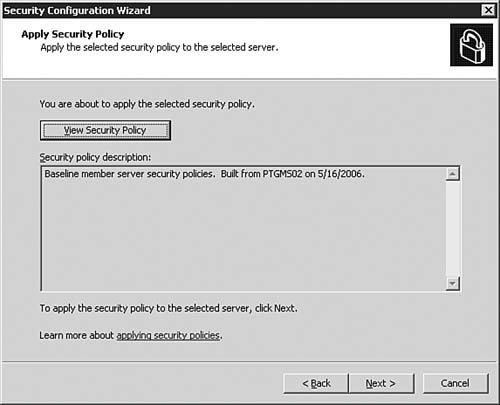
| 5. | The Applying Security Policy dialog box appears. After the processing is complete, you can click the Next button to continue.
| 6. | On the Completing the Security Configuration Wizard dialog box, click Finish to close the Security Configuration Wizard.
|
With our discussion of securing and auditing server activity behind us, we'll now move on to using the Windows Server Update Services (WSUS) application to keep clients and servers up to date with required patches and security updates. |