Installing and Configuring WINS
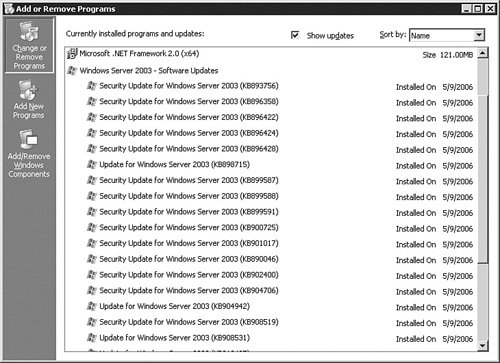
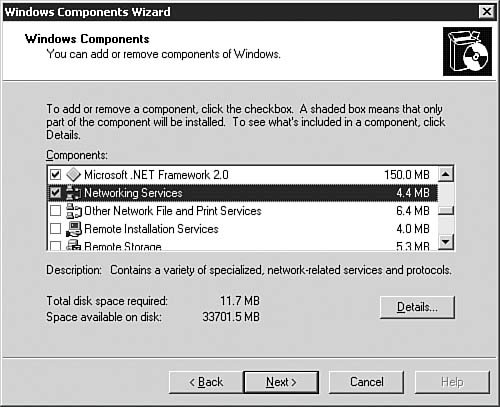
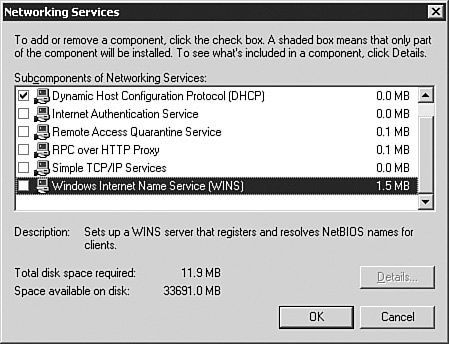
| Installing the WINS -service on your Windows Server 2003 computer is just as simple and straightforward as the two network services (DHCP and DNS) you have previously installed. To install the WINS service, follow the instructions provided in Step by Step 4.1. Exam Alert: Managing Windows Server 2003 Services The Step by Step examples use a utility called the WINS console. It is important to note that this manager is nothing more than the Microsoft Management Console with the WINS management snap-in installed. Microsoft creates these versions of the Microsoft Management Console to enable new users of Windows Server 2003 to more easily manage their systems. Thus, don't be confused if you see references to the Microsoft Management Console in the exam. That's all the WINS manager is. Step By Step4.1. Installing the Windows Internet Naming Service (WINS)
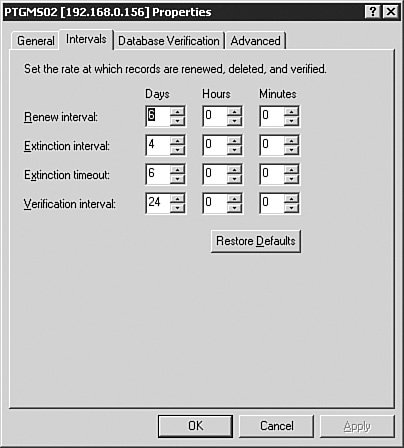
Note: DHCP and the WINS Service If, for some reason, you have your Windows Server 2003 computer configured to use DHCP addressing, you will receive a message from the installation process indicating that the WINS service should be installed only on a server with a static address. The Local Area Connection Properties dialog box will open to enable you to correct the issue. Microsoft includes this message because it is actually a very bad idea to put WINS (or any other network service) on a dynamically addressed server. You shouldn't let your WINS server use a dynamic address, because the address might change one day. If that occurs, all your users will lose access to the server because the addresses used to point at the WINS server are configured statically. The same is true for a DNS server, a DHCP server, a domain controller, and so on, as we discussed earlier in Chapter 1, "Configuring and Troubleshooting TCP/IP Addressing." Congratulationsyou just installed WINS. Keep in mind that you still need to configure your client computers to use the new server, but the server portion of the install is complete. Now that WINS is installed, let's look at configuring it. Configuring WINSSeveral properties can be configured in the Windows Internet Naming Service. They can be accessed by opening the WINS console, as seen in Figure 4.4. Figure 4.4. The WINS console is used for all configurations for the WINS service. You can open the WINS console by clicking Start, Programs, Administrative Tools, WINS. To access a WINS server's Properties dialog box, simply select it, right-click it, and select Properties from the context menu. The WINS server Properties dialog box will open to the General tab, as discussed next. The General TabThe General tab, shown in Figure 4.5, is used to configure statistics and backups for the WINS server. You can use this tab to configure the automatic update of WINS statistics and the interval at which they update from this tab. You also can configure the default backup path for the WINS database and enable the automatic backup of the database when the server is shut down; the latter is an administrative task that is highly recommended. Note: Should I Back Up? You should configure the WINS backup paths to a network share; this configuration ensures the maximum fault tolerance for the WINS database in case the server doesn't come back up. The Intervals TabThe Intervals tab, shown in Figure 4.6, is used to set the WINS database records renewal, deletion, and verification intervals. Figure 4.5. The General tab is used for configuring statistics and backups for the WINS database. Figure 4.6. In most networks, the default intervals are usually adequate for a stable WINS environment. You can set the following intervals:
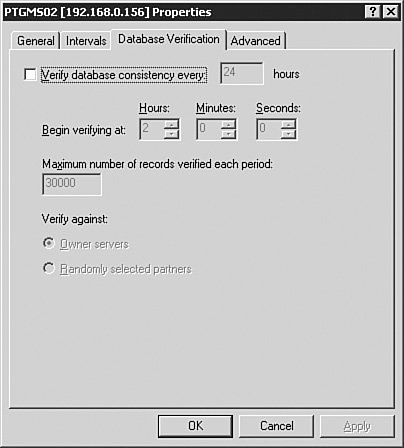
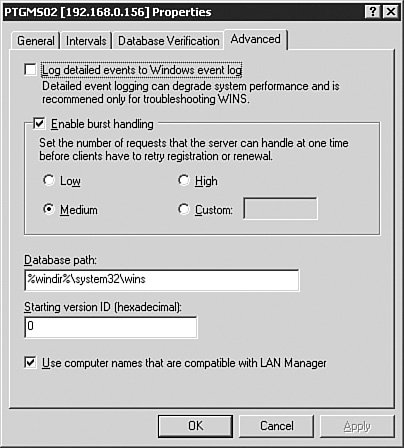
When a record is deleted from WINS, the server will actually Tombstone it, which is to mark it locally as extinct and release it from active use by that local WINS server. The Tombstoned record is then replicated to all other WINS servers configured to replicate with that local WINS server, thus applying that Tombstoned status to other WINS servers. When the verification interval has passed, the WINS servers can then automatically remove the record from the WINS database. The Database Verification TabThe Database Verification tab, seen in Figure 4.7, enables you to configure the verification parameters associated with the WINS database. You can enable database verification for a specific interval. The default interval is 24 hours; thus, if enabled, the database consistency will be verified once a day. You also specify the time to begin the consistency check, the number of database records to check for each period, as well as the source against which to verify the database. You can verify database consistency against owner servers (these are the servers from which the record being verified was replicated) or randomly selected partner servers. Although disabled by default, it is highly recommended that you configure database verification for your WINS databases. Figure 4.7. Ensuring the consistency of the WINS database is critical to a stable WINS environment. The Advanced TabThe Advanced tab, shown in Figure 4.8, is used to configure the remaining WINS parameters, including the following:
Exam Alert: Burst Mode First introduced to WINS in Windows 2000 Server, burst mode provides a means to allow many clients to simultaneously attempt to register their records. Changing the setting seen in Figure 4.8 changes the size of the burst queue, which determines how many name registration and refresh requests are received by the WINS server before burst mode is initiated. When burst mode is in effect, additional client requests are answered with a positive response by the WINS server immediately. This immediate response also includes a variable TTL (time to live) value, which then forces the clients to contact the WINS server again at a more controlled rate. That covers the basic installation and configuration of a WINS server. Let's look at configuring WINS replication between two WINS servers. Figure 4.8. The Advanced tab is the catchall for the remaining WINS parameters and contains some important parameters for troubleshooting and load regulating. |

EAN: 2147483647
Pages: 196
- Article 100 Definitions
- Article 427: Fixed Electric Heating Equipment for Pipelines and Vessels
- Example No. D2(b) Optional Calculation for One-Family Dwelling, Air Conditioning Larger than Heating [See 220.82(A) and 220.82(C)]
- Example D3(a) Industrial Feeders in a Common Raceway
- Example No. D5(a) Multifamily Dwelling Served at 208Y/120 Volts, Three Phase