Navigating Through Text
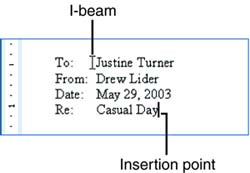
| As you're typing a document, you will surely want to revise what you've written. Maybe you want to add a paragraph earlier in the document, change some wording, or delete a sentence or two. Before you can edit your text, however, you have to move the insertion point ( navigate ) to the location where you want to make the change. Word enables you to navigate with both the keyboard and the mouse. In the remainder of this hour , you will practice both types of navigation techniques.
Navigating with the MouseTo navigate with the mouse, simply point to the location where you want to place the insertion point and click. If the location is currently offscreen , you need to scroll the location into view by dragging the scroll box or clicking the up/down arrows in the scrollbars, or by using the Browse buttons . These techniques are described in the next two sections.
Using the ScrollbarsWord provides a vertical scrollbar on the right side of the Word window and a horizontal scrollbar across the bottom of the window. You will frequently use the vertical scrollbar to scroll up and down through your document. By default, the entire width of your document is visible in the Word window, so you rarely need to use the horizontal scrollbar.
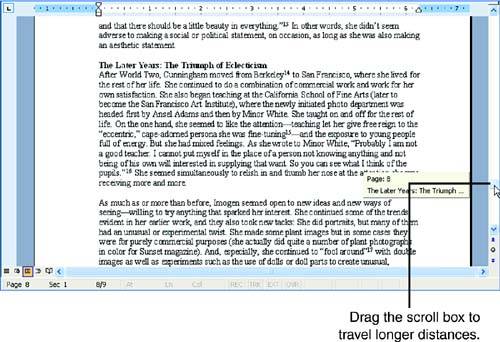
You can click the up and down arrows at either end of the vertical scrollbar to scroll approximately one line at a time. To scroll more quickly, point to the up or down arrow and hold down the mouse button. To move longer distances, it's faster to drag the scroll box along the scrollbar. As you drag, a ScreenTip tells you what page you are on. If your document has headings, the ScreenTip also shows what section of the document you're in (see Figure 2.9). Figure 2.9. Page 8 of this nine-page document is scrolled into view.
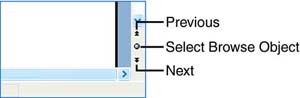
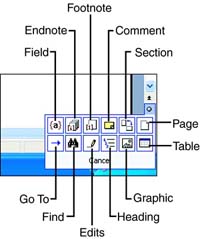
Using the Browse ButtonsBrowsing is a fast way to move sequentially through your document. You can use several types of objects as the focus point for browsing ”including pages, headings, graphics, and footnotes ”and you can change the browse object at any time. To browse, you use the three Browse buttons in the lower-right corner of the Word window (see Figure 2.10). Figure 2.10. The Browse buttons let you move sequentially through your document. The default option is to browse by page, so the ScreenTips for the Next and Previous buttons are Next Page and Previous Page. Click the Next Page button to travel directly to the top of the next page; click the Previous Page button to go to the top of the previous page. If you want to browse by a different type of object, click the Select Browse Object button. Word displays a grid containing various browse objects (see Figure 2.11). Point to each square to see its description in the gray area at the bottom of the grid. Some objects, such as Field and Comment, are useful only if you have used certain features in your document. The two squares on the left end of the lower row, Go To and Find, display the Find and Replace dialog box. Figure 2.11. Click the Select Browse Object button and choose an object to browse by in the grid. Select the browse object that you want to use. As soon as you choose an object other than Page, the Next and Previous buttons turn blue, and their ScreenTips change to reflect the currently selected object (Next Heading and Previous Heading, for example). Clicking these buttons now takes you to the next or previous instance of the browse object you selected. Navigating with the KeyboardIf you prefer not to have to take your hands off the keyboard, you can move the insertion point through an entire document by using only the four arrow keys (see the first four items in Table 2.1), but you won't get anywhere fast. To navigate more efficiently , use the keyboard shortcuts listed in Table 2.1. Learning these shortcuts will save you huge amounts of time later on as you're editing documents. Table 2.1. Keyboard Techniques for Moving the Insertion Point
Take a moment to practice the keyboard techniques now. You might want to jot them on a Post-it and stick the "cheat sheet" on your monitor. That way, you can refer to the shortcuts easily until you have them memorized. |


EAN: 2147483647
Pages: 315