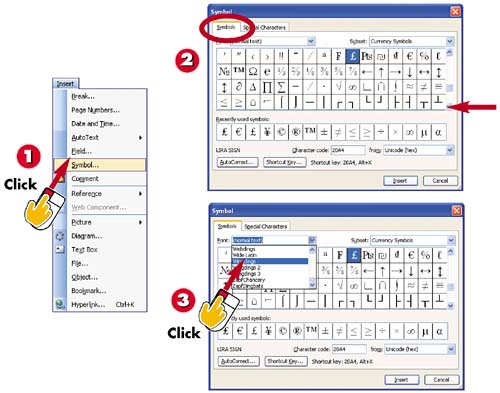
To insert a symbol, click in the document in the spot where you want the symbol to go, open the Insert menu, and choose Symbol .
The Symbol dialog box opens. In the Symbols tab, look through the available symbols to find the one you want.
If you don't see the symbol you want, click the down arrow next to the Font field and choose a different font set from the list that appears.
INTRODUCTION
Many everyday documents, such as letters and memos, require special characters here and there. For example, you might need to use the trademark symbol ( ), a long dash ( ”), or an ellipsis ( ). Word inserts many of these symbols for you automatically as you type (refer to the preceding task, "Correcting Text Automatically," for more information). If it doesn't insert the one you need, however, you can likely find it in the Symbol dialog box.
TIP
Using AutoCorrect
To see which symbols Word adds automatically, choose Tools , AutoCorrect Options , in the AutoCorrect tab. To see additional symbols, view the Replace as you type options in the AutoFormat As You Type tab.
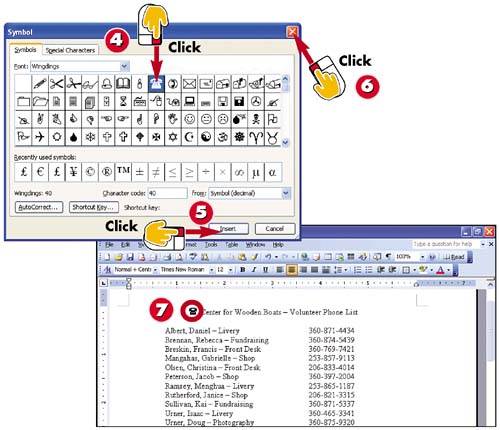
To insert a symbol, first click it.
Click the Insert button.
Click the Close button in the upper-right corner of the Symbol dialog box.
Word inserts the symbol in your document.
TIP
Changing the Size of Symbols
You can enlarge symbols that you've inserted in your document just like regular text. Drag over a symbol to select it, and then choose a larger point size from the Font Size list in the Formatting toolbar. (See "Changing the Font and Font Size" in Part 6.)