Customizing Themes
Sometimes you won t care for a particular aspect of a theme, such as the color of text, or the style of bullets. Well, you don t have to accept the default settings. You can change any aspect of a theme by right-clicking the theme, then choosing Customize. This displays the Customize Theme dialog box.
Using the Customize Theme dialog box, you can modify the theme s colors, graphics, and text settings. Follow the techniques discussed in the sections that follow.
Modifying Theme Colors
Is there something about the colors in a theme that you just don t like? Wouldn't you love to fine-tune the colors just a bit? You can. In the Themes task pane, right-click the theme you want to modify, select Customize, then click Colors. You can now modify the theme's colors, using the options of the Customize Theme dialog box, as shown in Figure 5-2.

Figure 5-2: You can customize a theme s colors by using predefined color schemes, the color wheel, and settings for individual page elements.
In the bottom section of Figure 5-2, you ll see an entry for Theme Color Set. Each theme has two color sets associated with it: normal colors and vivid colors. The normal color set is used when you select Normal Colors; it uses traditional, less bright colors. The vivid color set is the one used when you select Vivid Colors; it has brighter colors than the normal colors set.
Choose the color set you want to modify, then follow these steps to customize the color set:
-
Options of the Color Schemes tab are used to coordinate every aspect of colors used in the theme. To preview what the current theme would look like with a different color scheme, click any of the color schemes provided.
-
Options of the Color Wheel tab allow you to change the colors used in the themes. You can, for example, make them more red, more green, or more blue. You adjust the colors, and the contrast between colors, by clicking on a new area of the color wheel, as shown in Figure 5-3, or by dragging the pointer to a new location. You adjust brightness using the Brightness slider.
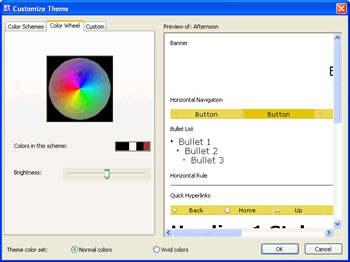
Figure 5-3: The color wheel helps you set the colors you want to use in the color scheme. -
Options of the Custom tab allow you to change color settings for individual page elements, such as backgrounds, headings, and hyperlinks . To change color settings, select the element you want to work with in the Item list, then select a color in the Color list.
-
When you are finished making changes, click OK, then click Save As to save the theme. When prompted, enter the name of the new theme, then click OK.
| Note | Keep in mind that each theme has two colors sets. If you make changes to one color set, you may want to apply similar changes to the theme's other color set as well. |
Changing Theme Graphics
Sometimes you might love a theme, but dislike the graphics it uses, or you may want to replace a graphic in the theme with one you ve created. You can do this, and this section shows you how. Start by right-clicking the theme that you want to work with in the Themes task pane, then selecting Customize. In the Customize Theme dialog box, click Graphics to display the options shown in Figure 5-4.
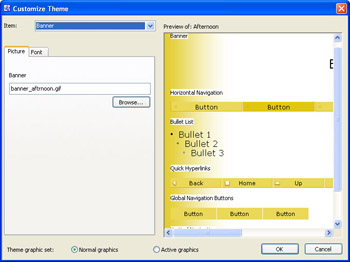
Figure 5-4: You can also customize the graphics used in themes ”everything from background pictures to bullets and buttons can be changed.
As with colors, each theme can have two different sets of graphics. One set of graphics is used when you select Normal Graphics. Another set of graphics is used when you select Active Graphics. Use the Theme Graphics Set options to choose the graphics set you want to modify. If the buttons are dimmed, it means that the same graphics are used in both sets.
Once you choose the graphics set you want to modify, follow these steps to customize the graphics set:
-
Use the Item list to select the type of graphic you want to work with, such as background picture or banner.
-
Options of the Picture tab let you change the graphic files used. You ll find the file name for the currently-selected graphic on this tab. Click Browse to find another graphic, using the Open File dialog box.
-
Options of the Font tab let you specify the font face, style, size , and alignment of any text that might be associated with the graphic. Use the selection lists provided to change the text style. The default entry for the font face typically is a series of fonts, such as Verdana , Arial , Helvetica , sans serif . Here, the first font is the primary font that should be used, and the rest of the fonts are alternates. If the options of this tab are dimmed, no text can be associated with the type of graphic you ve chosen .
Note Specifying alternate fonts to use is important, because some fonts may not be installed or supported on a user s computer. If you want to provide a list of alternate fonts, click the primary font you want to use in the Font list, enter a comma, and then type the name of the next font to use. Separate any additional fonts to use with commas as well. Keep in mind that the last entry should not have a comma. You ll learn more about font faces and styles in Chapter 6, Polishing Design with Style Sheets.
-
Repeat steps 1 through 3 to change the graphic files and fonts used with other graphics in the currently selected graphics set.
-
When you are finished making changes, click OK, then click Save As to save the theme. When prompted, enter the name of the new theme and click OK.
Optimizing Theme Text Styles
Many of the FrontPage themes use Verdana , Arial , and Helvetica as the primary fonts for body text and headings. While these fonts display well on most computers and operating systems, they may not be the ones you want to use with your site. In this case, you can change the text styles used with the theme. Right-click the theme that you want to work with in the Themes task pane, then select Customize. In the Customize Theme dialog box, click Text to display the options, as shown in Figure 5-5.
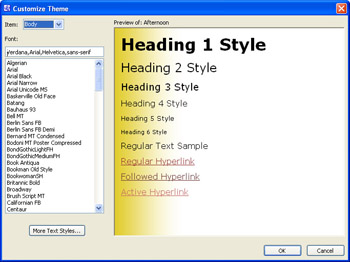
Figure 5-5: The body text and headings used with themes normally have a standard font, such as Verdana, but you can change this if you d like.
You can now modify the text style used with the theme by completing the following steps:
-
Use the Item list to select the type of text you want to work with, such as Body (for standard paragraph text) or Heading 1 (for level 1 heading).
-
The Font field shows the current default fonts. Select a different font, or type the fonts to use in a comma-separated list, such as Verdana, Arial, Helvetica, sans serif .
-
Repeat steps 1 and 2 to change the fonts used with other text styles.
-
When you re finished making changes, click OK, then click Save As to save the theme. When prompted, enter the name of the new theme and click OK.
EAN: 2147483647
Pages: 179