Keeping Visitors Informed by Sending a Confirmation Page
Keeping Visitors Informed by Sending a Confirmation Page
After your visitors send you the information they requested , they ll naturally want to know if their data was received by you successfully. Every bit of interaction and courtesy you can provide them will improve your image and, hopefully, your public relations. To let them know their submission was successful, and (if necessary) that you ll be responding shortly, you can use FrontPage to identify a confirmation form. When the form results arrive at the Web server, the form handler automatically sends this page to the sender, acknowledging the receipt. FrontPage includes a confirmation template that makes the task a breeze :
-
Open the Web that contains the form you ve created.
-
Choose Page or Web from the New submenu of the File menu.
-
Click More Page Templates in the New Page section of the Task Pane.
-
Click Confirmation Form, and click OK.
-
Customize the confirmation form by adding your own content.
-
Right-click any fields you want to customize, and choose Confirmation Field Properties from the shortcut menu (see Figure 15-8).
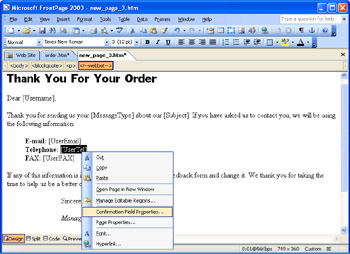
Figure 15-8: This template helps you create a confirmation page. -
Enter a new name for the field in the Name Of Form Field To Confirm box, and click OK.
| Aha! | Improve Accuracy with the Confirmation Page Template |
EAN: 2147483647
Pages: 179