The sample Utility
| < Day Day Up > |
The sample UtilityThe following description of the sample utility shows the format that is used to describe the utilities in this part of the book. These descriptions are similar to the man page descriptions (pages 30 and 721); however, most users find the descriptions in this book easier to read and understand. These descriptions emphasize the most useful features of the utilities and often leave out the more obscure features. For information about the less commonly used features, refer to the man and info pages or call the utility with the help option, which works with many utilities. sample: Very brief description of what the utility doessample [options] arguments Following the syntax line is a description of the utility. The syntax line shows how to run the utility from the command line. Options and arguments enclosed in brackets ( [ ] ) are not required. Type words that appear in this italic typeface as is. Words that you must substitute when you type appear in this bold italic typeface. Words listed as arguments to a command identify single arguments (for example, source-file) or groups of similar arguments (for example, directory-list ). ArgumentsThis section describes the arguments that you can use when you run the utility. The argument itself, as shown in the preceding syntax line, is printed in this bold italic typeface. OptionsThis section lists some of the options you can use with the command. Unless otherwise specified, you must precede options with one or two hyphens. Most commands accept a single hyphen before multiple options (page 109). Options in this section are ordered alphabetically by short (single-hyphen) options. If an option has only a long version (two hyphens), it is ordered by its long option. Following are some sample options:
delimiter=dchar
DiscussionThis optional section contains a discussion about how to use the utility and any quirks it may have. NotesThis section contains miscellaneous notes some important and others merely interesting. ExamplesThis section contains examples of how to use the utility. This section is tutorial and is more casual than the preceding sections of the description. aspell: Checks a file for spelling errorsaspell check [options]filename aspell list [options] < filename aspell config aspell help The aspell utility checks the spelling of words in a document against a standard dictionary. You can use aspell interactively: It displays each misspelled word in context, together with a menu that gives you the choice of accepting the word as is, choosing one of aspell's suggested replacements for the word, inserting the word into your personal dictionary, or replacing the word with one you enter. You can also use aspell in batch mode so that it reads from standard input and writes to standard output. tip: aspell is not like other utilities regarding its input Unlike many other utilities, aspell does not accept input from standard input when you do not specify a filename on the command line. Instead, the action specifies where aspell gets its input. ActionYou must choose one and only one action when you run aspell.
ArgumentsThe filename is the name of the file you want to check. The aspell utility accepts this argument only when you use the check ( c) action. With the list ( l) action, input must come from standard input. OptionsThe aspell utility has many options. A few of the more commonly used ones are listed in this section; see the manual for a complete list. Default values of many options are determined when aspell is compiled (see the config action). You can specify options on the command line, in value of the ASPELL_CONF shell variable, or in your personal configuration file (~/.aspell.conf). Superuser can create a global configuration file (/etc/aspell.conf). Put one option per line in a configuration file; separate options with a semicolon (;) in ASPELL_CONF. Options on the command line override those in ASPELL_CONF, which override those in your personal configuration file, which override those in the global configuration file. There are two types of options in the following list: Boolean and value. The Boolean options turn a feature on (enable the feature) or off (disable the feature). Precede a Boolean option with dont to turn it off. For example, ignore-case turns the ignore-case feature on and dont-ignore-case turns it off. Value options assign a value to a feature. Follow the option with an equal sign and a value for example, ignore=4. For all options in a configuration file or in the ASPELL_CONF variable, drop the leading hyphens (ignore-case or dont-ignore-case). caution: aspell options and leading hyphens The way you specify options differs depending on whether you are specifying them on the command line, using the ASPELL_CONF shell variable, or in a configuration file. On the command line prefix long options with two hyphens (for example, ignore-case or dont-ignore-case). In ASPELL_CONF and configuration files, drop the leading hyphens (for example, ignore-case or dont-ignore-case).
DiscussionThe aspell utility has two basic modes of operation: batch and interactive. You specify batch mode by using the list or l action. In batch mode aspell takes the document you want to check for spelling errors as standard input and sends the list of potentially misspelled words to standard output. You specify interactive mode by using the check or c action. In interactive mode aspell displays a screen with the potentially misspelled word in context highlighted in the middle and a menu of choices at the bottom. See "Examples" for an illustation. The menu includes various commands (Table V-3) as well as some suggestions of similar, correctly spelled words. You either enter one of the numbers from the menu to select a suggested word to replace the word in question or enter a letter to give a command.
NotesFor more information refer to the /usr/share/doc/aspell directory with manuals in the man-html and man-text subdirectories and to the aspell home page located at aspell.sourceforge.net. The aspell utility is not a foolproof way of finding spelling errors. It also does not check for misused, properly spelled words (such as red instead of read). Spelling from emacsYou can make it easy to use aspell from emacs by adding the following line to your ~/.emacs file. This line causes emacs' ispell functions to call aspell: (setq-default ispell-program-name "aspell") Spelling from vimSimilarly, you can make it easy to use aspell from vim by adding the following line to your ~/.vimrc file: map ^T :w!<CR>:!aspell check %<CR>:e! %<CR> When you enter this line in ~/.vimrc using vim, enter the ^T as CONTROL-V CONTROL-T (page 159). With this line in ~/.vimrc, CONTROL-T brings up aspell to spell check the file you are editing with vim. ExamplesThe following examples use aspell to correct the spelling in the memo.txt file: $ cat memo.txt Here's a document for teh aspell utilitey to check. It obviosly needs proofing quiet badly. The first example uses aspell with the check action and no options. The appearance of the screen for the first misspelled word, teh, is shown. At the bottom of the screen is the menu of commands and suggested words. The numbered words each differ slightly from the misspelled word: $ aspell check memo.txt Here's a document for teh aspell utilitey to check. It obviosly needs proofing quiet badly. ============================================================ 1) the 6) th 2) Te 7) tea 3) tech 8) tee 4) Th 9) Ted 5) eh 0) tel i) Ignore I) Ignore all r) Replace R) Replace all a) Add l) Add Lower b) Abort x) Exit ============================================================ ? Enter one of the menu choices in response to the preceding display; aspell will do your bidding and move the highlight to the next misspelled word (unless you choose to abort or exit). The next example uses the list action to display a list of misspelled words. The word quiet is not in the list it is not properly used but is properly spelled. $ aspell list < memo.txt teh aspell utilitey obviosly The last example also uses the uses the list action. It shows a quick way to check the spelling of a word or two with a single command. The user gives the aspell list command and then enters seperate temperature into aspell's standard input (the keyboard). After the user enters RETURN and CONTROL-D (to mark the end of file), aspell writes the misspelled word to standard output (the screen): $ aspell list seperate temperatureRETURN CONTROL-D seperate at: Executes commands at a specified timeat [options] time [date | +increment] atq atrm job-list batch [options] [time] The at and batch utilities execute commands at a specified time. They accept commands from standard input or, with the f option, from a file. Commands are executed in the same environment as the at or batch command. Unless redirected, standard output and standard error from commands are emailed to the user who ran at or batch. A job is the group of commands that is executed by one call to at. The batch utility differs from at in that it schedules jobs so that they run when the CPU load on the system is low. The atq utility displays a list of at jobs you have queued; atrm cancels pending at jobs. ArgumentsThe time is the time of day that at runs the job. You can specify the time as a one-, two-, or four-digit number. One- and two-digit numbers specify an hour, and four-digit numbers specify an hour and minute. You can also give the time in the form hh:mm. The at utility assumes a 24-hour clock unless you place am or pm immediately after the number, in which case it uses a 12-hour clock. You can also specify time as now, midnight, noon, or teatime (4:00 PM). The date is the day of the week or day of the month on which you want at to execute the job. When you do not specify a day, at executes the job today if the hour you specify in time is greater than the current hour. If the hour is less than the current hour, at executes the job tomorrow. You specify a day of the week by spelling it out or abbreviating it to three letters. You can also use the words today and tomorrow. Use the name of a month followed by the number of the day in the month to specify a date. You can follow the month and day number with a year. The increment is a number followed by one of the following (plural or singular is allowed): minutes, hours, days, or weeks. The at utility adds the increment to time. You cannot specify an increment for a date. When using atrm, job-list is a list of one or more at job numbers. You can list job numbers by running at with the l option or by using atq. OptionsThe l and d options are not for use when you initiate a job with at. You can use them only to determine the status of a job or to cancel a job.
NotesThe shell saves the environment variables and the working directory at the time you submit an at job so that they are available when at executes commands. /etc/at.allow and /etc/at.denyThe root user can always use at. The /etc/at.allow and /etc/at.deny files, which should be read0able and writable by root only (mode 600), control which ordinary, local users can use at. When /etc/at.deny exists and is empty, all users can use at. When /etc/at.deny does not exist, only users listed in /etc/at.allow can use at. Users listed in /etc/at.deny cannot use at unless they are also listed in /etc/at.allow. Jobs you submit using at are run by the at daemon (atd). This daemon stores jobs in /var/spool/at and output in /var/spool/at/spool, both of which should be set to mode 700 and owned by the user named daemon. ExamplesYou can use any of the following techniques to paginate and print long_file tomorrow at 2:00 AM. The first example executes the command directly from the command line; the last two examples use the pr_tonight file, which contains the necessary command, and execute it using at. $ at 2am at> pr long_file | lpr at>CONTROL-D<EOT> job 8 at 2005-08-17 02:00 $ cat pr_tonight #!/bin/bash pr long_file | lpr $ at -f pr_tonight 2am job 9 at 2005-08-17 02:00 $ at 2am < pr_tonight job 10 at 2005-08-17 02:00 If you execute commands directly from the command line, you must signal the end of the commands by pressing CONTROL-D at the beginning of a line. After you press CONTROL-D, at displays a line that begins with job followed by the job number and the time at will execute the job. If you run atq after the preceding commands, it displays a list of jobs in its queue: $ atq 8 2005-08-17 02:00 a 9 2005-08-17 02:00 a 10 2005-08-17 02:00 a The following command removes job number 9 from the queue: $ atrm 9 $ atq 8 2005-08-17 02:00 a 10 2005-08-17 02:00 a The next example executes cmdfile at 3:30 PM (1530 hours) one week from today: $ at -f cmdfile 1530 +1 week job 12 at 2005-08-23 15:30 Next at executes a job at 7 PM on Thursday. This job uses find to create an intermediate file, redirects the output sent to standard error, and prints the file. $ at 7pm Thursday at> find / -name "core" -print >report.out 2>report.err at> lpr report.out at>CONTROL-D<EOT> job 13 at 2005-08-18 19:00 The final example shows some of the output generated by the c option when at is queried about the preceding job. Most of the lines show the environment; only the last few lines execute the commands: $ at -c 13 #!/bin/sh # atrun uid=500 gid=500 # mail mark 0 umask 2 PATH=/usr/kerberos/bin:/usr/local/bin:/bin:/usr/bin:/usr/X11R6/bin:.; export PATH PWD=/home/mark/book.examples/99/cp; export PWD EXINIT=set\ ai\ aw; export EXINIT LANG=C; export LANG PS1=\\\$\ ; export PS1 ... cd /home/mark/book\.examples/99/cp || { echo 'Execution directory inaccessible' >&2 exit 1 } find / -name "core" -print >report.out 2>report.err lpr report.out bzip2: Compresses or decompresses filesbzip2 [options] [file-list] bunzip2 [options] [file-list] bzcat [options] [file-list] bzip2recover [file] The bzip2 utility compresses files; bunzip2 restores files compressed with bzip2; bzcat displays files compressed with bzip2. ArgumentsThe file-list is a list of one or more files (no directories) that are to be compressed or decompressed. If file-list is empty or if the special option is present, bzip2 reads from standard input. The stdout option causes bzip2 to write to standard output. OptionsAccepts the common options described on page 587.
DiscussionThe bzip2 and bunzip2 utilities work similarly to gzip and gunzip; see the discussion of gzip (page 689) for more information. Normally bzip2 does not overwrite a file; you must use force to overwrite a file during compression or decompression. NotesThe bzip2 home page is sources.redhat.com/bzip2. The bzip2 utility does a better job of compressing files than gzip. Use the bzip2 modifier with tar (page 788) to compress archive files with bzip2. bzcat file-listWorks like cat except that it uses bunzip2 to decompress file-list as it copies files to standard output. bzip2recoverAttempts to recover a damaged file that was compressed with bzip2. ExamplesIn the following example, bzip2 compresses a file and gives the resulting file the same name with a .bz2 filename extension. The v option displays statistics about the compression. $ ls -l total 728 -rw-r--r-- 1 sam sam 737414 Feb 20 19:05 bigfile $ bzip2 -v bigfile bigfile: 3.926:1, 2.037 bits/byte, 74.53% saved, 737414 in, 187806 out $ ls -l total 188 -rw-r--r-- 1 sam sam 187806 Feb 20 19:05 bigfile.bz2 Next touch creates a file with the same name as the original file; bunzip2 refuses to overwrite the file in the process of decompressing bigfile.bz2. The force option enables bunzip2 to overwrite the file. $ touch bigfile $ bunzip2 bigfile.bz2 bunzip2: Output file bigfile already exists. $ bunzip2 --force bigfile.bz2 $ ls -l total 728 -rw-r--r-- 1 sam sam 737414 Feb 20 19:05 bigfile cal: Displays a calendarcal [options] [[month] year] The cal utility displays a calendar for a month or a year. ArgumentsThe arguments specify the month and year for which cal displays a calendar. The month is a decimal integer from 1 to 12 and the year is a decimal integer. Without any arguments, cal displays a calendar for the current month. When you specify a single argument, it is taken to be the year. Options
NotesDo not abbreviate the year. The year 05 is not the same as 2005. ExamplesThe following command displays a calendar for August 2007: $ cal 8 2007 August 2007 Su Mo Tu We Th Fr Sa 1 2 3 4 5 6 7 8 9 10 11 12 13 14 15 16 17 18 19 20 21 22 23 24 25 26 27 28 29 30 31 Next is a Julian calendar for 1949 with Monday as the first day of the week: $ cal -jm 1949 1949 January February Mon Tue Wed Thu Fri Sat Sun Mon Tue Wed Thu Fri Sat Sun 1 2 32 33 34 35 36 37 3 4 5 6 7 8 9 38 39 40 41 42 43 44 10 11 12 13 14 15 16 45 46 47 48 49 50 51 17 18 19 20 21 22 23 52 53 54 55 56 57 58 24 25 26 27 28 29 30 59 31 ... cat: Joins and displays filescat [options] [file-list] The cat utility copies files to standard output. You can use cat to display the contents of one or more text files on the screen. ArgumentsThe file-list is a list of the pathnames of one or more files that cat processes. If you do not specify an argument or if you specify a hyphen ( ) in place of a filename, cat reads from standard input. OptionsAccepts the common options described on page 587.
number-nonblank
show-nonprinting
NotesSee page 115 for a discussion of cat, standard input, and standard output. Use the od utility (page 737) to display the contents of a file that does not contain text (for example, an executable program file). Use the tac utility to display lines of a text file in reverse order. See the tac info page for more information. The name cat is derived from one of the functions of this utility, catenate, which means to join together sequentially, or end to end. caution: Set noclobber to avoid overwriting a file Despite cat's warning message, the shell destroys the input file (letter) before invoking cat in the following example: $ cat memo letter > letter cat: letter: input file is output file You can prevent overwriting a file in this situation by setting the noclobber variable (pages 119 and 367). ExamplesThe following command displays the contents of the memo text file on the terminal: $ cat memo ... The next example catenates three text files and redirects the output to the all file: $ cat page1 letter memo > all You can use cat to create short text files without using an editor. Enter the following command line, type (or paste) the text you want in the file, and press CONTROL-D on a line by itself: $ cat > new_file ... (text) ... CONTROL-D In this case cat takes input from standard input (the keyboard) and the shell redirects standard output (a copy of the input) to the file you specify. The CONTROL-D signals the EOF (end of file) and causes cat to return control to the shell (page 116). In the next example, a pipe sends the output from who to standard input of cat. The shell redirects cat's output to the file named output that, after the commands have finished executing, contains the contents of the header file, the output of who, and footer. The hyphen on the command line causes cat to read standard input after reading header and before reading footer. $ who | cat header - footer > output cd: Changes to another working directorycd [options] [directory] The cd builtin makes directory the working directory. ArgumentsThe directory is the pathname of the directory you want to be the new working directory. Without an argument, cd makes your home directory the working directory. Using a hyphen in place of directory changes to the previous working directory. NotesThe cd command is a bash and tcsh builtin. See page 82 for a discussion of cd. Without an argument, cd makes your home directory the working directory; it uses the value of the HOME (bash; page 283) or home (tcsh, page 362) variable for this purpose. With an argument of a hyphen, cd makes the previous working directory the working directory. It uses the value of the OLDPWD (bash) or owd (tcsh) variable for this purpose. The CDPATH (bash; page 289) or cdpath (tcsh; page 362) variable contains a colon-separated list of directories that cd searches. Within the list a null directory name (::) or a period (:.:) represents the working directory. If CDPATH or cdpath is not set, cd searches only the working directory for directory. If this variable is set and directory is not an absolute pathname (does not begin with a slash), cd searches the directories in the list; if the search fails, cd searches the working directory. See page 289 for a discussion of CDPATH. ExamplesThe following cd command makes Alex's home directory his working directory. The pwd builtin verifies the change: $ pwd /home/alex/literature $ cd $ pwd /home/alex The next command makes the /home/alex/literature directory the working directory: $ cd /home/alex/literature $ pwd /home/alex/literature Next the cd utility makes a subdirectory of the working directory the new working directory: $ cd memos $ pwd /home/alex/literature/memos Finally cd uses the . . reference to the parent of the working directory to make the parent the new working directory: $ cd .. $ pwd /home/alex/literature chgrp: Changes the group associated with a filechgrp [options] group file-list chgrp [options] reference=rfile file-list The chgrp utility changes the group associated with one or more files. ArgumentsThe group is the name or numeric group ID of the new group. The file-list is a list of the pathnames of the files whose group association is to be changed. The rfile is the pathname of a file whose group is to become the new group associated with file-list. Options
no-dereference
reference=rfile
NotesOnly the owner of a file or root can change the group association of a file. Also, unless you are root, you must belong to the specified group to change the group ID of a file to that group. See page 608 for information on how chown can change the group associated with, as well as the owner of, a file. ExamplesThe following command changes the group that the manuals file is associated with; the new group is pubs. $ chgrp pubs manuals chmod: Changes the access mode (permissions) of a filechmod [options] who operator permission file-list (symbolic) chmod [options] mode file-list (absolute) chmod [options] reference=rfile file-list (referential) The chmod utility changes the ways in which a file can be accessed by the owner of the file, the group to which the file belongs, and/or all other users. Only the owner of a file or Superuser can change the access mode, or permissions, of a file. You can specify the new access mode absolutely, symbolically, or referentially. ArgumentsArguments specify which files are to have their modes changed in what ways. SymbolicYou can specify multiple sets of symbolic modes (who operator permission) by separating each set from the next with a comma. The chmod utility changes the access permission for the class of users specified by who. The class of users is designated by one or more of the letters specified in the who column of Table V-4.
Table V-5 lists the symbolic mode operators.
The access permission is specified by one or more of the letters listed in Table V-6.
AbsoluteYou can use an octal number to specify the access mode. Construct the number by ORing the appropriate values from Table V-7. To OR two octal numbers from this table, just add them. (Refer to Table V-8 for examples.)
Table V-8 lists some typical modes. Options
reference=rfile
NotesWhen you are using symbolic arguments, you can omit the permission from the command line only when the operator is =. This omission takes away all permissions. See the second example in the next section. ExamplesThe following examples show how to use the chmod utility to change the permissions of the file named temp. The initial access mode of temp is shown by ls (see "Discussion" on page 710 for information about the ls display): $ ls -l temp -rw-rw-r-- 1 alex pubs 57 Jul 12 16:47 temp When you do not follow an equal sign with a permission, chmod removes all permissions for the specified user class. The following command removes all access permissions for the group and all other users so that only the owner has access to the file: $ chmod go= temp $ ls -l temp -rw------- 1 alex pubs 57 Jul 12 16:47 temp The next command changes the access modes for all users (owner, group, and others) to read and write. Now anyone can read from or write to the file. $ chmod a=rw temp $ ls -l temp -rw-rw-rw- 1 alex pubs 57 Jul 12 16:47 temp Using an absolute argument, a=rw becomes 666. The next command performs the same function as the previous one: $ chmod 666 temp The next command removes write access permission for other users. As a result members of the pubs group can still read from and write to the file, but other users can only read from the file: $ chmod o-w temp $ ls -l temp -rw-rw-r-- 1 alex pubs 57 Jul 12 16:47 temp The following command yields the same result, using an absolute argument: $ chmod 664 temp The next command adds execute access permission for all users: $ chmod a+x temp $ ls -l temp -rwxrwxr-x 1 alex pubs 57 Jul 12 16:47 temp If temp is a shell script or other executable file, all users can now execute it. (You need read and execute access to execute a shell script but only execute access to execute a binary file.) The absolute command that yields the same result is $ chmod 775 temp The final command uses symbolic arguments to achieve the same result as the preceding one. It sets permissions to read, write, and execute for the owner, and to read and write for the group and other users. A comma separates the sets of symbolic modes. $ chmod u=rwx,go=rw temp chown: Changes the owner of a file and/or the group the file is associated withchown [options] owner file-list chown [options] owner:group file-list chown [options] owner: file-list chown [options] :group file-list chown [options] reference=rfile file-list The chown utility changes the owner of a file and/or the group the file is associated with. Only root can change the owner of a file. Only root or the owner of a file who belongs to the new group can change the group a file is associated with. ArgumentsThe owner is the username or numeric user ID of the new owner. The file-list is a list of the pathnames of the files whose ownership and/or group association you want to change. The group is the group name or numeric group ID of the new group that the file is associated with. Table V-9 shows the ways you can specify the new owner and/or group.
OptionsAccepts the common options described on page 587.
no-dereference
reference=rfile
NotesThe chown utility clears setuid and setgid bits when it changes the owner of a file. ExamplesThe following command changes the owner of the chapter1 file in the manuals directory. The new owner is Jenny: # chown jenny manuals/chapter1 The following command makes Alex the owner of, and Alex's login group the group associated with, all files in the /home/alex/literature directory and in all its subdirectories: # chown --recursive alex: /home/alex/literature The next command changes the ownership of the files in literature to alex and the group associated with these files to pubs: # chown alex:pubs /home/alex/literature/* The final example changes the group association of the files in manuals to pubs without altering their ownership. The owner of the files, who is executing this command, must belong to the pubs group. $ chown :pubs manuals/* cmp: Compares two filescmp [options] file1 [file2 [skip1 [skip2]]] The cmp utility displays the differences between two files on a byte-by-byte basis. If the files are the same, cmp is silent. If the files differ, cmp displays the byte and line number of the first difference. ArgumentsThe file1 and file2 are pathnames of the files that cmp compares. If file2 is omitted, cmp uses standard input instead. Using a hyphen ( ) in place of file1 or file2 causes cmp to read standard input instead of that file. The skip1 and skip2 are decimal numbers indicating the number of bytes to skip in each file before beginning the comparison. Options
ignore initial=n
NotesByte and line numbering start at 1. The cmp utility does not display a message if the files are identical; it only sets the exit status. This utility returns an exit status of 0 if the files are the same and 1 if they are different. An exit status greater than 1 means an error occurred. When you use skip1 (and skip2), the offset values cmp displays are based on the byte where the comparison began. You can use the standard multiplicative suffixes after skip1 and skip2; see Table V-1 on page 586. Unlike diff (page 638), cmp works with binary as well as ASCII files. ExamplesThe examples use the files a and b shown below. These files have two differences. The first difference is that the word lazy in file a is replaced by lasy in file b. The second difference is more subtle: A TAB character appears just before the NEWLINE character in file b. $ cat a The quick brown fox jumped over the lazy dog. $ cat b The quick brown fox jumped over the lasy dog.TAB The first example uses cmp without any options to compare the two files. The cmp utility reports that the files are different and identifies the offset from the start of the files where the first difference is found: $ cmp a b a b differ: char 39, line 1 You can display the values of the bytes at that location by adding the print chars option: $ cmp --print-bytes a b a b differ: char 39, line 1 is 172 z 163 s The l option displays all bytes that differ between the two files. Because this option creates a lot of output if the files have many differences, you may want to redirect the output to a file. The following example shows the two differences between files a and b. The b option displays the values for the bytes as well. Where file a has a CONTROL J (NEWLINE), file b has a CONTROL I (TAB). The message saying that it has reached the end of file on file a indicates that file b is longer than file a. $ cmp -lb a b 39 172 z 163 s 46 12 ^J 11 ^I cmp: EOF on a In the next example, the ignore initial option is used to skip over the first difference in the files. The cmp utility now reports on the second difference. The difference is put at character 7, which is the 46th character in the original file b (7 characters past the ignored 39 characters). $ cmp --ignore-initial=39 a b a b differ: char 7, line 1 You can use skip1 and skip2 in place of the ignore initial option used in the preceding example: $ cmp a b 39 39 a b differ: char 7, line 1 comm: Compares sorted filescomm [options] file1 file2 The comm utility displays a line-by-line comparison of two sorted files. The first of the three columns it displays lists the lines found only in file1, the second column lists the lines found only in file2, and the third lists the lines common to both files. ArgumentsThe file1 and file2 are pathnames of the files that comm compares. Using a hyphen ( ) in place of file1 or file2 causes comm to read standard input instead of that file. OptionsYou can combine the options.
NotesIf the files have not been sorted, comm will not work properly. Lines in the second column are preceded by one TAB, and those in the third column are preceded by two TABs. The exit status indicates whether comm completed normally (0) or abnormally (not 0). ExamplesThe following examples use two files, c and d, in the working directory. As with all input to comm, the files have already been sorted: $ cat c bbbbb ccccc ddddd eeeee fffff $ cat d aaaaa ddddd eeeee ggggg hhhhh Refer to sort on page 762 for information on sorting files. The following example calls comm without any options, so it displays three columns. The first column lists those lines found only in file c, the second column lists those found in d, and the third lists the lines found in both c and d: $ comm c d aaaaa bbbbb ccccc ddddd eeeee fffff ggggg hhhhh The next example shows the use of options to prevent comm from displaying columns 1 and 2. The result is column 3, a list of the lines common to files c and d: $ comm -12 c d ddddd eeeee configure: Configures source code automatically./configure options The configure script is part of the GNU Configure and Build System. Software developers who supply source code for their products face the problem of making it easy for relatively naive users to build and install their software package on a wide variety of machine architectures, operating systems, and system software. Toward this end many software developers supply a shell script named configure with their source code. When you run configure, it determines the capabilities of the local system. The data collected by configure is used to build the makefiles with which make (page 715) builds the executables and libraries. You can adjust the behavior of configure by specifying command line options and environment variables. Optionsdisable-feature
enable-feature
prefix=directory
DiscussionThe GNU Configure and Build System allows software developers to distribute software that can configure itself to be built on a variety of systems. This system builds a shell script named configure, which prepares the software distribution to be built and installed on a local system. The configure script searches the local system to find the various dependencies for the software distribution and constructs the appropriate makefiles. Once you have run configure, you can build the software with a make command and install the software with a make install command. The configure script determines which C compiler to use (usually gcc) and specifies a set of flags to pass to that compiler. You can set the environment variables CC and CFLAGS to override these values with your own choices. (See the "Examples" section.) NotesEach package that uses the GNU autoconfiguration utility provides its own custom copy of configure, which the software developer created using the GNU autoconf utility. Read the README and INSTALL files that are provided with the package you are installing to obtain detailed information about the available options. The configure scripts are self-contained and run correctly on a wide variety of systems. You do not need any special system resources to use configure. ExamplesThe simplest way to call configure is to cd to the base directory for the software distribution you want to configure and then run the following command: $ ./configure The ./ is prepended to the command name to ensure that you are running the configure script that was supplied with the software distribution. To cause configure to build makefiles that pass the flags Wall and O2 to gcc, use the following command from bash: $ CFLAGS="-Wall -O2" ./configure If you are using tcsh, use the following command: tcsh $ env CFLAGS="-Wall -O2" ./configure cp: Copies filescp [options] source-file destination-file cp [options] source-file-list destination-directory The cp utility copies one or more files. It can either make a copy of a single file (first format) or it can copy one or more files to a directory (second format). With the recursive option, cp can copy directories. ArgumentsThe source-file is the pathname of the file that cp makes a copy of. The destination-file is the pathname that cp assigns to the resulting copy of the file. The source-file-list is a list of one or more pathnames of files that cp makes copies of. The destination-directory is the pathname of the directory in which cp places the copied files. With this format, cp gives each of the copied files the same simple filename as its source-file. The recursive option enables cp to copy directories recursively from the source-file-list into the destination-directory. OptionsAccepts the common options described on page 587.
no-dereference
preserve=links
NotesIf the destination-file exists before you execute cp, cp overwrites the file, destroying the contents but leaving the access privileges, owner, and group associated with the file as they were. If the destination-file does not exist, cp uses the access privileges of the source-file. The user who copies the file becomes the owner of the destination-file and the user's group becomes the group associated with the destination-file. With the p option, cp attempts to set the owner, group, permissions, access date, and modification date to match those of the source-file. Unlike ln (page 702), the destination-file that cp creates is independent of its source-file. ExamplesThe first command makes a copy of the file letter in the working directory. The name of the copy is letter.sav. $ cp letter letter.sav The next command copies all files with filenames ending in .c into the archives directory, which is a subdirectory of the working directory. Each copied file retains its simple filename but has a new absolute pathname. Because of the preserve option, the copied files in archives have the same owner, group, permissions, access date, and modification date as the source files. $ cp --preserve *.c archives The next example copies memo from /home/jenny to the working directory: $ cp /home/jenny/memo . The next example uses the parents option to copy the file memo/thursday/max to the dir directory as dir/memo/thursday/max. The find utility shows the newly created directory hierarchy. $ cp --parents memo/thursday/max dir $ find dir dir dir/memo dir/memo/thursday dir/memo/thursday/max The following command copies the files named memo and letter into another directory. The copies have the same simple filenames as the source files (memo and letter) but have different absolute pathnames. The absolute pathnames of the copied files are /home/jenny/memo and /home/jenny/letter. $ cp memo letter /home/jenny The final command demonstrates one use of the force option. Alex owns the working directory and tries unsuccessfully to copy one onto a file (me) that he does not have write permission for. Because he has write permission to the directory that holds me, Alex can remove the file but not write to it. The force option unlinks, or removes, me and then copies one to the new file named me. $ ls -ld drwxrwxr-x 2 alex alex 4096 Oct 21 22:55 . $ ls -l -rw-r--r-- 1 root root 3555 Oct 21 22:54 me -rw-rw-r-- 1 alex alex 1222 Oct 21 22:55 one $ cp one me cp: cannot create regular file 'me': Permission denied $ cp --force one me $ ls -l -rw-r--r-- 1 alex alex 1222 Oct 21 22:58 me -rw-rw-r-- 1 alex alex 1222 Oct 21 22:55 one If Alex had used the backup option in addition to force, cp would have created a backup of me named me~. Refer to "Directory Access Permissions" on page 94 for more information. cpio: Creates an archive or restores files from an archivecpio create [options] cpio extract [options] [patterns] cpio pass-through [options] directory The cpio utility has three modes of operation: Create mode places multiple files into a single archive file, extract mode restores files from an archive, and pass-through mode copies a directory hierarchy to another location. The archive file used by cpio may be saved on disk, tape, other removable media, or a remote system. Create mode reads a list of ordinary or directory filenames from standard input and writes the resulting archive file to standard output. You can use this mode to create an archive. Extract mode reads the name of an archive from standard input and extracts files from that archive. You can decide to restore all the files from the archive or only those whose names match specific patterns. Pass-through mode reads ordinary or directory filenames from standard input and copies the files to another location on the disk. ArgumentsBy default cpio in extract mode extracts all files found in the archive. You can choose to extract files selectively by supplying one or more patterns. If the name of a file in the archive matches one of the patterns, that file is extracted; otherwise, it is ignored. The cpio patterns are similar to shell wildcards (page 127) except that patterns match slashes (/ ) and a leading period (.) in a filename. In pass-through mode you must give the name of the target directory as an argument to cpio. OptionsMajor OptionsThree options determine the mode in which cpio operates. You must include exactly one of these options whenever you use cpio.
Other OptionsThe remaining options alter the behavior of cpio. These options work with one or more of the preceding major options. reset access time
make directories
pattern file=filename
preserve modification time
no-absolute-filenames
DiscussionGNU cpio version 2.5 displays erroneous truncating inode number error messages; you can safely ignore these messages. Without the unconditional option, cpio will not overwrite a more recently modified file with an older file. You can use both ordinary and directory filenames as input when you create an archive. If the name of an ordinary file appears in the input list before the name of its parent directory, the ordinary file appears before its parent directory in the archive as well. This order can lead to an avoidable error: When you extract files from the archive, the child has nowhere to go in the file structure if its parent has not yet been extracted. Making sure that files appear after their parent directories in the archive is not always a solution. One problem occurs if the preserve modification time option is used when extracting files. Because the modification time of a parent directory is updated whenever a file is created within it, the original modification time of the parent directory is lost when the first file is written to it. The solution to this potential problem is to ensure that all files appear before their parent directories when creating an archive and to create directories as needed when extracting files from an archive. When you use this technique, directories are extracted only after all files have been written to them and their modification times are preserved. With the depth option, the find utility generates a list of files with all children appearing in the list before their parent directories. If you use this list to create an archive, the files are in the proper order. (Refer to the first example in the next section.) When extracting files from an archive, the make directories option causes cpio to create parent directories as needed and the preserve modification time option does just what its name says. Using this combination of utilities and options preserves directory modification times through a create/extract sequence. This strategy also solves another potential problem. Sometimes a parent directory may not have permissions set so that you can extract files into it. When cpio automatically creates the directory with make directories, you can be assured of write permission to the directory. When the directory is extracted from the archive (after all the files are written into the directory), it is extracted with its original permissions. ExamplesThe first example creates an archive of the files in Jenny's home directory, writing the archive to a tape drive supported by the ftape driver: $ find /home/jenny -depth -print | cpio -oB >/dev/ftape The find utility produces the filenames that cpio uses to build the archive. The depth option causes all entries in a directory to be listed before listing the directory name itself, making it possible for cpio to preserve the original modification times of directories (see the preceding "Discussion.") Use the make-directories and the preserve-modification-time when you extract files from this archive (see the following examples). The B option blocks the tape at 5,120 bytes per block. To check the contents of the archive file and display a detailed listing of the files it contains, use $ cpio -itv < /dev/ftape The following command restores the files that formerly were in the memo subdirectory of Jenny's home directory: $ cpio -idm /home/jenny/memo/\* < /dev/ftape The d ( make-directories) option ensures that any subdirectories that were in the memo directory are re-created as needed. The m ( preserve-modification-time) option preserves the modification times of files and directories. The asterisk in the regular expression is escaped to keep the shell from expanding it. The next command is the same as the preceding command except that it uses the no-absolute-filenames option to re-create the memo directory in the working directory, which is named memocopy. The pattern does not start with the slash that represents the root directory allowing cpio to create the files with relative pathnames. $ pwd /home/jenny/memocopy $ cpio -idm -- no-absolute-filenames home/jenny/memo/\* < /dev/ftape The final example uses the f option to restore all the files in the archive except those that were formerly in the memo subdirectory: $ cpio -ivmdf /home/jenny/memo/\* < /dev/ftape The v option lists the extracted files as cpio processes the archive, verifying that the expected files are extracted. crontab: Maintains crontab filescrontab [ u user-name] filename crontab [ u user-name] option A crontab file associates periodic times (such as 14:00 on Wednesdays) with commands. The cron utility executes each command at the specified time. When you are working as yourself, the crontab utility installs, removes, lists, and edits your crontab file. Superuser can work with any user's crontab file. ArgumentsThe first format copies the contents of filename (which contains crontab commands) into the crontab file of the user who runs the command. When the user does not have a crontab file, this process creates a new one; when the user has a crontab file, this process overwrites the file. When you replace filename with a hyphen ( ), crontab reads commands from standard input. The second format lists, removes, or edits the crontab file, depending on which option you specify. OptionsChoose only one of the e, l, or r options. Superuser can use u with one of these options.
NotesThis section covers the versions of cron, crond, crontab, and crontab files that were written by Paul Vixie hence the term Vixie cron. These versions differ from an earlier version of Vixie cron as well as from the classic SVR3 syntax. This version is POSIX compliant. User crontab files are kept in the /var/spool/cron directory, each named with the username of the user that it belongs to, owned by root, and associated with the user's primary group. The system utility named cron reads the crontab files and runs the commands. If a command line in a crontab file does not redirect its output, output sent to standard output and standard error are mailed to the user unless you set the MAILTO variable within the crontab file to a different username. To make the system administrator's job easier, the directories named /etc/cron.hourly, /etc/cron.daily, /etc/cron.weekly, and /etc/cron.monthly hold crontab files that are run by run-parts, which in turn are run by the /etc/crontab file. Each of these directories contains files that execute system tasks at the interval named by the directory. Superuser can add files to these directories instead of adding lines to root's crontab file. A typical /etc/crontab file looks like this: $ cat /etc/crontab SHELL=/bin/bash PATH=/sbin:/bin:/usr/sbin:/usr/bin MAILTO=root HOME=/ # run-parts 01 * * * * root run-parts /etc/cron.hourly 02 4 * * * root run-parts /etc/cron.daily 22 4 * * 0 root run-parts /etc/cron.weekly 42 4 1 * * root run-parts /etc/cron.monthly Each entry in a crontab file begins with five fields that specify when the command is to run (minute, hour, day of the month, month, and day of the week). The cron utility interprets an asterisk appearing in place of a number as a wildcard representing all possible values. In the day-of-the-week field, you can use either 7 or 0 to represent Sunday. It is a good practice to start cron jobs a variable number of minutes before or after the hour, half hour, or quarter hour. When you start them at these times, it becomes less likely that many processes will start at the same time, potentially overloading the system. When cron starts (usually when the system is booted), it reads all of the crontab files into memory. The cron utility mostly sleeps but wakes up once a minute, reviews all crontab entries it has stored in memory, and runs whichever ones are due to be run at that time. /etc/cron.allow /etc/cron.denySuperuser determines which users can run crontab by creating, editing, and removing the /etc/cron.allow and /etc/cron.deny files. When you create a cron.deny file with no entries and no cron.allow file exists, everyone can use crontab. When the cron.allow file exists, only users listed in that file can use crontab, regardless of the presence and contents of cron.deny. Otherwise, you can list in the cron.allow file those users who should be able to use crontab and in cron.deny those who should not be able to use it. (Listing a user in cron.deny is not necessary because, if a cron.allow file exists and the user is not listed in it, the user will not be able to use crontab anyway.) ExamplesThe following example uses crontab l to list the contents of Jenny's crontab file (/var/spool/cron/jenny). All the scripts that Jenny runs are in her ~/bin directory. The first line sets the MAILTO variable to alex so that Alex gets the output from commands run from Jenny's crontab file that is not redirected. The sat.job script runs every Saturday (day 6) at 2:05 AM, twice.week runs at 12:02 AM on Sunday and Thursday (days 0 and 4), and twice.day runs twice a day, every day, at 10 AM and 4 PM. $ who am i jenny $ crontab -l MAILTO=alex 05 02 * * 6 $HOME/bin/sat.job 00 02 * * 0,4 $HOME/bin/twice.week 05 10,16 * * * $HOME/bin/twice.day To add an entry to your crontab file, run the crontab utility with the e (edit) option. Some Linux systems use a version of crontab that does not support the e option. If the local system runs such a version, you need to make a copy of your existing crontab file, edit it, and then resubmit it, as in the example that follows. The l (list) option displays a copy of your crontab file. $ crontab -l > newcron $ vim newcron ... $ crontab newcron cut: Selects characters or fields from input linescut [options] [file-list] The cut utility selects characters or fields from lines of input and writes them to standard output. Character and field numbering start with 1. ArgumentsThe file-list is a list of ordinary files. If you do not specify an argument or if you specify a hyphen ( ) in place of a filename, cut reads from standard input. OptionsAccepts the common options described on page 587.
NotesAlthough limited in functionality, cut is easy to learn and use and is a good choice when columns and fields can be selected without using pattern matching. Sometimes cut is used with paste (page 742). ExamplesFor the next two examples, assume that an ls l command produces the following output: $ ls -l total 2944 -rwxr-xr-x 1 zach pubs 259 Feb 1 00:12 countout -rw-rw-r-- 1 zach pubs 9453 Feb 4 23:17 headers -rw-rw-r-- 1 zach pubs 1474828 Jan 14 14:15 memo -rw-rw-r-- 1 zach pubs 1474828 Jan 14 14:33 memos_save -rw-rw-r-- 1 zach pubs 7134 Feb 4 23:18 tmp1 -rw-rw-r-- 1 zach pubs 4770 Feb 4 23:26 tmp2 -rw-rw-r-- 1 zach pubs 13580 Nov 7 08:01 typescript The following command outputs the permissions of the files in the working directory. The cut utility with the c option selects characters 2 through 10 from each input line. The characters in this range are written to standard output. $ ls -l | cut -c2-10 otal 2944 rwxr-xr-x rw-rw-r-- rw-rw-r-- rw-rw-r-- rw-rw-r-- rw-rw-r-- rw-rw-r-- The next command outputs the size and name of each file in the working directory. This time the f option selects the fifth and ninth fields from the input lines. The d option tells cut to use SPACEs, not TABs, as delimiters. The TR utility (page 804) with the s option changes sequences of more than one SPACE character into a single SPACE; otherwise, cut counts the extra SPACE characters as separate fields. $ ls -l | tr -s ' ' ' ' | cut -f5,9 -d' ' 259 countout 9453 headers 1474828 memo 1474828 memos_save 7134 tmp1 4770 tmp2 13580 typescript The last example displays a list of full names as stored in the fifth field of the /etc/passwd file. The d option specifies that the colon character be used as the field delimiter. $ cat /etc/passwd root:x:0:0:Root:/:/bin/sh jenny:x:401:50:Jenny Chen:/home/jenny:/bin/zsh alex:x:402:50:Alex Watson:/home/alex:/bin/bash scott:x:504:500:Scott Adams:/home/scott:/bin/tcsh hls:x:505:500:Helen Simpson:/home/hls:/bin/bash $ cut -d: -f5 /etc/passwd Root Jenny Chen Alex Watson Scott Adams Helen Simpson date: Displays or sets the system time and datedate [options] [+format] date [options] [newdate] The date utility displays the time and date known to the system. Superuser can use date to change the system clock. ArgumentsThe +format argument specifies the format for the output of date. The format string consisting of field descriptors and text follows a plus sign (+). The field descriptors are preceded by percent signs, and each one is replaced by its value in the output. Table V-10 lists some of the field descriptors.
By default date zero fills numeric fields. Place an underscore (_) immediately following the percent sign (%) for a specific field to cause date to blank fill the field and with a hyphen ( ) to cause date not to fill the field that is, to left justify the field. The date utility assumes that, in a format string, any character that is not a percent sign, an underscore or a hyphen following the percent sign, or a field descriptor is ordinary text and copies it to standard output. You can use ordinary text to add punctuation to the date and to add labels (for example, you can put the word DATE: in front of the date). Surround the format argument with single quotation marks if it contains SPACE s or other characters that have a special meaning to the shell. Setting the dateWhen Superuser specifies newdate, the system changes the system clock to reflect the new date. The newdate argument has the format nnddhhmm[[cc]yy][.ss] where nn is the number of the month (01 12), dd is the day of the month (01 31), hh is the hour based on a 24-hour clock (00 23), and mm is the minutes (00 59). When you change the date, you must specify at least these fields. The optional cc specifies the first two digits of the year (the value of the century minus 1), and yy specifies the last two digits of the year. You can specify yy or ccyy following mm. When you do not specify a year, date assumes that the year has not changed. You can specify the number of seconds past the start of the minute with .ss. OptionsAccepts the common options described on page 587.
NotesIf you set up a locale database, date uses that database to substitute terms appropriate to your locale (page 885). ExamplesThe first example shows how to set the date for 2:07:30 PM on August 19 without changing the year: # date 08191407.30 Sat Aug 19 14:07:30 PDT 2005 The next example shows the format argument, which causes date to display the date in a commonly used format: $ date '+Today is %h %d, %Y' Today is Aug 19, 2005 dd: Converts and copies a filedd [arguments] The dd (device-to-device copy) utility converts and copies a file. The primary use of dd is to copy files to and from such devices as tape and floppy drives. Often dd can handle the transfer of information to and from other operating systems when other methods fail. A rich set of arguments gives you precise control over the characteristics of the transfer. ArgumentsAccepts the common options described on page 587. By default dd copies standard input to standard output.
NotesYou can use the standard multiplicative suffixes to make it easier to specify large block sizes. See Table V-1 on page 586. ExamplesYou can use dd to create a file filled with pseudo-random bytes. $ dd if=/dev/urandom of=randfile2 bs=1 count=100 The preceding command reads from the /dev/urandom file (an interface to the kernel's random number generator) and writes to the file named randfile. The block size is 1 and the count is 100 so randfile is 100 bytes long. For bytes that are more random, you can read from /dev/random. See the urandom and random man pages for more information. Wiping a fileYou can use a similar technique to wipe data from a file before deleting it, making it almost impossible to recover data from a deleted file. You might want to wipe a file for security reasons. Wipe a file several times for added security. In the following example, ls shows the size of the file named secret; dd, with a block size of 1 and a count corresponding to the number of bytes in secret, then wipes the file. The conv=notrunc argument ensures that dd writes over the data in the file and not another place on the disk. $ ls -l secret -rw-rw-r-- 1 max max 2494 Feb 6 00:56 secret $ dd if=/dev/urandom of=secret bs=1 count=2494 conv=notrunc 2494+0 records in 2494+0 records out $ rm secret Copying a disketteYou can use dd to make an exact copy of a floppy diskette. First copy the contents of the diskette to a file on the hard drive and then copy the file from the hard disk to a formatted diskette. This technique works regardless of what is on the floppy diskette. The next example copies a DOS-formatted diskette. The mount, ls, umount sequences at the beginning and end of the example verify that the original diskette and the copy hold the same files. You can use the floppy.copy file to make multiple copies of the diskette. # mount -t msdos /dev/fd0H1440 /mnt # ls /mnt abprint.dat bti.ini setup.ins supfiles.z wbt.z adbook.z setup.exe setup.pkg telephon.z # umount /mnt # dd if=/dev/fd0 ibs=512 > floppy.copy 2880+0 records in 2880+0 records out # ls -l floppy.copy -rw-rw-r-- 1 alex speedy 1474560 Oct 11 05:43 floppy.copy # dd if=floppy.copy bs=512 of=/dev/fd0 2880+0 records in 2880+0 records out # mount -t msdos /dev/fd0H1440 /mnt # ls /mnt abprint.dat bti.ini setup.ins supfiles.z wbt.z adbook.z setup.exe setup.pkg telephon.z # umount /mnt df: Displays disk space usagedf [options] [filesystem-list] The df (disk free) utility reports on the total space and the free space on each mounted device. ArgumentsWhen you call df without an argument, it reports on the free space on each of the currently mounted devices. The filesystem-list is an optional list of one or more pathnames that specify the filesystems you want the report to cover. You can refer to a mounted filesystem by its device pathname or by the pathname of the directory it is mounted on. Options
ExamplesIn the following example, df displays information about all mounted filesystems on the local system: $ df Filesystem 1k-blocks Used Available Use% Mounted on /dev/hda12 1517920 53264 1387548 4% / /dev/hda1 15522 4846 9875 33% /boot /dev/hda8 1011928 110268 850256 11% /free1 /dev/hda9 1011928 30624 929900 3% /free2 /dev/hda10 1130540 78992 994120 7% /free3 /dev/hda5 4032092 1988080 1839188 52% /home /dev/hda7 1011928 60 960464 0% /tmp /dev/hda6 2522048 824084 1569848 34% /usr zach:/c 2096160 1811392 284768 86% /zach_c zach:/d 2096450 1935097 161353 92% /zach_d Next df is called with the l and h options, generating a human-readable list of local filesystems. The sizes in this listing are given in terms of megabytes and gigabytes. The NFS mounted filesystems (from zach) are not visible. $ df -lh Filesystem Size Used Avail Use% Mounted on /dev/hda12 1.4G 52M 1.3G 4% / /dev/hda1 15M 4.7M 9.6M 33% /boot /dev/hda8 988M 108M 830M 11% /free1 /dev/hda9 988M 30M 908M 3% /free2 /dev/hda10 1.1G 77M 971M 7% /free3 /dev/hda5 3.8G 1.9G 1.8G 52% /home /dev/hda7 988M 60k 938M 0% /tmp /dev/hda6 2.4G 805M 1.5G 34% /usr The next example displays information about the /free2 partition in megabyte units: $ df -BM /free2 Filesystem 1M-blocks Used Available Use% Mounted on /dev/hda9 988 30 908 3% /free2 The final example displays information about NFS filesystems in human-readable terms: $ df -ht nfs Filesystem Size Used Avail Use% Mounted on zach:/c 2.0G 1.7G 278M 86% /zach_c zach:/d 2.0G 1.8G 157M 92% /zach_d diff: Displays the differences between two filesdiff [options] file1 file2 diff [options] file1 directory diff [options] directory file2 diff [options] directory1 directory2 The diff utility displays line-by-line differences between two files. By default diff displays the differences as instructions you can use to edit one of the files to make it the same as the other. ArgumentsThe file1 and file2 are pathnames of ordinary files that diff works on. When the directory argument is used in place of file2, diff looks for a file in directory with the same name as file1. It works similarly when directory replaces file1. When you specify two directory arguments, diff compares the files in directory1 with the files that have the same simple filenames in directory2. OptionsAccepts the common options described on page 587, with one exception: When one of the arguments is a directory and the other is an ordinary file, you cannot compare to standard input.
NotesThe sdiff utility is similar to diff but its output may be easier to read. The diff side-by-side option produces the same output as sdiff. See the "Examples" section and refer to the diff and sdiff man and info pages for more information. You can use the diff3 utility to compare three files. DiscussionWhen you use diff without any options, it produces a series of lines containing Add (a), Delete (d), and Change (c) instructions. Each of these lines is followed by the lines from the file that you need to add, delete, or change to make the files the same. A less than symbol (<) precedes lines from file1. A greater than symbol (>) precedes lines from file2. The diff output appears in the format shown in Table V-12. A pair of line numbers separated by a comma represents a range of lines; a single line number represents a single line.
The diff utility assumes that you will convert file1 to file2. The line numbers to the left of each of the a, c, or d instructions always pertain to file1; the line numbers to the right of the instructions apply to file2. To convert file2 to file1, run diff again, reversing the order of the arguments. ExamplesThe first example shows how diff displays the differences between two short, similar files: $ cat m aaaaa bbbbb ccccc $ cat n aaaaa ccccc $ diff m n 2d1 < bbbbb The difference between files m and n is that the second line of file m (bbbbb) is missing from file n. The first line that diff displays (2d1) indicates that you need to delete the second line from file1 (m) to make it the same as file2 (n). The next line diff displays starts with a less than symbol (<), indicating that this line of text is from file1. In this example, you do not need this information all you need to know is the line number so that you can delete the line. The side-by-side option and the sdiff utility, both with the output width set to 30 columns (characters), display the same output. In the output a less than symbol points to the extra line in file m, whereas diff/sdiff leaves a blank line in file n where the extra line would go to make the files the same. $ diff --side-by-side --width=30 m n aaaaa aaaaa bbbbb < ccccc ccccc $ sdiff -w 30 m n aaaaa aaaaa bbbbb < ccccc ccccc The next example uses the same m file and a new file, p, to show diff issuing an a (append) instruction: $ cat p aaaaa bbbbb rrrrr ccccc $ diff m p 2a3 > rrrrr In the preceding example, diff issues the instruction 2a3 to indicate that you must append a line to file m, after line 2, to make it the same as file p. The second line that diff displays indicates that the line is from file p (the line begins with >, indicating file2). In this example, you need the information on this line; the appended line must contain the text rrrrr. The next example uses file m again, this time with file r, to show how diff indicates a line that needs to be changed: $ cat r aaaaa -q ccccc $ diff m r 2c2 < bbbbb --- > -q The difference between the two files is in line 2: File m contains bbbbb, and file r contains q. The diff utility displays 2c2 to indicate that you need to change line 2. After indicating that a change is needed, diff shows that you must change line 2 in file m (bbbbb) to line 2 in file r ( q) to make the files the same. The three hyphens indicate the end of the text in file m that needs to be changed and the start of the text in file r that is to replace it. Comparing the same files using the side-by-side and width options ( y and W) yields an easier-to-read result. The pipe symbol (|) indicates that the line on one side must replace the line on the other side to make the files the same: $ diff -y -W 30 m r aaaaa aaaaa bbbbb | -q ccccc ccccc The next examples compare the two files q and v: $ cat q $ cat v Monday Monday Tuesday Wednesday Wednesday Thursday Thursday Thursday Saturday Friday Sunday Saturday Sundae Running in side-by-side mode diff shows that Tuesday is missing from file v, there is only one Thursday in file q (there are two in file v), and Friday is missing from file q. The last line is Sunday in file q and Sundae in file v: diff indicates that these lines are different. You can change file q to be the same as file v by removing Tuesday, adding one Thursday and Friday, and substituting Sundae from file v for Sunday from file q. Alternatively, you can change file v to be the same as file q by adding Tuesday, removing one Thursday and Friday, and substituting Sunday from file q for Sundae from file v. $ diff -y -W 30 q v Monday Monday Tuesday < Wednesday Wednesday Thursday Thursday > Thursday > Friday Saturday Saturday Sunday | Sundae Context diffWith the context option (called a context diff), diff displays output that tells you how to turn the first file into the second. The top two lines identify the files and show that q is represented by asterisks, whereas v is represented by hyphens. Following a row of asterisks that indicates the start of a hunk of text is a row of asterisks with the numbers 1,6 in the middle. This line indicates that the instructions in the first section tell you what to remove from or change in file q namely, lines 1 through 6 (that is, all the lines of file q; in a longer file it would mark the first hunk). The hyphen on the next line means that you need to remove the line with Tuesday. The line with an exclamation point indicates that you need to replace the line with Sunday with the corresponding line from file v. The row of hyphens with the numbers 1,7 in the middle indicates that the next section tells you which lines from file v lines 1 through 7 you need to add or change in file q. You need to add a second line with Thursday and a line with Friday, and you need to change Sunday in file q to Sundae (from file v). $ diff --context q v *** q Mon Aug 22 18:26:45 2005 --- v Mon Aug 22 18:27:55 2005 *************** *** 1,6 **** Monday - Tuesday Wednesday Thursday Saturday ! Sunday --- 1,7 ---- Monday Wednesday Thursday + Thursday + Friday Saturday ! Sundae du: Displays information on disk usage by filedu [options] [path-list] The du (disk usage) utility reports how much disk space is occupied by a directory (along with all its subdirectories and files) or a file. By default du displays the number of 1,024-byte blocks that are occupied by the directory or file. ArgumentsWithout any arguments, du displays information about the working directory and its subdirectories. The path-list specifies the directories and files you want information on. OptionsWithout any options, du displays the total storage used for each argument in path-list. For directories du displays this total after recursively listing the totals for each subdirectory.
ExamplesIn the first example, du displays size information about subdirectories in the working directory. The last line contains the grand total for the working directory and its subdirectories. $ du 26 ./Postscript 4 ./RCS 47 ./XIcon 4 ./Printer/RCS 12 ./Printer 105 . The total (105) is the number of blocks occupied by all plain files and directories under the working directory. All files are counted, even though du displays only the sizes of directories. Next using the summarize option, du displays the total for each of the directories in /home but not for any subdirectories: # du --summarize /home/* 68 /home/Desktop 1188 /home/doug 100108 /home/dump 62160 /home/ftp 6540 /home/httpd 16 /home/lost+found 1862104 /home/alex 176 /home/max 88 /home/jenny 4 /home/samba 4 /home/tom Add to the previous example the total option and you get the same listing with a grand total at the end: # du --summarize --total /home/* 68 /home/Desktop ... 4 /home/tom 2032456 total If you do not have read permission for a file or directory that du encounters, du sends a warning to standard error and skips that file or directory. The following example uses the s (summarize), h (human-readable), and c (total) options: $ du -shc /usr/* 112M /usr/X11R6 161M /usr/bin 4.0K /usr/dict 4.0K /usr/doc 4.0K /usr/etc 3.9M /usr/games ... du: cannot change to directory '/usr/lost+found': Permission denied 30M /usr/sbin du: cannot change to directory '/usr/share/ssl/CA': Permission denied 797M /usr/share 188M /usr/src 2.2G total The final example displays, in human-readable format, the total size of all the files the user can read in the /usr filesystem. Redirecting standard error to /dev/null discards all warnings about files and directories that are unreadable. $ du --human-readable --summarize /usr 2>/dev/null 2.2G /usr echo: Displays a messageecho [options] message The echo utility copies its arguments, followed by a NEWLINE, to standard output. The Bourne Again and TC Shells each has an echo builtin that works similarly to the echo utility. ArgumentsThe message consists of one or more arguments, which can include quoted strings, ambiguous file references, and shell variables. A SPACE separates each argument from the next. The shell recognizes unquoted special characters in the arguments. For example, the shell expands an asterisk into a list of filenames in the working directory. OptionsYou can configure the tcsh echo builtin to treat backslash escape sequences and the n option in different ways. Refer to echo_style in the tcsh man page. The typical tcsh configuration recognizes the n option, enables backslash escape sequences, and ignores the e and E options.
NotesYou can use echo to send messages to the screen from a shell script. See page 129 for a discussion of how to use echo to display filenames using wildcard characters. The echo utility and builtins provide an escape notation to represent certain nonprinting characters in message (Table V-13). You must use the e option in order for these backslash escape sequences to work with the echo utility and the bash echo builtin. Typically you do not need the e option with the tcsh echo builtin.
ExamplesFollowing are some echo commands. These commands will work with the echo utility (/bin/echo) and the bash and tcsh echo builtins, except for the last, which may not need the e option under tcsh. $ echo "This command displays a string." This command displays a string. $ echo -n "This displayed string is not followed by a NEWLINE." This displayed string is not followed by a NEWLINE.$ echo hi hi $ echo -e "This message contains\v a vertical tab." This message contains a vertical tab. $ The following examples contain messages with the backslash escape sequence \c. In the first example, the shell processes the arguments before calling echo. When the shell sees the \c, it replaces the \c with the character c. The next three examples show how to quote the \c so that the shell passes it to echo, which then does not append a NEWLINE to the end of the message. The first four examples are run under bash and require the e option. The final example runs under tcsh, which typically does not use this option. $ echo -e There is a newline after this.\c There is a newline after this.c $ echo -e 'There is no newline after this.\c' There is no newline after this.$ $ echo -e "There is no newline after this.\c" There is no newline after this.$ $ echo -e There is no newline after this.\\c There is no newline after this.$ $ tcsh tcsh $ echo 'There is no newline after this.\c' There is no newline after this.$ You can use the n option in place of e and \c. expr: Evaluates an expressionexpr expression The expr utility evaluates an expression and sends the result to standard output. It evaluates character strings that represent either numeric or nonnumeric values. Operators are used with the strings to form expressions. ArgumentsThe expression is composed of strings interspersed with operators. Each string and operator constitute a distinct argument that you must separate from other arguments with a SPACE. You must quote operators that have special meanings to the shell (for example, the multiplication operator, *). The following list of expr operators is given in order of decreasing precedence. Each operator within a group of operators has the same precedence. You can change the order of evaluation by using parentheses.
NotesThe expr utility returns an exit status of 0 (zero) if the expression evaluates to other than a null string or the number 0, a status of 1 if the expression is null or 0, and a status of 2 if the expression is invalid. Although expr and this discussion distinguish between numeric and nonnumeric arguments, all arguments to expr are nonnumeric (character strings). When applicable, expr attempts to convert an argument to a number (for example, when using the + operator). If a string contains characters other than 0 through 9 with an optional leading minus sign, expr cannot convert it. Specifically, if a string contains a plus sign or a decimal point, expr considers it to be nonnumeric. If both arguments are numeric, the comparison is numeric. If one is nonnumeric, the comparison is lexicographic. ExamplesThe following examples show command lines that call expr to evaluate constants. You can also use expr to evaluate variables in a shell script. The fourth command displays an error message because of the illegal decimal point in 5.3: $ expr 17 + 40 57 $ expr 10 - 24 -14 $ expr -17 + 20 3 $ expr 5.3 + 4 expr: non-numeric argument The multiplication (*), division ( / ), and remainder (%) operators provide additional arithmetic power. You must quote the multiplication operator (precede it with a backslash) so that the shell will not treat it as a special character (an ambiguous file reference). You cannot put quotation marks around the entire expression because each string and operator must be a separate argument. $ expr 5 \* 4 20 $ expr 21 / 7 3 $ expr 23 % 7 2 The next two examples show how parentheses change the order of evaluation. You must quote each parenthesis and surround the backslash/parenthesis combination with SPACEs: $ expr 2 \* 3 + 4 10 $ expr 2 \* \( 3 + 4 \) 14 You can use relational operators to determine the relationship between numeric or nonnumeric arguments. The following commands compare two strings to see if they are equal; expr displays a 0 when the relationship is false and a 1 when it is true. $ expr fred == sam 0 $ expr sam == sam 1 In the following examples, the relational operators, which must be quoted, establish order between numeric or nonnumeric arguments. Again, if a relationship is true, expr displays a 1. $ expr fred \> sam 0 $ expr fred \< sam 1 $ expr 5 \< 7 1 The next command compares 5 with m. When one of the arguments that expr is comparing with a relational operator is nonnumeric, expr considers the other to be nonnumeric. In this case because m is nonnumeric, expr treats 5 as a nonnumeric argument. The comparison is between the ASCII (on many systems) values of m and 5. The ASCII value of m is 109 and that of 5 is 53, so expr evaluates the relationship as true. $ expr 5 \< m 1 The next example shows the matching operator determining that the four characters in the second string match the first four characters in the first string. The expr utility displays the number of matching characters (4). $ expr abcdefghijkl : abcd 4 The & operator displays a 0 if one or both of its arguments are 0 or a null string; otherwise, it displays the first argument: $ expr '' \& book 0 $ expr magazine \& book magazine $ expr 5 \& 0 0 $ expr 5 \& 6 5 The | operator displays the first argument if it is not 0 or a null string; otherwise, it displays the second argument: $ expr '' \| book book $ expr magazine \| book magazine $ expr 5 \| 0 5 $ expr 0 \| 5 5 $ expr 5 \| 6 5 file: Displays the classification of a filefile [option] file-list The file utility classifies files according to their contents. ArgumentsThe file-list is a list of the pathnames of one or more files that file classifies. You can specify any kind of file, including ordinary, directory, and special files, in the file-list. Options
NotesThe file utility can classify more than 5, 000 file types. Some of the more common file types found on Linux systems, as displayed by file, are archive ascii text c program text commands text core file cpio archive data directory ELF 32-bit LSB executable empty English text executable The file utility uses a maximum of three tests in its attempt to classify a file: filesystem, magic number, and language tests. When file identifies the type of a file, it ceases testing. The filesystem test examines the return from a stat system call to see whether the file is empty or a special file. The magic number (page 886) test looks for data in particular fixed formats near the beginning of the file. The language test, if needed, determines whether the file is a text file, what encoding it uses, and what language it is written in. Refer to the file man page for a more detailed description of how file works. The results of file are not always correct. ExamplesSome examples of file identification follow: /etc/DIR_COLORS: ASCII English text /etc/X11: directory /etc/aliases.db: regular file, no read permission /etc/anacrontab: ASCII text /etc/asound.state: ASCII text, with very long lines /etc/at.deny: empty /etc/auto.net: Bourne shell script text executable /etc/grub.conf: symbolic link to '../boot/grub/grub.conf' /etc/localtime: timezone data /etc/named.conf: C++ program text /etc/rpc: ASCII C program text /etc/vimrc: Composer 669 Module sound data /usr/bin/GET: perl script text executable /usr/bin/HtFileType: Bourne shell script text executable /usr/bin/Maelstrom: setgid ELF 32-bit LSB executable, Intel 80386, version 1 (SYSV), for GNU/Linux 2.2.5, dynamically linked (uses shared libs), stripped /usr/bin/X11: symbolic link to '../X11R6/bin' /usr/bin/[: ELF 32-bit LSB executable, Intel 80386, version 1 (SYSV), for GNU/Linux 2.2 find: Finds files based on criteriafind [directory-list] [expression] The find utility selects files that are located in specified directory hierarchies and that meet specified criteria. ArgumentsThe directory-list specifies the directories that find is to search. When find searches a directory, it searches all subdirectories to all levels. When you do not specify a directory-list, find searches the working directory. The expression contains criteria, as described in the "Criteria" section. The find utility tests each of the files in each of the directories in the directory-list to see whether it meets the criteria described by the expression. When you do not specify an expression, the expression defaults to print. A SPACE separating two criteria is a Boolean AND operator: The file must meet both criteria to be selected. A or or o separating the criteria is a Boolean OR operator: The file must meet one or the other (or both) of the criteria to be selected. You can negate any criterion by preceding it with an exclamation point. The find utility evaluates criteria from left to right unless you group them using parentheses. Within the expression you must quote special characters so that the shell will not interpret them but rather passes them to find. Special characters that you may frequently use with find are parentheses, brackets, question marks, and asterisks. Each element within the expression is a separate argument. You must separate arguments from each other with SPACEs. There must be a SPACE on both sides of each parenthesis, exclamation point, criterion, or other element. CriteriaYou can use the following criteria within the expression. As used in this list, ±n is a decimal integer that can be expressed as +n (more than n), n (fewer than n), or n (exactly n).
DiscussionAssume that x and y are criteria. The following command line never tests whether the file meets criterion y if it does not meet criterion x. Because the criteria are separated by a SPACE (the Boolean AND operator), once find determines that criterion x is not met, the file cannot meet the criteria so find does not continue testing. You can read the expression as "(test to see whether) the file meets criterion x and (SPACE means and ) criterion y." $ find dir x y The next command line tests the file against criterion y if criterion x is not met. The file can still meet the criteria so find continues the evaluation. You can read the expression as "(test to see whether) the file meets criterion x or criterion y." If the file meets criterion x, find does not evaluate criterion y as there is no need to do so. $ find dir x - or y Action criteriaCertain "criteria" do not select files but rather cause find to take action. The action is triggered when find evaluates one of these action criteria. Therefore, the position of an action criterion on the command line not the result of its evaluation determines whether find takes the action. The print action criterion causes find to display the pathname of the file it is testing. The following command line displays the names of all files in the dir directory (and all its subdirectories), regardless of whether they meet the criterion x: $ find dir -print x The following command line displays only the names of the files in the dir directory that meet criterion x: $ find dir x -print This common use of print after the testing criteria is the default action criterion. The following command line generates the same output as the previous one: $ find dir x NotesYou can use the a operator between criteria for clarity. This operator is a Boolean AND operator, just as the SPACE is. ExamplesThe simplest find command has no arguments and lists the files in the working directory and all subdirectories: $ find ... The following command finds the files in the working directory and subdirectories that have filenames beginning with a. The command uses a period to designate the working directory. To prevent the shell from interpreting the a* as an ambiguous file reference, it is enclosed within quotation marks. $ find . -name 'a*' The print criterion is implicit in the preceding command. If you omit the directory-list argument, find searches the working directory. The next command performs the same function as the preceding one without explicitly specifying the working directory: $ find -name 'a*' The following command sends a list of selected filenames to the cpio utility, which writes them to tape. The first part of the command line ends with a pipe symbol, so the shell expects another command to follow and displays a secondary prompt (>) before accepting the rest of the command line. You can read this find command as "find, in the root directory and all subdirectories ( / ), ordinary files ( type f ) that have been modified within the past day ( mtime 1), with the exception of files whose names are suffixed with .o (! name '*.o')." (An object file carries a .o suffix and usually does not need to be preserved because it can be re-created from the corresponding source file.) $ find / -type f - mtime -1 ! -name '*.o' -print | > cpio -oB > /dev/ftape The following command finds, displays the filenames of, and deletes the files in the working directory and subdirectories named core or junk: $ find . \( -name core -o -name junk \) -print -exec rm {} \; ... The parentheses and the semicolon following exec are quoted so that the shell does not treat them as special characters. SPACE s separate the quoted parentheses from other elements on the command line. Read this find command as "find, in the working directory and subdirectories (.), files named core ( name core) or ( o) junk ( name junk) [if a file meets these criteria, continue] and (SPACE ) print the name of the file ( print) and (SPACE) delete the file ( exec rm { })." The next shell script uses find in conjunction with grep to identify files that contain a particular string. This script enables you to look for a file when you remember its contents but cannot remember its filename. The finder script locates files in the working directory and subdirectories that contain the string specified on the command line. The type f criterion is necessary so that find will pass to grep only the names of ordinary files, not directory files. $ cat finder find . -type f -exec grep -l "$1" {} \; $ finder "Executive Meeting" ./january/memo.0102 ./april/memo.0415 When called with the string Executive Meeting, finder locates two files containing that string: ./january/memo.0102 and ./april/memo.0415. The period (.) in the pathnames represents the working directory; january and april are subdirectories of the working directory. The grep utility with the recursive option performs the same function as the finder script. The next command looks in two user directories for files that are larger than 100 blocks ( size +100) and have been accessed only more than five days ago that is, have not been accessed within the past five days ( atime +5). This find command then asks whether you want to delete the file ( ok rm { }). You must respond to each query with y (for yes) or n (for no). The rm command works only if you have write and execute access permission to the directory. $ find /home/alex /home/barbara -size +100 -atime +5 -ok rm {} \; < rm ... /home/alex/notes >? y < rm ... /home/alex/letter >? n ... In the next example, /home/alex/memos is a symbolic link to Jenny's directory named /home/jenny/memos. When you use the follow option with find, the symbolic link is followed, and the contents of that directory are searched. $ ls -l /home/alex lrwxrwxrwx 1 alex pubs 17 Aug 19 17:07 memos -> /home/jenny/memos -rw-r--r-- 1 alex pubs 5119 Aug 19 17:08 report $ find /home/alex -print /home/alex /home/alex/memos /home/alex/report /home/alex/.profile $ find /home/alex -follow -print /home/alex /home/alex/memos /home/alex/memos/memo.817 /home/alex/memos/memo.710 /home/alex/report /home/alex/.profile finger: Displays information about usersfinger [options] [user-list] The finger utility displays the usernames of users, together with their full names, terminal device numbers, times they logged in, and other information. The options control how much information finger displays, and the user-list specifies which users finger displays information about. The finger utility can retrieve information from both local and remote systems. ArgumentsWithout any arguments, finger provides a short ( s) report on users who are logged in on the local system. When you specify a user-list, finger provides a long ( l) report on each user in the user-list. Names in the user-list are not case sensitive. If the name includes an at sign (@), the finger utility interprets the name following the @ as the name of a remote host to contact over the network. If there is also a name in front of the @ sign, finger provides information on that particular user on the remote system. Options
DiscussionThe long report provided by the finger utility includes the user's username, full name, home directory location, and login shell, plus information about when the user last logged in and how long it has been since the user last typed on the keyboard and read her email. After extracting this information from various system files, the finger utility displays the contents of the ~/.plan, ~/.project, and ~/.pgpkey in the user's home directory. It is up to each user to create and maintain these files, which usually provide more information about the user (such as telephone number, postal mail address, schedule, interests, and pgp key). The short report generated by finger is similar to that provided by the w utility; it includes the user's username, his full name, the device number of the user's terminal, the amount of time that has elapsed since the user last typed on the terminal keyboard, the time the user logged in, and the location of the user's terminal. If the user logged in over the network, the name of the remote system is displayed. NotesWhen you specify a network address, the finger utility queries a standard network service that runs on the remote system. Although this service is supplied with most Linux systems, some administrators choose not to run it (so as to minimize the load on their systems, to eliminate possible security risks, or simply to maintain privacy). If you try to use finger to get information on someone at such a site, the result may be an error message or nothing at all. The remote system determines how much information to share with the local system and in what format. As a result the report displayed for any given system may differ from the examples shown here. See also "finger: Lists Users on the System" on page 64. A file named ~/.nofinger causes finger to deny the existence of the person whose home directory it appears in. For this subterfuge to work, the finger query must originate from a system other than the local host and the fingerd daemon must be able to see the .nofinger file (generally the home directory must have its execute bit for other users set). ExamplesThe first example displays information on the users logged in on the local system: $ finger Login Name Tty Idle Login Time Office Office Phone alex Alex Watson tty1 13:29 Jun 25 21:03 hls Helen Simpson *pts/1 13:29 Jun 25 21:02 (:0) jenny Jenny Chen pts/2 Jun 26 07:47 (bravo.example.com) The asterisk (*) in front of the name of Helen's terminal (TTY) line indicates that she has blocked others from sending messages directly to her terminal (see mesg on page 68). A long report displays the string messages off for users who have disabled messages. The next two examples cause finger to contact the remote system named kudos over the network for information: $ finger @kudos [kudos] Login Name Tty Idle Login Time Office Office Phone alex Alex Watson tty1 23:15 Jun 25 11:22 roy Roy Wong pts/2 Jun 25 11:22 $ finger watson@kudos [kudos] Login: alex Name: Alex Watson Directory: /home/alex Shell: /bin/zsh On since Sat Jun 25 11:22 (PDT) on tty1, idle 23:22 Last login Sun Jun 26 06:20 (PDT) on ttyp2 from speedy Mail last read Thu Jun 23 08:10 2005 (PDT) Plan: For appointments contact Jenny Chen, x1963. fmt: Formats text very simplyfmt [option] [file-list] The fmt utility does simple text formatting by attempting to make all nonblank lines nearly the same length. ArgumentsThe fmt utility reads the files in file-list and sends a formatted version of their contents to standard output. If you do not specify a filename or if you specify a filename of , fmt reads from standard input. Options
NotesThe fmt utility works by moving NEWLINE characters. The indention of lines, as well as the spacing between words, is left intact. This utility is often used to format text while you are using an editor, such as vim. For example, you can format a paragraph with the vim editor in command mode by positioning the cursor at the top of the paragraph and then entering !}fmt 60. This command replaces the paragraph with the output generated by feeding it through fmt, specifying a width of 60 characters. Type u immediately if you want to undo the formatting. ExamplesThe following example shows how fmt attempts to make all the lines the same length. The w 50 option gives a target line length of 50 characters. $ cat memo One factor that is important to remember while administering the dietary intake of Charcharodon carcharias is that there is, at least from the point of view of the subject, very little differentiating the prepared morsels being proffered from your digits. In other words, don't feed the sharks! $ fmt -w 50 memo One factor that is important to remember while administering the dietary intake of Charcharodon carcharias is that there is, at least from the point of view of the subject, very little differentiating the prepared morsels being proffered from your digits. In other words, don't feed the sharks! The next example demonstrates the split-only option. Long lines are broken so that none is longer than 50 characters; this option prevents fmt from filling short lines. $ fmt -w 50 --split-only memo One factor that is important to remember while administering the dietary intake of Charcharodon carcharias is that there is, at least from the point of view of the subject, very little differentiating the prepared morsels being proffered from your digits. In other words, don't feed the sharks! fsck: Checks and repairs a filesystemfsck [options] [filesystem-list] The fsck utility verifies the integrity of a filesystem and reports on and optionally repairs problems it finds. It is a front end for filesystem checkers, each specific to a filesystem type. ArgumentsWithout the A option and with no filesystem-list, fsck checks the filesystems listed in the /etc/fstab file one at a time (serially). With the A option and with no filesystem-list, fsck checks all the filesystems listed in the /etc/fstab file in parallel if possible. See the s option for a discussion of checking filesystems in parallel. The filesystem-list specifies the filesystems to be checked. It can either specify the name of the device that holds the filesystem (for example, /dev/hda2) or, if the filesystem appears in /etc/fstab, specify the mount point (for example, /usr2) for the filesystem. The filesystem-list can also specify the label for the filesystem from /etc/fstab (for example, LABEL=home). OptionsWhen you run fsck, you can specify both global options and options specific to the filesystem type that fsck is checking (for example, ext2, ext3, msdos, reiserfs). Global options must precede type-specific options. Global Options
Filesystem Type-Specific OptionsThe following command lists the filesystem checking utilities available on the local system. Files with the same inode numbers are linked (page 99). $ ls -i /sbin/*fsck* 63801 /sbin/dosfsck 63856 /sbin/fsck.cramfs 63801 /sbin/fsck.msdos 63763 /sbin/e2fsck 63763 /sbin/fsck.ext2 63801 /sbin/fsck.vfat 63780 /sbin/fsck 63763 /sbin/fsck.ext3 Review the man page or give the pathname of the filesystem checking utility to determine which options the utility accepts: $ /sbin/fsck.ext3 Usage: /sbin/fsck.ext3 [-panyrcdfvstDFSV] [-b superblock] [-B blocksize] [-I inode_buffer_blocks] [-P process_inode_size] [-l|-L bad_blocks_file] [-C fd] [-j ext-journal] [-E extended-options] device Emergency help: -p Automatic repair (no questions) -n Make no changes to the filesystem -y Assume "yes" to all questions -c Check for bad blocks and add them to the badblock list -f Force checking even if filesystem is marked clean ... The following options apply to many filesystem types, including ext2 and ext3:
NotesWhen a filesystem is consistent, fsck displays a report such as the following: # /sbin/fsck -f /dev/hda1 fsck 1.35 (28-Feb-2004) e2fsck 1.35 (28-Feb-2004) Pass 1: Checking inodes, blocks, and sizes Pass 2: Checking directory structure Pass 3: Checking directory connectivity Pass 4: Checking reference counts Pass 5: Checking group summary information /boot: 71/26104 files (15.5% non-contiguous), 37257/104391 blocks Interactive modeYou can run fsck either interactively or in batch mode. For many filesystems, unless you use one of the a, p, y, or n options, fsck runs in interactive mode. In interactive mode, if fsck finds a problem with a filesystem, it reports the problem and allows you to choose whether to repair or ignore it. If you repair a problem you may lose some data; however, that is often the most reasonable alternative. Although it is technically feasible to repair files that are damaged and that fsck says you should remove, this action is usually not practical. The best insurance against significant loss of data is frequent backups. Order of checkingThe fsck utility looks at the sixth column in the /etc/fstab file to determine if, and in what order, it should check filesystems. A 0 (zero) in this position indicates that the filesystem should not be checked. A 1 (one) indicates that it should be checked first and is usually reserved for the root filesystem. A 2 indicates that the filesystem should be checked after those marked with a 1. fsck is a front endSimilar to mkfs (page 725), fsck is a front end that calls other utilities to handle various types of filesystems. For example, fsck calls e2fsck to check the widely used ext2 and ext3 filesystems. (Refer to the e2fsck man page for more information.) Other utilities that fsck calls are typically named fsck.type, where type is the filesystem type. By splitting fsck in this manner, filesystem developers can provide programs to check their filesystems without affecting the development of other filesystems or changing how system administrators use fsck. Boot timeRun fsck on filesystems that are unmounted or mounted readonly. When Linux is booting, the root filesystem is first mounted readonly to allow it to be processed by fsck. If fsck finds no problems with the root filesystem, it is then remounted (using the remount option to the mount utility) read-write and fsck is typically run with the A, R, and p options. lost+foundWhen it encounters a file that has lost its link to its filename, fsck asks whether to reconnect it. If you choose to reconnect it, the file is put in a directory named lost+found in the root directory of the filesystem that the file was found in. The reconnected file is given its inode number as a name. For fsck to restore files in this way, a lost+found directory must be in the root directory of each filesystem. For example, if a system uses the /, /usr, and /tmp filesystems, you should have these three lost+found directories: /lost+found, /usr/lost+found, and /tmp/lost+found. Each of the lost+found directories must have unused entries that fsck can use to store the inode numbers for files that have lost their links. When you create an ext2 and ext3 filesystem using mkfs (page 725), a lost+found directory with the required unused entries is created automatically. Alternatively, you can use the mklost+found utility to create this directory in ext2 and ext3 filesystems if needed. On other types of filesystems you can create the unused entries by adding many files to the directory and then removing them. Try using touch (page 801) to create 500 entries in the lost+found directory and then using rm to delete them. MessagesTable V-14 lists fsck's common messages. In general fsck suggests the most logical way of dealing with a problem in the file structure. Unless you have information that suggests another response, respond to the prompts with yes. Use the system backup tapes or disks to restore data that is lost as a result of this process.
CleanupOnce it has repaired the filesystem, fsck informs you about the status of the filesystem. The fsck utility displays the following message after it repairs a filesystem: *****File System Was Modified***** On ext2 and ext3 filesystems, fsck displays the following message when it has finished checking a filesystem: filesys: used/maximum files (percent non-contiguous), used/maximum blocks This message tells you how many files and disk blocks are in use as well as how many files and disk blocks the filesystem can hold. The percent non-contiguous tells you how fragmented the disk is. ftp: Transfers files over a networkftp [options] [remote-system] The ftp utility is a user interface to the standard File Transfer Protocol (FTP), which transfers files between systems that can communicate over a network. To establish an FTP connection, you must have an account (personal, guest, or anonymous) on the remote system. security: Use FTP only to download public information FTP is not a secure protocol. The ftp utility sends your password over the network as cleartext, which is not a secure practice. You can use scp (page 758) for many FTP functions other than allowing anonymous users to download information. Because scp uses an encrypted connection, user passwords and data cannot be sniffed. ArgumentsThe remote-system is the name or network address of the server, running an ftpd daemon, that you want to exchange files with. Options
DiscussionThe ftp utility is interactive. After you start it, ftp prompts you to enter commands to set parameters and transfer files. You can use a number of commands in response to the ftp> prompt; following are some of the more common ones.
NotesA Linux system running ftp can exchange files with any of the many operating systems that support the FTP protocol. Many sites offer archives of free information on an FTP server, although many of these are merely alternatives to an easier-to-access Web site (for example, ftp://ftp.ibiblio.org/pub/Linux and http://www.ibiblio.org/pub/Linux). Most browsers can connect to and download files from FTP servers. The ftp utility makes no assumptions about filesystem naming or structure because you can use ftp to exchange files with non-UNIX/Linux systems (whose filename conventions may be different). Anonymous FTPMany systems most notably those from which you can download free software allow you to log in as anonymous. Most systems that support anonymous logins accept the name ftp as an easier-to-spell and quicker-to-enter synonym for anonymous. An anonymous user is usually restricted to a portion of a filesystem set aside to hold files that are to be shared with remote users. When you log in as an anonymous user, the server prompts you to enter a password. Although any password may be accepted, by convention you are expected to supply your email address. Many systems that permit anonymous access store interesting files in the pub directory. Passive versus active connectionsA client can ask an FTP server to establish either a PASV (passive the default) or a PORT (active) connection for data transfer. Some servers are limited to one type of connection. The difference between a passive and an active FTP connection lies in whether the client or server initiates the data connection. In passive mode, the client initiates the data connection to the server (on port 20 by default); in active mode, the server initiates the data connection (there is no default port). Neither type of connection is inherently more secure. Passive connections are more common because a client behind a NAT (page 889) firewall can connect to a passive server and because it is simpler to program a scalable passive server. Automatic loginYou can store server-specific FTP username and password information so that you do not have to enter it each time you visit an FTP site. Each line of the ~/.netrc file identifies a server. When you connect to an FTP server, ftp reads ~/.netrc to determine whether you have an automatic login set up for that server. The format of a line in ~/.netrc is machine server login username password passwd where server is the name of the server, username is your username, and passwd is your password on server. Replace machine with default on the last line of the file to specify a username and password for systems not listed in ~/.netrc. The default line is useful for logging in on anonymous servers. A sample ~/.netrc file follows: $ cat ~/.netrc machine bravo login alex password mypassword default login anonymous password alex@example.com Protect the account information in .netrc by making it readable by only the user whose home directory it appears in. Refer to the netrc man page for more information. ExamplesFollowing are two ftp sessions wherein Alex transfers files from and to an FTP server named bravo. When Alex gives the command ftp bravo, the local ftp client connects to the server, which asks for a username and password. Because he is logged in on his local system as alex, ftp suggests that he log in on bravo as alex. To log in as alex, he could just press RETURN. His username on bravo is watson, however, so he types watson in response to the Name (bravo:alex): prompt. Alex responds to the Password: prompt with his normal system password, and the FTP server greets him and informs him that it is Using binary mode to transfer files. With ftp in binary mode, Alex can transfer ASCII and binary files. Connect and log in$ ftp bravo Connected to bravo. 220 (vsFTPd 1.2.0) 530 Please login with USER and PASS. 530 Please login with USER and PASS. KERBEROS_V4 rejected as an authentication type Name (bravo:alex): watson 331 Please specify the password. Password: 230 Login successful. Remote system type is UNIX. Using binary mode to transfer files. ftp> After logging in, Alex uses the ftp ls command to display the contents of his remote working directory, which is his home directory on bravo. Then he cds to the memos directory and displays the files there. ls and cdftp> ls 227 Entering Passive Mode (192,168,0,6,79,105) 150 Here comes the directory listing. drwxr-xr-x 2 500 500 4096 Oct 10 23:52 expenses drwxr-xr-x 2 500 500 4096 Oct 10 23:59 memos drwxrwxr-x 22 500 500 4096 Oct 10 23:32 tech 226 Directory send OK. ftp> cd memos 250 Directory successfully changed. ftp> ls 227 Entering Passive Mode (192,168,0,6,114,210) 150 Here comes the directory listing. -rw-r--r-- 1 500 500 4770 Oct 10 23:58 memo.0514 -rw-r--r-- 1 500 500 7134 Oct 10 23:58 memo.0628 -rw-r--r-- 1 500 500 9453 Oct 10 23:58 memo.0905 -rw-r--r-- 1 500 500 3466 Oct 10 23:59 memo.0921 -rw-r--r-- 1 500 500 1945 Oct 10 23:59 memo.1102 226 Directory send OK. Next Alex uses the ftp get command to copy memo.1102 from the server to the local system. Binary mode ensures that he will get a good copy of the file regardless of whether it is binary or ASCII. The server confirms that the file was copied successfully and notes the size of the file and the time it took to copy. Alex then copies the local file memo.1114 to the remote system. The file is copied into his remote working directory, memos. get and putftp> get memo.1102 local: memo.1102 remote: memo.1102 227 Entering Passive Mode (192,168,0,6,194,214) 150 Opening BINARY mode data connection for memo.1102 (1945 bytes). 226 File send OK. 1945 bytes received in 7.1e-05 secs (2.7e+04 Kbytes/sec) ftp> put memo.1114 local: memo.1114 remote: memo.1114 227 Entering Passive Mode (192,168,0,6,174,97) 150 Ok to send data. 226 File receive OK. 1945 bytes sent in 2.8e-05 secs (6.8e+04 Kbytes/sec) After a while Alex decides he wants to copy all the files in the memo directory on bravo to a new directory on his local system. He gives an ls command to make sure he is going to copy the right files, but ftp has timed out. Instead of exiting from ftp and giving another ftp command from the shell, Alex gives ftp an open bravo command to reconnect to the server. After logging in, he uses the ftp cd command to change directories to memos on the server. Timeout and openftp> ls 421 Timeout. Passive mode refused. ftp> open bravo Connected to bravo (192.168.0.6). 220 (vsFTPd 1.1.3) ... ftp> cd memos 250 Directory successfully changed. lcd (local cd)At this point, Alex realizes he has not created the new directory to hold the files he wants to download. Giving an ftp mkdir command would create a new directory on the server, but Alex wants a new directory on the local system. He uses an exclamation point (!) followed by a mkdir memos.hold command to invoke a shell and run mkdir on the local system, creating a directory named memos.hold in his working directory on the local system. (You can display the name of your working directory on the local system with !pwd.) Next, because he wants to copy files from the server to the memos.hold directory on his local system, he has to change his working directory on the local system. Giving the command !cd memos.hold will not accomplish what Alex wants to do because the exclamation point spawns a new shell on the local system and the cd command would be effective only in the new shell, which is not the shell that ftp is running under. For this situation, ftp provides the lcd (local cd) command, which changes the working directory for ftp and reports on the new local working directory. ftp> !mkdir memos.hold ftp> lcd memos.hold Local directory now /home/alex/memos.hold Alex uses the ftp mget (multiple get) command followed by the asterisk (*) wildcard to copy all the files from the remote memos directory to the memos.hold directory on the local system. When ftp prompts him for the first file, he realizes that he forgot to turn off prompts, responds with n, and presses CONTROL-C to stop copying files in response to the second prompt. The server checks whether he wants to continue with his mget command. Next Alex gives the ftp prompt command, which toggles the prompt action (turns it off if it is on and turns it on if it is off). Now when he gives an mget * command, ftp copies all the files without prompting him. After getting the files he wants, Alex gives a quit command to close the connection with the server, exit from ftp, and return to the local shell prompt. mget and promptftp> mget * mget memo.0514? n mget memo.0628? CONTROL-C Continue with mget? n ftp> prompt Interactive mode off. ftp> mget * local: memo.0514 remote: memo.0514 227 Entering Passive Mode (192,168,0,6,53,55) 150 Opening BINARY mode data connection for memo.0514 (4770 bytes). 226 File send OK. 4770 bytes received in 8.8e-05 secs (5.3e+04 Kbytes/sec) local: memo.0628 remote: memo.0628 227 Entering Passive Mode (192,168,0,6,65,102) 150 Opening BINARY mode data connection for memo.0628 (7134 bytes). 226 File send OK. ... 150 Opening BINARY mode data connection for memo.1114 (1945 bytes). 226 File send OK. 1945 bytes received in 3.9e-05 secs (4.9e+04 Kbytes/sec) ftp> quit 221 Goodbye. gcc: Compiles C and C++ programsgcc [options] file-list [ larg] g++ [options] file-list [ larg] The Linux operating system uses the GNU C compiler, gcc, to preprocess, compile, assemble, and link C language source files. The same compiler with a different front end, g++, processes C++ source code. The gcc and g++ compilers can also assemble and link assembly language source files, link object files only, or build object files for use in shared libraries. These compilers take input from files you specify on the command line. Unless you use the o option, they store the executable program in a.out. The gcc and g++ compilers are part of GCC, the GNU Compiler Collection, which includes front ends for C, C++, Objective C, Fortran, Java, and Ada as well as libraries for these languages. Go to gcc.gnu.org for more information. tip: gcc and g++ Although this section specifies the gcc compiler, most of it applies to g++ as well. ArgumentsThe file-list is a list of the pathnames of the files that gcc is to process. OptionsWithout any options gcc accepts C language source files, assembly language files, object files, and other files described in Table V-15 on page 681. The gcc utility preprocesses, compiles, assembles, and links these files as appropriate, producing an executable file named a.out. If gcc is used to create object files without linking them to produce an executable file, each object file is named by adding the extension .o to the basename of the corresponding source file. If gcc is used to create an executable file, it deletes the object files after linking.
Some of the most commonly used options are listed here. When certain filename extensions are associated with an option, you can assume that the extension is added to the basename of the source file.
NotesThe preceding list of options represents only a small fraction of the full set of options available with the GNU C compiler. See the gcc info page for a complete list. See "Programming in C" on page 388 for more information about using the gcc compiler. Although the o option is generally used to specify a filename to store object code, this option also allows you to name files resulting from other compilation steps. In the following example, the o option causes the assembly language produced by the gcc command to be stored in the file acode instead of pgm.s, the default: $ gcc -S -o acode pgm.c The lint utility found in many UNIX systems is not available on Linux. However, the Wall option (page 408) performs many of the same checks and can be used in place of lint. The conventions used by the C compiler for assigning filename extensions are summarized in Table V-15. ExamplesThe first example compiles, assembles, and links a single C program, compute.c. The executable output is put in a.out. The gcc utility deletes the object file. $ gcc compute.c The next example compiles the same program using the C optimizer ( O option). It assembles and links the optimized code. The o option causes gcc to put the executable output in compute. $ gcc -O -o compute compute.c Next a C source file, an assembly language file, and an object file are compiled, assembled, and linked. The executable output goes in progo. $ gcc -o progo procom.c profast.s proout.o In the next example, gcc searches the standard math library stored in /lib/libm.a when it is linking the himath program and puts the executable output in a.out: $ gcc himath.c -lm In the following example, the C compiler compiles topo.c with options that check the code for questionable source code practices ( Wall option) and violations of the ANSI C standard ( pedantic option). The g option embeds debugging support in the executable file, which is saved in topo with the o topo option. Full optimization is enabled with the O3 option. The warnings produced by the C compiler are sent to standard output. Here the first and last warnings result from the pedantic option; the other warnings result from the Wall option: $ gcc -Wall -g -O3 -pedantic -o topo topo.c In file included from topo.c:2: /usr/include/ctype.h:65: warning: comma at end of enumerator list topo.c:13: warning: return-type defaults to 'int' topo.c: In function 'main': topo.c:14: warning: unused variable 'c' topo.c: In function 'getline': topo.c:44: warning: 'c' might be used uninitialized in this function When compiling programs that use the X11 include files and libraries, you may need to use the I and L options to tell gcc where to locate those include files and libraries. The next example uses those options and instructs gcc to link the program with the basic X11 library: $ gcc -I/usr/X11R6/include plot.c -L/usr/X11R6/lib -lX11 grep: Searches for a pattern in filesgrep [options] pattern [file-list] The grep utility searches one or more files, line by line, for a pattern, which can be a simple string or another form of a regular expression. The grep utility takes various actions, specified by options, each time it finds a line that contains a match for the pattern. This utility takes its input from files you specify on the command line or from standard input. ArgumentsThe pattern is a regular expression, as defined in Appendix A. You must quote regular expressions that contain special characters, SPACE s, or TAB s. An easy way to quote these characters is to enclose the entire expression within single quotation marks. The file-list is a list of the pathnames of ordinary files that grep searches. With the r option, file-list may contain directories whose contents are searched. OptionsWithout any options grep sends lines that contain a match for pattern to standard output. When you specify more than one file on the command line, grep precedes each line that it displays with the name of the file that it came from followed by a colon. Major OptionsYou can use only one of the following three options at a time. Normally you do not need to use any, because grep defaults to G, which is regular grep.
Other OptionsAccepts the common options described on page 587.
NotesThe grep utility returns an exit status of 0 if it finds a match, 1 if it does not find a match, and 2 if the file is not accessible or there is a syntax error. egrep and fgrepTwo utilities perform functions similar to that of grep. The egrep utility (same as grep E) allows you to use extended regular expressions (page 836), which include a different set of special characters than basic regular expressions (page 834). The fgrep utility (same as grep F) is fast and compact but processes only simple strings, not regular expressions. ExamplesThe following examples assume that the working directory contains three files: testa, testb, and testc: File testa File testb File testc aaabb aaaaa AAAAA bbbcc bbbbb BBBBB ff-ff ccccc CCCCC cccdd ddddd DDDDD dddaa The grep utility can search for a pattern that is a simple string of characters. The following command line searches testa and displays each line containing the string bb: $ grep bb testa aaabb bbbcc The v option reverses the sense of the test. The following example displays the lines in testa without bb: $ grep -v bb testa ff-ff cccdd dddaa The n option displays the line number of each displayed line: $ grep -n bb testa 1:aaabb 2:bbbcc The grep utility can search through more than one file. Here grep searches through each file in the working directory. The name of the file containing the string precedes each line of output. $ grep bb * testa:aaabb testa:bbbcc testb:bbbbb When the search for the string bb is done with the w option, grep produces no output because none of the files contains the string bb as a separate word: $ grep -w bb * $ The search that grep performs is case sensitive. Because the previous examples specified lowercase bb, grep did not find the uppercase string BBBBB in testc. The i option causes both uppercase and lowercase letters to match either case of letter in the pattern: $ grep -i bb * testa:aaabb testa:bbbcc testb:bbbbb testc:BBBBB $ grep -i BB * testa:aaabb testa:bbbcc testb:bbbbb testc:BBBBB The c option displays the number of lines in each file that contain a match: $ grep -c bb * testa:2 testb:1 testc:0 The f option finds matches for each pattern in a file of patterns. The next example shows gfile, which holds two patterns, one per line, and grep searching for matches to the patterns in gfile: $ cat gfile aaa bbb $ grep -f gfile test* testa:aaabb testa:bbbcc testb:aaaaa testb:bbbbb The following command line displays from text2 lines that contain a string of characters starting with st, followed by zero or more characters (.* represents zero or more characters in a regular expression see Appendix A), and ending in ing: $ grep 'st.*ing' text2 ... The ^ regular expression, which matches the beginning of a line, can be used alone to match every line in a file. Together with the n option, ^ can be used to display the lines in a file, preceded by their line numbers: $ grep -n '^' testa 1:aaabb 2:bbbcc 3:ff-ff 4:cccdd 5:dddaa The next command line counts the number of times #include statements appear in C source files in the working directory. The h option causes grep to suppress the filenames from its output. The input to sort is all lines from *.c that match #include. The output from sort is an ordered list of lines that contains many duplicates. When uniq with the c option processes this sorted list, it outputs repeated lines only once, along with a count of the number of repetitions in its input. $ grep -h '#include' *.c | sort | uniq -c 9 #include "buff.h" 2 #include "poly.h" 1 #include "screen.h" 6 #include "window.h" 2 #include "x2.h" 2 #include "x3.h" 2 #include <math.h> 3 #include <stdio.h> The final command calls the vim editor with a list of files in the working directory that contain the string Sampson. The $(…) command substitution construct (page 329) causes the shell to execute grep in place and supply vim with a list of filenames that you want to edit: $ vim $(grep -l 'Sampson' *) ... The single quotation marks are not necessary in this example, but they are required if the regular expression you are searching for contains special characters or SPACEs. It is generally a good habit to quote the pattern so that the shell does not interpret special characters it may contain. gzip: Compresses or decompresses filesgzip [options] [file-list] gunzip [options] [file-list] zcat [file-list] The gzip utility compresses files; gunzip restores files compressed with gzip; zcat displays files compressed with gzip. ArgumentsThe file-list is a list of the names of one or more files that are to be compressed or decompressed. If a directory appears in file-list with no recursive option, gzip/gunzip issues an error message and ignores the directory. With the recursive option, gzip/gunzip recursively compresses/decompresses files within the directory hierarchy. If file-list is empty or if the special option is present, gzip reads from standard input. The stdout option causes gzip and gunzip to write to standard output. The information in this section also applies to gunzip, a link to gzip. OptionsAccepts the common options described on page 587.
DiscussionCompressing files reduces disk space requirements and the time needed to transmit files between systems. When gzip compresses a file, it adds the extension .gz to the filename. For example, compressing the file fname creates the file fname.gz and deletes the original file. To restore fname, use the command gunzip with the argument fname.gz. Almost all files become much smaller when compressed with gzip. On rare occasions a file will become larger, but only by a slight amount. The type of a file and its contents (as well as the n option) determine how much smaller a file becomes; text files are often reduced by 60 to 70 percent. The attributes of a file, such as its owner, permissions, and modification and access times, are left intact when gzip compresses and gunzip decompresses a file. If the compressed version of a file already exists, gzip reports that fact and asks for your confirmation before overwriting the existing file. If a file has multiple links to it, gzip issues an error message and exits. The force option overrides the default behavior in both of these situations. NotesFor more information refer to "gzip: Compresses a File" on page 58. In addition to the gzip format, gunzip recognizes several other compression formats, enabling gunzip to decompress files compressed with compress. To see an example of a file that becomes larger when compressed with gzip, compare the size of a file that has been compressed once with the same file compressed with gzip again. Because gzip complains when you give it an argument with the extension .gz, you need to rename the file before compressing it a second time. The tar utility with the z modifier (page 789) calls gzip. The following related utilities display and manipulate compressed files. None of these utilities changes the files that it works on.
ExamplesIn the first example, gzip compresses two files. Then gunzip decompresses one of the files. When a file is compressed and decompressed, its size changes but its modification time remains the same: $ ls -l total 175 -rw-rw-r-- 1 alex group 33557 Jul 20 17:32 patch-2.0.7 -rw-rw-r-- 1 alex group 143258 Jul 20 17:32 patch-2.0.8 $ gzip * $ ls -l total 51 -rw-rw-r-- 1 alex group 9693 Jul 20 17:32 patch-2.0.7.gz -rw-rw-r-- 1 alex group 40426 Jul 20 17:32 patch-2.0.8.gz $ gunzip patch-2.0.7.gz $ ls -l total 75 -rw-rw-r-- 1 alex group 33557 Jul 20 17:32 patch-2.0.7 -rw-rw-r-- 1 alex group 40426 Jul 20 17:32 patch-2.0.8.gz In the next example, the files in Jenny's home directory are archived by using the cpio utility (page 619). The archive is compressed with gzip before it is written to tape: $ find /home/jenny -depth -print | cpio -oBm | gzip >/dev/ftape head: Displays the beginning of a filehead [options] [file-list] The head utility displays the beginning (head) of a file. The utility takes its input from one or more files you specify on the command line or from standard input. ArgumentsThe file-list is a list of the pathnames of the files that head displays. When you specify more than one file, head displays the filename before displaying the first few lines of each file. When you do not specify a file, head takes its input from standard input. OptionsAccepts the common options described on page 587.
NotesThe head utility displays the first ten lines of a file by default. ExamplesThe examples in this section are based on the following file: $ cat eleven line one line two line three line four line five line six line seven line eight line nine line ten line eleven Without any arguments head displays the first ten lines of a file: $ head eleven line one line two line three line four line five line six line seven line eight line nine line ten The next example displays the first three lines ( lines 3) of the file: $ head --lines 3 eleven line one line two line three The following example is equivalent to the preceding one: $ head -3 eleven line one line two line three The next example displays the first six characters ( bytes 6) in the file: $ head --bytes 6 eleven line o$ The final example displays all but the last seven lines of the file: $ head --lines=-7 eleven line one line two line three line four kill: Terminates a process by PIDkill [option] PID-list The kill utility terminates one or more processes by sending them signals. By default kill sends a software termination signal (signal number 15). For kill to work, the process must belong to the user executing kill, with one exception: Superuser can terminate any process. ArgumentsThe PID-list is a list of process identification (PID) numbers of processes that kill is to terminate. OptionsYou can specify a signal number or name, preceded by a hyphen, as an option to cause kill to send the signal you specify to the PID-list.
NotesSee also killall on page 695. See Table 11-5 on page 494 for a list of signals. The command kill l displays a complete list of signal numbers and names. In addition to the kill utility, kill is a builtin in the Bourne Again and TC Shells. The builtins work similarly to the utility described here. Give the command /bin/kill to use the kill utility and the command kill to use the builtin. It does not usually matter which you use. The shell displays the PID number of a background process when you initiate the process. You can also use the ps utility to determine PID numbers. If the software termination signal does not terminate a process, try using a KILL signal (signal number 9). A process can choose to ignore any signal except KILL. The kill utility/builtin accepts job identifiers in place of the PID-list. Job identifiers consist of a percent sign (%) followed by either a job number or a string that uniquely identifies the job. To terminate all processes that the current login process initiated and have the operating system log you out, give the command kill 9 0. caution: root: do not run kill with arguments of 9 0 or KILL 0 If you run the command kill 9 0 while you are logged in as Superuser, you will bring the system down. ExamplesThe first example shows a command line executing the file compute as a background process and the kill utility terminating it: $ compute & [2] 259 $ kill 259 $ RETURN [2]+ Terminated compute The next example shows the ps utility determining the PID number of the background process running a program named xprog and the kill utility terminating xprog with the TERM signal: $ ps PID TTY STAT TIME COMMAND 116 1 S 0:00 -tcsh 128 1 S N 0:00 xinit /home/alex/.xinitrc -- 137 1 S N 0:01 fvwm 138 p0 S N 0:00 -tcsh 161 p0 S N 0:10 xprog 262 p0 R N 0:00 ps $ kill -TERM 161 $ killall: Terminates a process by namekillall [option] name-list The killall utility sends signals to processes executing specified commands. For killall to work, the processes must belong to the user executing killall, with one exception: Superuser can terminate any process. ArgumentsThe name-list is a SPACE-separated list of names of programs that are to receive signals. OptionsYou can specify a signal number or name, preceded by a hyphen, as an option before the name-list to cause killall to send the signal you specify. By default killall sends software termination signals (signal number 15, SIGTERM).
NotesSee also kill on page 693. See Table 11-5 on page 494 for a list of signals. The command kill l displays a complete list of signal numbers and names. If the software termination signal does not terminate the process, try using a KILL signal (signal number 9). A process can choose to ignore any signal except KILL. You can use ps (page 746) to determine the name of the program you want to terminate. ExamplesYou can give the following commands to experiment with killall: $ sleep 60 & [1] 23274 $ sleep 50 & [2] 23275 $ sleep 40 & [3] 23276 $ sleep 120 & [4] 23277 $ killall sleep $ RETURN [1] Terminated sleep 60 [2] Terminated sleep 50 [3]- Terminated sleep 40 [4]+ Terminated sleep 120 If you want to terminate all instances of the Firefox browser, give the following command to determine how Firefox was called: $ ps -ef | grep -i firefox max 17517 17512 0 Apr02 ? 00:00:54 /usr/local/firefox/firefox-bin max 19340 2787 0 00:33 pts/6 00:00:00 grep firefox The next command, run as root, terminates all instances of the Firefox browser: # killall firefox-bin less: Displays text files, one screen at a timeless [options] [file-list] The less utility displays text files, one screen at a time. ArgumentsThe file-list is the list of files you want to view. If there is no file-list, less reads from standard input. OptionsAccepts the common options described on page 587.
NotesThe phrase "less is more" explains the origin of this utility. The more utility is the original Berkeley UNIX pager (also available under Linux). The less utility is similar to more but includes many enhancements. After displaying a screen of text, less displays a prompt and waits for you to enter a command. You can skip forward and backward in the file, invoke an editor, search for a pattern, or perform a number of other tasks. See the v command in the next section for information on how you can edit the file you are viewing with less. You can set the options to less either from the command line when you call less or by setting the LESS environment variable. For example, you can use the following command from bash to use less with the x4 and s options. $ export LESS="-x4 -s" Normally you would set LESS in ~/.bash_profile if you are using bash or in ~/.login if you are using tcsh. Once you have set the LESS variable, less is invoked with the specified options each time you call it. Any options you give on the command line override the settings in the LESS variable. The LESS variable is used both when you call less from the command line and when less is invoked by another program, such as man. To specify less as the pager to use with man and other programs, set the environment variable PAGER to less. For example, with bash you can add the following line to ~/.bash_profile: export PAGER=less CommandsWhenever less pauses, you can enter any of a large number of commands. This section describes some commonly used commands. Refer to the less man page for the full list of commands. The optional numeric argument n defaults to 1, with the exceptions noted. You do not need to follow these commands with a RETURN.
ExamplesThe following example displays the file memo.txt. To see more of the file, the user presses the SPACE bar in response to the less prompt at the bottom left of the screen: $ less memo.txt ... memo.txt SPACE ... In the next example, the user changes the prompt to a more meaningful message and uses the N option to display line numbers. Finally the user instructs less to skip forward to the first line containing the string procedure. $ less -Ps"Press SPACE to continue, q to quit" -N +/procedure ncut.icn 28 procedure main(args) 29 local filelist, arg, fields, delim 30 31 filelist:=[] ... 45 # Check for real field list 46 # 47 if /fields then stop("-fFIELD_LIST is required.") 48 49 # Process the files and output the fields Press SPACE to continue, q to quit ln: Makes a link to a fileln [options] existing-file [new-link] ln [options] existing-file-list directory The ln utility creates hard or symbolic links to one or more files. You can create a symbolic link, but not a hard link, to a directory. ArgumentsIn the first format the existing-file is the pathname of the file you want to create a link to. The new-link is the pathname of the new link. When you are creating a symbolic link, the existing-file can be a directory. If you omit new-link, ln creates a link to existing-file in the working directory, and uses the same simple filename as existing-file. In the second format the existing-file-list is a list of the pathnames of the ordinary files you want to create links to. The ln utility establishes the new links in the directory. The simple filenames of the entries in the directory are the same as the simple filenames of the files in the existing-file-list. Options
NotesFor more information refer to "Links" on page 96. The ls utility with the l option displays the number of hard links to a file (Figure 4-12, page 92). Hard linksBy default ln creates hard links. A hard link to a file is indistinguishable from the original file. All hard links to a file must be in the same filesystem. For more information refer to "Hard Links" on page 97. Symbolic linksYou can also use ln to create symbolic links. Unlike a hard link, a symbolic link can exist in a different filesystem from the linked-to file. Also, a symbolic link can point to a directory. For more information refer to "Symbolic Links" on page 99. If new-link is the name of an existing file, ln does not create the link unless you use the force option or answer yes when using the interactive option. ExamplesThe following command creates a link between memo2 in the /home/zach/literature directory and the working directory. The file appears as memo2 (the simple filename of the existing file) in the working directory: $ ln /home/zach/literature/memo2 . You can omit the period that represents the working directory from the preceding command. When you give a single argument to ln, it creates a link in the working directory. The next command creates a link to the same file. This time the file appears as new_memo in the working directory: $ ln /home/zach/literature/memo2 new_memo The following command creates a link that causes the file to appear in another user's directory: $ ln /home/zach/literature/memo2 /home/jenny/new_memo You must have write and execute access permission to the other user's directory for this command to work. If you own the file, you can use chmod to give the other user write access permission to the file. The next command creates a symbolic link to a directory. The ls ld command shows the link: $ ln -s /usr/local/bin bin $ ls -ld bin lrwxrwxrwx 1 zach zach 14 Feb 10 13:26 bin -> /usr/local/bin The final example attempts to create a symbolic link named memo1 to the file memo2. Because the file memo1 exists, ln refuses to make the link. When you use the interactive option, ln asks whether you want to replace the existing memo1 file with the symbolic link. If you enter y or yes, ln creates the link and the old memo1 disappears. $ ls -l memo? -rw-rw-r-- 1 zach group 224 Jul 31 14:48 memo1 -rw-rw-r-- 1 zach group 753 Jul 31 14:49 memo2 $ ln --symbolic memo2 memo1 ln: memo1: File exists $ ln --symbolic --interactive memo2 memo1 ln: replace 'memo1'? y $ ls -l memo? lrwxrwxrwx 1 zach group 5 Jul 31 14:49 memo1 -> memo2 -rw-rw-r-- 1 zach group 753 Jul 31 14:49 memo2 You can also use the force option to cause ln to overwrite a file. lpr: Sends files to printerslpr [options] [file-list] lpq [options] [job-identifiers] lprm [options] [job-identifiers] The lpr utility places one or more files into a print queue, providing orderly access to printers for several users or processes. The utility can work with printers attached to remote systems. You can use the lprm utility to remove files from the print queues and the lpq utility to check the status of files in the queues. Refer to "Notes" later in this section. ArgumentsThe file-list is a list of one or more filenames for lpr to print. Often these files are text files, but many systems are configured so that lpr can accept and properly print a variety of file types. Without a file-list, lpr accepts input from standard input. The job-identifiers is a list of job numbers or user names. If you do not know the job number of a print job, use lpq to display a list of print jobs. OptionsSome of the following options depend on the type of file being printed as well as on how the system is configured for printing.
DiscussionThe lpr utility takes input from files you specify on the command line or from standard input and adds the files to the print queue as print jobs. The utility assigns a unique identification number to each print job. The lpq utility displays the job numbers of the print jobs that lpr has set up; you can use the lprm utility to remove a print job from the print queue. lpqThe lpq utility displays information about jobs in a print queue. When called without any arguments, lpq lists all the print jobs queued for the default printer. Use lpr's P printer option with lpq to look at other print queues even those for printers connected to other systems. With the l option lpq displays more information about each job. If you give the username of a user as an argument, lpq displays only the printer jobs belonging to that user. lprmOne item displayed by lpq is the job number for each print job in the queue. To remove a job from the print queue, use the job number as an argument to lprm. Unless you are Superuser, you can remove only your own jobs. Even as Superuser you may not be able to remove a job from a queue for a remote printer. If you do not give any arguments to lprm, it removes the currently active printer job (that is, the job that is now printing) from the queue, if you own that job. NotesIf you normally use a printer other than the system default printer, you can set up lpr to use another printer as your personal default by assigning the name of this printer to the environment variable PRINTER. For example, if you use bash, you can add the following line to ~/.bash_profile to set your default printer to the printer named ps: export PRINTER=ps LPD and LPRTraditionally, UNIX had two printing systems: the BSD Line Printer Daemon (LPD) and the System V Line Printer system (LPR). Linux adopted those systems at first, and both UNIX and Linux have seen modifications to and replacements for these systems. Today CUPS is the default printing system under many Linux distributions. CUPSCUPS (Common UNIX Printing System) is a cross-platform print server built around IPP (Internet Printing Protocol), which is based on HTTP. CUPS provides a number of printer drivers and can print different types of files, including PostScript files. CUPS provides System V and BSD command line interfaces and, in addition to IPP, supports LPD/LPR, HTTP, SMB, and JetDirect (socket) protocols, among others. This section describes the LPD command line interface that runs under CUPS and also in native mode on older systems. ExamplesThe first command sends the file named memo2 to the default printer: $ lpr memo2 Next a pipe sends the output of ls to the printer named deskjet: $ ls | lpr -Pdeskjet The next example paginates and sends the file memo to the printer: $ pr -h "Today's memo" memo | lpr The next example shows a number of print jobs queued for the default printer. Alex owns all of these jobs, and the first one is currently being printed (active). Jobs 635 and 639 were created by sending input to lpr's standard input; job 638 was created by giving ncut.icn as an argument to the lpr command. The last column gives the size of each print job. $ lpq deskjet is ready and printing Rank Owner Job Files Total Size active alex 635 (stdin) 38128 bytes 1st alex 638 ncut.icn 3587 bytes 2nd alex 639 (stdin) 3960 bytes The next command removes job 638 from the default print queue: $ lprm 638 ls: Displays information about one or more filesls [options] [file-list] The ls utility displays information about one or more files. It lists the information alphabetically by filename unless you use an option to change the order. ArgumentsWhen you do not provide an argument, ls displays the names of the visible files in the working directory (those files whose filenames do not begin with a period). The file-list is a list of one or more pathnames of any ordinary, directory, or device files. It can include ambiguous file references. When you specify a directory, ls displays the contents of the directory. It displays the name of the directory only when needed to avoid ambiguity, such as when the listing includes more than one directory. When you specify an ordinary file, ls displays information about that one file. OptionsThe options determine the type of information ls displays, the manner in which it displays the information, and the order in which it is displayed. When you do not use an option, ls displays a short list that contains only the names of files.
DiscussionThe ls long listing ( format=long or l options) displays the seven columns shown in Figure 4-12 on page 92. The first column, which contains 11 characters, is divided as described in the following paragraphs. The first character describes the type of file, as shown in Table V-17.
The next nine characters of the first column represent the access permissions associated with the file. They are divided into three sets of three characters each. The first three characters represent the owner's access permissions. If the owner has read access permission to the file, r appears in the first character position. If the owner is not permitted to read the file, a hyphen appears in this position. The next two positions represent the owner's write and execute access permissions. If w appears in the second position the owner is permitted to write to the file; if x appears in the third position the owner is permitted to execute the file. An s in the third position indicates that the file has setuid permission and execute permission. An S indicates setuid without execute permission. A hyphen indicates that the owner does not have the access permission associated with the character position. In a similar manner the second and third sets of three characters represent the access permissions of the group the file is associated with and of other users. An s in the third position of the second set of characters indicates that the file has setgid permission with execute permission, and an S indicates setgid without execute permission. The last character is t if the sticky bit (page 903) is set with execute permission and T if it is set without execute permission. Refer to chmod on page 604 for information on changing access permissions. Figure 4-12 on page 92 illustrates the columns described in the following paragraphs. The second column indicates the number of hard links to the file. Refer to page 96 for more information on links. The third and fourth columns display the name of the owner of the file and the name of the group the file is associated with. The fifth column indicates the size of the file in bytes or, if information about a device file is being displayed, the major and minor device numbers. In the case of a directory, this number is the size of the directory file, not the size of the files that are entries within the directory. (Use du to display the sum of the sizes of all files in a directory.) Use the h option to display the size of files in kilobytes, megabytes, or gigabytes. The last two columns display the date and time the file was last modified and the filename, respectively. NotesRefer to page 127 for examples of using ls with ambiguous file references. With the color option ls displays filenames of various types of files in different colors. By default executable files are green, directory files are blue, symbolic links are cyan, archives and compressed files are red, and ordinary text files are black. The manner in which ls colors the various file types is specified in the /etc/DIR_COLORS file. If this file does not exist on the local system, ls will not color filenames. You can modify /etc/DIR_COLORS to alter the default color/filetype mappings on a systemwide basis. For your personal use, you can copy /etc/DIR_COLORS to the ~/.dir_colors file in your home directory and modify it. For your login, ~/.dir_colors overrides the systemwide colors established in /etc/DIR_COLORS. Refer to the dir_colors and dircolors man pages for more information. ExamplesThe first command line shows the ls utility with the x option, which sorts the files horizontally. The ls utility displays an alphabetical list of the names of the files in the working directory: $ ls -x bin c calendar execute letters shell The F option appends a slash ( / ) to files that are directories, an asterisk to files that are executable, and an at sign (@) after symbolic links: $ ls -Fx bin/ c/ calendar execute* letters/ shell@ Next the l (long) option displays a long list. The files are still in alphabetical order: $ ls -l total 8 drwxrwxr-x 2 jenny pubs 80 May 20 09:17 bin drwxrwxr-x 2 jenny pubs 144 Mar 26 11:59 c -rw-rw-r-- 1 jenny pubs 104 May 28 11:44 calendar -rwxrw-r-- 1 jenny pubs 85 May 6 08:27 execute drwxrwxr-x 2 jenny pubs 32 Oct 6 22:56 letters drwxrwxr-x 16 jenny pubs 1296 Jun 6 17:33 shell The a (all) option lists all files, including invisible ones: $ ls -a . .profile c execute shell .. bin calendar letters Combining the a and l options displays a long listing of all files, including invisible files, in the working directory. This list is still in alphabetical order: $ ls -al total 12 drwxrwxr-x 6 jenny pubs 480 Jun 6 17:42 . drwxrwx--- 26 root root 816 Jun 6 14:45 .. -rw-rw-r-- 1 jenny pubs 161 Jun 6 17:15 .profile drwxrwxr-x 2 jenny pubs 80 May 20 09:17 bin drwxrwxr-x 2 jenny pubs 144 Mar 26 11:59 c -rw-rw-r-- 1 jenny pubs 104 May 28 11:44 calendar -rwxrw-r-- 1 jenny pubs 85 May 6 08:27 execute drwxrwxr-x 2 jenny pubs 32 Oct 6 22:56 letters drwxrwxr-x 16 jenny pubs 1296 Jun 6 17:33 shell When you add the r (reverse) option to the command line, ls produces a list in reverse alphabetical order: $ ls -ral total 12 drwxrwxr-x 16 jenny pubs 1296 Jun 6 17:33 shell drwxrwxr-x 2 jenny pubs 32 Oct 6 22:56 letters -rwxrw-r-- 1 jenny pubs 85 May 6 08:27 execute -rw-rw-r-- 1 jenny pubs 104 May 28 11:44 calendar drwxrwxr-x 2 jenny pubs 144 Mar 26 11:59 c drwxrwxr-x 2 jenny pubs 80 May 20 09:17 bin -rw-rw-r-- 1 jenny pubs 161 Jun 6 17:15 .profile drwxrwx--- 26 root root 816 Jun 6 14:45 .. drwxrwxr-x 6 jenny pubs 480 Jun 6 17:42 . Use the t and l options to list files so that the most recently modified file appears at the top of the list: $ ls -tl total 8 drwxrwxr-x 16 jenny pubs 1296 Jun 6 17:33 shell -rw-rw-r-- 1 jenny pubs 104 May 28 11:44 calendar drwxrwxr-x 2 jenny pubs 80 May 20 09:17 bin -rwxrw-r-- 1 jenny pubs 85 May 6 08:27 execute drwxrwxr-x 2 jenny pubs 144 Mar 26 11:59 c drwxrwxr-x 2 jenny pubs 32 Oct 6 22:56 letters Together the r and t options cause the file you modified least recently to appear at the top of the list. $ ls -trl total 8 drwxrwxr-x 2 jenny pubs 32 Oct 6 22:56 letters drwxrwxr-x 2 jenny pubs 144 Mar 26 11:59 c -rwxrw-r-- 1 jenny pubs 85 May 6 08:27 execute drwxrwxr-x 2 jenny pubs 80 May 20 09:17 bin -rw-rw-r-- 1 jenny pubs 104 May 28 11:44 calendar drwxrwxr-x 16 jenny pubs 1296 Jun 6 17:33 shell The next example shows ls with a directory filename as an argument. The ls utility lists the contents of the directory in alphabetical order: $ ls bin c e lsdir To display information about the directory file itself, use the d (directory) option. This option lists information only about the directory: $ ls -dl bin drwxrwxr-x 2 jenny pubs 80 May 20 09:17 bin You can use the following command to display a list of all invisible filenames (those starting with a period) in your home directory. This is a convenient way to list the initialization files in your home directory: $ ls -d ~/.* /home/sam/. /home/sam/.gtkrc-kde /home/sam/.. /home/sam/.history ... make: Keeps a set of programs currentmake [options] [target-files] [arguments] The GNU make utility keeps a set of executable programs current, based on differences in the modification times of the programs and the source files that each program is dependent on. ArgumentsThe target-files refer to targets on dependency lines in the makefile. When you do not specify a target-file, make updates the target on the first dependency line in the makefile. Command line arguments of the form name=value set the variable name to value inside the makefile. See "Discussion" for more information. OptionsIf you do not use the f option, make takes its input from a file named GNUmakefile, makefile, or Makefile (in that order) in the working directory. In this section, this input file is referred to as makefile. Many users prefer to use the name Makefile because it shows up earlier in directory listings.
DiscussionThe make utility bases its actions on the modification times of the programs and the source files that each program is dependent on. Each of the executable programs, or target-files, is dependent on one or more prerequisite files. The relationships between target-files and prerequisites are specified on dependency lines in a makefile. Construction commands follow the dependency line, specifying how make can update the target-files. DocumentationRefer to page 399 for more information about make and makefiles. For additional information refer to www.gnu.org/software/make/manual/make.html and to the make info page. Although the most common use of make is to build programs from source code, this general-purpose build utility is suitable for a wide range of applications. Anywhere you can define a set of dependencies to get from one state to another represents an ideal candidate for using make. Much of make's power derives from the features you can set up in a makefile. For example, you can define variables using the same syntax found in the Bourne Again Shell. Always define the variable SHELL in a makefile; set it to the pathname of the shell you want to use when running construction commands. To define the variable and assign it a value, place the following line near the top of a makefile: SHELL=/bin/sh Assigning the value /bin/sh to SHELL allows you to use a makefile on other computer systems. On Linux systems /bin/sh is generally linked to /bin/bash. The make utility uses the value of the environment variable SHELL if you do not set SHELL in a makefile. If SHELL does not hold the path of the shell you intended to use and if you do not set SHELL in a makefile, the construction commands may fail. Following is a list of additional features associated with make:
NotesThe section "make: Keeps a Set of Programs Current" on page 399 provides more information about make. ExamplesThe first example causes make to bring the target-file named analysis up-to-date by issuing three cc commands. It uses a makefile named GNUmakefile, makefile, or Makefile in the working directory. $ make analysis cc - c analy.c cc - c stats.c cc - o analysis analy.o stats.o The following example also updates analysis but uses a makefile named analysis.mk in the working directory: $ make -f analysis.mk analysis 'analysis' is up to date. The next example lists the commands make would execute to bring the target-file named credit up-to-date. Because of the n (no-execution) option, make does not execute the commands. $ make -n credit cc - c - O credit.c cc - c - O accounts.c cc - c - O terms.c cc - o credit credit.c accounts.c terms.c The next example uses the t option to update the modification time of the target-file named credit. After you use this option, make thinks that credit is up-to-date. $ make -t credit $ make credit 'credit' is up to date. Next is a simple makefile for building a utility named ff. Because the cc command needed to build ff is complex, using a makefile allows you to rebuild ff easily, without having to remember and retype the cc command. $ cat Makefile # Build the ff command from the fastfind.c source SHELL=/bin/sh ff: cc -traditional -O2 -g -DBIG=5120 -o ff fastfind.c myClib.a $ make ff cc -traditional -O2 -g -DBIG=5120 -o ff fastfind.c myClib.a The following example shows a much more sophisticated makefile that uses features not discussed in this section. Refer to the sources cited under "Documentation" on page 716 for information about these and other advanced features. $ cat Makefile ########################################################### ## build and maintain the buffer library ########################################################### SHELL=/bin/sh ########################################################### ## Flags and libraries for compiling. The XLDLIBS are needed # whenever you build a program using the library. The CCFLAGS # give maximum optimization. CC=gcc CCFLAGS=-O2 $(CFLAGS) XLDLIBS= -lXaw3d -lXt -lXmu -lXext -lX11 -lm BUFLIB=libbuf.a ########################################################### ## Miscellaneous INCLUDES=buf.h XINCLUDES=xtbuff_ad.h OBJS=buff.o buf_print.o xtbuff.o ########################################################### ## Just a 'make' generates a help message help: Help @echo "You can make the following:" @echo " " @echo " libbuf.a -- the buffer library" @echo " bufdisplay -- display any-format buffer" @echo " buf2ppm -- convert buffer to pixmap" ########################################################### ## The main target is the library libbuf.a: $(OBJS) -/bin/rm libbuf.a ar rv libbuf.a $(OBJS) ranlib libbuf.a ########################################################### ## Secondary targets -- utilities built from the library bufdisplay: bufdisplay.c libbuf.a $(CC) $(CCFLAGS) bufdisplay.c -o bufdisplay $(BUFLIB) $(XLDLIBS) buf2ppm: buf2ppm.c libbuf.a $(CC) $(CCFLAGS) buf2ppm.c -o buf2ppm $(BUFLIB) ########################################################### ## Build the individual object units buff.o:$(INCLUDES) buff.c $(CC) -c $(CCFLAGS) buff.c buf_print.o:$(INCLUDES) buf_print.c $(CC) -c $(CCFLAGS) buf_print.c xtbuff.o: $(INCLUDES) $(XINCLUDES) xtbuff.c $(CC) -c $(CCFLAGS) xtbuff.c The make utility can be used for tasks other than compiling code. As a final example, assume that you have a database that lists IP addresses and the corresponding hostnames in two columns and that the database dumps these values to a file named hosts.tab. You need to extract only the hostnames from this file and generate a Web page named hosts.html containing these names. The following makefile is a simple report writer: $ cat makefile # SHELL=/bin/bash # hosts.html: hosts.tab @echo "<HTML><BODY>" > hosts.html @awk '{print $$2, "<br>"}' hosts.tab >> hosts.html @echo "</BODY></HTML>" >> hosts.html man: Displays documentation for commandsman [options] [section] command man k keyword The man utility provides online documentation for Linux commands. In addition to user commands, documentation is available for many other commands and details that relate to Linux. Because many Linux commands come from GNU, the GNU info utility (page 32) frequently provides more complete information. A one-line header is associated with each manual page. This header consists of a command name, the section of the manual in which the command is found, and a brief description of what the command does. These headers are stored in a database so that you can perform quick searches on keywords associated with each man page. ArgumentsThe section argument tells man to limit its search to the specified section of the manual (see page 30 for a listing of manual sections). Without this argument man searches the sections in numerical order and displays the first man page it finds. In the second form of the man command, the k option searches for the keyword in the database of man page headers; man displays a list of headers that contain the keyword. A man k command performs the same function as apropos (page 62). Options
DiscussionThe manual pages are organized in sections, each pertaining to a separate aspect of the Linux system. Section 1 contains user-callable commands and is the section most likely to be accessed by users who are not system administrators or programmers. Other sections of the manual describe system calls, library functions, and commands used by system administrators. See page 30 for a listing of the manual sections. PagerThe man utility uses less to display manual pages that fill more than one screen. To change to another pager, set the environment variable PAGER to the pathname of the pager you want to use. For example, adding the following line to the ~/.bash_profile file allows a bash user to use more instead of less: export PAGER=/bin/more MANPATHYou can tell man where to look for man pages by setting the environment variable MANPATH to a colon-separated list of directories. For example, bash users can add the following line to ~/.bash_profile to cause man to search the /usr/man, /usr/local/man, and /usr/X11R6/man directories: export MANPATH=/usr/man:/usr/local/man:/usr/X11R6/man You can edit /etc/man.config to further configure man. Refer to the man man page for more information. NotesThe argument to man is not always a command name. For example, the command man ascii lists the ASCII characters and their various representations; the command man k postscript lists man pages that pertain to PostScript. The man pages are commonly stored in unformatted, compressed form. When you request a man page, it has to be decompressed and formatted before being displayed. To speed up subsequent requests for that man page, man attempts to save the formatted version of the page. Some utilities described in the manual pages have the same name as shell builtin commands. The behavior of the shell builtin may differ slightly from the behavior of the utility as described in the manual page. ExamplesThe following example uses man to display the documentation for the command write, which sends messages to another user's terminal: $ man write WRITE(1) Linux Programmer's Manual WRITE(1) NAME write - send a message to another user SYNOPSIS write user [ttyname] DESCRIPTION Write allows you to communicate with other users, by copy- ing lines from your terminal to theirs. When you run the write command, the user you are writing ... The next example displays the man page for another command the man command itself, a good starting place for someone learning about the system: $ man man man(1) man(1) NAME man - format and display the online manual pages manpath - determine users search path for man pages SYNOPSIS man [-acdfFhkKtwW] [--path] [-m system] [-p string] [-C config_file] [-M pathlist] [-P pager] [-S section_list] [section] name ... DESCRIPTION man formats and displays the online manual pages. If you specify section, man only looks in that section of the ... The next example shows how you can use the man utility to find the man pages that pertain to a certain topic. In this case man k displays man page headers containing the string latex. The apropos utility (a shell script stored in /usr/bin/apropos) functions similarly to man k. $ man -k latex Pod::LaTeX (3pm) - Convert Pod data to formatted Latex einitex [elatex] (1) - extended TeX elatex [latex] (1) - structured text formatting and typesetting etex [elatex] (1) - extended TeX evirtex [elatex] (1) - extended TeX lambda [latex] (1) - structured text formatting and typesetting latex (1) - structured text formatting and typesetting ... The search for the keyword entered with the k option is not case sensitive. Although the keyword entered on the command line is all lowercase, it matches the first header, which contains the string LaTeX (uppercase and lowercase). The 3pm on the first line indicates that the man page is from Section 3 (Subroutines) of the Linux System Manual and comes from the Perl Programmers Reference Guide (it is a Perl subroutine; see www.perl.org for more information on the Perl programming language). mkdir: Creates a directorymkdir [option] directory-list The mkdir utility creates one or more directories. ArgumentsThe directory-list is a list of one or more pathnames of directories that mkdir creates. OptionsAccepts the common options described on page 587.
NotesYou must have permission to write to and search (execute permission) the parent directory of the directory you are creating. The mkdir utility creates directories that contain the standard invisible entries (. and . .). ExamplesThe following command creates the accounts directory as a subdirectory of the working directory and the prospective directory as a subdirectory of accounts: $ mkdir --parents accounts/prospective Without changing working directories, the same user creates another subdirectory within the accounts directory: $ mkdir accounts/existing Next the user changes the working directory to the accounts directory and creates one more subdirectory: $ cd accounts $ mkdir closed The last example shows the user creating another subdirectory. This time the mode option removes all access permissions for group and others: $ mkdir --mode go= accounts/past_due mkfs: Creates a filesystem on a devicemkfs [options] device The mkfs utility creates a filesystem on a device such as a floppy diskette or a partition of a hard disk. It acts as a front end for programs that create filesystems, each specific to a filesystem type. caution: mkfs destroys all data on a device Be careful when using mkfs, as it destroys all data on a device. ArgumentsThe device is the name of the device that you want to create the filesystem on. If the device name is in /etc/fstab, you can use the mount point of the device instead of the device name. OptionsWhen you run mkfs, you can specify both global options and options specific to the filesystem type that mkfs is creating (for example, ext2, ext3, msdos, reiserfs). Global options must precede type-specific options. Global Options
Filesystem Type-Specific OptionsThe following options apply to many common filesystem types, including ext2 and ext3. The following command lists the filesystem creation utilities available on the local system: $ ls /sbin/mkfs.* /sbin/mkfs.cramfs /sbin/mkfs.ext3 /sbin/mkfs.vfat /sbin/mkfs.ext2 /sbin/mkfs.msdos There is frequently a link to /sbin/mkfs.ext2 at /sbin/mke2fs. Review the man page or give the pathname of the filesystem creation utility to determine which options the utility accepts. $ /sbin/mkfs.ext3 Usage: mkfs.ext3 [-c|-t|-l filename] [-b block-size] [-f fragment-size] [-i bytes-per-inode] [-j] [-J journal-options] [-N number-of-inodes] [-m reserved-blocks-percentage] [-o creator-os] [-g blocks-per-group] [-L volume-label] [-M last-mounted-directory] [-O feature[,...]] [-r fs-revision] [-R options] [-qvSV] device [blocks-count]
DiscussionBefore you can write to and read from a hard disk or floppy diskette in the usual fashion, there must be a filesystem on it. Typically a hard disk is divided into partitions (page 892), each with a separate filesystem. A floppy diskette normally holds a single filesystem. Refer to Chapter 4 for more information on filesystems. NotesYou can use tune2fs (page 808) with the j option to change an existing ext2 filesystem into a journaling filesystem (page 883) of type ext3. (See "Examples.") You can also use tune2fs to change how often fsck (page 666) checks a filesystem. mkfs is a front endMuch like fsck, mkfs is a front end that calls other utilities to handle various types of filesystems. For example, mkfs calls mke2fs (which is typically linked to mkfs.ext2 and mkfs.ext3) to create the widely used ext2 and ext3 filesystems. Refer to the mke2fs man page for more information. Other utilities that mkfs calls are typically named mkfs.type, where type is the filesystem type. By splitting mkfs in this manner, filesystem developers can provide programs to create their filesystems without affecting the development of other filesystems or changing how system administrators use mkfs. ExamplesIn the following example, mkfs creates a filesystem on the device at /dev/hda8. In this case the default filesystem type is ext2. # /sbin/mkfs /dev/hda8 mke2fs 1.35 (28-Feb-2004) max_blocks 1309867008, rsv_groups = 39974, rsv_gdb = 312 Filesystem label= OS type: Linux Block size=4096 (log=2) Fragment size=4096 (log=2) 640000 inodes, 1279167 blocks 63958 blocks (5.00%) reserved for the super user First data block=0 Maximum filesystem blocks=1312817152 40 block groups 32768 blocks per group, 32768 fragments per group 16000 inodes per group Superblock backups stored on blocks: 32768, 98304, 163840, 229376, 294912, 819200, 884736 Writing inode tables: 0/40...39/40...done inode.i_blocks = 19976, i_size = 4243456 Writing superblocks and filesystem accounting information: done This filesystem will be automatically checked every 23 mounts or 180 days, whichever comes first. Use tune2fs -c or -i to override. Next the administrator uses tune2fs to convert the ext2 filesystem to an ext3 journaling filesystem: # /sbin/tune2fs -j /dev/hda8 tune2fs 1.35 (28-Feb-2004) Creating journal inode: done This filesystem will be automatically checked every 23 mounts or 180 days, whichever comes first. Use tune2fs -c or -i to override. Mtools: Uses DOS-style commands on files and directoriesmcd [directory] mcopy [options] file-list target mdel file-list mdir [ w] directory mformat [options] device mtype [options] file-list These utilities mimic DOS commands and manipulate Linux files or DOS files. The mcopy utility provides an easy way to move files between a Linux filesystem and a DOS disk. The default drive for all commands is /dev/fd0 or A:. UtilitiesTable V-18 lists some of the utilities in the Mtools collection.
ArgumentsThe directory, used with mcd and mdir, must be the name of a directory on a DOS disk. The file-list, used with mcopy and mtype, is a SPACE-separated list of filenames. The target, used with mcopy, is the name of a regular file or a directory. If you give mcopy a file-list with more than one filename, target must be the name of a directory. The device, used with mformat, is the DOS drive letter containing the disk to be formatted (for example, A:). Optionsmcopy
mdir
mformat
mtype
DiscussionAlthough these utilities mimic their DOS counterparts, they do not attempt to match those tools exactly. In most cases restrictions imposed by DOS are removed. For example, the asterisk ambiguous file reference (*) matches all filenames (as it does under Linux), including those filenames that DOS would require *.* to match. NotesIn this discussion, the term DOS disk refers to either a DOS partition on a hard disk or a DOS floppy diskette. You can download Mtools from the Mtools home page (mtools.linux.lu) or from rpmfind.net. If the local kernel is configured to support DOS filesystems, you can mount DOS disks on a Linux filesystem and manipulate the files using Linux utilities. Although this feature is handy and reduces the need for Mtools, it may not be practical or efficient to mount and unmount DOS filesystems each time you need to access a DOS file. These tasks can be time-consuming, and some systems are set up so that regular users cannot mount and unmount filesystems. Use caution when using Mtools. These utilities may not warn you if you are about to overwrite a file. Using explicit pathnames not ambiguous file references reduces the chance of overwriting a file. The most common uses of the Mtools utilities are to examine files on DOS floppy diskettes (mdir) and to copy files between a DOS floppy diskette and the Linux filesystem (mcopy). You can identify DOS disks by using the usual DOS drive letters: A: for the first floppy drive, C: for the first hard disk, and so on. You can separate filenames in paths by using either the Linux forward slash (/) or the DOS backslash (\). You need to escape backslashes to prevent the shell from interpreting it before passing the pathname to the utility you are using. Each of the Mtools utilities returns an exit code of 0 on success, 1 on complete failure, and 2 on partial failure. ExamplesIn the first example, mdir displays the contents of a DOS floppy diskette in /dev/fd0: $ mdir Volume in drive A is DOS UTY Directory for A:/ ACAD LIF 419370 5-10-05 1:29p CADVANCE LIF 40560 2-08-04 10:36a CHIPTST EXE 2209 4-26-05 4:22p DISK ID 31 12-27-05 4:49p GENERIC LIF 20983 2-08-04 10:37a INSTALL COM 896 7-05-05 10:23a INSTALL DAT 45277 12-27-05 4:49p KDINSTAL EXE 110529 8-13-05 10:50a LOTUS LIF 44099 1-18-05 3:36p PCAD LIF 17846 5-01-05 3:46p READID EXE 17261 5-07-05 8:26a README TXT 9851 4-30-05 10:32a UTILITY LIF 51069 5-05-05 9:13a WORD LIF 16817 7-01-05 9:58a WP LIF 57992 8-29-05 4:22p 15 File(s) 599040 bytes free The next example uses mcopy to copy the *.TXT files from the DOS floppy diskette to the working directory on the Linux filesystem. Because only one file has the extension .TXT, only one file is copied. Because .TXT files are usually text files under DOS, the t option strips off the unnecessary RETURN characters at the end of each line. The ambiguous file reference * is escaped on the command line to prevent the shell from attempting to expand it before passing the argument to mcopy. The mcopy utility locates the file README.TXT when given the pattern *.txt because DOS does not differentiate between uppercase and lowercase letters in filenames. $ mcopy -t a:\*.txt . Copying README.TXT Finally, the DOS floppy diskette is reformatted using mformat, wiping all data from the diskette. If the diskette has not been low-level formatted, you need to use fdformat before giving the following commands: $ mformat a: A check with mdir shows the floppy diskette is empty after formatting: $ mdir a: Volume in drive A has no label Directory for A:/ File "*" not found mv: Renames or moves a filemv [options] existing-file new-filename mv [options] existing-file-list directory mv [options] existing-directory new-directory The mv utility, which renames or moves one or more files, has three formats. The first renames a single file with a new filename that you supply. The second renames one or more files so that they appear in a specified directory. The third renames a directory. The mv utility physically moves the file if it is not possible to rename it (that is, if you move the file from one filesystem to another). ArgumentsIn the first form, the existing-file is a pathname that specifies the ordinary file that you want to rename. The new-filename is the new pathname of the file. In the second form, the existing-file-list is a list of the pathnames of the files that you want to rename and the directory specifies the new parent directory for the files. The files you rename will have the same simple filenames as each of the files in the existing-file-list but new absolute pathnames. The third form renames the existing-directory with the new-directory name. This form works only when the new-directory does not already exist. OptionsAccepts the common options described on page 587.
NotesGNU mv is implemented as cp (with the a option) and rm. When you execute the mv utility, it first copies the existing-file to the new-file. It then deletes the existing-file. If the new-file already exists, mv may delete it before copying. As with rm, you must have write and execute access permission to the parent directory of the existing-file, but you do not need read or write access permission to the file itself. If the move would overwrite a file that you do not have write permission for, mv displays the file's access permissions and waits for a response. If you enter y or Y, mv overwrites the file; otherwise, it does not move the file. If you use the f option, mv does not prompt you for a response but simply overwrites the file. Although earlier versions of mv could move only ordinary files between filesystems, mv can now move any type of file, including directories and device files. ExamplesThe first command renames letter, a file in the working directory, as letter.1201: $ mv letter letter.1201 The next command renames the file so that it appears, with the same simple filename, in the user's ~/archives directory: $ mv letter.1201 ~/archives The following command moves all files in the working directory whose names begin with memo so they appear in the /p04/backup directory: $ mv memo* /p04/backup Using the u option prevents mv from replacing a newer file with an older one. After the mv u command shown below, the newer file, memo2, has not been overwritten. The mv command without the u option overwrites the newer file (memo2's modification time and size have changed to those of memo1). $ ls -l -rw-rw-r-- 1 sam sam 22 Mar 25 23:34 memo1 -rw-rw-r-- 1 sam sam 19 Mar 25 23:40 memo2 $ mv -u memo1 memo2 $ ls -l -rw-rw-r-- 1 sam sam 22 Mar 25 23:34 memo1 -rw-rw-r-- 1 sam sam 19 Mar 25 23:40 memo2 $ mv memo1 memo2 $ ls -l -rw-rw-r-- 1 sam sam 22 Mar 25 23:34 memo2 nice: Changes the priority of a commandnice [option] [command-line] The nice utility reports the priority of the shell or alters the priority of a command. An ordinary user can decrease the priority of a command. Only Superuser can increase the priority of a command. The TC Shell has a nice builtin that has a different syntax. Refer to "Notes" for more information. ArgumentsThe command-line is the command line you want to execute at a different priority. Without any options or arguments, nice displays the priority of the shell running nice. OptionsWithout an option, nice defaults to an adjustment of 10, lowering the priority of the command by 10 typically from 0 to 10. As you raise the priority value, the command runs at a lower priority. adjustment=value
NotesYou can use top's r command (page 799) to change the priority of a running process. Higher (more positive) priority values mean that the kernel schedules a job less often. Lower (more negative) values cause the job to be scheduled more often. When Superuser schedules a job to run at the highest priority, this change can affect the performance of the system for all other jobs, including the operating system itself. For this reason you should be careful when using nice with negative values. The TC Shell has a nice builtin. Under tcsh, use the following syntax to change the priority at which command-line is run. The default priority is 4. You must include the plus sign for positive values. nice [±value] command line ExamplesThe following command executes find in the background at the lowest possible priority. The ps l command displays the nice value of the command in the NI column: # nice -n 19 find / -name core -print > corefiles.out & [1] 2610 # ps -l F S UID PID PPID C PRI NI ADDR SZ WCHAN TTY TIME CMD 100 S 0 1099 1097 0 75 0 - 605 wait4 pts/0 00:00:00 bash 100 R 0 2610 1099 0 99 19 - 634 - pts/0 00:00:03 find 100 R 0 2611 1099 0 76 0 - 747 - pts/0 00:00:00 ps The next command finds very large files and runs at a high priority ( 15): # nice -n -15 find / -size +50000k nohup: Runs a command that keeps running after you log outnohup command line The nohup utility executes a command line such that the command keeps running after you log out. In other words, nohup causes a process to ignore a SIGHUP signal. Depending on how the shell is configured, it may kill your background processes when you log out. The TC Shell has a nohup builtin. Refer to "Notes" for more information. ArgumentsThe command line is the command line you want to execute. NotesAccepts the common options described on page 587. If you do not redirect the output from a command that you execute using nohup, both standard output and standard error are sent to the file named nohup.out in the working directory. If you do not have write permission for the working directory, nohup sends output to ~/nohup.out. Unlike the nohup utility, the TC Shell's nohup builtin does not send output to nohup.out. Background jobs started from tcsh continue to run after you log out. ExamplesThe following command executes find in the background, using nohup: $ nohup find / -name core -print > corefiles.out & [1] 14235 od: Dumps the contents of a fileod [options] [file-list] The od (octal dump) utility dumps the contents of a file. The dump is useful for viewing executable (object) files and text files with embedded nonprinting characters. This utility takes its input from the file you specify on the command line or from standard input. ArgumentsThe file-list specifies the pathnames of the files that od displays. When you do not specify a file-list, od reads from standard input. OptionsAccepts the common options described on page 587. address radix=base
NotesTo retain backward compatibility with older, non-POSIX versions of od, the od utility includes the options listed in Table V-22 as shorthand versions of many of the preceding options.
ExamplesThe file ac, used in the following examples, contains all the ASCII characters. In the first example, the bytes in this file are displayed as named characters. The first column shows the offset of each byte from the start of the file. The offsets are given as octal values. $ od -t a ac 0000000 nul soh stx etx eot enq ack bel bs ht nl vt ff cr so si 0000020 dle dc1 dc2 dc3 dc4 nak syn etb can em sub esc fs gs rs us 0000040 sp ! " # $ % & ' ( ) * + , - . / 0000060 0 1 2 3 4 5 6 7 8 9 : ; < = > ? 0000100 @ A B C D E F G H I J K L M N O 0000120 P Q R S T U V W X Y Z [ \ ] ^ _ 0000140 ` a b c d e f g h i j k l m n o 0000160 p q r s t u v w x y z { | } ~ del 0000200 nul soh stx etx eot enq ack bel bs ht nl vt ff cr so si 0000220 dle dc1 dc2 dc3 dc4 nak syn etb can em sub esc fs gs rs us 0000240 sp ! " # $ % & ' ( ) * + , - . / 0000260 0 1 2 3 4 5 6 7 8 9 : ; < = > ? 0000300 @ A B C D E F G H I J K L M N O 0000320 P Q R S T U V W X Y Z [ \ ] ^ _ 0000340 ` a b c d e f g h i j k l m n o 0000360 p q r s t u v w x y z { | } ~ del 0000400 nl 0000401 In the next example, the bytes are displayed as octal numbers, ASCII characters, or printing characters preceded by a backslash (refer to Table V-20 on page 738): $ od -t c ac 0000000 \0 001 002 003 004 005 006 \a \b \t \n \v \f \r 016 017 0000020 020 021 022 023 024 025 026 027 030 031 032 033 034 035 036 037 0000040 ! " # $ % & ' ( ) * + , - . / 0000060 0 1 2 3 4 5 6 7 8 9 : ; < = > ? 0000100 @ A B C D E F G H I J K L M N O 0000120 P Q R S T U V W X Y Z [ \ ] ^ _ 0000140 ` a b c d e f g h i j k l m n o 0000160 p q r s t u v w x y z { | } ~ 177 0000200 200 201 202 203 204 205 206 207 210 211 212 213 214 215 216 217 0000220 220 221 222 223 224 225 226 227 230 231 232 233 234 235 236 237 0000240 240 241 242 243 244 245 246 247 250 251 252 253 254 255 256 257 0000260 260 261 262 263 264 265 266 267 270 271 272 273 274 275 276 277 0000300 300 301 302 303 304 305 306 307 310 311 312 313 314 315 316 317 0000320 320 321 322 323 324 325 326 327 330 331 332 333 334 335 336 337 0000340 340 341 342 343 344 345 346 347 350 351 352 353 354 355 356 357 0000360 360 361 362 363 364 365 366 367 370 371 372 373 374 375 376 377 0000400 \n 0000401 The final example finds in the file /usr/bin/who all strings that are at least three characters long (the default) and terminated by a null byte. See strings on page 777 for another way of displaying a similar list. The offset positions are given as decimal offsets instead of octal offsets. $ $ od -A d --strings /usr/bin/who ... 0015170 Joseph Arceneaux 0015187 Michael Stone 0015201 David MacKenzie 0015217 5.2.1 0015223 who 0015227 too many arguments 0015568 %-8.8s%s %-12s %-12s%s%s %-8s%s 0016840 Warning: -i will be removed in a future release; use -u instead 0016906 write error 0016918 %s: %s 0016925 literal 0016933 shell 0016939 shell-always 0016952 escape 0016959 clocale 0017708 Copyright (C) 2004 Free Software Foundation, Inc. 0018352 memory exhausted ... paste: Joins corresponding lines from filespaste [option] [file-list] The paste utility reads lines from the file-list and joins corresponding lines in its output. By default output lines are separated by a TAB character. ArgumentsThe file-list is a list of ordinary files. When you omit the file-list, paste reads from standard input. OptionsAccepts the common options described on page 587. delimiter=dlist
NotesA common use of paste is to rearrange the columns of a table. A utility, such as cut, can place the desired columns in separate files, and then paste can join them in any order. ExamplesThe following example uses the files fnames and acctinfo. These files can easily be created by using cut (page 627) and the /etc/passwd file. The paste command puts the full-name field first, followed by the remaining user account information. A TAB character separates the two output fields. $ cat fnames Jenny Chen Alex Watson Scott Adams Helen Simpson $ cat acctinfo jenny:x:401:50:/home/jenny:/bin/zsh alex:x:402:50:/home/alex:/bin/bash scott:x:504:500:/home/scott:/bin/tcsh hls:x:505:500:/home/hls:/bin/bash $ paste fnames acctinfo Jenny Chen jenny:x:401:50:/home/jenny:/bin/zsh Alex Watson alex:x:402:50:/home/alex:/bin/bash Scott Adams scott:x:504:500:/home/scott:/bin/tcsh Helen Simpson hls:x:505:500:/home/hls:/bin/bash The next examples use the files p1, p2, p3, and p4. The last example in this group uses the delimiter option to give paste a list of characters to use to separate output fields: $ cat p1 1 one ONE $ cat p2 2 two TWO extra $ cat p3 3 three THREE $ cat p4 4 four FOUR $ paste p4 p3 p2 p1 4 3 2 1 four three two one FOUR THREE TWO ONE extra $ paste --delimiter="+-=" p3 p2 p1 p4 3+2-1=4 three+two-one=four THREE+TWO-ONE=FOUR +extra-= The final example uses the serial option to paste the files one at a time: $ paste --serial p1 p2 p3 p4 1 one ONE 2 two TWO extra 3 three THREE 4 four FOUR pr: Paginates files for printingpr [options] [file-list] The pr utility breaks files into pages, usually in preparation for printing. Each page has a header with the name of the file, date, time, and page number. The pr utility takes its input from files you specify on the command line or from standard input. The output from pr goes to standard output and is frequently redirected by a pipe to a printer. ArgumentsThe file-list is a list of the pathnames of text files that you want pr to paginate. When you omit the file-list, pr reads from standard input. OptionsAccepts the common options described on page 587. You can embed options within the file-list. An embedded option affects only those files following it on the command line. show-control-chars
number-lines=[c[num]]
firstpage[:lastpage]
NotesWhen you use the columns option to display the output in multiple columns, pr displays the same number of lines in each column (with the possible exception of the last). ExamplesThe first command shows pr paginating a file named memo and sending its output through a pipe to lpr for printing: $ pr memo | lpr Now memo is sent to the printer again, this time with a special heading at the top of each page. The job is run in the background. $ pr -h 'MEMO RE: BOOK' memo | lpr & [1] 4904 Next pr displays the memo file on the screen, without any header, starting with page 3: $ pr -t +3 memo ... ps: Displays process statusps [options] [process-list] The ps utility displays status information about processes running on the local system. ArgumentsThe process-list is a comma- or SPACE-separated list of PID numbers. When you specify a process-list, ps reports on just the processes in that list. OptionsThe ps utility accepts three types of options, each preceded by a different prefix. You can intermix the options.
User=username
DiscussionWithout any options, ps displays the statuses of all active processes that your terminal/screen controls. Table V-23 lists the heading and content of each of the four columns that ps displays.
The columns that ps displays depend on your choice of options. Table V-24 lists the headings and contents of the most common columns.
NotesUse top (page 798) to display process status information dynamically. ExamplesThe first example shows ps, without any options, displaying the user's active processes. The first process is the shell (bash), and the second is the process executing the ps utility. $ ps PID TTY TIME CMD 2697 pts/0 00:00:02 bash 3299 pts/0 00:00:00 ps With the l (long) option, ps displays more information about the processes: $ ps -l F S UID PID PPID C PRI NI ADDR SZ WCHAN TTY TIME CMD 000 S 500 2697 2696 0 75 0 - 639 wait4 pts/0 00:00:02 bash 000 R 500 3300 2697 0 76 0 - 744 - pts/0 00:00:00 ps The u option shows various types of information about the processes, including how much of the local system CPU and memory each one is using: $ ps -u USER PID %CPU %MEM VSZ RSS TTY STAT START TIME COMMAND alex 2697 0.0 0.5 2556 1460 pts/0 S Jul31 0:02 -bash alex 3303 0.0 0.2 2476 616 pts/0 R Jul31 0:00 ps -u The forest option causes ps to display what the man page describes as an "ASCII art process tree." Processes that are children of other processes appear indented under their parents, making the process hierarchy, or tree, easier to see. $ ps -ef --forest UID PID PPID C STIME TTY TIME CMD root 1 0 0 Jul22 ? 00:00:03 init root 2 1 0 Jul22 ? 00:00:00 [keventd] ... root 785 1 0 Jul22 ? 00:00:00 /usr/sbin/apmd -p 10 -w 5 -W -P root 839 1 0 Jul22 ? 00:00:01 /usr/sbin/sshd root 3305 839 0 Aug01 ? 00:00:00 \_ /usr/sbin/sshd alex 3307 3305 0 Aug01 ? 00:00:00 \_ /usr/sbin/sshd alex 3308 3307 0 Aug01 pts/1 00:00:00 \_ -bash alex 3774 3308 0 Aug01 pts/1 00:00:00 \_ ps -ef --forest ... root 1040 1 0 Jul22 ? 00:00:00 login -- root root 3351 1040 0 Aug01 tty2 00:00:00 \_ -bash root 3402 3351 0 Aug01 tty2 00:00:00 \_ make modules root 3416 3402 0 Aug01 tty2 00:00:00 \_ make -C drivers CFLA root 3764 3416 0 Aug01 tty2 00:00:00 \_ make -C scsi mod root 3773 3764 0 Aug01 tty2 00:00:00 \_ ld -m elf_i3 ps and killThe next sequence of commands shows how to use ps to determine the PID number of a process running in the background and how to terminate that process by using the kill command. In this case it is not necessary to use ps because the shell displays the PID number of the background processes. The ps utility verifies the PID number. The first command executes find in the background. The shell displays the job and PID numbers of the process, followed by a prompt. $ find ~ -name memo -print > memo.out & [1] 3343 Next ps confirms the PID number of the background task. If you did not already know this number, using ps would be the only way to find it out. $ ps PID TTY TIME CMD 3308 pts/1 00:00:00 bash 3343 pts/1 00:00:00 find 3344 pts/1 00:00:00 ps Finally kill (page 693) terminates the process: $ kill 3343 $ RETURN [1]+ Terminated find ~ -name memo -print >memo.out $ rcp: Copies one or more files to or from a remote systemrcp [options] source-file destination-file rcp [options] source-file-list destination-directory The rcp utility copies one or more ordinary files between two systems that can communicate over a network. security: rcp is not secure The rcp utility uses host-based trust, which is not secure, to authorize files to be copied. Use scp (page 758) when it is available. ArgumentsThe source-file, source-file-list, and destination-file are pathnames of the ordinary files, and the destination-directory is the pathname of a directory file. A pathname that does not contain a colon (:) is the name of a file on the local system. A pathname of the form name@host:path names a file on the remote system named host. The path is relative to the home directory of the user name (unless path is an absolute pathname). When you omit the name@ portion of the destination, a relative pathname is relative to the home directory on the host of the user giving the rcp command. Like cp, rcp has two modes of operation: The first copies one file to another, and the second copies one or more files to a directory. The source-file[-list] is a list of the name(s) of the file(s) that rcp will copy; destination-file is the name that rcp assigns to the resulting copy of the file, or destination-directory is the name of the directory that rcp puts the copied files in. When rcp copies files to a destination-directory, the files maintain their original simple filenames. Options
NotesYou must have an account on the remote system to copy files to or from it using rcp. The rcp utility does not prompt for a password but uses several alternative methods to verify that you have the authority to read or write files on the remote system. One method requires that the name of the local system be specified in the /etc/hosts.equiv file on the remote system. If the name is there, rcp allows you to copy files if your usernames are the same on both systems and your account on the remote system has the necessary permissions to access files there. Authorization can also be specified on a per-user basis. Using this method the remote user's home directory must contain a file named ~/.rhosts that lists trusted remote systems and users. With this method, your local and remote user names do not have to match but your local username must appear on the line in the remote ~/.rhosts file that starts with the name of the local system. See "Examples" for rlogin (page 752) for a sample .rhosts file. If you use a wildcard (such as *) in a remote pathname, you must quote the wildcard character or pathname so that the wildcard is interpreted by the shell on the remote system and not by the local shell. As with cp, if the destination-file exists before you execute rcp, rcp overwrites the file. ExamplesThe first example copies the files with filenames ending in .c into the archives directory on the remote system named bravo. Because a username is not specified, rcp uses the local user's username on the remote system. Because the full pathname of the archives directory is not specified, rcp assumes that it is a subdirectory of the user's home directory on bravo. Each of the copied files retains its simple filename. $ rcp *.c bravo:archives The next example copies memo from the /home/jenny directory on bravo to the working directory on the local system: $ rcp bravo:/home/jenny/memo . Next rcp copies the files named memo.new and letter to Jenny's home directory on the remote system bravo. The absolute pathnames of the copied files on bravo are /home/jenny/memo.new and /home/jenny/letter: $ rcp memo.new letter bravo:/home/jenny The final command copies all the files in Jenny's reports directory on bravo to the oldreports directory on the local system, preserving the original modification dates and file access permissions on the copies: $ rcp -p 'bravo:reports/*' oldreports rlogin: Logs in on a remote systemrlogin [option] remote-system The rlogin utility establishes a login session on a remote system over a network. security: rlogin is not secure The rlogin utility uses host-based trust, which is not secure, to authorize your login. Alternatively, it sends your password over the network as cleartext, which is not a secure practice. Use ssh (page 773) when it is available. ArgumentsThe remote-system is the name of a system that the local system can reach over a network. Options
NotesIf the file named /etc/hosts.equiv located on the remote system specifies the name of the local system, the remote system will not prompt you to enter your password. Systems that are listed in the /etc/hosts.equiv file are considered as secure as the local system. An alternative way to specify a trusted relationship is on a per-user basis. Each user's home directory can contain a file named ~/.rhosts that holds a list of trusted remote systems and users. See "Examples" for a sample .rhosts file. ExamplesThe following example illustrates the use of rlogin. On the local system, Alex's username is alex; on the remote system bravo, his username is watson. The remote system prompts Alex to enter a password because he is logging in using a username different from the one he uses on the local system. $ who am i alex tty06 Oct 14 13:26 $ rlogin -l watson bravo Password: ~/.rhosts fileIf the local system is named hurrah, the following .rhosts file on bravo allows the user alex to log in as the user watson without entering a password: $ cat /home/watson/.rhosts hurrah alex rm: Removes a file (deletes a link)rm [options] file-list The rm utility removes hard and/or symbolic links to one or more files. When you remove the last hard link to a file, the file is deleted. caution: Be careful when you use rm with wildcards Because you can remove a large number of files with a single command, use rm cautiously, especially when you are working with ambiguous file references. If you have doubts about the effect of an rm command with an ambiguous file reference, first use echo with the same file reference and evaluate the list of files the reference generates. Alternatively, you can use the interactive option. ArgumentsThe file-list is a list of the list of files that rm deletes. OptionsAccepts the common options described on page 587.
NotesTo delete a file, you must have execute and write access permission to the parent directory of the file, but you do not need read or write access permission to the file itself. If you are running rm interactively (that is, if rm's standard input is coming from the keyboard) and you do not have write access permission to the file, rm displays your access permission and waits for you to respond. If your response starts with a y or Y, rm deletes the file; otherwise, it takes no action. If standard input is not coming from a keyboard, rm deletes the file without question. Refer to page 97 for information on hard links and page 99 for information on symbolic links. Page 101 includes a discussion about removing links. Refer to the rmdir utility (page 755) if you need to remove an empty directory. When you want to remove a file that begins with a hyphen, you must prevent rm from interpreting the filename as an option. One way to do so is to give the special option before the name of the file. This option tells rm that no more options follow: Any arguments that come after it are filenames, even if they look like options. security: Use shred to remove a file securely Using rm does not securely delete a file it is possible to recover a file deleted with rm. Use the shred utility to delete files more securely. See the example "Wiping a file" on page 634 for another method of deleting files more securely. ExamplesThe following commands delete files both in the working directory and in another directory: $ rm memo $ rm letter memo1 memo2 $ rm /home/jenny/temp The next example asks the user before removing each file in the working directory and its subdirectories: $ rm -ir . This command is useful for removing filenames that contain special characters, especially SPACEs, TABs, and NEWLINE s. (You should not create filenames containing these characters on purpose, but it may happen accidentally.) rmdir: Removes a directoryrmdir directory-list The rmdir utility deletes empty directories. ArgumentsThe directory-list is a list of pathnames of empty directories that rmdir removes. OptionsAccepts the common options described on page 587. ignore-fail-on-non-empty
NotesUse the rm utility with the r option if you need to remove directories that are not empty, together with their contents. ExamplesThe following command deletes the empty literature directory from the working directory: $ rmdir literature The next command removes the letters directory, using an absolute pathname: $ rmdir /home/jenny/letters The final command removes the letters, march, and 05 directories, assuming the directories are empty except for other directories named in the path: $ rmdir --parents letters/march/05 rsh: Executes commands on a remote systemrsh [option] host [command-line] The rsh utility runs command-line on host by starting a shell on the remote system. Without a command-line rsh calls rlogin, which logs you in on the remote system. security: rsh is not secure The rsh utility uses host-based trust, which is not secure, to authorize your login. Alternatively, it sends your password over the network as cleartext, which is not a secure practice. Use ssh (page 773) when it is available. ArgumentsThe host is the name of the remote system. The rsh utility runs command-line on the remote system. You must quote special characters in command-line so that they are not expanded by the local shell prior to passing them to rsh. Options
NotesIf the file named /etc/hosts.equiv located on the remote system specifies the name of the local system, the remote system will not prompt you to enter your password. Systems that are listed in the /etc/hosts.equiv file are considered as secure as the local system. An alternative way to specify a trusted relationship is on a per-user basis. Each user's home directory can contain a file named ~/.rhosts that holds a list of trusted remote systems and users. See "Examples" under rlogin (page 752) for a sample .rhosts file. ExamplesIn the first example, Alex uses rsh to obtain a listing of the files in his home directory on bravo: $ rsh bravo ls cost_of_living info preferences work Next the output of the previous command is redirected into the file bravo.ls. Because the redirection character (>) is not escaped, it is interpreted by the local shell, and the file bravo.ls is created on the local system. $ rsh bravo ls > bravo_ls $ cat bravo_ls cost_of_living info preferences work The next example quotes the redirection character (>) so that the file bravo.ls is created on the remote system (bravo), as shown by ls run on bravo: $ rsh bravo ls ">" bravo.ls $ rsh bravo ls bravo.ls cost_of_living info preferences work In the final example, rsh without command-line logs in on the remote system. Alex has used the l watson option to log in on bravo as watson. The /home/watson/.rhosts file must be configured to allow Alex to log in on the account in this manner. See "Examples" under rlogin (page 752) for a sample .rhosts file. $ rsh -l watson bravo Last login: Sat Jul 30 16:13:53 from kudos $ hostname bravo $ exit rlogin: connection closed. scp: Securely copies one or more files to or from a remote systemscp [[user@]from-host:]source-file [[user@]to-host:][destination-file] The scp (secure copy) utility copies an ordinary or directory file from one system to another on a network. This utility uses ssh to transfer files and the same authentication mechanism as ssh; therefore it provides the same security as ssh. The scp utility asks you for a password when it is needed. ArgumentsThe from-host is the name of the system you are copying files from and the to-host is the system you are copying to. When you do not specify a host, scp assumes the local system. The user on either system defaults to the user on the local system who is giving the command; you can specify a different user with user@. The scp utility permits you to copy between two remote systems. The source-file is the file you are copying, and the destination-file is the resulting copy. You can specify plain or directory files as relative or absolute pathnames. A relative pathname is relative to the specified or implicit user's home directory. When the source-file is a directory, you must use the r option to copy its contents. When the destination-file is a directory, each of the source files maintains its simple filename. Options
NotesThe scp utility is one of the OpenSSH suite of secure network connectivity tools. See "Notes" on page 774 for a discussion of OpenSSH security. Refer to "Message on initial connection to a server" on page 774 for information about a message you may get when using scp to connect to a remote system for the first time. You can copy from or to the local system or between two remote systems. Make sure that you have read permission for the file you are copying and write permission for the directory you are copying it into. You must quote a wildcard character (such as *) in a remote pathname so that it is interpreted by the shell on the remote system and not by the local shell. As with cp, if the destination-file exists before you run scp, scp overwrites the file. ExamplesThe first example copies the files with filenames ending in .c from the working directory on the local system into the ~jenny/archives directory on bravo. The wildcard character is not quoted so that the local shell will expand it. Because archives is a relative pathname, scp assumes that it is a subdirectory of Jenny's home directory on bravo. Each of the copied files retains its simple filename. $ scp *.c jenny@bravo:archives Next Alex copies the directory structure under ~alex/memos on the system named bravo to ~jenny/alex.memos.bravo on kudos. He must have the necessary permissions to write to Jenny's home directory on kudos. $ scp -r bravo:memos jenny@kudos:alex.memos.bravo Finally Alex copies the files with filenames ending in .c from Jenny's archives directory on bravo to the jenny.c.bravo directory in his working directory. The wildcard character is quoted to protect it from expansion by the local shell; it will be interpreted by the remote system, bravo. $ scp -r 'jenny@bravo:archives/*.c' jenny.c.bravo It is important to remember that whenever you copy multiple files or directories, the destination either local or remote must be an existing directory and not an ordinary or nonexistent file. sleep: Creates a process that sleeps for a specified intervalsleep time sleep time-list The sleep utility causes the process executing it to go to sleep for the time specified. ArgumentsTraditionally the amount of time that a process sleeps is given as a single integer argument, time, which denotes a number of seconds. The time does not have to be an integer, however: You can specify a decimal fraction. You can also append a unit specification to time: s (seconds), m (minutes), h (hours), and d (days). You can construct a time-list by including several times on the command line: The total time that the process sleeps is the sum of these times. For example, if you specify 1h 30m 100s, the process will sleep for 91 minutes and 40 seconds. ExamplesYou can use sleep from the command line to execute a command after a period of time. The following example executes in the background a process that reminds you to make a phone call in 20 minutes (1,200 seconds): $ (sleep 1200; echo "Remember to make call.") & [1] 4660 Alternatively, you could give the following command to get the same reminder: $ (sleep 20m; echo "Remember to make call.") & [2] 4667 You can also use sleep within a shell script to execute a command at regular intervals. The per shell script executes a program named update every 90 seconds: $ cat per #!/bin/bash while true do update sleep 90 done If you execute a shell script such as per in the background, you can terminate it only by using kill. The final shell script accepts the name of a file as an argument and waits for that file to appear on the disk. If the file does not exist, the script sleeps for 1 minute and 45 seconds before checking for the file again: $ cat wait_for_file #!/bin/bash if [ $# != 1 ]; then echo "Usage: wait_for_file filename" exit 1 fi while true do if [ -f "$1" ]; then echo "$1 is here now" exit 0 fi sleep 1m 45 done sort: Sorts and/or merges filessort [options] [file-list] The sort utility sorts and/or merges one or more text files. ArgumentsThe file-list is a list of pathnames of one or more ordinary files that contain the text to be sorted. If the file-list is omitted, sort takes its input from standard input. Without the o option sort sends its output to standard output. This utility sorts and merges files unless you use the m (merge only) or c (check only) option. OptionsWhen you do not specify an option, sort orders the file in the machine collating sequence (usually ASCII). Without a key option sort orders a file based on full lines. Use key to specify sort fields within a line. You can follow a key option with additional options without a leading hyphen; see "Discussion" for more information. ignore-leading-blanks
dictionary-order
ignore-nonprinting
key=start[,stop]
output=filename
field-separator=x
DiscussionWithout any options sort bases its ordering on full lines. In the following description, a field is a sequence of characters in a line of input. Without the field-separator option, fields are bounded by the empty string preceding a group of one or more blanks (TAB and SPACE characters). You cannot see the empty string that delimits the fields; it is an imaginary point between two fields. Fields are also bounded by the beginning and end of the line. The line shown in Figure 0-1 holds the fields Toni, SPACEBarnett, and SPACESPACESPACESPACE55020. These fields are used to define sort fields. Sometime fields and sort fields are the same. Sort fieldA sort field is a sequence of characters that sort uses to put lines in order. A sort field can contain all or part of one or more fields (Figure V-1). Figure V-1. Fields and sort fields
The key option specifies pairs of pointers that define subsections of each line (sort fields) for comparison. See the key option (page 763) for details. Leading blanksThe b option causes sort to ignore leading blanks in a sort field. If you do not use this option, sort considers each leading blank to be a character in the sort field and includes it in the sort comparison. OptionsYou can specify options that pertain only to a given sort field by immediately following the stop pointer (or the start pointer if there is no stop pointer) with one of the options b, d, f, i, n, or r. In this case you must not precede the option with a hyphen. Multiple sort fieldsWhen you specify more than one sort field, sort examines them in the order you specify them on the command line. If the first sort field of two lines is the same, sort examines the second sort field. If these are again the same, sort looks at the third field. This process continues for all the sort fields you specify. If all the sort fields are the same, sort examines the entire line. ExamplesThe examples in this section demonstrate some of the features and uses of the sort utility. The examples assume that the list file shown here is in the working directory: $ cat list Tom Winstrom 94201 Janet Dempsey 94111 Alice MacLeod 94114 David Mack 94114 Toni Barnett 95020 Jack Cooper 94072 Richard MacDonald 95510 This file contains a list of names and ZIP codes. Each line of the file contains three fields: the first name field, the last name field, and the ZIP code field. For the examples to work, make sure the blanks in the file are SPACE s, and not TABs. The first example demonstrates sort without any options the only argument is the name of the input file. In this case sort orders the file on a line-by-line basis. If the first characters on two lines are the same, sort looks at the second characters to determine the proper order. If the second characters are the same, sort looks at the third characters. This process continues until sort finds a character that differs between the lines. If the lines are identical, it does not matter which one sort puts first. In this example, sort needs to examine only the first three characters (at most) of each line. The sort utility displays a list that is in alphabetical order by first name. $ sort list Alice MacLeod 94114 David Mack 94114 Jack Cooper 94072 Janet Dempsey 94111 Richard MacDonald 95510 Tom Winstrom 94201 Toni Barnett 95020 You can instruct sort to skip any number of fields and characters on a line before beginning its comparison. Blanks normally mark the beginning of a field. The next example sorts the same list by last name, the second field. The key=2 argument instructs sort to begin its comparison with the second field, the last name. Because there is no second pointer, the sort field extends to the end of the line. Now the list is almost in last-name order, but there is a problem with Mac. $ sort --key=2 list Toni Barnett 95020 Jack Cooper 94072 Janet Dempsey 94111 Richard MacDonald 95510 Alice MacLeod 94114 David Mack 94114 Tom Winstrom 94201 In the preceding example, MacLeod comes before Mack. After finding that the sort fields of these two lines were the same through the third letter (Mac), sort put L before k because it arranges lines based on ASCII character codes, in which uppercase letters come before lowercase ones. The ignore-case option makes sort treat uppercase and lowercase letters as equals and fixes the problem with MacLeod and Mack: $ sort --ignore-case --key=2 list Toni Barnett 95020 Jack Cooper 94072 Janet Dempsey 94111 Richard MacDonald 95510 David Mack 94114 Alice MacLeod 94114 Tom Winstrom 94201 The next example attempts to sort list on the third field, the ZIP code. In this case sort does not put the numbers in order but rather puts the shortest name first in the sorted list and the longest name last. The key=3 argument instructs sort to begin its comparison with the third field, the ZIP code. A field starts with a blank and includes subsequent blanks. In the case of the list file, the blanks are SPACEs. The ASCII value of a SPACE character is less than that of any other printable character, so sort puts the ZIP code that is preceded by the most SPACEs first and the ZIP code that is preceded by the fewest SPACEs last. $ sort --key=3 list David Mack 94114 Jack Cooper 94072 Tom Winstrom 94201 Toni Barnett 95020 Janet Dempsey 94111 Alice MacLeod 94114 Richard MacDonald 95510 The b ( ignore-leading-blanks) option causes sort to ignore leading SPACEs within a field. With this option, the ZIP codes come out in the proper order. When sort determines that MacLeod and Mack have the same ZIP codes, it compares the entire lines, putting Alice MacLeod before David Mack (because A comes before D). $ sort -b --key=3 list Jack Cooper 94072 Janet Dempsey 94111 Alice MacLeod 94114 David Mack 94114 Tom Winstrom 94201 Toni Barnett 95020 Richard MacDonald 95510 To sort alphabetically by last name when ZIP codes are the same, sort needs to make a second pass that sorts on the last name field. The next example shows how to make this second pass by specifying a second sort field and uses the f ( ignore-case) option to keep the Mack/MacLeod problem from cropping up again: $ sort -b -f --key=3 --key=2 list Jack Cooper 94072 Janet Dempsey 94111 David Mack 94114 Alice MacLeod 94114 Tom Winstrom 94201 Toni Barnett 95020 Richard MacDonald 95510 The next example shows a sort command that skips not only fields but also characters. The k 3.4 option (equivalent to key=3.4) causes sort to start its comparison with the fourth character of the third field. Because the command does not define an end to the sort field, it defaults to the end of the line. The sort field is the last two digits in the ZIP code. $ sort -fb -k 3.4 list Tom Winstrom 94201 Richard MacDonald 95510 Janet Dempsey 94111 Alice MacLeod 94114 David Mack 94114 Toni Barnett 95020 Jack Cooper 94072 The problem of how to sort by last name within the last two digits of the ZIP code is solved by a second pass covering the last-name field. The f option following the k 2 affects the second pass, which orders by last name only. $ sort -b -k 3.4 -k 2f list Tom Winstrom 94201 Richard MacDonald 95510 Janet Dempsey 94111 David Mack 94114 Alice MacLeod 94114 Toni Barnett 95020 Jack Cooper 94072 The next set of examples uses the cars data file. From left to right the columns in the file contain each car's make, model, year of manufacture, mileage, and price: $ cat cars plym fury 1970 73 2500 chevy malibu 1999 60 3000 ford mustang 1965 45 10000 volvo s80 1998 102 9850 ford thundbd 2003 15 10500 chevy malibu 2000 50 3500 bmw 325i 1985 115 450 honda accord 2001 30 6000 ford taurus 2004 10 17000 toyota rav4 2002 180 750 chevy impala 1985 85 1550 ford explor 2003 25 9500 Without any options sort displays a sorted copy of the file: $ sort cars bmw 325i 1985 115 450 chevy impala 1985 85 1550 chevy malibu 1999 60 3000 chevy malibu 2000 50 3500 ford explor 2003 25 9500 ford mustang 1965 45 10000 ford taurus 2004 10 17000 ford thundbd 2003 15 10500 honda accord 2001 30 6000 plym fury 1970 73 2500 toyota rav4 2002 180 750 volvo s80 1998 102 9850 The objective of the next example is to sort by manufacturer and by price within manufacturer. Unless you specify otherwise, a sort field extends to the end of the line. The k 1 sort field specifier sorts from the beginning of the line. The command line instructs sort to sort on the entire line and then make a second pass, sorting on the fifth field all lines whose first-pass sort fields were the same ( k 5): $ sort -k 1 -k 5 cars bmw 325i 1985 115 450 chevy impala 1985 85 1550 chevy malibu 1999 60 3000 chevy malibu 2000 50 3500 ford explor 2003 25 9500 ford mustang 1965 45 10000 ford taurus 2004 10 17000 ford thundbd 2003 15 10500 honda accord 2001 30 6000 plym fury 1970 73 2500 toyota rav4 2002 180 750 volvo s80 1998 102 9850 Because no two lines are the same, sort makes only one pass, sorting on each entire line. (If two lines differed only in the fifth field, they would be sorted properly on the first pass anyway, so the second pass would be unnecessary.) Look at the lines containing taurus and thundbd. They are sorted by the second field rather than the fifth, demonstrating that sort never made a second pass and so never sorted on the fifth field. The next example forces the first-pass sort to stop at the end of the first field. The k 1,1 option specifies a start pointer of the first character of the first field and a stop pointer of the last character of the first field. When you do not specify a character within a start pointer, it defaults to the first character; when you do not specify a character within a stop pointer, it defaults to the last character. Now the taurus and thundbd are properly sorted by price. But look at the explor: It is less expensive than the other Fords, but sort has it positioned as the most expensive. The sort utility put the list in ASCII collating sequence order, not in numeric order: Thus 9500 comes after 10000 because 9 comes after 1. $ sort -k 1,1 -k 5 cars bmw 325i 1985 115 450 chevy impala 1985 85 1550 chevy malibu 1999 60 3000 chevy malibu 2000 50 3500 ford mustang 1965 45 10000 ford thundbd 2003 15 10500 ford taurus 2004 10 17000 ford explor 2003 25 9500 honda accord 2001 30 6000 plym fury 1970 73 2500 toyota rav4 2002 180 750 volvo s80 1998 102 9850 The n (numeric) option on the second pass puts the list in the proper order: $ sort -k 1,1 -k 5n cars bmw 325i 1985 115 450 chevy impala 1985 85 1550 chevy malibu 1999 60 3000 chevy malibu 2000 50 3500 ford explor 2003 25 9500 ford mustang 1965 45 10000 ford thundbd 2003 15 10500 ford taurus 2004 10 17000 honda accord 2001 30 6000 plym fury 1970 73 2500 toyota rav4 2002 180 750 volvo s80 1998 102 9850 The next example again demonstrates that, unless you instruct it otherwise, sort orders a file starting with the field you specify and continuing to the end of the line. It does not make a second pass unless two of the first sort fields are the same. Because there is no stop pointer on the first sort field specifier, the sort field for the first pass includes the third field through the end of the line. Although this example sorts the cars by years, it does not sort the cars by model within manufacturer within years (ford thndbd comes before ford explor, these lines should be reversed). $ sort -k 3 -k 1 cars ford mustang 1965 45 10000 plym fury 1970 73 2500 bmw 325i 1985 115 450 chevy impala 1985 85 1550 volvo s80 1998 102 9850 chevy malibu 1999 60 3000 chevy malibu 2000 50 3500 honda accord 2001 30 6000 toyota rav4 2002 180 750 ford thundbd 2003 15 10500 ford explor 2003 25 9500 ford taurus 2004 10 17000 Specifying an end to the sort field for the first pass allows sort to perform its secondary sort properly: $ sort -k 3,3 -k 1 cars ford mustang 1965 45 10000 plym fury 1970 73 2500 bmw 325i 1985 115 450 chevy impala 1985 85 1550 volvo s80 1998 102 9850 chevy malibu 1999 60 3000 chevy malibu 2000 50 3500 honda accord 2001 30 6000 toyota rav4 2002 180 750 ford explor 2003 25 9500 ford thundbd 2003 15 10500 ford taurus 2004 10 17000 The next examples demonstrate important sorting techniques: putting a list in alphabetical order, merging uppercase and lowercase entries, and eliminating duplicates. The unsorted list follows: $ cat short Pear Pear apple pear Apple Following is a plain sort: $ sort short Apple Pear Pear apple pear The following folded sort is a good start, but it does not eliminate duplicates: $ sort -f short Apple apple Pear Pear pear The u (unique) option eliminates duplicates but without the f the uppercase entries come first: $ sort -u short Apple Pear apple pear When you attempt to use both u and f, some of the entries get lost: $ sort -uf short apple Pear Two passes is the answer. Both passes are unique sorts, and the first folds lowercase letters onto uppercase ones: $ sort -u -k 1f -k 1 short Apple apple Pear pear split: Divides a file into sectionssplit [options] [filename [prefix]] The split utility breaks its input into 1000-line sections named xaa, xab, xac, and so on. The last section may be shorter. Options can change the sizes of the sections and lengths of the names. ArgumentsThe filename is the pathname of the file that split processes. If you do not specify an argument or if you specify a hyphen ( ) instead of the filename, split reads from standard input. The prefix is one or more characters that split uses to prefix the names of the files it creates. The default prefix is x. OptionsAccepts the common options described on page 587. suffix-length=len
numeric-suffixes
DiscussionBy default split names the first file it creates xaa. The x is the default prefix. You can change the prefix with the prefix argument on the command line. You can change the number of characters in each filename following the prefix with the suffix-length option. ExamplesBy default split breaks a file into 1,000-line sections with the names xaa, xab, xac, and so on. The wc utility with the l option shows the number of lines in each file. The last file, xar, is smaller than the rest. $ split /etc/termcap $ wc -l * 1000 xaa 1000 xab 1000 xac ... 1000 xap 1000 xaq 103 xar 17103 total The next example uses the prefix argument to specify a filename prefix of SEC and uses suffix-length to change the number of letters in the filename suffix to 3: $ split --suffix-length=3 /etc/termcap SEC $ ls SECaaa SECaac SECaae SECaag SECaai SECaak SECaam SECaao SECaaq SECaab SECaad SECaaf SECaah SECaaj SECaal SECaan SECaap SECaar ssh: Securely executes commands on a remote systemssh [option] [user@]host [command-line] The ssh utility runs command-line on host by starting a shell on the remote system or logs you in on host. The ssh utility, which can replace rsh and rlogin, provides secure, encrypted communication between two systems on an insecure network. ArgumentsThe host is the system that you want to log in or run a command on. Unless you have one of several kinds of authentication established, ssh prompts you for a username and password for the remote system. When ssh is able to log in automatically, it logs in as the user running the ssh command or as user if user@ appears on the ssh command line. The command-line runs on the remote system. Without command-line, ssh logs you in on the remote system. You must quote special characters in command-line if you do not want them expanded by the local shell. Options
NotesOpenSSHUsing public-key encryption, OpenSSH provides two levels of authentication: server and client/user. First, the client (ssh or scp) verifies that it is connected to the correct server and OpenSSH encrypts communication between the client and server. Second, once a secure, encrypted connection has been established, OpenSSH confirms that the user is authorized to log in on or copy files from/to the server. Once the system and user have been verified, OpenSSH allows different services to pass through the connection. These services include interactive shell sessions (ssh), remote command execution (ssh and scp), X11 client/server connections, and TCP/IP port tunneling. Message on initial connection to a serverWhen you connect to an OpenSSH server for the first time, the OpenSSH client prompts you to confirm that you are connected to the correct system. This checking can help prevent a person-in-the-middle attack. The authenticity of host 'grape (192.168.0.3)' can't be established. RSA key fingerprint is c9:03:c1:9d:c2:91:55:50:e8:19:2b:f4:36:ef:73:78. Are you sure you want to continue connecting (yes/no)? yes Warning: Permanently added 'grape,192.168.0.3' (RSA) to the list of known hosts. Before you respond to the preceding query, verify that you are logging in on the correct system and not an imposter. If you are not sure, a telephone call to someone who logs in on that system locally can verify that you are on the intended system. When you answer yes (you must spell it out ), the client appends the server's public host key to the user's ~/.ssh/known_hosts file on the local system, creating the ~/.ssh directory if necessary. So that it can keep track of which line in known_hosts applies to which server, OpenSSH prepends the name of the server and the server's IP address to the line. Subsequently, when you use OpenSSH to connect to that server, the client verifies that it is connected to the correct server by comparing this key to the one supplied by the server. ExamplesIn the first example, Alex uses ssh to display a list of the files in his home directory on kudos: $ ssh kudos ls alex@kudos's password: Work code graphs reports Next the output of the previous command is redirected to the file kudos_ls. Because the redirection character (>) is not escaped, it is interpreted by the local shell, and the file kudos_ls is created on the local system. $ ssh kudos ls > kudos_ls alex@kudos's password: $ cat kudos_ls Work code graphs reports The next example quotes the entire command that will run on the remote system. As a result, the local shell does not interpret the redirection character (>) but rather passes it to the remote shell. The file kudos.ls is created on the remote system (kudos), as shown by ls run on kudos: $ ssh kudos "ls > kudos.ls" alex@kudos's password: $ ssh kudos ls alex@kudos's password: Work code graphs kudos.ls reports The next command does not quote the pipe symbol (|). As a result the pipe is interpreted by the local shell, which sends the output of the remote ls to standard input of less on the local system: $ ssh kudos ls | less Next ssh executes a series of commands, connected with pipes, on a remote system. The commands are enclosed within single quotation marks so that the local shell does not interpret the pipe symbols and all the commands are run on the remote system. $ ssh kudos 'ps -ef | grep nmbd | grep -v grep | cut -c10-15 |xargs kill -1' The output of ps is piped through grep, which passes all lines containing the string nmbd to another invocation of grep. The second grep passes all lines not containing the string grep to cut (page 627). The cut utility extracts the process ID numbers and passes them to xargs (page 821), which kills the listed processes with a HUP signal (kill 1). In the following example, ssh without command-line logs in on the remote system. Here Alex has used watson@kudos to log in on kudos as watson: $ ssh watson@kudos watson@kudos's password: Last login: Sat Sep 17 06:51:59 from bravo $ hostname kudos $ exit Alex now decides to change the password for his watson login on kudos. $ ssh watson@kudos passwd watson@kudos's password: (current) UNIX password: por Alex stops as soon as he sees passwd (running on kudos) displaying his password: He knows that something is wrong. For the passwd to work, it must run with a tty (terminal) so that it can turn off character echo (stty echo) and thus not display passwords as the user enters them. The t option solves the problem by associating a pseudo-tty with the process running passwd on the remote system: $ ssh -t watson@kudos passwd watson@kudos's password: Changing password for watson (current) UNIX password: New UNIX password: Retype new UNIX password: passwd: all authentication tokens updated successfully Connection to kudos closed. $ The t option is also useful when you are running a program that uses a character-based/pseudographical interface. The following example uses tar (page 786) to create an archive file of the contents of the working directory hierarchy. The f option causes tar to send its output to standard output. A pipe sends the output of tar running on the local system, via ssh, to dd (page 633) running on the remote system. $ cat buwd #! /bin/bash # back up the working directory to the user's # home directory on the remote system specified # by $machine # remote system: machine=speedy dir=$(basename $(pwd)) filename=$$.$dir.tar echo Backing up $(pwd) to your home directory on $machine tar -cf - . | ssh $machine "dd obs=256k of=$filename" echo done. Name of file on $machine is $filename strings: Displays strings of printable charactersstrings [options] file-list The strings utility displays strings of printable characters from object and other nontext files. ArgumentsThe file-list is a list of files that strings processes. Options
print-file-name
DiscussionThe strings utility can help you determine the contents of nontext files. One application for strings is determining the owner of files in a lost+found directory. ExamplesThe following example displays the strings of four or more printable characters in the executable file for the man utility. If you did not know what this file was, these strings could help you determine that it was the man executable. $ strings /usr/bin/man ... man: internal error - cannot find message %d /unsafe/ my_xsprintf called with %s Error parsing config file No manual entry for %s using %s as pager %s, version %s found man directory %s found manpath map %s --> %s corresponding catdir is %s Line too long in config file section: %s ... stty: Displays or sets terminal parametersstty [options] [arguments] Without any arguments, stty displays certain parameters affecting the operation of the terminal/terminal emulator. For a list of some of these parameters and an explanation of each, see "Arguments." The arguments establish or change parameters. OptionsAccepts the common options described on page 587.
file=/dev/device
ArgumentsThe arguments to stty specify which terminal parameters stty is to alter. Turn on each of the parameters that is preceded by an optional hyphen (indicated in the following list as [ ]) by specifying the parameter without the hyphen. Turn it off by using the hyphen. Unless specified otherwise, this section describes the parameters in their on states. Special Keys and Characteristics
Modes of Data Transmission
Treatment of Characters
Job Control Parameters
NotesThe name stty is an abbreviation for set teletypewriter, or set tty (page 807), the first terminal that UNIX was run on. Today stty is commonly thought of as set terminal. The shells retain some control over standard input when you use them interactively. As a consequence a number of the options available with stty appear to have no effect. For example, the command stty echo appears to have no effect under tcsh: tcsh $ stty -echo tcsh $ date Fri Feb 18 21:21:14 PST 2005 While stty echo does work when you are using bash interactively, stty echoe does not. However, you can still use these options to affect shell scripts and other utilities. $ cat testit #!/bin/bash stty -echo echo -n "Enter a value: " read a echo echo "You entered: $a" stty echo $ testit Enter a value: You entered: 77 In the preceding example, the kernel does not display the user's response to the Enter a value: prompt. The value is retained by the a variable and is displayed by the echo "You entered: $a" statement. ExamplesThe first example shows that stty without any arguments displays several terminal operation parameters. (Your system may display more or different parameters.) The character following the erase = is the erase key. A ^ preceding a character indicates a CONTROL key. In the example the erase key is set to CONTROL-H. If stty does not display the erase character, it is set to its default value of DELETE . If you do not see a kill character, it is set to its default of ^U. $ stty speed 38400 baud; line = 0; erase = ^H; Next the ek argument returns the erase and line kill keys to their default values: $ stty ek The next display verifies the change. The stty utility does not display either the erase character or the line kill character, indicating that both are set to their default values: $ stty speed 38400 baud; line = 0; The next example sets the erase key to CONTROL-H. The CONTROL-V quotes the CONTROL-H so that the shell does not interpret it and it is passed to stty: $ stty erase CONTROL V CONTROL H $ stty speed 38400 baud; line = 0; erase = ^H; Next stty sets the line kill key to CONTROL-X. This time the user entered a caret (^) followed by an x to represent CONTROL-X. You can use either a lowercase or uppercase letter. $ stty kill ^X $ stty speed 38400 baud; line = 0; erase = ^H; kill = ^X; Now stty changes the interrupt key to CONTROL-C: $ stty intr CONTROL V CONTROL C In the following example, stty turns off TABs so that the appropriate number of SPACEs is sent to the terminal in place of a TAB. Use this command if a terminal does not automatically expand TABs. $ stty -tabs If you log in and everything appears on the terminal in uppercase letters, give the following command and then check the CAPS LOCK key. If it is set, turn it off: $ STTY -LCASE Turn on lcase if you are using a very old terminal that cannot display lowercase characters. Although no one usually changes the suspend key from its default of CONTROL-Z, you can. Give the following command to change the suspend key to CONTROL-T: $ stty susp ^T tail: Displays the last part (tail) of a filetail [options] [file-list] The tail utility displays the last part, or end, of a file. ArgumentsThe file-list is a list of pathnames of the files that tail displays. When you specify more than one file, tail displays the filename of each file before displaying the lines of the file. If you do not specify an argument or if you specify a hyphen ( ) instead of a filename, tail reads from standard input. OptionsAccepts the common options described on page 587. bytes=[+]n[u]
sleep-interval=n
NotesThe tail utility displays the last ten lines of its input by default. ExamplesThe examples are based on the eleven file: $ cat eleven line one line two line three line four line five line six line seven line eight line nine line ten line eleven First tail displays the last ten lines of the eleven file (no options): $ tail eleven line two line three line four line five line six line seven line eight line nine line ten line eleven Next it displays the last three lines ( lines 3) of the file: $ tail --lines 3 eleven line nine line ten line eleven The following example displays the file starting at line 8 (+8): $ tail -n +8 eleven line eight line nine line ten line eleven The next example displays the last six characters in the file ( bytes 6). Only five characters are evident (leven); the sixth is a NEWLINE. $ tail --bytes 6 eleven leven The final example demonstrates the f option. Here tail tracks the output of a make command, which is being sent to the file accounts.out: $ make accounts > accounts.out & $ tail -f accounts.out cc -c trans.c cc -c reports.c ... CONTROL-C $ In the preceding example, using tail with f has the same effect as running make in the foreground and letting its output go to the terminal. However, using tail offers some advantages. First, the output of make is saved in a file. (The output would not be saved if you let it go to the terminal.) Second, if you decide to do something else while make is running, you can kill tail and the screen will be free for you to use while make continues in the background. When you are running a large job, such as compiling a large program, you can use tail with the f option to check on its progress periodically. tar: Stores or retrieves files to/from an archive filetar option [modifiers] [file-list] The tar (tape archive) utility creates, adds to, lists, and retrieves files from an archive file. ArgumentsThe file-list is a list of pathnames of the files that tar archives or extracts. OptionsUse only one of the following options to indicate what type of action you want tar to take. You can alter the action of the option by following it with one or more modifiers.
ModifiersYou can specify one or more modifiers following an option. If you use the single-character form of the modifier, a leading hyphen is not required. In general, it is a good practice to use the hyphen unless you combine the modifier with other single-character modifiers. If a modifier takes an argument, that modifier must be the last one in a group. For example, the arguments are arranged legally in the following tar command: $ tar -cb 10 -f /dev/ftape memos Conversely, the following tar command generates an error: $ tar -cbf 10 /dev/ftape memos tar: f: Invalid blocking factor Try 'tar --help' for more information. The error occurs because the b modifier takes an argument but is not the last modifier in a group. blocking-factor=n
ignore-failed-read
one-file-system
tape length=n
absolute-paths
exclude-from=filename
NotesThe help option displays all the tar options and modifiers. The info page on tar provides extensive information, including a tutorial. You can use ambiguous file references in file-list when you create an archive but not when you extract files from an archive. The name of a directory file within the file-list references all files and subdirectories within that directory. The file that tar sends its output to by default is compilation specific; typically it goes to standard output. Use the f option to specify a different filename or device to hold the archive. When you create an archive using a simple filename in file-list, the file appears in the working directory when you extract it. If you use a relative pathname when you create an archive, the file appears with that relative pathname, starting from the working directory when you extract it. If you use the P option and an absolute pathname when you create an archive, tar extracts the file with the same pathname. ExamplesThe following example makes a copy of the /home/alex directory hierarchy on a floppy tape device. The v modifier causes the command to list the files it writes to the tape. This command erases anything that was already on the tape. The message from tar explains that the default action is to store all pathnames as relative paths instead of absolute paths, thereby allowing you to extract the files into a different directory on the disk. $ tar -cvf /dev/ftape /home/alex tar: Removing leading '/' from member names. home/alex/ home/alex/.bash_history home/alex/.bash_profile ... In the next example, the same directory is saved on the tape device /dev/st0 with a blocking factor of 100. Without the v modifier, tar does not display the list of files it is writing to the tape. The command runs in the background and displays any messages after the shell issues a new prompt. $ tar -cb 100 -f /dev/st0 /home/alex & [1] 4298 $ tar: Removing leading '/' from member names. The next command displays the table of contents of the archive on tape device /dev/ftape: $ tar -tvf /dev/ftape drwxrwxrwx alex/group 0 Jun 30 21:39 2004 home/alex/ -rw-r--r-- alex/group 678 Aug 6 14:12 2005 home/alex/.bash_history -rw-r--r-- alex/group 571 Aug 6 14:06 2005 home/alex/.bash_profile drwx------ alex/group 0 Nov 6 22:34 2005 home/alex/mail/ -rw------- alex/group 2799 Nov 6 22:34 2005 home/alex/mail/sent-mail ... In the last example, Alex creates a gzipped tar archive in /tmp/alex.tgz. This approach is a popular way to bundle files that you want to transfer over a network or otherwise share with others. Ending a filename with .tgz is one convention for identifying gzipped tar archives. Another convention is to end the filename with .tar.z. $ tar -czf /tmp/alex.tgz literature The next command lists the files in the compressed archive alex.tgz: $ tar -tzvf /tmp/alex.tgz ... tee: Copies standard input to standard output and one or more filestee [options] file-list The tee utility copies standard input to standard output and to one or more files. ArgumentsThe file-list is a list of the pathnames of files that receive output from tee. OptionsWithout any options, tee overwrites the output files if they exist and responds to interrupts. If a file in file-list does not exist, tee creates it.
ignore-interrupts
ExamplesIn the following example, a pipe sends the output from make to tee, which copies it to standard output and the file accounts.out. The copy that goes to standard output appears on the screen. The cat utility displays the copy that was sent to the file: $ make accounts | tee accounts.out cc -c trans.c cc -c reports.c ... $ cat accounts.out cc -c trans.c cc -c reports.c ... Refer to page 787 for a similar example that uses tail f rather than tee. telnet: Connects to a remote system over a networktelnet [options] [remote-system] The telnet utility implements the TELNET protocol to connect to a remote system over a network. security: telnet is not secure The telnet utility is not secure. It sends your username and password over the network as cleartext, which is not a secure practice. Use ssh (page 773) when it is available. ArgumentsThe remote-system is the name or IP address of the remote system that telnet connects to. When you do not specify a remote-system, telnet works interactively and prompts you to enter one of the commands described in this section. Options
DiscussionAfter telnet connects to a remote system, you can put telnet in command mode by typing the escape character (usually CONTROL-]). A remote system should report the escape character it recognizes. To leave command mode, type RETURN on a line by itself. In command mode telnet displays the telnet> prompt. You can use the following commands in command mode:
open remote-computer
NotesMany computers, including non-Linux systems, support the TELNET protocol. The telnet utility is a user interface to this protocol for Linux systems that allows you to connect to many different types of systems. Although you typically use telnet to log in, the remote computer may offer other services through telnet, such as access to special databases. ExamplesIn the following example, the user connects to the remote system named bravo. After running a few commands, the user escapes to command mode and uses the z command to suspend the telnet session so as to run a few commands on the local system. The user gives an fg command to the shell to resume using telnet. The logout command on the remote system ends the telnet session, and the local shell displays a prompt. kudos% telnet bravo Trying 192.168.0.55 ... Connected to bravo. Escape character is '^]'. Fedora Core Release 2 (Tettnang) Kernel 2.6.5-1.358 on an i686 login: watson Password: Last login: Wed Jul 31 10:37:16 from kudos bravo $ ... bravo $CONTROL-] telnet> z [1]+ Stopped telnet bravo kudos $ ... kudos $fg telnet bravo bravo$ logout Connection closed by foreign host. kudos $ test: Evaluates an expressiontest expression [ expression ] The test utility evaluates an expression and returns a condition code indicating that the expression is either true (0) or false (not 0). You can place brackets ( [ ] ) around the expression instead of using the word test (second format). ArgumentsThe expression contains one or more criteria (see the following list) that test evaluates. A a separating two criteria is a Boolean AND operator: Both criteria must be true for test to return a condition code of true. A o is a Boolean OR operator. When o separates two criteria, one or the other (or both) of the criteria must be true for test to return a condition code of true. You can negate any criterion by preceding it with an exclamation point (!). You can group criteria with parentheses. If there are no parentheses, a takes precedence over o, and test evaluates operators of equal precedence from left to right. Within the expression you must quote special characters, such as parentheses, so that the shell does not interpret them but rather passes them to test. Because each element, such as a criterion, string, or variable within the expression, is a separate argument, you must separate each element from other elements with a SPACE. Table V-25 lists the criteria you can use within the expression. Table V-26 lists test's relational operators.
NotesThe test command is built into the Bourne Again and TC Shells. ExamplesThe following examples demonstrate the use of the test utility in Bourne Again Shell scripts. Although test works from a command line, it is more commonly employed in shell scripts to test input or verify access to a file. The first example prompts the user, reads a line of input into a variable, and uses the synonym for test, [ ], to see whether the user entered yes: $ cat user_in echo -n "Input yes or no: " read user_input if [ "$user_input" = "yes" ] then echo You input yes. fi The next example prompts for a filename and then uses the synonym for test, [ ], to see whether the user has read access permission ( r) for the file and ( a) whether the file contains information ( s): $ cat validate echo -n "Enter filename: " read filename if [ -r "$filename" -a -s "$filename" ] then echo File $filename exists and contains information. echo You have read access permission to the file. fi The t 1 criterion checks whether the process running test is sending standard output to the screen. If it is, the test utility returns a value of true (0). The shell stores the exit status of the last command it ran in the $? variable. The following script tests whether its output is going to a terminal: $ cat term test -t 1 echo "This program is (=0) or is not (=1) sending its output to a terminal:" $? First term is run with the output going to the terminal: $ term This program is (=0) or is not (=1) sending its output to a terminal: 0 The next example runs term and redirects the output to a file. The contents of the file temp show that test returned 1, indicating that its output was not going to a terminal. $ term > temp $ cat temp This program is (=0) or is not (=1) sending its output to a terminal: 1 top: Dynamically displays process statustop [options] The top utility displays information about the status of the local system including information about current processes. OptionsAlthough top does not require the use of hyphens with options, it is a good idea to include them for clarity and consistency with other utilities. You can cause top to run as though you had specified any of the options by giving commands to the utility while it is running. See "Discussion" for more information.
DiscussionThe first few lines that top displays summarize the status of the local system. You can turn each of these lines on or off with the toggle switches (interactive command keys) specified in the following descriptions. The first line is the same as the output of the uptime utility and shows the current time, the amount of time the local system has been running since it was last booted, the number of users logged in, and the load averages from the last 1, 5, and 15 minutes (toggle l [lowercase "l"]). The second line indicates the number of processes that are currently running (toggle t). The next three lines report on CPU (also toggle t), memory (toggle m), and swap space (also toggle m) use. The rest of the display reports on individual processes, listed in descending order by current CPU usage (the most CPU-intensive process is listed first). By default top displays the number of processes that fit on the screen. Table V-27 describes the meanings of the fields displayed for each process.
While top is running, you can use the following commands to modify its behavior. Some of these commands are disabled when you run top in secure mode ( s option).
NotesThe top utility is similar to ps but periodically updates the display, enabling you to watch the behavior of the local system over time. This utility shows only as much of the command line for each process as fits on a line. If a process is swapped out, top replaces the command line with the name of the command in parentheses. The top utility uses the proc filesystem: When proc is not mounted, top does not work. Requesting continuous updates is almost always a mistake. The display updates too quickly and the system load increases dramatically. ExamplesThe following display is the result of a typical execution of top: top - 23:30:31 up 18 days, 30 min, 6 users, load average: 0.08, 0.07, 0.01 Tasks: 125 total, 1 running, 124 sleeping, 0 stopped, 0 zombie Cpu(s): 0.9% us, 0.7% sy, 0.0% ni, 98.4% id, 0.0% wa, 0.0% hi, 0.0% si Mem: 1037272k total, 1023048k used, 14224k free, 126684k buffers Swap: 2048248k total, 0k used, 2048248k free, 382612k cached PID USER PR NI VIRT RES SHR S %CPU %MEM TIME+ COMMAND 2029 root 15 0 227m 96m 132m S 0.4 9.5 192:12.51 X 2214 sam 15 0 34728 20m 29m S 0.4 2.0 351:08.69 kdeinit 14314 sam 16 0 22736 12m 18m S 0.2 1.3 0:07.83 gaim 15476 sam 16 0 2760 932 1620 R 0.2 0.1 0:00.93 top 1 root 16 0 1836 464 1316 S 0.0 0.0 0:06.74 init 2 root 34 19 0 0 0 S 0.0 0.0 0:00.01 ksoftirqd/0 3 root 5 -10 0 0 0 S 0.0 0.0 0:00.65 events/0 4 root 5 -10 0 0 0 S 0.0 0.0 0:00.01 kblockd/0 6 root 5 -10 0 0 0 S 0.0 0.0 0:00.06 khelper 5 root 15 0 0 0 0 S 0.0 0.0 0:00.00 khubd 7 root 15 0 0 0 0 S 0.0 0.0 0:03.36 pdflush 10 root 11 -10 0 0 0 S 0.0 0.0 0:00.00 aio/0 9 root 15 0 0 0 0 S 0.0 0.0 0:17.85 kswapd0 touch: Changes a file's access and/or modification timetouch [options] file-list The touch utility changes the access and/or modification time of a file to the current time or a time you specify. ArgumentsThe file-list is a list of the pathnames of the files that touch will update. OptionsAccepts the common options described on page 587. Without any options touch changes the access and modification times to the current time. When you do not specify the no-create option, touch creates files that do not exist.
date=datestring
time=mtime or time=modify
ExamplesThe first three commands show touch updating an existing file. The ls utility with the l option displays the modification time of the file. The last three commands show touch creating a file. $ ls -l program.c -rw-r--r-- 1 alex group 5860 Apr 21 09:54 program.c $ touch program.c $ ls -l program.c -rw-r--r-- 1 alex group 5860 Aug 13 19:01 program.c $ ls -l read.c ls: read.c: No such file or directory $ touch read.c $ ls -l read.c -rw-rw-r-- 1 alex group 0 Aug 13 19:01 read.c The next example demonstrates the use of the a option to change the access time only and the d option to specify a date for touch to use instead of the current date and time. The first ls command displays the file modification times; the second ls (with the time=atime option) displays file access times. In this case the touch command does not have the intended effect: The access times of the files cases and excerpts are changed to 7:00 on the current date and three unwanted files are created. Because the date was not quoted (by surrounding it with double quotation marks), touch assumed that 7:00 went with the d option and created the pm, Jul, and 30 files. $ ls -l -rw-rw-r-- 1 alex group 45 Nov 30 2005 cases -rw-rw-rw- 1 alex group 14 Jan 8 2006 excerpts $ ls -l --time=atime -rw-rw-r-- 1 alex group 45 Jul 17 19:47 cases -rw-rw-rw- 1 alex group 14 Jul 17 19:47 excerpts $ touch -a -d 7:00 pm Jul 30 cases excerpts $ ls -l -rw-rw-r-- 1 alex group 0 Aug 11 12:23 30 -rw-rw-r-- 1 alex group 0 Aug 11 12:23 Jul -rw-rw-r-- 1 alex group 45 Nov 30 2005 cases -rw-rw-rw- 1 alex group 14 Jan 8 2006 excerpts -rw-rw-r-- 1 alex group 0 Aug 11 12:23 pm $ ls -l --time=atime -rw-rw-r-- 1 alex group 0 Aug 11 07:00 30 -rw-rw-r-- 1 alex group 0 Aug 11 07:00 Jul -rw-rw-r-- 1 alex group 45 Aug 11 07:00 cases -rw-rw-rw- 1 alex group 14 Aug 11 07:00 excerpts -rw-rw-r-- 1 alex group 0 Aug 11 07:00 pm The final example is the same as the preceding one but correctly encloses the date within double quotation marks. After the touch command is executed, ls shows that the access times of the files cases and excerpts have been updated as expected: $ ls -l -rw-rw-r-- 1 alex group 45 Nov 30 2005 cases -rw-rw-rw- 1 alex group 14 Jan 8 2006 excerpts $ ls -l --time=atime -rw-rw-r-- 1 alex group 45 Jul 17 19:47 cases -rw-rw-rw- 1 alex group 14 Jul 17 19:47 excerpts $ touch -a -d "7:00 pm Jul 30" cases excerpts $ ls -l -rw-rw-r-- 1 alex group 45 Nov 30 2005 cases -rw-rw-rw- 1 alex group 14 Jan 8 2006 excerpts $ ls -l --time=atime -rw-rw-r-- 1 alex group 45 Jul 30 19:00 cases -rw-rw-rw- 1 alex group 14 Jul 30 19:00 excerpts tr: Replaces specified characterstr [options] string1 [string2] The tr utility reads standard input and, for each input character, maps it to an alternate character, deletes the character, or leaves the character alone. This utility reads from standard input and writes to standard output. ArgumentsThe tr utility is typically used with two arguments, string1 and string2. The position of each character in the two strings is important: Each time tr finds a character from string1 in its input, it replaces that character with the corresponding character from string2. With one argument, string1, and the delete option, tr deletes the characters specified in string1. The option squeeze-repeats replaces multiple sequential occurrences of characters in string1 with single occurrences (for example, abbc becomes abc). RangesA range of characters is similar in function to a character class within a regular expression (page 829). GNU TR does not support ranges (character classes) enclosed within brackets. You can specify a range of characters by following the character that appears earlier in the collating sequence with a hyphen and then the character that comes later in the collating sequence. For example, 1 6 expands to 123456. Although the range A Z expands as you would expect in ASCII, this approach does not work when you use the EBCDIC collating sequence, as these characters are not sequential in EBCDIC. See "Character Classes" for a solution to this issue. Character ClassesA TR character class is not the same as described elsewhere in this book. (GNU documentation uses the term list operator for what this book calls a character class.) You specify a character class as '[:class:]', where class is a character class from Table V-28. You must specify a character class in string1 unless you are performing case conversion (see "Examples" later in this section) or are using the d and s options together.
Options
squeeze-repeats
NotesWhen string1 is longer than string2, the initial portion of string1 (equal in length to string2) is used in the translation. When string1 is shorter than string2, tr uses the last character of string1 to extend string1 to the length of string2. In this case tr departs from the POSIX standard, which does not define a result. If you use the delete and squeeze-repeats options at the same time, tr deletes the characters in string1 and then reduces multiple sequential occurrences of characters in string2. ExamplesYou can use a hyphen to represent a range of characters in string1 or string2. The two command lines in the following example produce the same result: $ echo abcdef | tr 'abcdef' 'xyzabc' xyzabc $ echo abcdef | tr 'a-f' 'x-za-c' xyzabc The next example demonstrates a popular method for disguising text, often called ROT13 (rotate 13) because it replaces the first letter of the alphabet with the thirteenth, the second with the fourteenth, and so forth. $ echo The punchline of the joke is ... | > tr 'A-M N-Z a-m n-z' 'N-Z A-M n-z a-m' Gur chapuyvar bs gur wbxr vf ... To make the text intelligible again, reverse the order of the arguments to tr: $ echo Gur chapuyvar bs gur wbxr vf ... | > tr 'N-Z A-M n-z a-m' 'A-M N-Z a-m n-z' The punchline of the joke is ... The delete option causes tr to delete selected characters: $ echo If you can read this, you can spot the missing vowels! | > tr --delete 'aeiou' If y cn rd ths, y cn spt th mssng vwls! In the following example, TR replaces characters and reduces pairs of identical characters to single characters: $ echo tennessee | tr -s 'tnse' 'srne' serene The next example replaces each sequence of nonalphabetic characters (the complement of all the alphabetic characters as specified by the character class alpha) in the file draft1 with a single NEWLINE character. The output is a list of words, one per line. $ tr --complement --squeeze-repeats '[:alpha:]' '\n' < draft1 The next example uses character classes to upshift the string hi there: $ echo hi there | tr '[:lower:]' '[:upper:]' HI THERE tty: Displays the terminal pathnametty [option] The tty utility displays the pathname of standard input if it is a terminal and displays not a tty if it is not a terminal. The exit status is 0 if standard input is a terminal and 1 if it is not. ArgumentsThere are no arguments. OptionsAccepts the common options described on page 587.
NotesThe term tty is short for teletypewriter, the terminal device on which UNIX was first run. This command appears in UNIX, and Linux has kept it for the sake of consistency and tradition. ExamplesThe following example illustrates the use of tty: $ tty /dev/pts/11 $ echo $? 0 $ tty < memo not a tty $ echo $? 1 tune2fs: Changes parameters on an ext2 or ext3 filesystemtune2fs [options] device The tune2fs utility displays and modifies filesystem parameters on ext2 filesystems and on ext3 filesystems, which are modified ext2 filesystems. This utility can also set up journaling on an ext2 filesystem, turning it into an ext3 filesystem. With typical filesystem permissions, tune2fs must be run as root. ArgumentsThe device is the name of the device, such as /dev/hda8, that holds the filesystem whose parameters you want to display or modify. Options
DiscussionChecking a large filesystem can take a long time. Use the C and/or T options to stagger filesystem checks so they do not all happen at the same time. When all the filesystem checks occur at the same time it can take a long time for the system to boot. ExamplesFollowing is the output of tune2fs run with the l option on a typical ext3 filesystem: # /sbin/tune2fs -l /dev/hda2 tune2fs 1.35 (28-Feb-2004) Filesystem volume name: /p04 Last mounted on: <not available> Filesystem UUID: 125be803-2f51-53ef-dfcf-292bf7e4ecc4 Filesystem magic number: 0xEF53 Filesystem revision #: 1 (dynamic) Filesystem features: has_journal filetype needs_recovery sparse_super Default mount options: (none) Filesystem state: clean Errors behavior: Continue Filesystem OS type: Linux Inode count: 2562240 Block count: 5120718 Reserved block count: 256035 Free blocks: 3194303 Free inodes: 2554160 First block: 0 Block size: 4096 Fragment size: 4096 Blocks per group: 32768 Fragments per group: 32768 Inodes per group: 16320 Inode blocks per group: 510 Filesystem created: Sat May 17 15:22:29 2003 Last mount time: Sun Jan 30 23:00:37 2005 Last write time: Sun Jan 30 23:00:37 2005 Mount count: 5 Maximum mount count: 30 Last checked: Thu Dec 2 01:02:46 2004 Check interval: 15552000 (6 months) Next check after: Tue May 31 02:02:46 2005 Reserved blocks uid: 0 (user root) Reserved blocks gid: 0 (group root) First inode: 11 Inode size: 128 Journal inode: 8 Default directory hash: tea Directory Hash Seed: 81345bv8-740d-4af5-c5bc-12033ed7c121 Journal backup: inode blocks umask: Establishes the file-creation permissions maskumask [mask] The umask builtin specifies a mask that the system uses to set access permissions when you create a file. This builtin works slightly differently in each of the shells. ArgumentsThe mask can be a three-digit octal number (bash and tcsh) or a symbolic value (bash) such as you would use with chmod (page 604). The mask specifies the permissions that are not allowed. When mask is an octal number, the digits correspond to the permissions for the owner of the file, members of the group the file is associated with, and everyone else. Because the mask specifies the permissions that are not allowed, the system subtracts each of these digits from 7 when you create a file. The resulting three octal numbers specify the access permissions for the file (the numbers you would use with chmod). A mask that you give as a symbolic value also specifies the permissions that are not allowed. See "Notes." Without any arguments, umask displays the file-creation permissions mask. NotesMost utilities and applications do not attempt to create files with execute permissions, regardless of the value of mask; they assume that you do not want an executable file. As a result, when a utility or application such as touch creates a file, the system subtracts each of the digits in mask from 6. An exception occurs with mkdir, which does assume that you want the execute (access in the case of a directory) bit set. See "Examples." The umask program is a builtin in bash and tcsh and generally goes in the initialization file for your shell (~/.bash_profile [bash] or ~/.login [tcsh]). Under bash the argument g=r,o=r turns on the write bit in the mask for groups and other users (the mask is 0033), causing those bits to be off in file permissions (744 or 644). Refer to chmod on page 604 for more information about symbolic permissions. ExamplesThe following commands set the file-creation permissions mask and display the mask and its effect when you create a file and a directory. The mask of 022, when subtracted from 777, gives permissions of 644 (rw r r ) for a file and 755 (rwxr xr x) for a directory: $ umask 022 $ umask 022 $ touch afile $ mkdir adirectory $ ls -ld afile adirectory drwxr-xr-x 2 max max 4096 Jul 24 11:25 adirectory -rw-r--r-- 1 max max 0 Jul 24 11:25 afile The next example sets the same mask value symbolically: $ umask g=rx,o=rx $ umask 022 uniq: Displays unique linesuniq [options] [input-file] [output-file] The uniq utility displays its input, removing all but one copy of successive repeated lines. If the file has been sorted (see sort on page 762), uniq ensures that no two lines that it displays are the same. ArgumentsWhen you do not specify the input-file, uniq reads from standard input. When you do not specify the output-file, uniq writes to standard output. OptionsAccepts the common options described on page 587. A field is a sequence of characters bounded by SPACE s, TABs, NEWLINEs, or a combination of these characters.
skip-fields=nfield
skip-chars=nchar
check-chars=nchar
ExamplesThese examples assume that the file named test in the working directory contains the following text: $ cat test boy took bat home boy took bat home girl took bat home dog brought hat home dog brought hat home dog brought hat home Without any options, uniq displays only one copy of successive repeated lines: $ uniq test boy took bat home girl took bat home dog brought hat home The count option displays the number of consecutive occurrences of each line in the file: $ uniq --count test 2 boy took bat home 1 girl took bat home 3 dog brought hat home The repeated option displays only lines that are consecutively repeated in the file. $ uniq --repeated test boy took bat home dog brought hat home The unique option displays only lines that are not consecutively repeated in the file: $ uniq --unique test girl took bat home Next the skip-fields option skips the first field in each line, causing the lines that begin with boy and the one that begins with girl to appear to be consecutive repeated lines. The uniq utility displays only one occurrence of these lines: $ uniq --skip-fields=1 test boy took bat home dog brought hat home The next example uses both the f ( skip-fields) and s ( skip-chars) arguments first to skip two fields and then to skip two characters. The two characters this command skips include the SPACE that separates the second and third fields and the first character of the third field. Ignoring these characters, all the lines appear to be consecutive repeated lines containing the string at home. The uniq utility displays only the first of these lines: $ uniq -f 2 -s 2 test boy took bat home w: Displays information about system usersw [options] [username] The w utility displays the names of users who are currently logged in, together with their terminal device numbers, the times they logged in, the commands they are running, and other information. Options
ArgumentsThe username restricts the display to information about that user. DiscussionThe first line that w displays is the same as that displayed by uptime. This line includes the time of day, how long the system has been running (in days, hours, and minutes), how many users are logged in, and how busy the system is (load average). From left to right, the load averages indicate the number of processes that have been waiting to run in the past 1 minute, 5 minutes, and 15 minutes. The columns of information that w displays have the following headings: USER TTY FROM LOGIN@ IDLE JCPU PCPU WHAT The USER is the username of the user. The TTY is the device name for the line that the user is on. The FROM is the system name that a remote user is logged in from; it is a hyphen for a local user. The LOGIN@ gives the date and time the user logged in. The IDLE indicates how many minutes have elapsed since the user last used the keyboard. The JCPU is the CPU time used by all processes attached to the user's tty, not including completed background jobs. The PCPU is the time used by the process named in the WHAT column. The WHAT is the command that user is running. ExamplesThe first example shows the full list produced by the w utility: $ w 10:26am up 1 day, 55 min, 6 users, load average: 0.15, 0.03, 0.01 USER TTY FROM LOGIN@ IDLE JCPU PCPU WHAT alex tty1 - Fri 9am 20:39m 0.22s 0.01s vim td alex tty2 - Fri 5pm 17:16m 0.07s 0.07s -bash root pts/1 - Fri 4pm 14:28m 0.20s 0.07s -bash jenny pts/2 - Fri 5pm 3:23 0.08s 0.08s /bin/bash hls pts/3 potato 10:07am 0.00s 0.08s 0.02s w The next example shows the s option producing an abbreviated listing: $ w -s 10:30am up 1 day, 58 min, 6 users, load average: 0.15, 0.03, 0.01 USER TTY FROM IDLE WHAT alex tty1 - 20:43m vim td alex tty2 - 17:19m -bash root pts/1 - 14:31m -bash jenny pts/2 - 0.20s vim memo.030125 hls pts/3 potato 0.00s w -s The final example requests information only about Alex: $ w alex 10:35am up 1 day, 1:04, 6 users, load average: 0.06, 0.01, 0.00 USER TTY FROM LOGIN@ IDLE JCPU PCPU WHAT alex tty1 - Fri 9am 20:48m 0.22s 0.01s vim td alex tty2 - Fri 5pm 17:25m 0.07s 0.07s -bash wc: Displays the number of lines, words, and byteswc [options] [file-list] The wc utility displays the number of lines, words, and bytes in its input. When you specify more than one file on the command line, wc displays totals for each file as well as totals for the group of files. ArgumentsThe file-list is a list of the pathnames of one or more files that wc analyzes. When you omit file-list, the wc utility takes its input from standard input. OptionsAccepts the common options described on page 587.
max-line-length
NotesA word is a sequence of characters bounded by SPACE s, TAB s, NEWLINE s, or a combination of these characters. ExamplesThe following command analyzes the file named memo. The numbers in the output represent the number of lines, words, and bytes in the file: $ wc memo 5 31 146 memo The next command displays the number of lines and words in three files. The line at the bottom, with the word total in the right column, contains the sum of each column. $ wc -lw memo1 memo2 memo3 10 62 memo1 12 74 memo2 12 68 memo3 34 204 total which: Shows where in PATH a command is locatedwhich command-list For each command in command-list, the which utility searches the directories in the PATH variable (page 284) and displays the absolute pathname of the first file it finds whose simple filename is the same as the command. ArgumentsThe command-list is a list of one or more commands (utilities) that which searches for. For each command which searches the directories listed in the PATH environment variable, in order, and displays the full pathname of the first command (executable file) it finds. If which does not locate a command, it displays a message. Options
read-functions
NotesMany distributions define an alias for which such as the following: $alias which alias which='alias | /usr/bin/which --tty-only --read-alias --show-dot --show-tilde' If which is not behaving as you would expect, verify that you are not running an alias. The preceding alias causes which to be effective only when it is run interactively ( tty-only) and to display aliases, display the working directory as a period when appropriate, and display the name of the user's home directory as a tilde. The TC Shell includes a which builtin (see the tcsh man page) that works slightly differently from the which utility (/usr/bin/which). Without any options the which utility does not locate aliases, functions, and shell builtins because these do not appear in PATH. In contrast the tcsh which builtin locates aliases, functions, and shell builtins. ExamplesThe first example quotes the first letter of the command (\which) to prevent the shell from invoking the alias (page 313) for which: $ \which vim dir which /usr/bin/vim /usr/bin/dir /usr/bin/which The next example is the same as the first but uses the alias for which (which it displays): $ which vim dir which alias which='alias | /usr/bin/which --tty-only --read-alias --show-dot --show-tilde' /usr/bin/which /usr/bin/vim /usr/bin/dir The final example is the same as the previous one except that it is run from tcsh. The tcsh which builtin is used instead of the which utility: tcsh $ which vim dir which /usr/bin/vim /usr/bin/dir which: shell built-in command. who: Displays information about logged-in userswho [options] who am i The who utility displays information about users who are logged in on the local system. This information includes each user's username, terminal device, login time, and, if applicable, the corresponding remote hostname or X display. ArgumentsWhen given two arguments (traditionally, am i), who displays information about the user giving the command. If applicable, the username is preceded by the hostname of the system running who (as in kudos!alex). OptionsAccepts the common options described on page 587.
DiscussionThe line that who displays has the following syntax: user [messages] line login-time [idle] [PID] comment The user is the username of the user. The messages indicates whether messages are enabled or disabled (see the message option). The line is the device name associated with the line the user is logged in on. The login-time is the date and time that the user logged in. The idle is the length of time since the terminal was last used (the idle time; see the idle option). The PID is the process identification number. The comment is the remote system or X display that the user is logged in from (blank for local users). NotesThe finger utility (page 661) provides information similar to that given by who. ExamplesThe following examples demonstrate the use of the who utility: $ who hls tty1 Jul 30 06:01 jenny tty2 Jul 30 06:02 alex ttyp3 Jul 30 14:56 (bravo) $ who am i bravo!alex ttyp3 Jul 30 14:56 (bravo) $ who --heading --users -T USER LINE TIME IDLE PID COMMENT hls - tty1 Jul 30 06:01 03:53 1821 jenny + tty2 Jul 30 06:02 14:47 2235 alex + ttyp3 Jul 30 14:56 . 14777 (bravo) xargs: Converts standard input into command linesxargs [options] [command] The xargs utility is a convenient, efficient way to convert standard output of one command into arguments for another command. This utility reads from standard input, keeps track of the maximum allowable length of a command line, and avoids exceeding that limit by repeating command as needed. Finally xargs executes the constructed command line. ArgumentsThe command is the command line you want xargs to use as a base for the command it constructs. If you omit command, it defaults to echo. The xargs utility appends to command the arguments it receives from standard input. If any arguments should precede the arguments from standard input, you must include them as part of command. Optionsreplace[=marker]
max lines[=num]
max args=num
max procs=num
no run if empty
DiscussionThe xargs utility reads arguments to command from standard input, interpreting each whitespace-delimited string as a separate argument. It then constructs a command line from command and a series of arguments. When the maximum command line length would be exceeded by adding another argument, xargs runs the command line it has built. If there is more input, xargs repeats the process of building a command line and running it. This process continues until all input has been read. NotesOne common use of xargs is as an efficient alternative to the exec option of find (page 656). If you call find with the exec option to run a command, it runs the command once for each file it processes. Each execution of the command creates a new process, which can drain system resources when you are processing many files. By accumulating as many arguments as possible, xargs can greatly reduce the number of processes needed. The first example in the "Examples" section shows how to use xargs with find. The replace option changes how xargs handles whitespace in standard input. Without this option xargs treats sequences of blanks, TABS, and NEWLINES as equivalent. With this option xargs TReats NEWLINE characters in a special way. If it encounters a NEWLINE in standard input when using the replace option, xargs runs command using the argument list that has been built up to that point. ExamplesTo locate and remove all files whose names end in .o from the working directory and its subdirectories, you can use the find exec option: $ find . -name \*.o -exec rm --force {} \; This approach calls the rm utility once for each .o file that find locates. Each invocation of rm requires a new process. If a lot of .o files exist, a significant amount of time is spent creating, starting, and then cleaning up these processes. You can reduce the number of processes by allowing xargs to accumulate as many filenames as possible before calling rm: $ find . -name \*.o -print | xargs rm --force In the next example, the contents of all *.txt files located by find are searched for lines containing the word login. All filenames that contain login are displayed by grep. $ find . -name \*.txt -print | xargs grep -w -l login The next example shows how you can use the replace option to cause xargs to embed standard input within command instead of appending it to command. This option also causes command to be executed each time a NEWLINE character is encountered in standard input; max-lines does not override this behavior. $ cat names Tom, Dick, and Harry $ xargs echo "Hello, " < names Hello, Tom, Dick, and Harry $ xargs --replace echo "Hello {}. Join me for lunch?" <names Hello Tom,. Join me for lunch? Hello Dick,. Join me for lunch? Hello and Harry. Join me for lunch? The final example uses the same input file as the previous example as well as the max-args and max-lines options: $ xargs echo "Hi there" < names Hi there Tom, Dick, and Harry $ xargs --max-args=1 echo "Hi there" < names Hi there Tom, Hi there Dick, Hi there and Hi there Harry $ xargs --max-lines=2 echo "Hi there" < names Hi there Tom, Dick, Hi there and Harry See page 775 for another example of the use of xargs. | |||||||||||||||||||||||||||||||||||||||||||||||||||||||||||||||||||||||||||||||||||||||||||||||||||||||||||||||||||||||||||||||||||||||||||||||||||||||||||||||||||||||||||||||||||||||||||||||||||||||||||||||||||||||||||||||||||||||||||||||||||||||||||||||||||||||||||||||||||||||||||||||||||||||||||||||||||||||||||||||||||||||||||||||||||||||||||||||||||||||||||||||||||||||||||||||||||||||||||||||||||||||||||||||||||||||||||||||||||||||||||||||||||||||||||||||||||||||||||||||||||||||||||||||||||||||||||||||||||||||||||||||||||||||||||||||||||||||||||||||||||||||||||||||||||||||||||||||||||||||||||||||||||||||||||||||||||||||||||||||||||||||||||||||||||||||||||||||||||||||||||||||||||||||||||||||||||||||||||||||||||||||||||||||||||||||||||||||||||||||||||||||||||||||||||||||||||||||||||||||||||||||||||||||||||||||||||||||||||||||||||||||||||||||||||||||||||||||||||||||||||||||||||||||||||||||||||||||||||||||||||||||||||||||||||||||||||||||||||||||||||||||||||||||||||||||||||||||||||||||
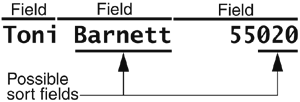
| < Day Day Up > |
EAN: N/A
Pages: 213