|  Inserting a New Table in a Snap 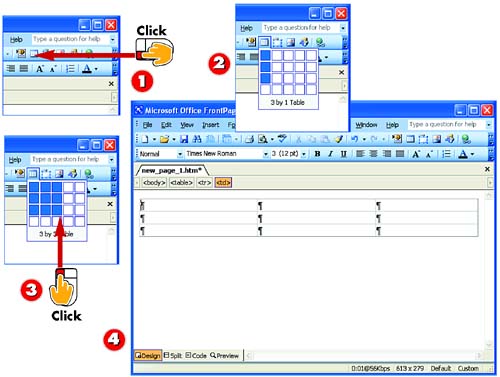 -
 | Click the Insert Table button on the Standard toolbar. | -
 | Move the mouse downward (don't click or hold!) to highlight the number of rows you want. | -
 | Move the mouse to the right to highlight the number of columns you want, and click. | -
 | A table with the number of rows and columns you specified is added to your page. | INTRODUCTION All you need to get started with tables is a page in progress, a rough idea of what you want to put in the table (sometimes it helps to scribble the table out on paper first), and a rough idea of where you want to put it. Here's the quickest way to start a table (as long as it's no bigger than four columns by five rows). |
HINT The Dashes Are for Show Dashed lines seen around table cells in Design view just show where your table is ”they won't show up on the Web page. But if you really want visible table borders, see the task "Dressing Up Tables with Gridlines" later in this part. |
HINT Don't Worry About Size Don't worry about the size (or number) of the rows and columns in the table initially. The rows and columns will expand to fit your content as you enter it, and you can also manually choose their size. You can add or delete rows and columns, too. |
Inserting a More Complex New Table 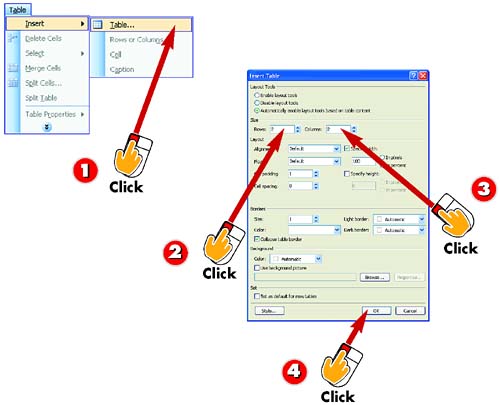 -
| | Open the Table menu, choose Insert , and select Table . | -
| | In the Rows field, type the number of rows the table should contain. | -
| | In the Columns field, type the number of columns the table should contain. | -
| | Click OK or press Enter . | INTRODUCTION When the table will be bigger than 4 columns by 5 rows, or when you want to select certain formatting options while creating the table, FrontPage offers an alternative table-creation method. |
TIP Can't See the Whole Table Dialog Box The Insert Table dialog box is very large; depending on the screen resolution you use on your computer, you might not be able to see the bottom of it, even if you drag it as high as you can. For now, don't worry ”everything you need is near the top of the dialog box, except the OK button. If you can't see the OK button, remember that pressing the Enter key does the same thing as clicking OK. |
Importing a Table from Another Program 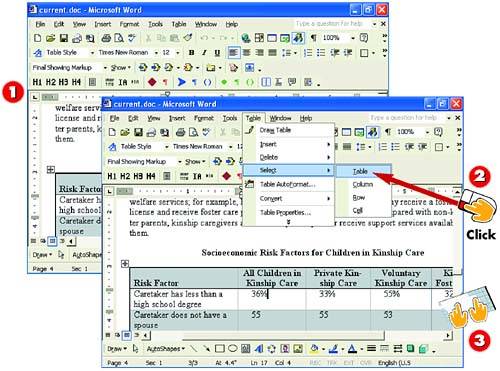 -
| | In the program you used to create the table you want to import, open the file containing the table (or create the table). | -
| | If you are using Word, click the table, or open the Table menu, and choose Select, Table ; in Excel, highlight the portion of the current worksheet you want to import. | -
| | Press and hold down the Ctrl key, press the Insert key, and then release both keyboard buttons . | INTRODUCTION If you have another Windows program in which you can create tables, such as Microsoft Word or Excel, you can create tables there and then import those tables right into your FrontPage Web pages. This not only enables you to create tables by using programs you already know, but also to easily reuse tables you might already have in word-processing or spreadsheet documents. |
TIP There Are Other Ways to Copy In most programs, instead of step 3, you can click a Copy button on the toolbar, or choose Edit, Copy . But in case those options aren't available, Ctrl+Insert always works in Windows programs. |
 -
| | Switch to (or open) the FrontPage file, and click the spot on the Web page where you want the table to go. | -
 | Click the Paste button on the Standard toolbar. | -
 | The table is pasted into your Web page. | TIP Change Imported Tables Any Way You Want After importing the table, you may edit and enhance the table in any of the ways described in this part, just as if you had created it in FrontPage. |
Deleting a Table 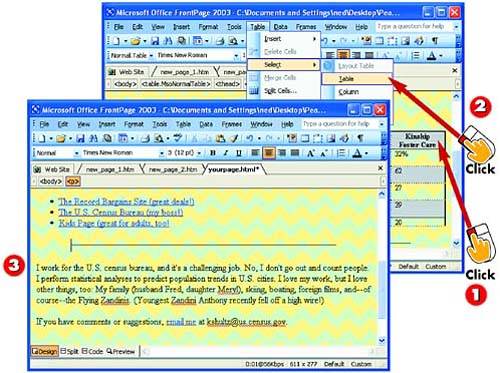 -
| | Click anywhere in the table you want to delete. | -
| | Open the Table menu, choose Select , and then Table . Press the Delete key on your keyboard. | -
| | The table is deleted. | INTRODUCTION The Web author who createth hath the power to taketh away. (Or something like that.) Here's how to delete a table. |
HINT You Can Drag Tables Where You Want 'Em To move a table, first perform steps 1 and 2. Then, click and hold on the selected table, drag it where you want it, and release it. |
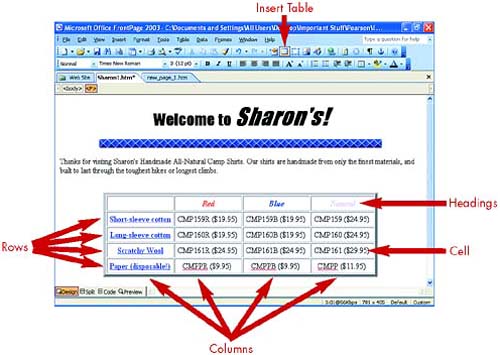
Putting Text in Table Cells 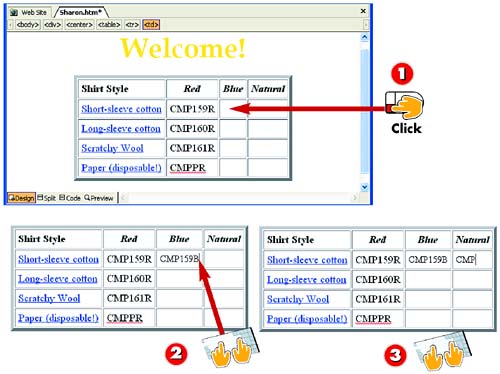 -
| | Click in the cell in which you want to add text. | -
| | Type whatever you want. | -
| | Press the Tab key to jump to the next cell (or click in the cell you want to fill next ), and type the text you want. | INTRODUCTION A table without content is like a room without furniture. Here's how to start filling in your new table by putting text in cells ”the boxes formed by each intersection of a row and column. |
TIP Alignment Aligns Text in the Cell, Not on the Page If you apply alignment (see Part 4) to text in a cell, the text is aligned relative to the cell it's in, not the page. For example, if you apply center alignment to text in a cell, the text is centered within the cell. |
HINT Formatting Table Text You can apply character formatting including fonts, bold, italic, underlining, or color to text in a table. Making the text in all cells in the top row bold, italic, or a unique color is a nice way to create column headings that stand out. |
Putting Pictures in a Table 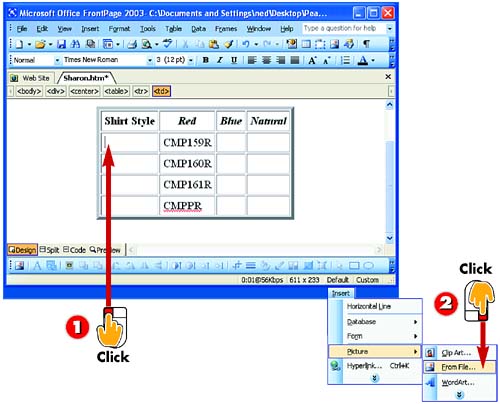 -
| | Click in the cell in which you want to put a picture. | -
| | Using any of the techniques mentioned in Part 6, insert the picture. | INTRODUCTION Most tables are mostly text, but you can give your table panache by using a picture or two in its cells. |
TIP Tables Can Hold Animations Yes, you can put an animated GIF picture in a table cell. |
TIP Links Work in Table Cells You can put links in a table, too. Just add to the table the text or picture you want to use as the link source, highlight that text or picture in its table cell, and create the link as usual (see Part 5 for more information). |
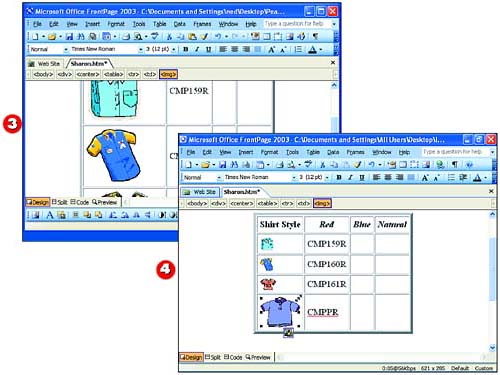 -
| | Continue adding pictures to cells until you've added all the pictures for this table. | -
| | On each picture, drag a corner handle (see Part 6) to scale the picture to the size you want. | HINT Row and Column Sizes Will Change to Fit Your Pics When you have sized all the pictures in your table, the row and column sizes automatically change their size to match. |
TIP Pictures in Tables Are Fully Formattable You can use any of the picture-formatting techniques from Part 6 on a picture in a table cell. To open the Image Properties dialog box to format a picture in a cell, point to the picture, right-click, and choose Picture Properties from the shortcut menu that appears. |
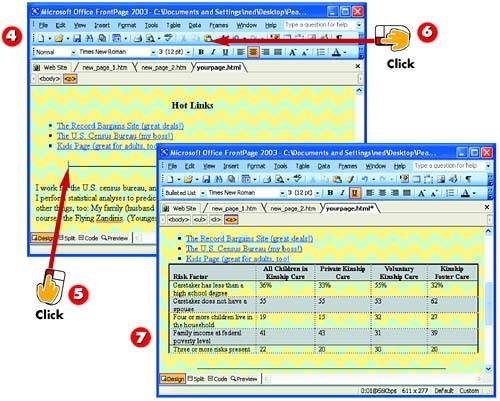
Automatically Filling Multiple Table Cells 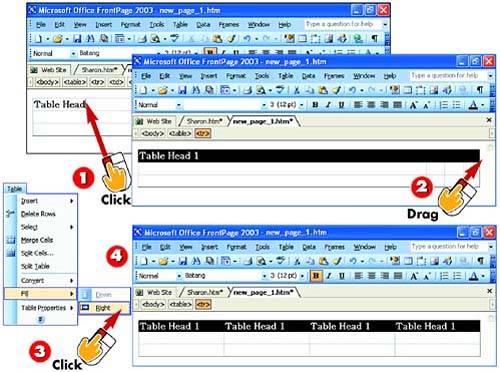 -
| | To fill a row, first click in the cell containing the content you want to add to other cells. | -
| | Drag to highlight the cell and the row. | -
| | Open the Table menu, choose Fill , and select Right . | -
| | The selected cells are filled with the contents of the first cell. | INTRODUCTION To save yourself the trouble of formatting the text or other contents of a whole table of cells individually, or when the contents of whole rows or columns of cells are similar or the same, you can save time with FrontPage's Fill tool, which automatically copies the contents of a cell (formatting and all) to other cells. |
HINT Use Fill to Make Column Heads The Fill tool is a good way to create formatted column heads. Create and format one column head and then fill the rest of the row. When you type the other column heads, they'll automatically be formatted like the first one. |
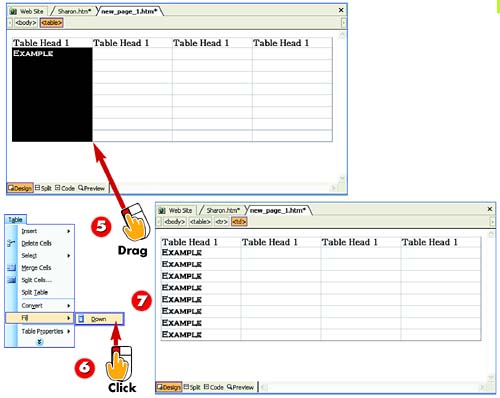 -
| | To fill a column, click in the cell containing the content you want to add to other cells. Drag to highlight the cell and the column. | -
| | Open the Table menu, choose Fill , and select Down . | -
 | The selected cells are filled with the contents of the first cell. | HINT Fill Works for Any Kind of Content You can use the Fill tool for any table contents ”even pictures. All the contents, and all the formatting ”image size, cell background, font, and so on ”are copied to the other cells. |
Using a Big Table to Design a Page 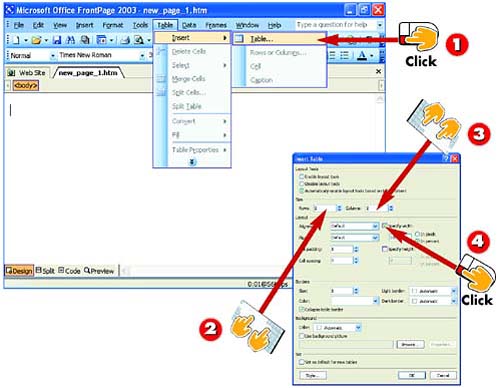 -
| | In a new blank page, open the Table menu, choose Insert , and select Table . | -
| | In the Rows field, type the number of rows the table should contain. | -
| | In the Columns field, type the number of columns the table should contain. | -
| | Click the Specify width check box to select it. | INTRODUCTION By creating a table so big that it covers the whole page, you give yourself the ability to put each chunk of page content ”a paragraph here, a picture there ”in its own cell. That enables you to arrange text and pictures in ways that would otherwise be impossible (unless you opted for "absolute positioning" and the limitations that come with it). |
TIP Some Tables Format Whole Template Pages Most of the pages you create from templates are formatted by big tables. Use the table editing steps you learn in this Part to change the layout of pages you create from templates. |
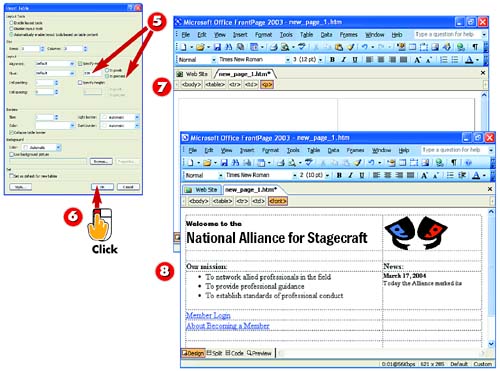 -
| | Make sure that the number in the box is 100 and that the In percent option is selected, to create a table that is 100% the width of the page. | -
| | Click OK or press Enter . | -
| | A table with the number of rows and columns you specified is added to the page. Add content to the cells as needed. | -
 | Text and objects on your page appear where you place them. | TIP Don't Worry If You Can't See the Whole Table Dialog Box The Insert Table dialog box is very large; depending on the screen resolution you use on your computer, you might not be able to see the bottom of it, even if you drag it as high as you can. For now, don't worry ”everything you need is near the top of the dialog box, except the OK button. If you can't see the OK button, remember that pressing the Enter key does the same thing as clicking OK. |
Adding a Caption to a Table 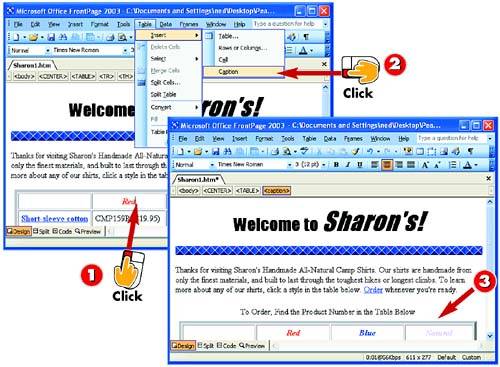 -
| | Click anywhere in the table to which you want to add a caption. | -
| | Open the Table menu, choose Insert , and select Caption . | -
| | Type your caption. | INTRODUCTION Some tables need a caption ”a descriptive title directly above or below the cells. If you choose to include a caption, it can include a description of what is found in the table, or it might provide instructions on how to use the information in the table. |
HINT Double-Click to Format Your Caption To format the text of the caption, double-click the caption to select it, and then apply formatting ”font, size, color, and so on. |
Dressing Up Tables with Gridlines  -
| | After clicking anywhere in the table to which you want to add gridlines, open the Table menu, choose Table Properties , and select Table . | -
| | The Table Properties dialog box opens. In the Borders area, click in the Size box and type a number for the width of the borders. | -
| | Click OK or press Enter . | -
| | Gridlines are added to the table. | INTRODUCTION So far, your table does a great job of lining up its content in rows and columns. But unless you've added them, the table lacks the nice grid of lines ”and box all around ”that delineate the content and can make the table look sharp. |
TIP A Bigger Border Size Makes a Thicker Border In step 2, the higher the number, the thicker the border. Typing a 4 in the Size field creates a nice, moderately heavy border; typing 1 creates an elegant, thin border. |
TIP Cell Padding Raising the number in the Cell padding field in the Table Properties dialog box creates more space around the cell contents, making the cells seem less crowded. |
Choosing Custom Border Colors  -
| | Click anywhere in the table whose borders or gridlines you want to alter. Open the Table menu, choose Table Properties , and select Table . | -
| | In the Borders section of the Table Properties dialog box, choose a color from each of the three lists: Color, Light border , and Dark border . | -
| | Click OK or press Enter . | -
| | FrontPage applies your color selections. | INTRODUCTION A table border or gridline is not one line, but three lines used together to create a 3D effect: a basic border line, a "light border" (a highlight), and a "dark border" (a shadow). You can pick the color for each part of the border. |
TIP Use "Apply" to Play with Table Choices To experiment with the Table Properties dialog box, make any changes in the dialog box and then click the Apply button rather than OK. The changes are made, but the Table Properties dialog box remains open, so you can try different settings without having to reopen it. |
Choosing a Background for a Table 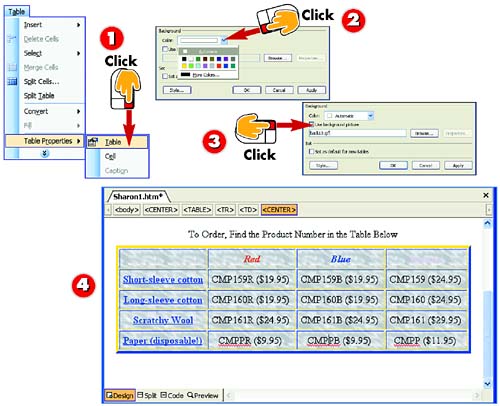 -
| | Click anywhere in the table whose background color you want to change. Open the Table menu, choose Table Properties , and select Table . | -
| | The Table Properties dialog box opens. To add a solid-color background to the table, open the Color list in the Background area and choose a color. | -
| | To add a picture background, click the Use background picture check box. Type the name of the picture file, or click Browse . When you're finished, click OK . | -
| | The selected background is applied. | INTRODUCTION Unless you add a background to a table, the page's background color or image shows through the table (but does not obscure the table's content or borders). But a table can have its own background, different from that of the page, to make the table ”and more importantly, its contents ”really stand out. |
HINT Background Picture Trumps Background Color If you choose both a background image and a background color, the color is irrelevant ”a background image overrides a background color. |
Adding New Rows 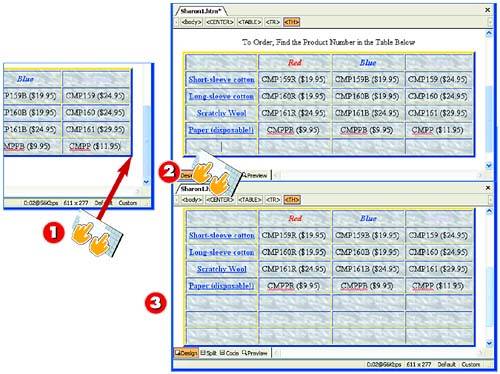 -
| | In the bottom row of the table, click in the cell farthest to the right, and press the Tab key on your keyboard to create a new row. | -
| | A new row is added. To add even more rows, keep pressing Tab . | -
| | More rows are added, one for each time you pressed the Tab key. | INTRODUCTION Ooops . The table needs another row. No need to start over; just add what you need to the bottom of the table. |
TIP Insert a Row Anywhere in a Table To insert a new row, but not at the bottom, click in any cell in the row you want to be directly above the new row. Then, open the Table menu, choose Insert , and select Row or Columns ; then click OK in the dialog box that appears. |
Adding New Columns 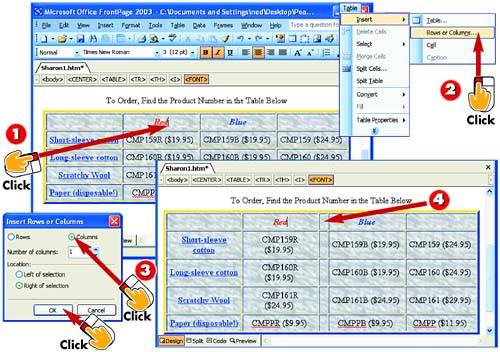 -
| | Click in any cell in the column that will be to the left of the new column. | -
| | Open the Table menu, choose Insert , and select Rows or Columns . | -
| | Click the Columns option, and click OK . | -
| | A new column is added. | INTRODUCTION Ooops, redux ! Suppose that your table needs another column . Fortunately, adding one is simple. |
TIP Add Multiple Columns To add more than one column to the right of the selected column, change the setting in the Number of columns field in the Insert Rows or Columns dialog box. |
TIP Adding a Left Column If you want the new column to be the leftmost column, click in the column that's farthest left and perform steps 2 and 3, but click the Left of selection option before clicking OK . |
Fine-Tuning Row and Column Sizes 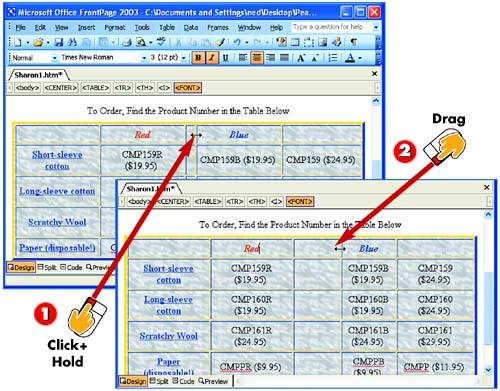 -
| | Using your mouse, point to the border of the row or column you want to resize. When the pointer becomes a two-sided arrow, click and hold. | -
| | Drag the row or column border until the row or column is the size you want it to be, and then release the mouse button. | INTRODUCTION After you insert all your content into the table, you might want to fine-tune the width of columns or height of rows ” especially when you're using a table to control page layout. You can do this simply by dragging the space between two rows or columns. |
TIP Making All Rows and Columns the Same Size To make all rows or all columns the same size, regardless of their contents, open the Table menu and then choose Distribute Rows Evenly or Distribute Columns Evenly . |
TIP Undoing Your Fine-Tuning If you're not happy with your fine-tuning, you can make the table revert to basing its row heights and column widths on the size of cell contents by clicking anywhere in the table, opening the Table menu, and choosing Autofit . |
Aligning a Table on the Page 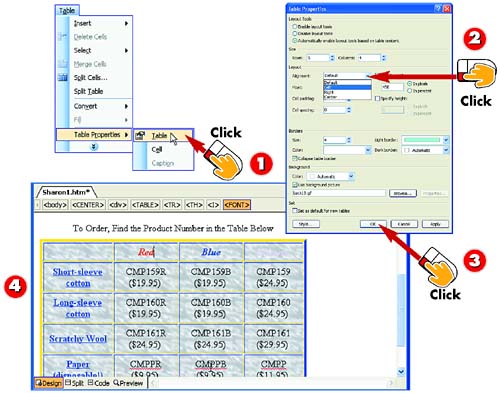 -
| | After you've clicked anywhere in the table you want to align, open the Table menu, choose Table Properties , and select Table . | -
| | The Table Properties dialog box opens. Click the down arrow next to the Alignment field and choose Left, Center , or Right from the list that appears. | -
| | Click OK or press Enter . | -
| | The table is aligned. | INTRODUCTION When a table is less than 100 percent of the width of the page, you can align it in the same positions you can align a paragraph or picture: left, center, or right. Note, however, that the usual alignment buttons don't do the job for tables. |
|