Event Handling
|
| < Free Open Study > |
|
About Box
Until now you haven't placed an About box in any of your add-ins. Because this is areal production add-in, you'll want to say who is responsible for its development. You do that with the About box, which you'll learn about in this section.
I also want to do something else in this section: I want to illustrate how simple it is to create a UserControl in Visual Basic .NET. This is not a book on creating UserControls, but then this is not going to be a complex UserControl. It will be just a little flash for the audience.
When you click the NET Desktop tool button, the About box will display. It is fairly standard, with just a few labels and a single UserControl that displays an animated logo for my company. The form is shown in Figure 12-12. You will see that the light in the lighthouse is rotating. Obviously, this is the UserControl and it is simply dropped on the form. Because a UserControl is always running, even in design mode, the light will rotate as soon as the control is dropped onto a form at design time.
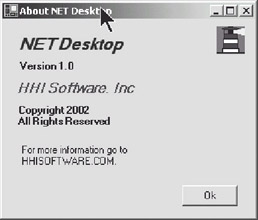
Figure 12-12: The About NET Desktop box
Building the UserControl
To build a UserControl, go to the start page of Visual Studio .NET. Click the New Project button and the New Project dialog box will display. Click the Visual Basic Projects folder and click the Windows Control Library icon. Enter the name for your control's project and select a path where you want the project stored. Click OK to create the project.
In Figure 12-13, you will see that I have placed four picture boxes, one on top of the other, in the UserControl's designer. I have dropped down the list of properties so that you can easily see that there are more images than just the one that appears on the Designer. Each of the four picture boxes has a picture of the lighthouse and the fog light is rotated 90 degrees in relation to the previous image. If I then alternately show and hide the four different images, it makes the lighthouse fog light appear to rotate.
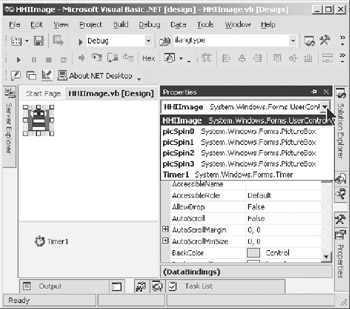
Figure 12-13: The UserControl's designer
I have also placed a Timer control on the form and set the Interval property to 500. This will cause the timer to fire every half second.
The only code required in the control is code to consecutively hide and show the four images as the timer fires. Listing 12-14 shows the code for the Timer1_Tick event. This code will be activated every half second. The code is very simple. It determines which picture box is currently visible. It then makes the next picture in line for showing visible and makes the other three invisible.
Listing 12-14: Timer1_Tick Event
Private Sub Timer1_Tick(ByVal sender As Object, _ ByVal e As System.EventArgs) Handles Timer1.Tick Select Case True Case Me.picSpin0.Visible picSpin1.Visible = True picSpin2.Visible = False picSpin3.Visible = False picSpin0.Visible = False Case picSpin1.Visible picSpin1.Visible = False picSpin2.Visible = True picSpin3.Visible = False picSpin0.Visible = False Case picSpin2.Visible picSpin1.Visible = False picSpin2.Visible = False picSpin3.Visible = True picSpin0.Visible = False Case picSpin3.Visible picSpin1.Visible = False picSpin2.Visible = False picSpin3.Visible = False picSpin0.Visible = True End Select End Sub
Once the code is in place, you must build the project before the control will appear in the Toolbox. After the project is built, the control's icon will be in the Toolbox and you can drag it onto a form in another project of the solution.
|
| < Free Open Study > |
|
EAN: 2147483647
Pages: 172