| Designing documents can sometimes be fun, but there's always a certain amount of drudgery to some of the things you might be asked to do, such as design tables of financial data. So there was much rejoicing in the page layout world when InDesign 2.0 came out with its table features, meaning the days of painstakingly drawing columns and rows and then setting up tabs to put information in those fields were over. The best part of the table feature is that you can import Excel spreadsheets directly into the document by choosing File, Place; you can copy and paste data into a table; you can convert tabbed text into a table; or you can set up your own tables and enter the information. However you choose to do it, you'll be happy the table features are there. To create a table on the fly, first create a text frame on your page. Click in it with the Type tool so you have a blinking cursor. Choose Table, Insert Table and in the Insert Table dialog shown in Figure 27.24, enter the number of rows, columns, header rows and header columns you want in your table. Figure 27.24. To create a custom table, first set up the number of rows and any header information. 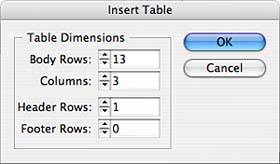
Insert text by typing at the blinking cursor within a cell. The cell's size expands horizontally to hold as many lines of text as needed. To move from cell to cell, press the Tab key. You can place a graphic file within a table cell by choosing File, Place and choosing your graphic. If the graphic does not fit in the cell, you might see an overset text symbol, indicating you need to enlarge the frame. To avoid an overset graphic in a cell, place your graphic file on the page and then choose Edit, Copy or Edit, Cut. Use the Type tool to click the cell in which you want to place your graphic and then choose Edit, Paste. The cell expands to fit the graphic. Importing Table Data To import table data, you must first draw a text frame on your page. Either draw the frame with the Type tool or draw a frame and then click in it with the Type tool to turn it into a text frame. Then follow these steps: 1. | Choose File, Place. Find the table document you want to import. You can import Microsoft Excel documents, tab-delimited text, or plain text. If you want to see how the table will import, select View Import Options in the Place dialog.
| 2. | The Import Options dialog enables you to choose which sheet of the document you want to import (see Figure 27.25). The name that was given to the sheet shows up in the pop-up menu. If you set up a view with specific cells in Excel you can choose that or type in the cell range you want to import.
Figure 27.25. If you view import options for your table, you can choose exactly what is imported and how. 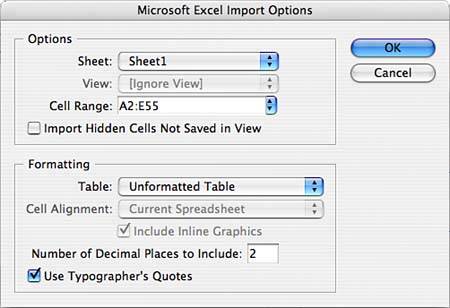
| 3. | Use the Import Hidden Cells Not Saved in View check box to import cells that do not appear in the view of the file you selected in the original document.
| 4. | In the Formatting area, choose Formatted Table, Unformatted Table, or Unformatted Tabbed Text from the Table pop-up menu. Any option enables you to choose the number of decimal places you want to import and whether to use typographer's quotes (also called smart quotes).
| 5. | If you choose Formatted Table, you can also choose whether to leave the cell alignment as it is in the file or bring it in as left-, right-, or center-aligned text. Click the check box to import inline graphics that are in the Excel spreadsheet.
| 6. | Click OK to import the table into the text frame.
|
Copying and Pasting in Tables To get table information into your InDesign document as a table, you have to place it; you cannot copy information from an Excel file, for example, and then paste it into an InDesign table. There are a couple of things to know, however, about copying and pasting when you're working with tables in InDesign: If you copy several cells' worth of information and then paste at a blinking cursor within a single table cell, all the information copied is pasted into the selected cell. You have essentially pasted a table within a single table cell. To paste the information in individual cells, drag your cursor across the appropriate number of cells needed to paste the information and then choose Edit, Paste.
Formatting Tables InDesign gives you many options for formatting the tables you place or create. You can use the commands under the Table menu, or you can use the Table palette. In this section, you concentrate on going through the Table palette, but understand that the menu commands are named the same and perform the same functions: When you click in your table, the Table palette displays the number of rows and number of columns. Use the Number of Rows and Number of Columns entry boxes or arrows to change the number of either. Row height can either be determined by a fixed measurement or automatically adjusted to fit the content. For automatic row height, select At Least in the Row Height pop-up menu and enter the smallest height the row should have. To set a fixed height for the row, select Exactly from the pop-up menu and enter the exact measurement in the Row Height entry field. Enter the specific width for the columns in the Column Width field. The next two sets of buttons (Align and Rotate) enable you to align your text vertically and set the direction your type should run. Set top, bottom, left, and right cell insets in the Cell Inset fields at the bottom of the palette.
The first selection in the Table palette menu is for Table Options, Table Setup. The other selections in the Table Options submenu are available through the Table Setup dialog, so you can either pick a specific dialog through the menu, or open the Table Setup dialog and pick what you want to change by clicking on one of the five tabs. Again, make sure that you use the Preview check box: Table Setup: Set table dimensions, specifications for the table border stroke, table spacing, and options for how your table strokes are drawn (see Figure 27.26). Figure 27.26. The Table Setup tab of the Table Options dialog. 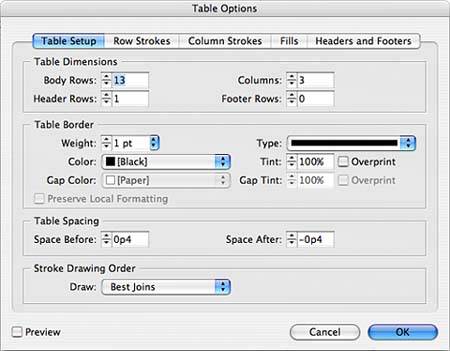
Row Strokes: Use the Alternating Pattern pop-up menu to choose how you want strokes to alternate (see Figure 27.27). For easier reading, you might want to set up different strokes on every other row, if there are several different categories of information being displayed, for example. These options enable you to set alternating stroke weights, type, color, tint, and gap color if you have specified dotted or dashed lines. You can also choose to skip numbers of the first or last rows. Figure 27.27. The Row Strokes tab of the Table Options dialog. 
Column Strokes: Like Row Strokes, these options enable you to decide whether you want alternating column strokes. These are the same options as in the Row Strokes tab (see Figure 27.28). Figure 27.28. The Column Strokes tab of the Table Options dialog. 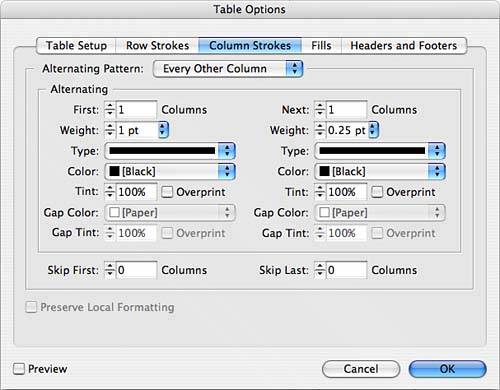
Fills: To make large tables easier to read you might want to alternate the fill of rows or columns (see Figure 27.29). Choose your Alternating Pattern and then choose the color (the list of available colors is pulled from the Swatches palette) and tint. You can also choose to skip rows. Figure 27.29. The Fills tab of the Table Options dialog. 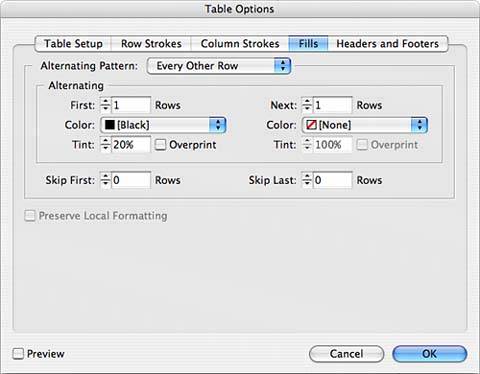
Headers and Footers: Header and footer rows enable you to define the information in your table (see Figure 27.30). If you have a table that spans several columns or pages, you might want to set the header or footer to repeat for ease of reading. Enter the number of header and footer rows the table contains, and then choose from the pop-up menus how often you want your header and/or footer to repeat. Use the check boxes to skip the first header or the last footer. Figure 27.30. The Headers and Footers tab of the Table Options dialog. 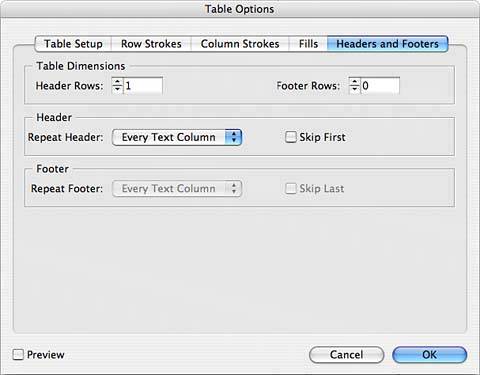
The next selection in the Table palette menu is Cell Options, Text. Again, the other selections in the Cell Options submenu are available through the Text dialog, so you can either pick a specific dialog through the menu, or open the Text dialog and pick what you want to change by clicking on one of the four tabs. As always, use the Preview check box: Text: You can set Cell Insets for the Top, Bottom, Left, and Right (see Figure 27.31). Use the pop-up menu to select the vertical text alignment. If you choose Justify, you can select a limit for the paragraph spacing. Choose the Offset, or how you want your type to align to the baseline, and a minimum offset number. Click the check box to clip the contents to the cell and select your text rotation angle in increments of 90 degrees. Figure 27.31. The Text tab of the Cell Options dialog. 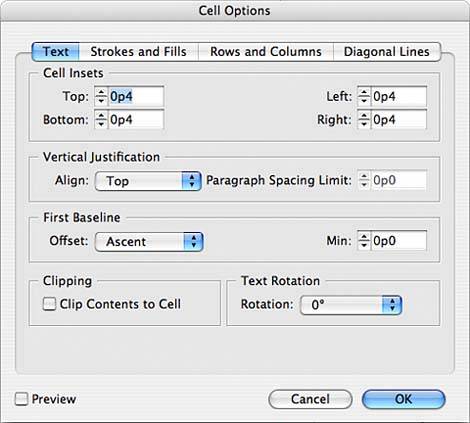
Strokes and Fills: This tab enables you to choose the stroke and fill for the selected cell(s). A preview window at the top shows a preview of the cell(s) you selected (see Figure 27.32). Figure 27.32. The Strokes and Fills tab of the Cell Options dialog. 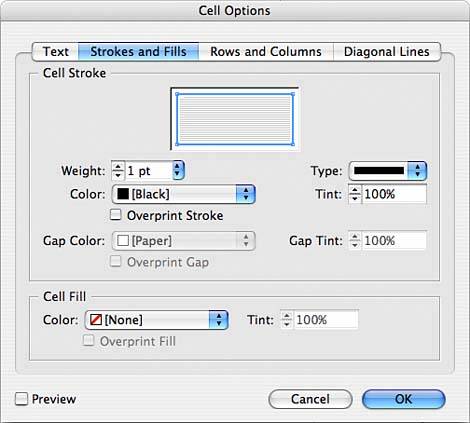
Rows and Columns: Choose At Least to set a minimum and maximum size for row height (see Figure 27.33). The rows change size based on content, but they are never larger or smaller than the amount you enter here. Select Exactly to enter a set height that will not change. Set Column Width. Keep Options refers to how the selected cell(s) will break. You can choose to flow the table to the next frame, next column, or next specific page, or let it break anywhere. Click the Keep with Next Row check box if you want the row in which you clicked to stay with the row that follows. Figure 27.33. The Rows and Columns tab of the Cell Options dialog. 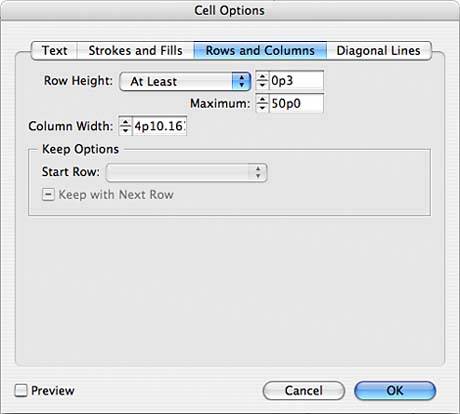
Diagonal Lines: If you want selected cells to contain diagonal or crossed lines, click to select the type of diagonal you want to put in the cell(s), and then set the line stroke characteristics and whether you want the cell's content or the diagonal to be in front (see Figure 27.34). Figure 27.34. The Diagonal Lines tab of the Cell Options dialog. 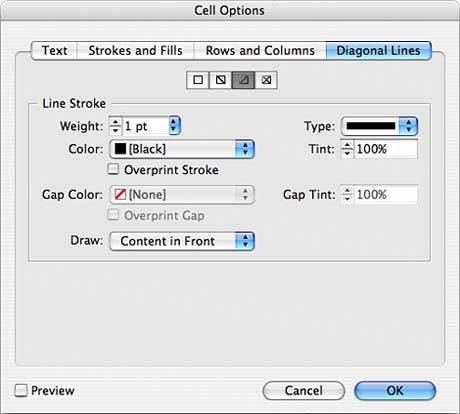
The next selections in the Table palette menu enable you to insert rows or columns, and to delete rows, columns, or the entire table: Select Merge Cells from the palette menu to combine two or more selected cells into one cell (see Figure 27.35). Select Unmerge Cells to separate merged cells back to individual cells. Figure 27.35. Merged cells can create a heading for a number of columns. 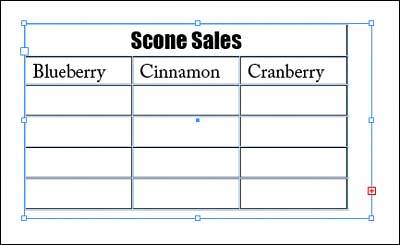
Split Cell Horizontally and Split Cell Vertically enable you to create multiple cells in one cell (see Figure 27.36). The commands under Convert Rows convert the selected row to a header, a footer, or a body row. Figure 27.36. Table cells can be split vertically or horizontally. 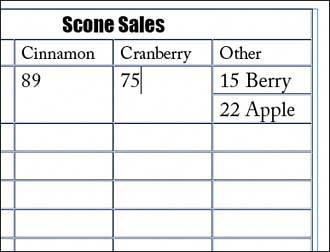
Distribute Rows Evenly and Distribute Columns Evenly make the selected rows or columns the same size. When you have a defined header or footer row, Edit Header and Edit Footer jump to the first cell in the row to enable you to edit the information quickly.
Again, the majority of the commands under the Table menu give you the same options as provided by the Table palette menu. There are, however, a few differences: Convert Text to Table: If you placed tab- or comma-delimited text in a document and later want to convert it to a table, select it and then use this command to open a dialog specifying how to separate rows and columns. Convert Table to Text: This command does just the opposite, converting a table to regular text. You can select how rows and columns should be separated in the resulting text. Go to Row: Enter a row number to jump there quickly.
|