| As discussed previously, the Setup Project Wizard offers an easy-to-use interface encompassing the most commonly used setup project options. You can use the Setup Project Wizard to create an installer in four simple steps. If you need to include more functionality in an installer than the wizard supports, you can manually enhance the installer that the wizard creates. To illustrate the process of creating an installer for a Windows Application project, start with an existing project or create a test project for deployment. Any Windows Application project will do; our goal here is to create an installer package that will allow you to deploy the application on a user's computer. Even if the user does not have Visual Studio .NET installed on his system, the installer package will ensure that the components required by the application are installed and registered on the client PC. For the purposes of this demonstration, I will be working with the Loan Calculator application that we created in Chapter 2, "Creating Your First Windows Application." You can follow along by using that project. If you do not have the code for that project, you can download it from www.vbinsider.com. Look for the file named LoanCalc.zip. To see the Setup Project Wizard in action, follow these steps: -
Begin by opening the Loan Calculator project. -
Once the Loan Calculator project is open, select File, Add Project, New Project in Visual Basic .NET's menu system. You will see the Add New Project dialog box, illustrated in Figure A.1. Figure A.1. The Add New Project dialog box lets you select among a number of Setup and Deployment type projects. 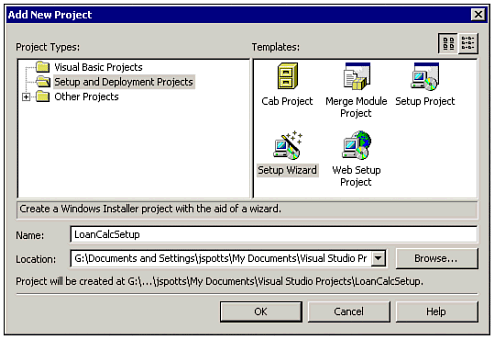 -
In the Project Type (left) pane of this dialog box, select Setup and Deployment Projects. -
In the Templates (right) pane, select Setup Wizard. -
Type LoanCalcSetup as the name of the project. Note that since there is already a solution open in the Visual Basic .NET IDE, you can choose to have the setup project added to the current solution or to close the current solution before continuing. -
Click OK to close the New Project dialog box. You will see Step 1 of the Setup Project Wizard, as shown in Figure A.2. Figure A.2. The Setup Project Wizard consists of five steps.  -
Click Next to continue to Step 2 of the wizard. Step 2 of the Setup Project Wizard, shown in Figure A.3, allows you to choose the project type for the installer you are creating. You have these four options: Figure A.3. In Step 2 of the Setup Project Wizard, you specify the type of project for which your setup package is to be created. 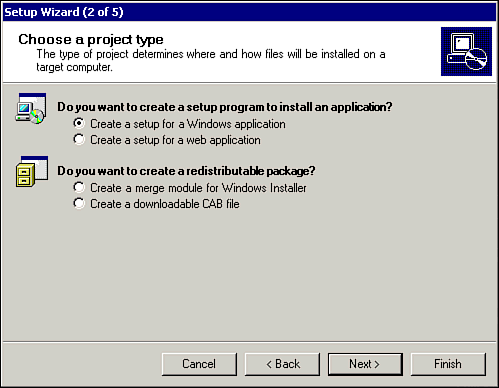 Create a Setup for a Windows Application Create a Setup for a Web Application Create a Merge Module for Windows Installer Create a Downloadable CAB File For a simple Windows Application project, you will select the first option; Web Applications require the second option. Either of the first two options leads to the creation of a setup program that the user will run to install the application on his PC. The third and fourth options will create a redistributable package, which can be combined with other packages to form a complete, customizable setup solution in which individual components can be updated easily without affecting the overall package.
-
For this example, select the first option (Create a Setup for a Windows Application) and click Next. You will see the third step of the Setup Project Wizard, depicted in Figure A.4. Figure A.4. Step 3 of the Setup Project Wizard lets you specify the components to include in your setup package. 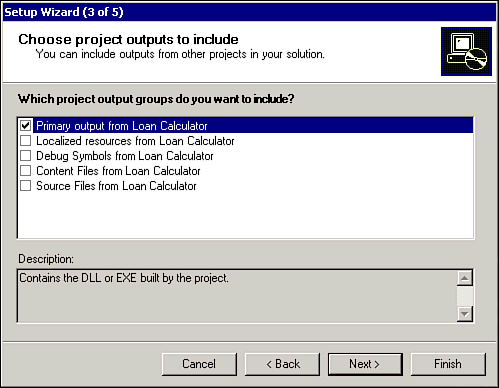 -
Step 3 of the Setup Project Wizard is where you specify what is to be included in your setup package. Typically, you will want to include at least the primary output of your project, which consists of the EXE (or DLL) file that is created when the application is built. You may also choose to include other things such as the actual source files that were used to create the project. Select any of the other available options to see a description of that option. Check Primary Output, and then click Next. -
In Step 4 of the Setup Project Wizard, shown in Figure A.5, you can include any additional files that you want to be distributed to your end user. Examples of these additional files include Read Me files, documentation, help files, initial databases, and so on. Click the Add button to designate files to include; when you are done, click Next. Figure A.5. The wizard lets you add extra files that you want to be distributed to your user. This would be a good place to include an End-User License Agreement (EULA), for example. 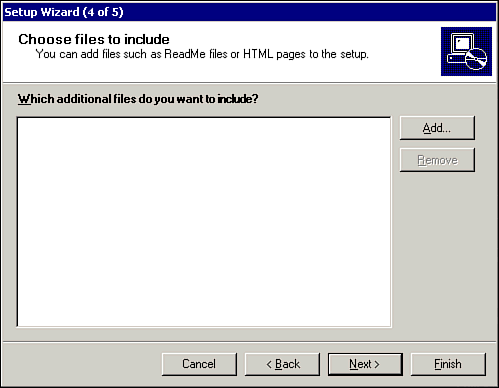 -
Step 5 of the Setup Project Wizard, which summarizes the actions that the wizard will perform, is shown in Figure A.6. Click Next. Figure A.6. The wizard is ready to complete its task. 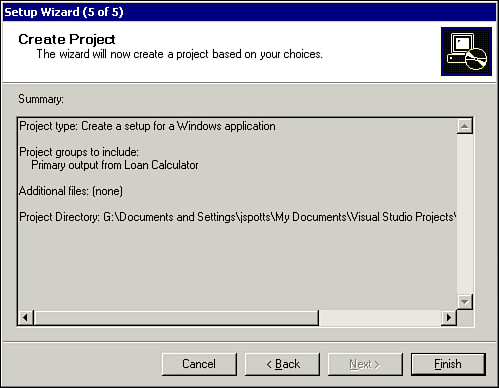
After the wizard has completed, a new setup project is created and added to the current solution. The Solution Explorer window, shown in Figure A.7 undocked from its usual position, now includes this new setup project. You can see that the setup project includes a merge module file, which has a .msm extension. merge modules are used by the Windows Installer to deliver the components that will be installed during the setup process. Typically, each application that is part of a setup package will be represented by its own merge module file. Merge modules also contain version information for each component so that the Windows Installer can ensure that it is not replacing components with earlier versions. Figure A.7. The solution now includes the new setup project. 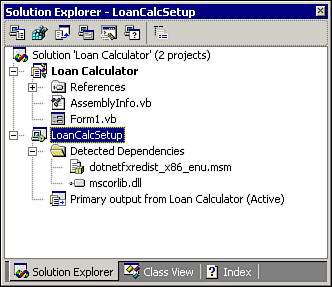 As mentioned earlier, the Setup Project Wizard creates a setup project with many of the commonly used options already populated. Before building the setup project and creating the setup package, however, you will probably want to modify at least some of the options. The following sections introduce you to some of the options that you may want to modify. |
