Checkerboarding: Using AB Track Editing for Transitions
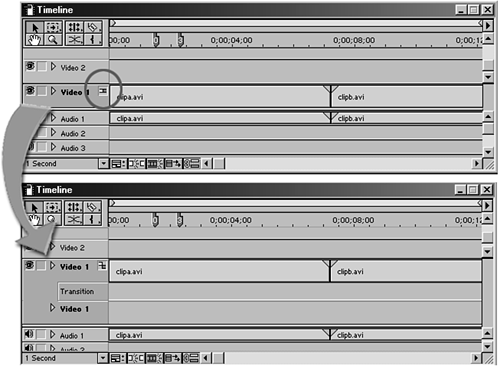
Checkerboarding: Using A/B Track Editing for TransitionsYou might opt to split Video Track 1 into three separate tracks that work together simultaneously: track A, a Transition track, and track B. This method is a more visual way of displaying how transitions work. You might want to try this method at first, until you get a grasp of what occurs when working with transitions, but I think you will find it a much more complex and slower method with the more-advanced editing you do. (See the next section for an alternative solution.) To add a dissolve (or other transitions) in Premiere with split tracks, do the following:
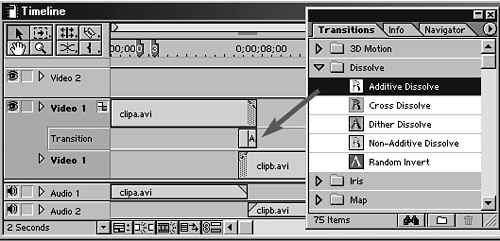
Remember, the only place you can put a dissolve or any type of transition is between Video Tracks 1A and 1B. If the shots do not overlap with a transition in place, the edit points play back as a simple cut. You might need to play around and try different lengths of dissolve transitions to get the right look and feel you're after. See how difficult and time-consuming this process can be? Wait until you have to make changes to your sequence. I strongly recommend becoming familiar with editing and adding transitions in Single-Layer Editing mode (discussed in the next section). note You can alter the transition's length (trimming the effect similar to how you trim any video clip) by moving your mouse over either end of the effect. The cursor changes into a red trim icon similar to the Rolling Edit Tool icon, as shown in Figure 5.10. Right-click to drag the edit point to change the duration and speed of the dissolve transition. Figure 5.10. Trim dissolve transitions to set the effect's desired length.
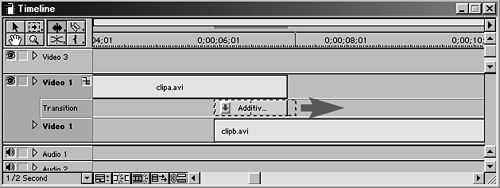
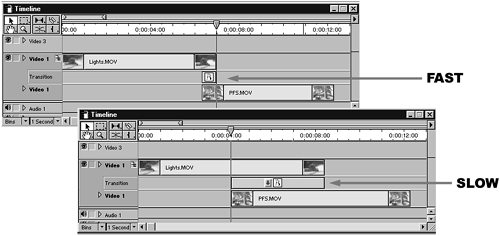
tip Lengthening the dissolve's duration, as shown in Figure 5.11, makes the transition occur over a longer period of time. This creates a slow, gradual fade from one scene into the other. This is a good approach when you are trying to create an emotional effect or show the passage of time. A short, quick dissolve may be used to soften the effects of a scene that does not cut together well. Figure 5.11. Slow dissolves can create an emotional effect or show the passage of a long period of time.
Changing a transition's duration in the timeline automatically changes the duration of one of the two clips that the transition falls between. Which direction you trim the transition determines whether the clip in Video Track 1A or 1B gets trimmed. tip If you want to change the transition's duration without affecting the clips' edit points, hold down the Ctrl key (Windows) or the Command key (Macintosh) while adjusting the transition's end points. |