Installing Mac OS X Applications
| Although Carbonized and Cocoa applications behave somewhat differently, their similarities are at least as great as their differences. This is especially true when it comes to the installation of applications. Under Mac OS X, there are two basic strategies by which applications are installed:
Because Mac OS X is designed as a multiuser OS, where you install Mac OS X applications is a bit more complicated than was installing applications under previous versions of the OS. There are two locations in which you should install Mac OS X applications:
NOTE Accessing an application installed in a Home directory is dependent on the permissions you assign to that application's folder. Modifying the permissions of the application's folder so that all users have access will allow everyone to use the application, even if they are not logged in as the user that owns that application. These installation locations are appropriate only for Mac OS X (Carbonized or Cocoa) applications. You install Classic or Unix applications in locations that are appropriate for those types of applications. CAUTION If you have trouble installing an application, make sure that you are logged in as an Administrator. Many application installations can be done only while using an Administrator account. Installing Mac OS X Applications with Drag and DropUnder Mac OS X, applications can be provided as bundles. A bundle is the collection of the executable files and other resources that are required for an application. An application bundle can be presented to you as a single icon; this makes the drag-and-drop installation technique possible. Instead of having to deal with an installer application or with a bunch of individual files, you can easily act on an entire application bundle by acting on its single icon. Installing applications that use the drag-and-drop method is especially simple. Most of these applications are provided as Self Mounting Image (.smi) or Disk Image (.dmg) files. This means that the file behaves just as if it were a volume you mount on your desktop. This is accomplished through Apple's Disk Copy application, which will handle .smi and .dmg files for you automatically. Most of the Mac OS X applications you will install use this method, making installation of Mac OS X applications almost trivially easy. NOTE The only difference between the behavior of .smi and .dmg files is that .smi files automatically mount on your desktop when you launch them. Disk image files use Apple's Disk Copy software to mount because this application is installed on your Mac by default, these files behave quite similarly and you probably won't notice any difference between them. However, you could use an .smi file even if Disk Copy wasn't installed on your machine, whereas you can't use a .dmg file without the Disk Copy application. The general process to install an application provided in an .smi or .dmg file is the following:
NOTE Some applications don't even provide a .smi or .dmg file. After you download and uncompress the file, you will have the application's folder immediately. Drag this folder to where you want the application to be installed. Most Apple applications that you can download from the Web are provided in the .smi format, as are many third-party applications. As an example, download and install OmniWeb, which is a popular Mac OS X Web browser.
NOTE
After you have installed the application, you can delete the .dmg file. However, you might want to create a directory to store these files in the event that you need to reinstall the application at a later date. This will prevent you from having to download it again.
Installing Mac OS X Applications Using an InstallerMost applications that use an installer application install in a similar fashion; however, minor variations can exist depending on the specific installer application that is used. Under Mac OS X, most applications that use the Installer application come in package files, which have the extension .pkg. And most Mac OS X applications use Apple's Installer program. For example, when you installed Mac OS X on your machine, you used this installer. NOTE When you download an application that comes in a .pkg file, it will often be included in a .dmg or .smi file. This usually is done when there are files outside the application to be installed that the developer wants to include with the application, but that should not be installed as part of it (readme files, for example). The general process to install and use .pkg files is the following:
An example of an application that uses this technique is the Samba Unix server application, which enables you to share files with Windows users.
|
 To learn how to download files from the Web and prepare them for use,
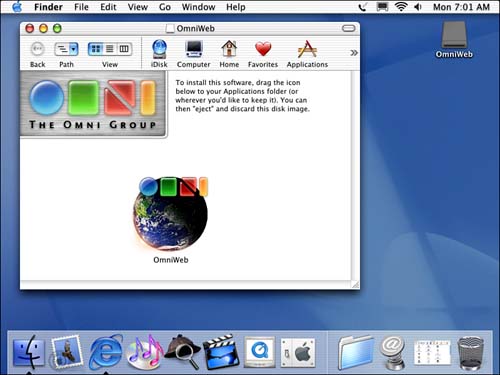
EAN: 2147483647
Pages: 260