Listening to an Audio CD
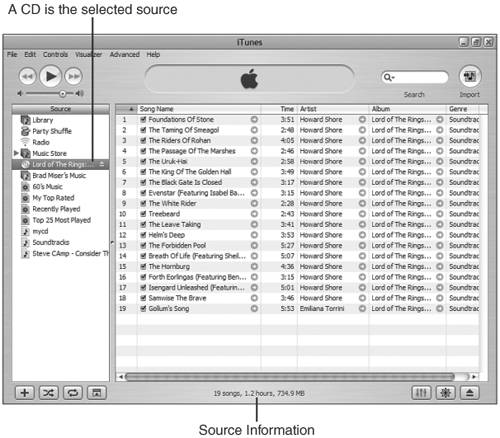
| What iTunes has in common with its much less sophisticated cousins the boom box and the standard CD player is the ability to play audio CDs. Although the basic function is the same, iTunes has several tricks in its bag to make listening even better. So, grab a CD and give it a try:
That's it. You now know everything you need to listen to an audio CD. However, there are lots more ways to control the tunes, some of which are in the following list:
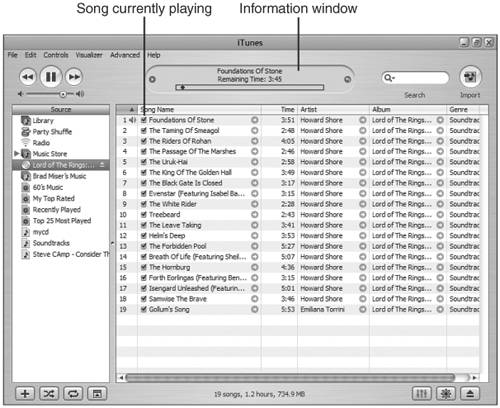
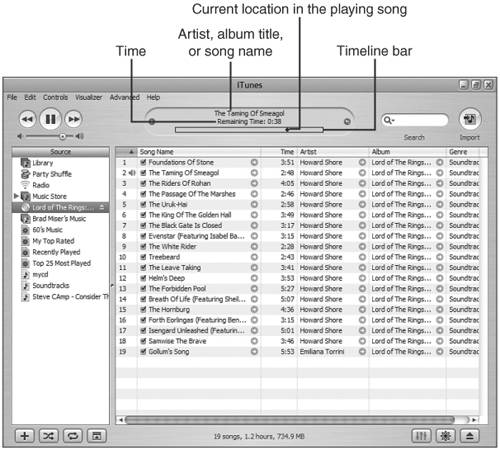
Viewing Information While Listening to TunesYou can view different information in the Information window, such as the name, artist, and album of the currently playing song. When you first view this window, it contains a timeline bar that represents the total length of the song being played (see Figure 13.3). A black diamond indicates the relative position of the music you are hearing at any point in time compared to the total length of the song. Figure 13.3. The iTunes Information window looks basic, but there is much hidden behind its quiet demeanor. Note
At the top of the Information window is a line of text. What appears here changes over time; it automatically rotates between the artist's name, album name, and name of the song currently playing. You can freeze this display on a specific attribute, such as song name, by clicking the text. Each time you click, the information will change from album to artist to song name. Whichever one you last clicked on will remain showing in the window. Underneath the album, artist, and song name line is the time information. This can display elapsed time (the amount of time a song has been playing), remaining time (the amount of time a song has left), or total time (the song's total length). Unlike the name information, this display does not rotate among these values. You can set the value being displayed by clicking the time being displayed; each time you click, a different time value will be shown until you have rotated among all three values. Note
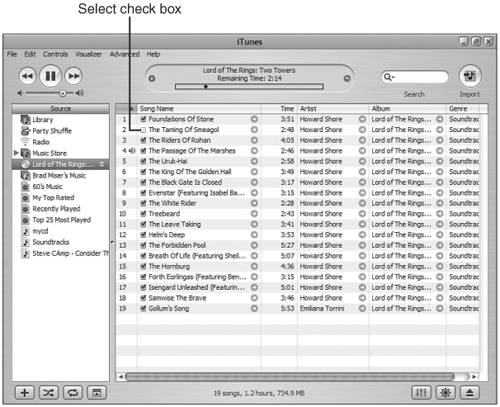
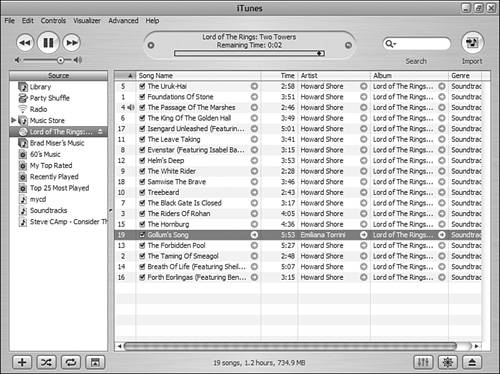
Finally, if you click the Change Display button, the display will become a graphical representation of the volume levels at various frequency groups (see Figure 13.4). You can return to the title information by clicking the button again. Figure 13.4. Why would you want to use the volume level display in the Information window? No real reason, but it does look kind of cool. Controlling the TunesPlaying an audio CD from start to finish and controlling the volume are useful and required tasks, but with iTunes you can take control of your music so that you hear only what you want to hear, in the order in which you want to hear it. In the following sections, you'll see how iTunes lets you take control of your tunes. For example, in the next section, you'll learn how to choose the songs you want to hear. Choosing the Songs You HearLet's face it, you probably don't like every song on a CD no matter how much you like the CD on the whole. With iTunes, you can choose the songs that play when you play the CD. You can cause a song to be skipped by unchecking the Select check box (see Figure 13.5). When the CD plays, it will skip over every song whose Select check box is unchecked. Figure 13.5. Here, the song "The Taming of Smeagol" will be skipped because its Select check box is unchecked (of course, this is only for an example; all the songs on this CD are excellent). Tip
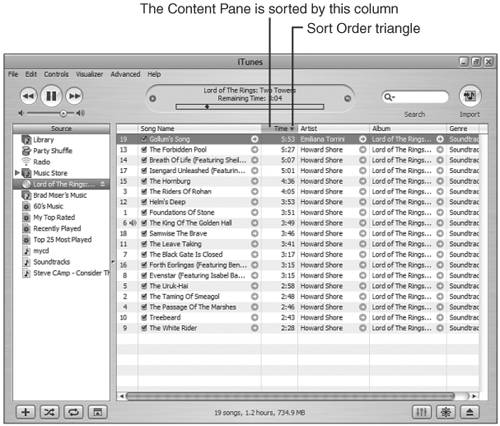
To have iTunes include and thus play the song again the next time you play the CD, simply check its Select check box. Choosing the Order in Which Songs PlayiTunes determines the order in which songs play by the order in which they are shown in the Content pane, starting from the top of the pane and moving to the bottom. By default, songs are listed and therefore play in the order they appear on the CD, from track 1 to the last track on the disc. However, you can make songs on a CD play in any order you choose. You have a couple ways to do this. You can change the order in which songs are listed in the Content pane (and thus the order in which they play) by dragging the songs up or down in the pane (see Figure 13.6). When you change the order of the songs in the pane, you change the order in which they will play. Figure 13.6. Order! Order! Compare the order of the songs in this figure with the previous one; listening to the CD now will be an entirely different experience. You can also change the order of tracks by sorting the Content pane by the various attributes shown, such as Song Name, Time, Artist, and so on. You can do this by clicking the column heading of the attribute by which you want to sort the list. When you do so, the tracks will be sorted by that column (see Figure 13.7). To change the direction of the sort (from ascending to descending or from descending to ascending), click the Sort Order triangle; the sort direction will be reversed, and the songs will be reordered accordingly. Just like when you manually move songs around, they will play in the order in which they are listed in the pane. Figure 13.7. Now the order of the songs is based on their length; in this case, the longest song on the CD will play first, the next longest second, and so on. The column by which the pane is sorted is indicated by the column heading being highlighted in bluethis defaults to the first column, which is the track number. (When a CD is the source, the Track Number column is always the first or leftmost column in the Content pane, and it's unlabeled.) When you select a different column, its heading becomes blue to show that it is the current sort column. Tip
You can also tell which column is the sort column as well as the direction of the sort by the Sort Order triangle. It only appears in the sort column. When the triangle is pointing down, the sort is descending. When the triangle is pointing up, the sort is ascending. Getting RandomFor a little variety, you can have iTunes play songs in a random order. This feature is called Shuffle. To use this feature, click the Shuffle button located at the bottom of the window (second one from the left) or choose Controls, Shuffle. As you play music, songs will be selected in a random fashion regardless of how they are listed in the window. Just to add a bit of confusion for you, the order in which the songs are listed in the window doesn't change as you might expect. This is the one case in which the order of the songs in the window is not the order in which they play. The only way you can tell that the Shuffle feature is active is that the Shuffle button will be highlighted. Note
To return the CD to its natural order, click the Shuffle button again or choose Controls, Shuffle. Repeating TracksSometimes, you just can't get enough. In that case, you can set iTunes to repeat an entire CD once or to repeat only a single song. To repeat your tunes, check out these pointers:
Controlling iTunes from the DesktopUsing the controls you have seen so far is fine, but you might not want to have the iTunes window foremost all the time. You must be able to see iTunes to control it, right? Wrong! Tip
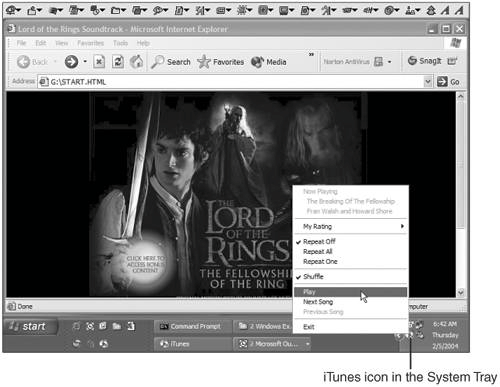
Controlling iTunes from the Windows System TrayWhen iTunes is running on a Windows machine, an iTunes icon is displayed in the System Tray. Right-click this icon and you will see an iTunes menu (see Figure 13.8). At the top of the menu, you will see information about the song that is playing (if iTunes is paused, this text will be grayed out). You can use the commands on this menu just as you can from within iTunes itself. For example, you can skip to the next song by choosing Next Song. After you choose a command, you can move off the menu and it will disappear. This is a handy way to control iTunes without having to make its window active or even show it on your desktop. Figure 13.8. You can control iTunes even if you can't see it. If you don't want the iTunes icon to appear in the System Tray for some reason, you can remove it. Open the iTunes Preferences dialog box (Ctrl+,), click the Advanced tab, uncheck the Show iTunes Icon in System Tray check box, and click OK. The icon will no longer appear in your System Tray. Tip
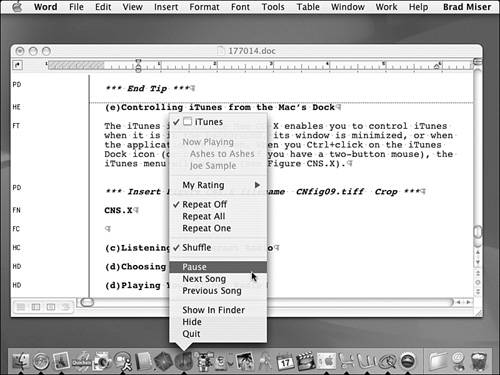
Controlling iTunes from the Mac's DockThe iTunes icon on the Mac OS X enables you to control iTunes when it is in the background, when its window is minimized, or when the application is hidden. When you Ctrl-click the iTunes Dock icon (or right-click if you have a two-button mouse), the iTunes menu will appear (see Figure 13.9). At the top of this menu, you will see information about the song currently playing (the text is grayed out if iTunes is paused). You control iTunes by choosing a command on this menu. For example, you can pause the music by choosing Pause. After you choose a command, the menu will disappear, and you can get back to what you were doing. Figure 13.9. On the Mac, you use its Dock menu to control iTunes even when you can't see it. |


EAN: 2147483647
Pages: 187