Working with HTML Tables
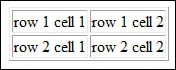
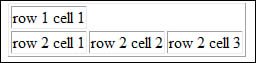
| In addition to making pretty text and inserting links and graphics, one of the other interesting things you can do with HTML is add a table to your item listing. While tables sound complicated (and they are, to a degree), they're necessary for both formatting your listing's background and borders, and for organizing the content in your listing. Mastering tables gives you a powerful tool to use when creating your eBay auction templates. Note Learn more about using tables in your auctions in Chapter 8, "Working with Tables, Borders, and Backgrounds." Creating Simple TablesCreating a table starts with a pair of container tags. That is, you enclose your table within matching <table> and </table> codes. Then you enclose each individual row in the table with <tr> and </tr> codes, and each cell in each row with <td> and </td> codes. That's rightyou create each row of your table one at a time. And each row can have different numbers of cells; you don't define the total number of columns for your table as a whole. If you want to create a table where the first row has a single cell, the second row has two cells, and the third row has four cells, you can do it. (And quite easily, too.) But let's get back to basics. We'll start with a simple table that contains a single row that itself contains a single cell. The code for this table looks like this: Note To make this complex code easier to read, I'm offsetting the code for each subsequent section of the table, much as you would in a typical outline. This type of code offsetting is helpful, but not necessary; it doesn't change how the table actually appears. <table> <tr> <td>This is the text for the cell</td> </tr> </table> The resulting table should like the one in Figure 5.1. Figure 5.1. A table with one row and one column. Now let's take that same table and give it two cells in the solo row instead of one. Here's the new code: <table> <tr> <td>This is the text for the first cell</td> <td>This is the text for the second cell</td> </tr> </table> Figure 5.2 shows the resulting table. Figure 5.2. A table with one row and two columns. Getting the idea? Now let's add a second row, also with two cells. Here's the code: <table> <tr> <td>row 1 cell 1</td> <td>row 1 cell 2</td> </tr> <tr> <td>row 2 cell 1</td> <td>row 2 cell 2</td> </tr> </table> Figure 5.3 shows what the table looks like. Figure 5.3. A table with two rows and two columns. Now, to show that you can have different numbers of cells in each row, let's take the same table but make it so the first row has a single cell, and the second row has three cells. Here's the code: <table> <tr> <td>row 1 cell 1</td> </tr> <tr> <td>row 2 cell 1</td> <td>row 2 cell 2</td> <td>row 2 cell 3</td> </tr> </table> Figure 5.4 shows what this table looks like. Figure 5.4. A table with a single-cell first row, and a three-cell second row. Within any individual cell in the table, you can insert any type of itemplain text, formatted text, bulleted lists, background shading, and even graphics. Just make sure that the contents of the cell are enclosed with the <td> and </td> tags. Aligning and Sizing Your TableThe <table> tag can contain various attributes that affect the placement and formatting of the table. The two attributes we'll examine first are the align and width attributes. Not surprisingly, you use the align attribute to determine how the table will be alignedto the left margin, the right margin, or centered on the page. By default, the table will be aligned to the left margin, so it's only the other two options you need to worry about. For example, the code to center align a table is this: <table align="center">Note that the center (or right or left) parameter is in quotation marks. To determine the total width of your table on the page, you use the width parameter within the <table> tag. You can specify the width as either a percent of the total page width, or as a specific width in pixels. To specify a percentage, enter the attribute as "xx%" (within quotation marks, with the percent sign); to specify a specific pixel width, enter the attribute as "xx" (within quotation marks, but without the percent sign). For example, to specify a table 400 pixels wide, you'd use the following code: <table width="400">Or to specify a table that occupies 75% of the total page width, you'd use this code: <table width="75%">Of course, you can gang the align and width attributes together, like this: <table align="center" width="75%">Adding Table Borders and BackgroundsA white table on a white page doesn't look much like a table at all. (Although it can help you align text in columns, by putting each column of text in a separate table cell.) One way to set your table off from the rest of the page is to put a border around it. Not surprisingly, you add a border to your table by using the border attribute within the <table> tag. You specify the width of the border in pixels (surrounded by quotation marks). For example, here's the code to add a 2-pixel border around the outside of a table: Note Alert readers will note that the tables in Figures 5.1 through 5.4 had borders around them. I did this by adding the border attribute to the example code, to make the table cells easier to discern. <table border="2">By default, the border will pick up the color scheme of the page, which is typically a gray color. To create a colored border, use the bordercolor attribute, followed by the hexadecimal code or color name (within quotation marks). For example, to create a 2-pixel blue border, use this code: <table border="2" bordercolor="blue">You can also add a background color or graphic to your entire table. You do this with the bgcolor and background attributes. You add the bgcolor attribute to the <table> tag, and then specify the color number or name, like this (for a light gray background): <table bgcolor="#CCCCCC">To use a graphic as a background image for your table, you employ the <background> attribute. Just set the value for the attribute to the full URL of the image file you want to use, like this: <table background="URL">Naturally, you can combine all the <table> attributes into a vary long tag, to create tables with sophisticated formatting. For example, here's the code for a table that's 500 pixels wide, centered on the page, with a 1-pixel blue border and a light gray background: <table align="center" width="500" border="1" bordercolor="blue" bgcolor="#CCCCCC"> When you take it one piece at a time, it's pretty easy. Sizing and Formatting Individual Cells Within a TableNot only can you format your table as a whole, you can also format each cell within the table individually. This is how you put borders around specific sections of your listing, or shade the background of selected sections. We'll start with the simple act of sizing a cell. You do this by employing the width attributed within the <td> tag. You follow the same rules as with <table> sizing, specifying either a specific width in pixels, or the width as a percentage of the total table. For example, to size a cell as 50% of the total table width, you use this code: <td width="50%">To add a border to a table cell, you first have to specify a border width for the entire table. Then you can change the color of the border for the specific cell, by using the bordercolor attribute within the <td> tag, like this: <table border="1"> <td bordercolor="green"> Shading the background of a cell is as simple as adding the bgcolor attribute to the <td> tag, like this: <td bgcolor="color">Finally, you can use a graphic image as the background for any single cell by using the background attribute to the <td> tag, and then specifying the full URL and filename of the image file, like this: <table background="URL">How does this work in practice? Figure 5.5 shows a single-row, two-column table where one of the cells has a shaded background and the other doesn't. Here's the code for the complete table: <table align="center" width="75%"> <tr> <td width="75%"> This is the left column. This is the left column. This is the left column. </td> <td width="25%" bgcolor="#CCCCCC"> This is the right column. </td> </tr> </table> Figure 5.5. Shading just one cell in a table. |

EAN: 2147483647
Pages: 101