Plugging into the Game Engine
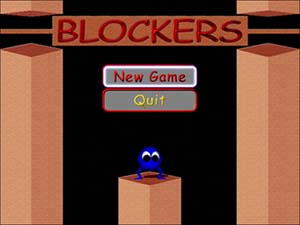
| That's all there is to the main menu screen for your new game. Now all you'll need to do is plug it in to your game engine, and you'll be well on your way to having a fully functional game. Go back to your game engine class, and add the following two variables to your class: // Is the main menu currently being shown private bool isMainMenuShowing = true; // The main UI screen private MainUiScreen mainScreen = null; These control the main menu UI screen, as well as determine whether this screen is currently being shown. Because the first thing you see when you start the game is the main menu, obviously you want this Boolean variable to default to true, as it does here. Now you actually create an instance of the main menu UI screen, which you do in the OnCreateDevice method. Add the following code to the end of that method: // Create the main UI Screen mainScreen = new MainUiScreen(device, desc.Width, desc.Height); mainScreen.NewGame += new EventHandler(OnNewGame); mainScreen.Quit += new EventHandler(OnMainQuit); You won't be able to compile yet because the event-handler methods haven't been declared yet. For now, you can skip them because you will handle them in a few moments. First, because you've created your main menu screen, you want to ensure that it gets cleaned up when the application shuts down. In the OnDestroyDevice method for your game engine, add the following to the end of the method: if (mainScreen != null) { mainScreen.Dispose(); } This code ensures that the textures and sprite used for rendering this UI screen are cleaned up properly. Speaking of rendering, you probably want to ensure that your screen will get rendered as well. For now, go ahead and remove the code that you used to render the sky box from your OnFrameRender method (don't worry, you'll replace it later) because you don't want the sky box to be rendered while the main menu is being displayed. Replace your OnFrameRender method with the one in Listing 6.5. Listing 6.5. Rendering Your Main Menu public void OnFrameRender(Device device, double appTime, float elapsedTime) { bool beginSceneCalled = false; // Clear the render target and the zbuffer device.Clear(ClearFlags.ZBuffer | ClearFlags.Target, 0, 1.0f, 0); try { device.BeginScene(); beginSceneCalled = true; // Decide what to render here if (isMainMenuShowing) { mainScreen.Draw(); } #if (DEBUG) // Show debug stats (in debug mode) debugFont.DrawText(null, sampleFramework.FrameStats, new System.Drawing.Rectangle(2,0,0,0), DrawTextFormat.NoClip, unchecked((int)0xffffff00)); debugFont.DrawText(null, sampleFramework.DeviceStats, new System.Drawing.Rectangle(2,15,0,0), DrawTextFormat.NoClip, unchecked((int)0xffffff00)); #endif } finally { if (beginSceneCalled) device.EndScene(); } } Obviously, your rendering method got a lot less complex with that. Because the UI screen is encapsulated so well, it's only a single method call to ensure that everything gets rendered correctly. You're not entirely finished yet, though. Remember, for the buttons to work correctly, you need to call into the mouse and keyboard methods of the UI screen. You have hooked the mouse and keyboard user input callbacks from the sample framework. Go ahead and add the code from Listing 6.6 to them now to call into the appropriate UI screen. Listing 6.6. Handling User Input private void OnMouseEvent(bool leftDown, bool rightDown, bool middleDown, bool side1Down, bool side2Down, int wheel, int x, int y) { if (!leftDown) { if (isMainMenuShowing) { mainScreen.OnMouseMove(x, y); } } else if (leftDown) { if (isMainMenuShowing) { mainScreen.OnMouseClick(x, y); } } } /// <summary>Handle keyboard strokes</summary> private void OnKeyEvent(System.Windows.Forms.Keys key, bool keyDown, bool altDown) { // Only do this when it's down if (keyDown) { if (isMainMenuShowing) { mainScreen.OnKeyPress(key); } } } These methods are automatically called by the sample framework whenever the appropriate event occurs. For example, as you move the mouse cursor across the screen, the OnMouseEvent method is called; similarly, the OnKeyEvent method is called if you press a keyboard button. You've now implemented the main menu screen, except for the two event handlers you need to handle the button clicks on the screen. Go ahead and add those now: private void OnNewGame(object sender, EventArgs e) { } private void OnMainQuit(object sender, EventArgs e) { sampleFramework.CloseWindow(); } You can see an example of what the rendered screen would look like in Figure 6.1. Naturally, when you click the Quit button, you want the application to quit. However, what do you want to do when a user clicks on the New Game button? The next step in the process is to show the character select screen; however, you haven't implemented it yet, which is why the OnNewGame handler is still blank. Before you can implement the code there, create this new UI screen. Figure 6.1. The main menu user screen.
|
EAN: 2147483647
Pages: 191