Using a Stager to Deploy Applications
Even if your Web application contains ISAPI filters or COM+ objects, these application elements don't mandate the need for a stager. You can install them directly on the controller and deploy them to the rest of cluster. The decision to use a stager is driven by the need for release management in all deployment cases.
A stager does enable you to manage the production process better by inserting a layer between your production cluster and your development/test server(s).
For this reason we've included several staging scenarios to illustrate how you can deploy different types of applications to one or two tiers. These scenarios include:
- Deploying a static Web application (Web Guide) containing HTML pages and graphics to a Web cluster.
- Deploying updated components in the Pre-Flight Check application to a Web cluster.
- Deploying the FMStocks 2000 application to both the Web and COM+ clusters.
About the Scenarios
The following deployment scenarios are provided solely for the purpose of illustrating how you can use a stager to deploy new applications as well as application updates to one-tier, two-tier, or three-tier cluster environments. In every case you have to develop a deployment strategy that takes into account your operational requirements as well as address the deployment issues we've highlighted. Once again, the questions to consider:
- Do you have to provide 365-day/24-hour uptime?
- Do you currently use scheduled downtime for maintenance?
- Are there periods where a live update will have minimal impact on your users?
After you establish your operational needs, you can use the scenarios we describe as guides for tailoring custom deployments on your own clusters.
Preparing for the Scenarios
After we finished configuring the two-tier environment earlier in this chapter, we had load-balanced COM+ objects getting created on the cluster in the component server tier (RKCOMCluster). Because these deployments are to a single tier—the RKWebCluster—we have to reconfigure some settings on the servers in the Web tier.
Reconfigure RKWebCluster
What we need to do is unmark the load-balancing option for the Pre-Flight Check components so that they get created and executed on the Web tier. You can do this manually, or create a batch file that does the reverse of PFSetupCOMDLB.bat and its associated INF file, PFCOMSetupDLB.
We logged on to the controller and created two new files (uPFSetupCOMDLB.BAT and uPFCOMSetupDLB.INF), which we saved in C:\ACPF.
The code in uPFSetupCOMDLB.BAT is:
@echo off regsvr32 /s COMpWrap.dll COMTestSetup /inf:uPFCOMSetupDLB.INF
The code in the INF file is:
&ACPF * Set component properties SetCompProp AC_PF_VB PFComponent.PFComp LoadBalancingSupported N SetCompProp AC_PF_VC TestCOM.TestCOM1.1 LoadBalancingSupported N SetCompProp AC_PF_VC TestCOM.TestCOM2.1 LoadBalancingSupported N SetCompProp AC_PF_VC TestCOM.TestCOM3.1 LoadBalancingSupported N SetCompProp AC_PF_VC TestCOM.TestCOM4.1 LoadBalancingSupported N SetCompProp AC_PF_VC TestCOM.TestCOM5.1 LoadBalancingSupported N
We then ran uPFSetupCOMDLB.bat and unmarked the components for load balancing. After confirming that the changes were implemented correctly on the controller, we deployed ACPFApp to the other cluster members, ACDW518AS and ACDW802AS. As a final test, we used the Web browser to connect the cluster (http:// 192.168.100.102/ACPFWeb/PFWelcome.asp) and verify that the objects were being created on the Web cluster.
NOTE
It's not necessary to delete the component server routing list because it will be used by the FMStocks 2000 application, which also uses CLB.
Prepare the Stager
As a final step in deployment preparations, we implemented the single management console concept on the stager by opening the Application Center snap-in on the stager and adding the RKWebCluster to the console tree. This approach enables you to manage the entire staging process from a single console, as shown in Figure 8.15.
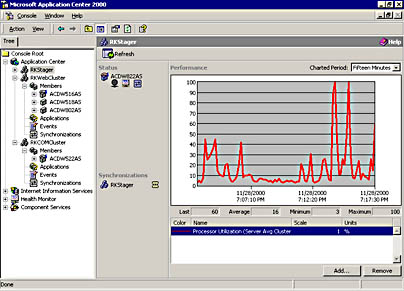
Figure 8.15 Managing a staging cluster and Web cluster from the stager console
Now that we've prepared our staging environment, we can step through the various staging scenarios, beginning with a deployment of our Web Guide application to the Web cluster, RKWebCluster.
EAN: N/A
Pages: 183