Working with Documents and Issues
SharePoint Team Services provides the documents and issues services in Project Server. Both services function correctly for users who have Windows credentials and who use Windows Authentication to access Project Server. Users who access Project Web Access with Project Server accounts aren’t able to access these services correctly.
Working with Issues
The home page announces active issues and changes to issues when you log on. As shown in Figure 15-12, I have issues. As you saw in the previous chapter, you can link to issues through the Timesheet interface. On this page, you can either click the link in the center of the page or click the Issues selection on the main menu.
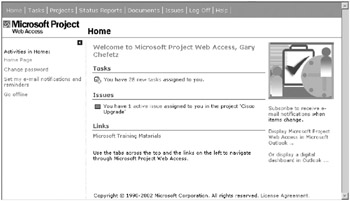
Figure 15-12. The home page with an issues information alert
In the “View and submit issues in all projects” interface, “all projects” refers to all the projects that the user has access to, defined as any project in which the user has an assignment. The system automatically grants access to the documents and issues areas to Windows users with assignments in projects. Figure 15-13 shows the “View and submit issues for all projects” interface for a user who has assignments in only one project. The grid displays one project accordingly. Note that the system summarizes issues for the project in the grid along with the current issue status. The figure shows that there’s only one issue currently created for the project.
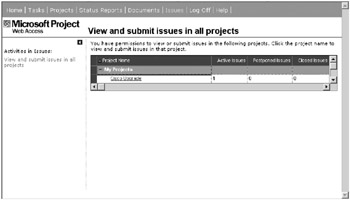
Figure 15-13. The issues home page for a user with access to one project
Clicking the project link displays the View and Submit Issues page for a single project. As shown in Figure 15-14, the project name displays above the page title. Notice that in the upper-left area of the page, you can select a number of views based on standard criteria. Click the links to redisplay the page with the conditions applied. Click the current-project-specific link in the Activities menu to return it to a full selection or click the “View and submit issues in all projects” link to select a different project to work with.
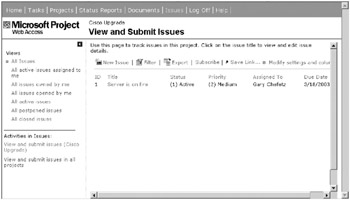
Figure 15-14. The issues page for a specific project
Use ad hoc filtering to alter the record set as well. Click the Filter link in the toolbar and the display changes, as shown in Figure 15-15. Each file in the display becomes a pick list, allowing you to set a value to filter on any column. Making a selection applies the filter to the view. Click Hide Filter Choices on the toolbar to cancel selected filtering.
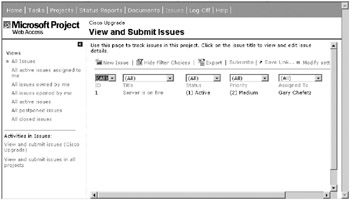
Figure 15-15. The issues page in ad hoc filter mode
Clicking the issue name in the list displays the issue details, as shown in Figure 15-16. The issue details display but you can’t edit them.
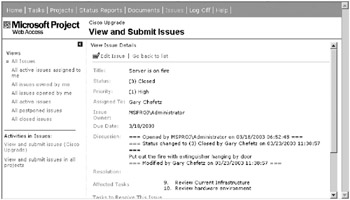
Figure 15-16. View issue details.
Click Edit Issue to open the issue for editing, as shown in Figure 15-17. Users make changes to issue details from this page. Click Save Changes to save any changes you made during the session. Click “Go back to list” to abandon the changes without saving. The same page displays when you click Create New Issue.

Figure 15-17. Edit issue details.
Scrolling through the edit or create new issue interface, as shown in Figure 15-18, you cross-link issues to other issues, tasks, and documents by clicking one of the link actions at the bottom of the page.
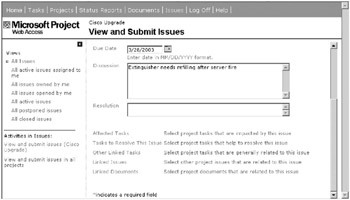
Figure 15-18. The edit issue details page scrolled to the bottom
Clicking a link opens a dialog box that displays the available selections relative to the link that you clicked. Figure 15-19 shows the “Link the issue to the selected issues” dialog box, which dynamically displays other available issues for linking. Note the filtering tools and search feature available to help you narrow the selection. Figure 15-20 shows the “Link the issue to the selected tasks” dialog box. All of these dialog boxes are very similar.
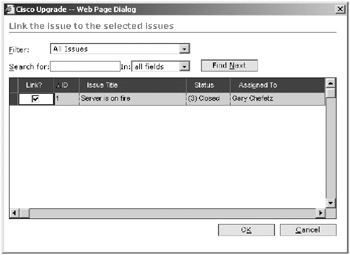
Figure 15-19. Link issues to issues.
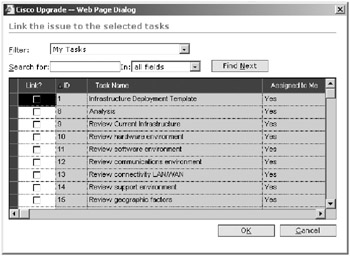
Figure 15-20. Link issues to tasks.
Clicking the Export button on the toolbar for the first time causes the system to prompt you to download a module. Accept the download and the system opens Excel, placing the list data in rows and columns in a worksheet.
Working with Document Libraries
Clicking Documents in the main navigation menu takes you to the page shown in Figure 15-21. Notice that the “View and upload documents for all projects” link displays in red to indicate that it’s selected. Click this link to refresh this view at any time. Like issues, users have access to document libraries based on having a work assignment in a project. If you have an assignment in a project, you’ll see it presented in the grid on this page. All Windows users in your Project Server system have access to the public documents area. System administrators have access to all libraries.
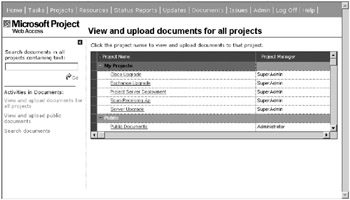
Figure 15-21. Select a project from the “View and upload documents for all projects” view.
| Tip | Give Windows users in the system access to document libraries and issues lists for specific projects by giving them a small assignment in each project. These are typically tasks with a token effort. |
Selecting a project link in the grid opens the document libraries home page for your project, as shown in Figure 15-22. Note that the name of the project displays above the page title. Each library contains one sublibrary indicated with a folder icon. By default, one sublibrary, Shared Documents, gets created. The documents home page displays this and any other folders that the team has added.
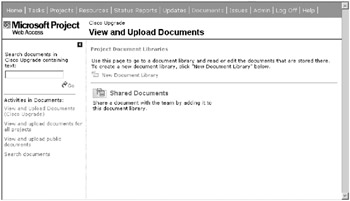
Figure 15-22. View and upload documents for a specific project.
Click the New Document Library link to create a new sublibrary in your project library. The system displays the New Document Library page shown in Figure 15-23.
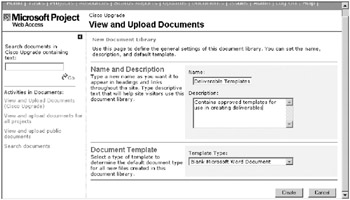
Figure 15-23. Create a new document library.
Give your new library a name and a description. Choose a template for the library from the Template Type list:
-
Blank Microsoft Word Document
-
Blank Microsoft FrontPage Document
-
Blank Microsoft Excel Document
-
Blank Microsoft PowerPoint Document
The reason for selecting a blank template relates to features available only if you have an Office XP client application license installed on your workstation. The full version of the Office XP Web Components, available only to users of Office XP, allows you to open and edit Office documents in your Web browser, thus avoiding the need to download and upload the documents each time. This feature won’t work for users of earlier Office versions.
Click the Create button to create the new library and add it to your Project display, as shown in Figure 15-24.
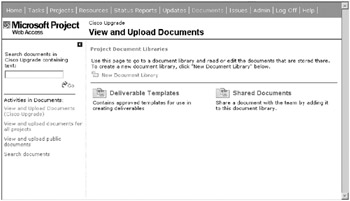
Figure 15-24. A new library is added.
Opening the shared documents library reveals the document list already available for the project. As shown in Figure 15-25, if documents contained in the library weren’t available during your last session, they’re flagged as new in the view. I’ve collapsed the left-hand navigation for better viewing. Use the New Document feature only if you have Office XP, otherwise it won’t work. Similarly, click a filename to open it in your browser if you have Office XP, otherwise the system will prompt you to download the file.
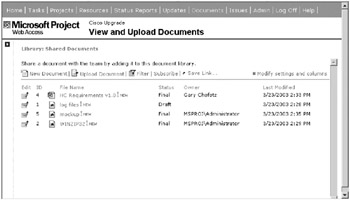
Figure 15-25. The shared documents library opened
Click the Filter link in the toolbar to change the view to expose value pickers for each field in the view to use in an ad hoc manner. Clicking the Subscribe link takes you to the “Set reminders for yourself” area of Project Web Access. Here you would make a selection under the project documents area. Click the Upload Document link on the toolbar to upload a new document to the library. Note in the upload page shown in Figure 15-26 that you can choose to overwrite a previous version of the document if you’re saving it with the same name. This ability somewhat replaces the ability to edit in place for those users who don’t have Office XP.

Figure 15-26. Upload a new document.
Let’s say that this was a very large library and I decided to go with an ad hoc filter. I click the Filter link and choose the administrator in the Owner field to filter out all documents except those that the administrator owns. I then click Save Link on the toolbar so that I can use the filtered view again the next time I visit the page. Clicking the Save Link button presents the dialog box shown in Figure 15-27. Here I enter a name for my link and click OK.
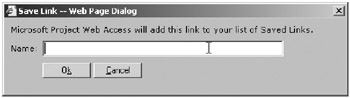
Figure 15-27. Give the link a name.
Saving the link adds a section at the top of the left navigation pane. The new Saved Links section, shown in Figure 15-28, is expanded to reveal the new link. Each time the link is clicked, the view will change to one filtered to select Administrators only.
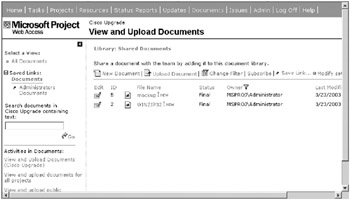
Figure 15-28. The Saved Links section now shows.
EAN: 2147483647
Pages: 185