| Moving around and modifying the standard Plone slots is important, but adding your own slots will further your ability to customize your site for your audience. In this section, you'll learn how to create a portlet that will contain static content housed in a Plone document. You then can place the custom slot in any position in the Plone template or use your newfound skills to utilize folder-or user -specific settings. To create the foundation for your portlet, which we'll call portlet_announce , log in to the Zope Management Interface and navigate to your Plone instance. Then select the portal_skins object and the custom folder. This folder might or might not be empty, depending on how much you've played around with custom instances of portlets. From the drop-down menu, select Page Template and press the Add button. You'll see a form containing two fields: id and file . The file field is relevant only if you want to upload the content of an already-created file containing your page template. Because that's not the case in this instance, you can leave it blank. Enter an ID of portlet_announce , and press the Add and Edit button. This creates a basic page template and places you in the editing screen. You should replace the content in that generic template with the code found in Listing 5.1. Listing 5.1. The portlet_announce Code 1: <html xmlns:tal="http://xml.zope.org/namespaces/tal" 2: xmlns:metal="http://xml.zope.org/namespaces/metal" 3: i18n:domain="plone"> 4: <body> 5: <!-- The annoncements box --> 6: <div metal:define-macro="portlet"> 7: <div class="portlet" > 8: <h5><tal:block replace="here/announce/Title">Replace</tal:block></h5> 9: <div class="portletBody"> 10: <tal:block replace="structure here/announce/CookedBody">Replace</tal:block> 11: </div> 12: </div> 13: </div> 14: </body> 15: </html>
Lines 1 “3 are the basic document-definition lines that you'll see for any Plone template. They specify that although it is technically an HTML document, several other Zope-and Plone-specific attributes must be set. Line 4 opens the body tag, while line 5 is simply a comment that reminds you this is going to be an announcement box. In line 6, the macro is defined. This is an important definition because it enables you to use the following line in your left_slots or right_slots field, for slot placement:
here/portlet_announce/macros/portlet
Line 7 gives the portlet an Id of portlet-announce . Line 8 begins the content display and places an H5 heading tag around a template tag. The template tag, with the attribute of replace , looks in your Plone document root for a document with an Id of announce . When it finds this document, it looks for the title of the document and replaces the placeholder text ” Replace ”between the template tags. Line 9 begins the body of the portlet, which loads the styles that are associated with the portletBody class. Line 10 is another template tag that performs the same replacement action as the template tag in line 8, except that it looks for the body of the Plone page, not the title. The keyword structure in the template code tells the portlet to render all formatting found in the Plone document; in this case, the use of CookedBody tells the portlet to interpret the structured text of the document. In addition to the template text area itself, the template contains several other modifiable elements and actions: -
Title ” Use this field to specify a title for your template. -
Content-Type ” Use this field to specify the content type of the document you are creating or modifying. The default value is text/html . -
Expand Macros While Editing ” If selected, METAL macros will be expanded while editing the source code, to help you. -
Taller, Shorter, Wider, Narrower ” These buttons modify the appearance of the text area in which you are typing. -
File ” Use this field to upload the contents of a complete HTML or XML file into the text area instead of typing the contents. When you have completed your modifications, press the Save Changes button. You can then add the name of your custom slot in the left_slots or right_slots field of your choice within the Plone properties screen. Next , log in to your Plone site and create the document called by the portlet. Simply create a document with the Id of announce in the root of your Plone site. Be sure to complete the workflow and publish the document for all members . When your document is published, your custom slot should be displayed in the side of the template you chose. The title and the body of the Plone document should be seen in the title bar and body box of your new static slot. An example of a custom slot that loads a Plone document is shown in Figure 5.9. Figure 5.9. Sample static slot in use. 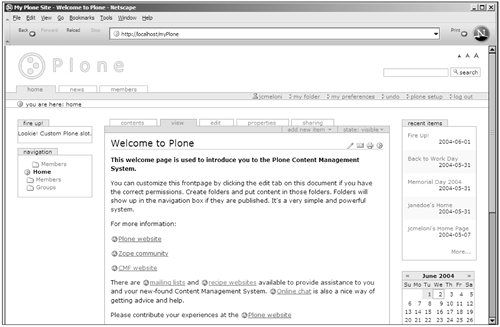
Although it's not the most fascinating use of a custom slot, the process described enables you to add whatever static slots you want. You can modify the placement and accessibility of these slots just as you can any standard Plone slot. In the next section, you'll leave slot-land to learn how to customize the tabs and graphics that make up your Plone site. |