Documenting Tasks
You can record additional information about a task in a note. For example, you might have detailed descriptions of a task and still want to keep the task’s name succinct. You can add such details to a task note. That way, the information resides in the Project file and can be easily viewed or printed.
There are three types of notes: task notes, resource notes, and assignment notes. You enter and review task notes on the Notes tab in the Task Information dialog box. (You can open the Task Information dialog box by clicking the Task Information command on the Project menu.) Notes in Project support a wide range of text formatting options; you can even link to or store graphic images and other types of files in notes.
Hyperlinks enable you to connect a specific task to additional information that resides outside of the project plan—such as another file, a specific location in a file, a page on the World Wide Web, or a page on an intranet.
In this exercise, you enter task notes and hyperlinks to document important information about some tasks.
-
In the Tasks pane, click the Link to or attach more task information link.
The Add Information pane appears. Take a moment to read the information in the pane.
-
Select the name of task 4, Pick locations.
-
In the Add Information pane, click the Add a note link.
Tip You can also click the Task Notes button on the Standard toolbar, or right- click on the task name and in the shortcut menu that appears click Task Notes.
Project displays the Task Information dialog box with the Notes tab visible.
-
In the Notes box, type Includes exterior street scene and indoor studio scenes.

-
Click OK.
A note icon appears in the Indicators column.
-
Point to the note icon as shown here:
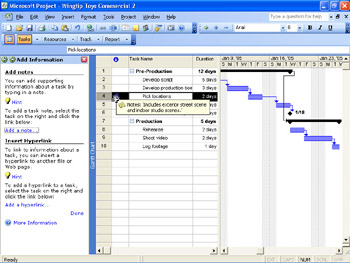
The note appears in a ScreenTip. For notes that are too long to appear in a ScreenTip, you can double-click the note icon to display the full text of the note.
To conclude this exercise, you create a hyperlink.
-
Select the name of task 5, Hold auditions.
-
In the Add Information pane, click the Add a hyperlink link.
Tip You can also click the Insert Hyperlink button on the Standard toolbar.
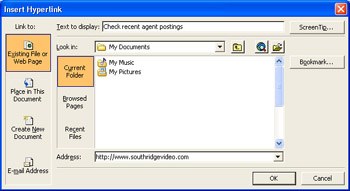
The Insert Hyperlink dialog box appears.
-
In the Text to display box, type Check recent agent postings.
-
In the Address box, type http://www.southridgevideo.com
-
Click OK.
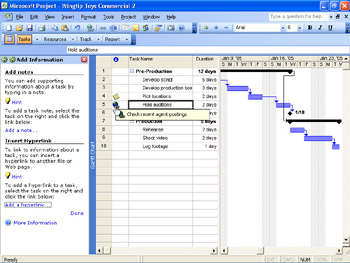
A hyperlink icon appears in the Indicators column. Pointing to the icon displays the descriptive text you typed above. Clicking the icon opens the Web page in your browser.
-
Click Done in the Add Information pane.
EAN: 2147483647
Pages: 199