New Internet Explorer 7 Security Features
| As more people, businesses, and organizations establish a presence online, the world becomes an increasingly connected place. And the more connected the world becomes, the more opportunities arise for communicating with others, doing research, sharing information, and collaborating on projects. The flip side to this new connectedness is the increased risk of connecting with a remote user whose intentions are less than honorable. It could be a fraud artist who sets up a legitimate-looking website to steal your password or credit card number, a virus programmer who sends a Trojan horse attached to a program download, or a website operator who uses web browser security holes to run malicious code on your machine. Admittedly, online security threats are relatively rare and are no reason to swear off the online world. However, these threats do exist and people fall victim to them every day. Luckily, protecting yourself from these and other e-menaces doesn't take much effort or time, particularly with the new security features built into Internet Explorer 7. Protected Mode: Reducing Internet Explorer's PrivilegesWindows Vista's antispyware initiatives aren't restricted to Windows Defender. Because spyware often leeches onto a system through a drive-by or pop-up download, it makes sense to set up the web browser as the first line of defense. Microsoft has done just that by introducing Protected mode for Internet Explorer (see Figure 6.11). Protected mode builds upon Vista's new User Account Control feature that I discuss later in this chapter (see "User Account Control: Smarter User Privileges"). Internet Explorer's Protected mode means that IE runs with a privilege level that's enough to surf the Web, but that's about it. Internet Explorer can't install software, modify the user's files or settings, add shortcuts to the Startup folder, or even change its own settings for the default home page and search engine. The Internet Explorer code is completely isolated from any other running application or process on your system. In fact, Internet Explorer can write data only to the Temporary Internet Files folder. If it needs to write elsewhere (during a file download, for example), it must get your permission. So any add-ons or other malware that attempt a covert install via Internet Explorer will be blocked before they can even get to Windows Defender. Figure 6.11. Internet Explorer 7 implements Protected mode to prevent covert spyware installs.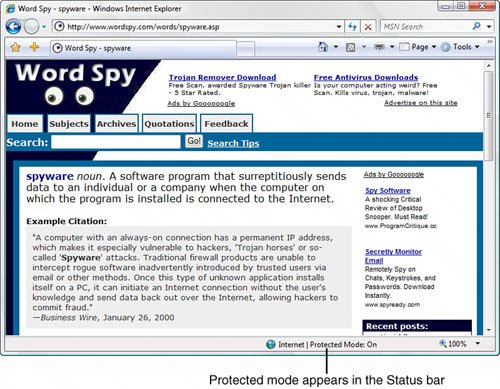 Note If you don't want to run Internet Explorer 7 in Protected mode, for some reason, you can turn it off. Select Tools, Internet Options, and then select the Security tab. Remove the checkmark from the Enable Protected Mode check box to deactivate it, and then click OK. Internet Explorer displays a message in the Information bar telling you that your security settings are putting you at risk. You can reactivate the Protected mode setting by clicking the Information bar and then clicking Fix Settings For Me. Otherwise, restart Internet Explorer to put the new setting into effect. Internet Explorer, ever persistent, will display a local SecurityRisk page that warns you about your security settings. Click the Home button to continue browsing. Total Security: Internet Explorer Without Add-OnsFor the ultimate in browsing security, Windows Vista ships with an alternative Internet Explorer shortcut that loads the browser without any third-party add-ons, extensions, toolbars, or ActiveX controls. Select Start, All Programs, Accessories, System Tools, Internet Explorer (No Add-Ons). Internet Explorer starts and displays the Add-Ons Disabled page, shown in Figure 6.12. Figure 6.12. Select the Internet Explorer (No Add-Ons) shortcut to run Internet Explorer without third-party add-ons, extensions, toolbars, or ActiveX controls.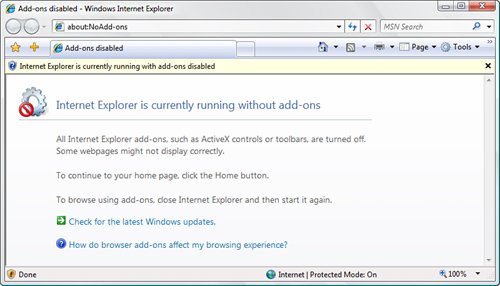 Thwarting Phishers with the Phishing FilterPhishing refers to creating a replica of an existing web page to fool a user into submitting personal, financial, or password data. The term comes from the fact that Internet scammers are using increasingly sophisticated lures as they "fish" for users' financial information and password data. The most common ploy is to copy the web page code from a major sitesuch as AOL or eBayand use that code to set up a replica page that appears to be part of the company's site. (This is why phishing is also called spoofing.) A fake email is sent out with a link to this page, which solicits the user's credit card data or password. When the form is submitted, it sends the data to the scammer while leaving the user on an actual page from the company's site so he or she doesn't suspect a thing. A phishing page looks identical to a legitimate page from the company because the phisher has simply copied the underlying source code from the original page. However, no spoof page can be a perfect replica of the original. Here are five things to look for:
If you watch for these things, you'll probably never be fooled into giving up sensitive data to a phisher. However, it's often not as easy as it sounds. For example, some phishers employ easily overlooked domain-spoofing tricks such as replacing the lowercase letter L with the number 1, or the uppercase letter O with the number 0. Still, most experienced users don't get fooled by phishing sites, so this isn't a big problem for them. Novice users, on the other hand, need all the help they can get. They tend to assume that everything they see on the Web is legitimate and trustworthy, and even if they're aware that scam sites exist, they don't know how to check for telltale phishing signs. To help these users, Internet Explorer 7 comes with a new tool called the Phishing Filter. This filter alerts you to potential phishing scams by doing two things each time you visit a site:
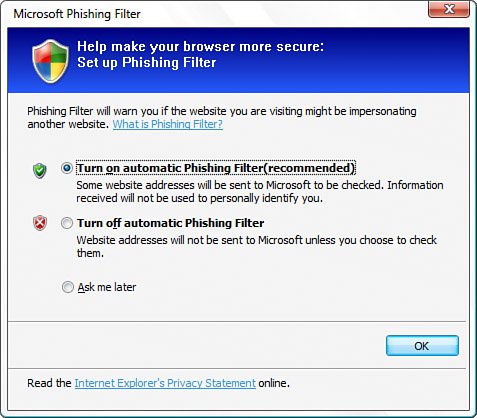
Internet Explorer's Phishing Filter is an opt-in tool because not all users need a helping hand when it comes to avoiding phishing scams. You have to activate it yourself, but that's not hard because as soon as you navigate to your first website in Internet Explorer 7, the Microsoft Phishing Filter dialog box appears, as shown in Figure 6.13. If you want to use the Phishing Filter, leave the Turn On Automatic Phishing Filter option activated and click OK. Figure 6.13. Internet Explorer 7 immediately asks whether you want to turn on the Phishing Filter. Note If you turn off the automatic Phishing Filter checks, you can still check for phishing site by site. After you navigate to a site that you want to check, select Tools, Phishing Filter, Check This Website. Here's how the Phishing Filter works:
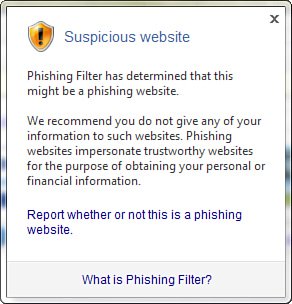
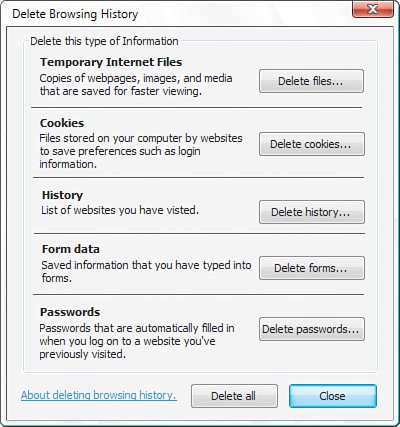
Figure 6.14 shows Internet Explorer 7 displaying a warning about a known phishing site. Figure 6.14. If Internet Explorer 7 detects a known phishing site, it displays "Phishing Website" in the Security Report area and blocks access to the site.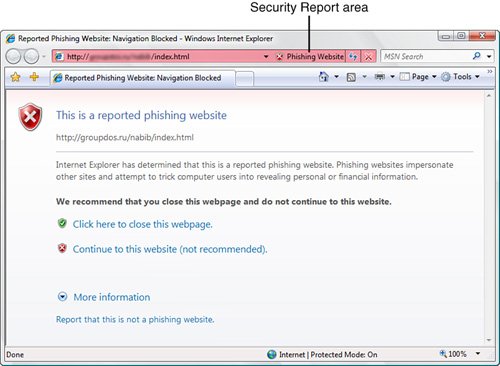 Click the "Suspicious Website" text, and Internet Explorer displays the security report shown in Figure 6.15. If you're sure this is a scam site, be sure to report it to help improve the database of phishing sites and prevent others from giving up sensitive data. To report a site, either clicking the Report link in the security report or select Tools, Phishing Filter, Report This Website. This opens the Phishing Filter Feedback page. Figure 6.15. This report appears when you click the "Suspicious Website" warning. Easier Add-On ManagementInternet Explorer 7 gives you a much better interface for managing all your browser addons, including ActiveX controls, toolbars, helper objects, and more. Select Tools, Manage Add-Ons to display the Manage Add-Ons dialog box shown in Figure 6.16. You can enable and disable add-ons, delete ActiveX control, and more. Figure 6.16. Use the Manage Add-Ons dialog box to view, enable, disable, and delete Internet Explorer add-ons.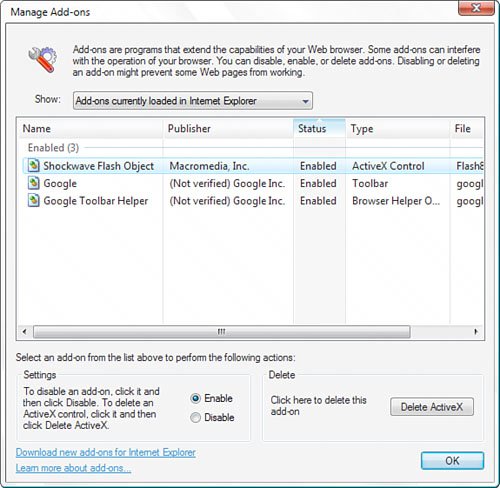 Deleting Browser HistoryInternet Explorer 7 makes it much easier to delete your browsing history. In previous versions, you had to make separate deletions for cache files, cookies, visited URLs, saved form data, and saved passwords. In Internet Explorer 7, you select Tools, Delete Browsing History to display the Delete Browsing History dialog box shown in Figure 6.17. From here, you can delete the browser history by category, or you can click Delete All to erase everything in one shot. Figure 6.17. Use the Delete Browsing History dialog box to delete some or all of your Internet Explorer 7 browsing history. |
EAN: 2147483647
Pages: 122