Work with Compressed Files
In addition to the different types of files I have discussed in this chapter, there is a special type of file that you’ll probably encounter occasionally: compressed files. These are files containing other files that have been compressed to take up less disk space. The file compression standard on the Mac has long been Stuffit, named after the most common compression program used for the Mac.
With Panther, Apple has included Zip compression in the Finder, so it’s very likely that this will become the most prevalent format in the future. In addition, since the advent of Mac OS X, other compression schemes have become common as well: tar and gzip, which come from the Unix world, are now often used by software developers to distribute files over the Internet.
Work with Stuffit Files
Stuffit files are the most common kind of compressed files you’ll come across on the Mac for now. You can spot them by their file extension, .sit, and their icon:

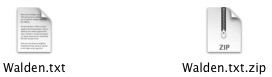
Compressed archives can contain hundreds or even thousands of files, or they may contain just one. The advantage to using archives is to save disk space. While some types of files cannot be compressed much (MP3 files are already compressed, as are JPEG images), compression can shrink files as much as 80 percent or more, depending on the file type. Figure 5-20 shows one example of a plain text file and a Stuffit archive created from that file.
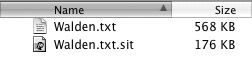
Figure 5-20: A plain text file and a Stuffit archive. The Stuffit archive is less than one-third the size of the original file.
When you download files from the Internet, they are often compressed. While Windows files are Zip archives, Mac files are usually compressed with Stuffit. Your Mac comes with a tool to expand compressed files—Stuffit Expander, which is installed in the Utilities folder of your Applications folder.
| Tip | Stuffit Expander can open Stuffit and Zip archives, as well as dozens of other less common compressed files. If you ever receive or download a compressed file, try using Stuffit Expander to expand it; there’s a good chance it will work. |
Expand Stuffit Archives
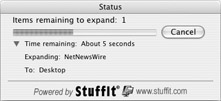
To expand a compressed Stuffit archive, just double-click the file. Stuffit Expander opens and expands the file, placing the uncompressed version of the file in the same folder as the original. As Stuffit Expander expands the file, it displays a window showing its progress:
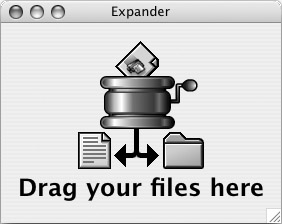
If you find you use Stuffit Expander often, you can place its icon in the Dock (see Chapter 4 for more on putting icons in the Dock) and drag your files on this icon. Or, if you open the Stuffit Expander application by double-clicking it, a window displays onto which you can drag your files to unstuff them.
Stuffit Expander offers many options for working with compressed files. It can automatically use your antivirus software (if you have one) to scan files for viruses at it expands them; it can watch a special folder and expand files as they are added; and you can choose a different location to save expanded files. All these options are available from the Stuffit Expander Preferences window, which you can open by selecting Stuffit Expander | Preferences.
Work with Zip Archives
While Mac OS X comes with Stuffit Expander to expand compressed files, it provides a different way, and a different type of compression, for you to create your own compressed archives. Mac OS X includes built-in Zip compression, so you can compress your own files to save space on your computer or to send to other users over the Internet. The advantage to using Zip compression is that you can send compressed files to Windows users, who can expand them easily.
To compress a file or folder, just click the item you want to compress, holding down the CONTROL key (or click the Action menu in the Finder toolbar, or the right mouse button), and select Create Archive Of [file or folder name].
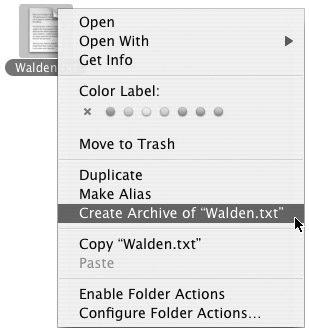
This creates a Zip archive in the same folder as the original item.
To expand a Zip archive you’ve made in this way, simply double-click it and the Finder will expand it in its current folder.
| Note | Compressed files are most useful when sending attachments with e-mail messages. Some e-mail programs, such as Entourage, which is part of Microsoft Office v. X, can compress attachments automatically without needing any additional software. When adding attachments to e-mail messages in this program, click the encoding button at the bottom of the attachment pane of the message window. |
Work with Other Types of Compressed Files
Since you can expand Zip files in the Finder, and since Stuffit Expander can expand just about any type of compressed file, you should never run into any problems. In addition to .sit files, you may need to expand other compression types, such as .gz, .tgz, and .tar, which are Unix compression formats. As long as these files have a Stuffit icon, you can decompress them by double-clicking, as explained earlier.
There is another type of compressed file you’ll come across, which is a different type of file: disk images. This is a special type of file often used for software installers, and Apple uses it for all of the software they provide for download.
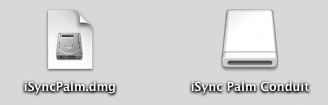
You can tell a disk image by its icon, which contains a hard disk icon against a white background, and its file extension: .dmg. Disk images can be compressed, and they often are when they are used for software installers. To access the contents of a disk image, double-click the .dmg file; you’ll see a dialog as the file is processed, and then it will appear on the Desktop and in the Finder window sidebar, with the same icon as for removable media such as Zip drives.
| Note | You may come across disk images with an .img extension as well. Just double-click them to mount them in the Finder. |
In the preceding illustration, the disk image file is on the left, and the mounted disk image is on the right. When you double-click the mounted disk image, a Finder window displays. You’ll usually find an installer package file in this window.
When you have finished working with a disk image, click the Eject button next to its icon in the Finder window sidebar, or drag the mounted disk image icon to the Trash to eject it. You can then store the .dmg file wherever you want to, or delete it if you no longer need it.
EAN: 2147483647
Pages: 171