Maintenance for Your Mac
Computer maintenance covers many areas. I told you earlier how to keep your Mac up-to-date by regularly checking for system and application updates; that’s one of the most important parts of maintaining your Mac. But proper maintenance goes beyond just ensuring that you have the latest versions of your software. While you can do little to check or repair your hardware, there is one item you need to keep an eye on: your hard disk.
The weakest hardware link in any computer is the hard disk, because this is where you data is written, stored, and read. While hard disks are very reliable, and don’t break down often, the way data is written to the disk can lead to problems.
A hard disk contains several magnetic platters and heads. The heads read and write to the platters, storing data in blocks, which are predetermined sectors on the hard disk. As data is written, the disk’s driver—the software that controls the read-write process—updates a directory, or catalog, which keeps records of where each piece of data is stored. The main problem that can occur with hard disks is that the directory gets corrupted, or damaged, making it impossible to find some or all of your files.
Corruption can be minor, affecting just one or several files, or it can be more serious, affecting the integrity of the entire disk. Unfortunately, only in a perfect world would hard disk corruption not exist. If a program incorrectly writes data to the disk, crashes when doing so, or if you have a power interruption, corruption can occur. In the most serious cases, your Mac will not be able to restart because it cannot read the system files it needs. In other cases, you might not be able to open certain files, and your applications may say that files are corrupted.
Each time you start up your Mac, the system runs a check on your hard disk. If any errors are found, and the built-in disk maintenance software can correct them, it does so. But sometimes disk corruption is more serious.
Fortunately, you can use disk maintenance software to check your disk, find out if there is corruption, and, in many cases, repair it. Several companies make such software for the Mac, and it comes either as programs designed only to repair disk problems or as part of larger packages that include other maintenance and security software. One such program is TechTool Deluxe, which is included in Apple’s AppleCare package, an extended guarantee program that covers your Mac for three years. TechTool Deluxe, shown in Figure 21-5, performs a variety of maintenance tasks, from checking your hardware for problems to checking your hard disk for irregularities and correcting them if possible.
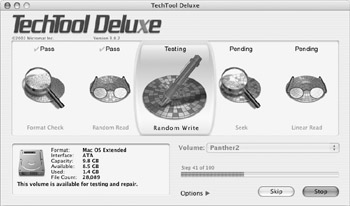
Figure 21-5: TechTool Deluxe checking a hard disk for problems
Since Mac OS X 10.3, Apple uses journaling by default when formatting hard disks. Journaling keeps a record of changes made to the directory, protecting against some types of corruption if you have a system crash or if you lose power. When this occurs, it may take your Mac longer to start up, but journaling allows your hard disk to recover its directory, as much as possible, and can prevent serious disk problems.
Journaling is on by default when you format a new volume or partition, but if you upgraded from a previous Mac OS X or Mac OS 9 system, journaling won’t be on. You can turn it on by using Disk Utility, which I talk about in the “Work with Apple’s Disk Utility” section later in this chapter.
TechTool Deluxe goes further than many other maintenance programs by checking internal hardware, such as your processor, RAM, and USB system. If you do have hardware problems, it should find most of them. A similar tool, called TechTool Pro, is available on its own, without an AppleCare contract, from Micromat (www.micromat.com), who also makes another hard disk maintenance program, Drive 10.
One of the most popular and powerful disk repair tools is DiskWarrior, by Alsoft (www .alsoft.com). With a unique approach, DiskWarrior rebuilds a damaged directory. This is a tool to use when you have problems; it doesn’t do anything but repair corrupted disks. It is very effective, and many Mac users have saved themselves from losing data with DiskWarrior.
Another third-party application is Norton Utilities (www.symantec.com). This includes Norton Disk Doctor, which diagnoses and repairs many hard disk problems, and also contains Norton Speed Disk, which defragments your hard disk. This package contains other programs as well: Norton File Saver, Volume Recover, and UnErase all give you powerful tools for protecting your hard disk and restoring its contents if you erase files by accident or have severe corruption.
| Tip | It’s a good idea to run one of these programs occasionally, just in case your hard disk has minor problems. All these programs can correct such problems before they become major problems, protecting you from serious corruption. Once a month is a good frequency to run hard disk checks. |
Work with Apple’s Disk Utility
Mac OS X includes an application called Disk Utility, which is located in the Utilities folder of your Application folder. This program is not a full-fledged disk repair application, but it allows you to format and partition hard disks, and create and work with disk images, and offers some verification and repair functions.
To check or repair your hard disk, open the Disk Utility application and click the First Aid tab. Click on your hard disk in the left-hand column, or if your hard disk has several partitions, as shown in Figure 21-6, click one of the partitions.
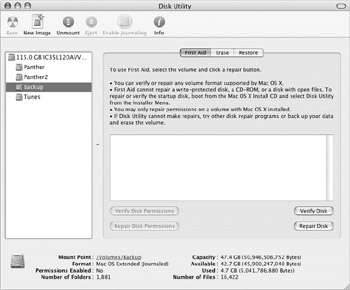
Figure 21-6: Disk Utility’s First Aid tab, where you can perform some verifications and repairs
You can verify the disk by clicking Verify Disk, and if the selected volume is not a startup volume, you can repair the disk by clicking Repair Disk. But remember, Disk Utility does not find as many problems as third-party disk maintenance software, so it might show that nothing is wrong with your disk, or it might find problems that it cannot repair.
Repair Your Startup Disk
I mentioned earlier that Disk Utility could only repair a disk or partition that is not the startup disk. This is the case when you run Disk Utility from your startup disk, but there is a way to run the program to check and repair your startup disk if you have problems with it.
To do this, insert the first Mac OS X installation CD in your Mac, and then restart. Hold down the C key on your keyboard so your Mac starts up from the CD. This launches the Mac OS X Installer. (Don’t worry; you’re not going to reinstall your Mac. This is the only way you can get access to the copy of Disk Utility that’s on the CD.)
Select Installer | Open Disk Utility to launch Disk Utility, and then follow the instructions I presented earlier to repair your startup disk. Since it’s no longer your startup disk—the CD is—you can run repair operations on it.
Disk Utility can also repair disk permissions on your startup volume. Since Mac OS X is based on a Unix system, it uses permissions, or privileges, for all its files. If some of these permissions are incorrect, certain system functions may not work properly. It is a good idea to repair these permissions if you have problems, or repair them each time you make a major system update.
To do this, select your Mac OS X startup volume. (See Figure 21-7.) Click Repair Disk Permissions to begin repair. This takes about ten to 15 minutes, depending on your installation. Disk Utility displays corrected permissions in the window as it goes on, and when the repair procedure is finished, this window displays a message saying that permissions have been repaired.
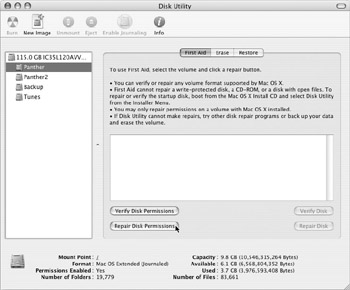
Figure 21-7: Selecting a Mac OS X startup volume in Disk Utility lets you verify or repair disk permissions.
Keep Tabs on Your Hard Disk
Note: Disk Utility can tell you the S.M.A.R.T. status of your hard disk, which can warn you if your disk is likely to have problems. S.M.A.R.T. is a technology, developed by IBM, that lets hard disks test themselves for potential problems. If you have problems with your Mac, it’s a good idea to check this.
Open Disk Utility and click your hard disk at the top of the list. Look at the info section at the bottom of the Disk Utility window:
![]()
If the S.M.A.R.T. Status is Verified, there’s nothing wrong with your disk, but if it says About to Fail, you should back up your data immediately and replace the disk. This means that the disk will fail very soon.
If your Mac has a CD- or DVD-writer, you can choose from two types of media: CD-Rs and DVD-Rs. These are writeable disks that you can only write to once, while CD-RWs and DVD-RWs are rewriteable disks, that you can use many times.
But to record again to a CD-RW or DVD-RW, you first must erase it. To do this in Mac OS X, use Disk Utility.
Insert your CD-RW or DVD-RW and open Disk Utility. Select the optical disk in the left column, and then click the Erase tab. Click Erase to erase the disk. If you check Quick Erase, only the disk’s directory is erased. Though this process is much faster, it doesn’t write zeros to the disk, meaning that someone could eventually recover your previous files with special software. But for most uses, Quick Erase is fine.
EAN: 2147483647
Pages: 171
- ERP System Acquisition: A Process Model and Results From an Austrian Survey
- The Second Wave ERP Market: An Australian Viewpoint
- Healthcare Information: From Administrative to Practice Databases
- Relevance and Micro-Relevance for the Professional as Determinants of IT-Diffusion and IT-Use in Healthcare
- Development of Interactive Web Sites to Enhance Police/Community Relations