Working with Pictures
The last type of control you are going to look at in this chapter allows users to add pictures to their forms. For example, in the Employee Information form shown in Figure 7-21, the user can add an employee photo to the form by clicking the icon.

Figure 7-21: Adding a picture through a form
This feature is where InfoPath really expands on functionality you might have found lacking in traditional electronic forms. It can be used to capture photographs, images, and other graphics to be stored in an XML file or database. Typical uses for this feature include storing photographs of employees, assets, and so on, as well as graphic elements normally submitted in other forms or reports, including charts, graphs, plots, and more.
For adding pictures to a form, InfoPath supports the following graphics file formats:
-
Enhanced Metafile (.emf)
-
Graphics Interchange Format (.gif)
-
Joint Photographic Experts Group (.jpg)
-
Portable Network Graphics (.png)
-
Microsoft Windows Bitmap (.bmp, .rle, .dib)
-
Windows Metafile Graphics (.wmf)
-
Tagged Image File Format (.tiff)
-
Encapsulated PostScript (.eps)
Note You can also insert other pictures in other graphic formats by using the filters that ship with Microsoft Office 2003 or stand-alone versions of Word 2003. These filters are not included with InfoPath 2003, so you need to either install Office or Word to use these filters.
Inserting a Picture Control
To actually prepare your form to accept pictures, you need to drag the Picture control onto your form from the Controls task pane. This creates a field in your data source with the data type of “Picture.” If you want to create a Picture object from an existing data source, the data type must be “Picture.” This data type may not be supported in your underlying data source, so make sure that you check before you use this feature.
When you drag the object onto your form, the dialog box shown in the following illustration prompts you to choose how the control should behave—you can set the control to accept the graphics file itself or just a link to the file.
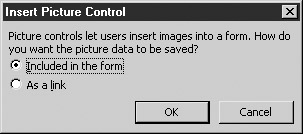
If you select the Included in the Form option, keep in mind that the size of the resulting data could be quite large, depending on the size and resolution of the graphic. If you instead select the As a Link option, remember that only the following graphics formats are supported:
-
Joint Photographic Experts Group (.jpg)
-
Graphics Interchange Format (.gif)
-
Portable Network Graphics (.png)
Formatting a Picture Control
When displaying a Picture control on a form, you have the choice of showing the default picture or specifying your own image. To set this and other formatting options, right-click the Picture Control and select Properties to open the dialog box shown here.

To specify the default picture that is used, select the Specify Default Picture radio button and then click the Browse button to open a standard Open dialog box and browse for the picture that you want to use as your default. Like other objects we have looked at, you can also control the size and position of your Picture control by using the other property pages in the Properties dialog box.
| Tip | InfoPath also includes an Ink Picture control that allows you to enter ink directly onto your form, which then can be stored as a picture within your data source. For more information on using InfoPath with a Tablet PC, select Help | Microsoft InfoPath Help and search on the term Ink. |
EAN: 2147483647
Pages: 142