Filling Out InfoPath Forms
Invariably, every InfoPath form you fill out is going to be different, depending on how the form was created. In the following sections, you are going to be working with an Expense Report form, but the techniques you learn can be applied to any form you are working with.
When you first open a form in InfoPath, the form appears in the Main View and the Task Pane is hidden, as shown in Figure 3-5.
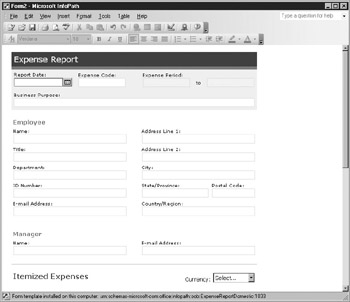
Figure 3-5: When you first open an InfoPath form to fill out, the Task Pane is hidden.
Entering Form Information
An InfoPath form can be made up of any number of different fields, including text boxes, drop-down boxes, date fields, and so on. The following sections describe how to work with these different types of fields and how to navigate between them.
Navigating Through the Form
You can navigate through the fields on an InfoPath form by using the TAB key to move sequentially from field to field or by using the arrow keys to navigate through the fields on your form. If you want to enter information in a specific field on the form and don’t want to “hop” around using these methods, you can also just click directly in the field where you want to enter your data.
Changing Form Views
Forms within InfoPath can consist of any number of separate pages, which are called form views. When a developer creates an InfoPath form, they create these views to help organize fields, tables, and so on, into logical groupings.
When filling out a form, you can change the view you are working with by selecting the View menu. The different views that are available appear at the top of the menu, as shown in here.
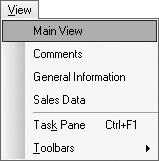
In this example, there are three different views available: Main View, Comments, General Information, and Sales Data. To switch between the views, you can use the View menu, or some developers may also put a button on your form to change to a specific view. (In the form used in this chapter, there is only one view, so there is no option to select another view under the View menu.)
Entering Data
Entering text into InfoPath fields is easy—simply navigate to the field you want to use and use the keyboard to enter the information. All the standard Windows Clipboard shortcuts (Cut, Copy, Paste) and common work-processing features (like Find and Replace) work with InfoPath so that you can quickly move information around as required. If you do make a mistake, you can either correct it by editing the field you are working with or using the Undo functionality by selecting Edit | Undo.
| Note | You can also check the spelling of data that you enter into a form by selecting Tools | Spelling. |
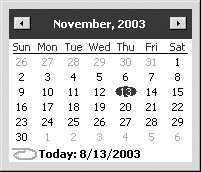
There are some types of fields that have their own unique attributes. When a user clicks the calendar icon beside a date field, for example, it can display a pop-up calendar like the one shown here, which allows you to select a date instead of having to type it.
Similarly, some fields have drop-down lists that you can use to select information from a list. To open a drop-down list similar to the one shown in Figure 3-6, click the down arrow icon that appears to the right of the field. You can then click an item to select it.
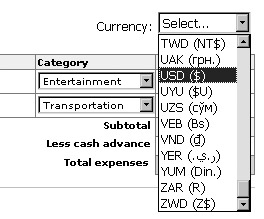
Figure 3-6: Drop-down lists provide a quick method of entering data.
Formatting Text
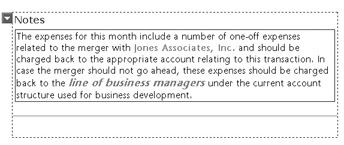
The majority of the fields you will work with on an InfoPath form are simple text boxes. Since text boxes are used for data entry, they don’t have a lot of formatting options. But your form may also include Rich Text boxes, which allow you to enter and format text, as shown here.
Working with Fonts
When working with a Rich Text box, you can control the fonts and formatting within the box by highlighting or selecting the text and using the options found in the Formatting toolbar to change the font name, size, and so on. You can also select Format | Font to open the Font view in the Task Pane, as shown in Figure 3-7.
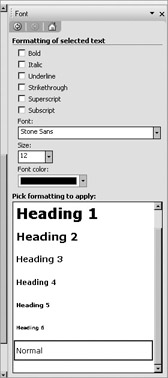
Figure 3-7: The Font view of the Task Pane
You can format text by highlighting a section of text and changing individual properties or by applying one of the preformatted Styles to the text.
Using Bullets and Numbering
In addition to formatting the font, you can also format blocks of text by using bullets or numbering, similar to the formatting features that are available in Microsoft Word. To create a bulleted or numbered list, click within a Rich Text box and then select Format | Bullets and Numbering to open the Task Pane shown in Figure 3-8.
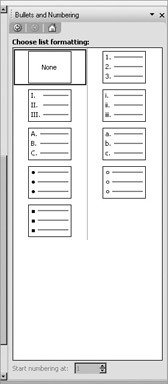
Figure 3-8: Select a format by clicking one of the list styles.
From the Task Pane, you can select a format by selecting one of the list styles, and then you can type in your Rich Text box as you normally would. To move to the next line (and number or bullet), press ENTER at the end of the line.
If you have an existing block of text within a Rich Text box that you would like to format, you can also highlight the text and use the same method to select the format you wish to apply.
Inserting Hyperlinks
You can also add hyperlinks to RTF boxes by placing your cursor where you want the hyperlink and then selecting Insert | Hyperlink to open the dialog box shown next.
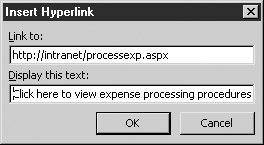
To create a hyperlink, enter the URL of the web site you want to link to (for example, www.microsoft.com), enter some text to be displayed (for example, “Click here to go to the Microsoft web site”), and then click OK. A hyperlink will be inserted into the text. When you click the link, the URL will be launched.
| Note | To create a link to an e-mail address, use mailto:address@domain.com. |
Inserting Tables into Rich Text Boxes
Another way to organize text within a Rich Text box is to add a table and enter your text in the rows and columns. To insert a table, select Insert | Table and enter the number of rows and columns to be created. Once you have inserted a table into a Rich Text box, you can then format the table by right-clicking the table and selecting Table Properties from the right-click menu, as shown here.
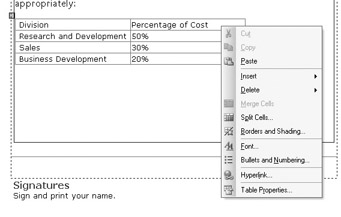
You can also use the right-click menu to insert and delete rows, merge and split cells, and set the borders and shading for your table.
You can add pictures or graphics to Rich Text boxes by selecting Insert | Picture and browsing for a graphic. InfoPath supports most of the standard graphic file formats, including WMF, BMP, GIF, PNG, TIF, EPS, and others.
To format pictures that you have inserted, right-click the picture and select Format Picture to open the dialog box shown here.
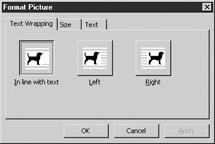
You can then select the alignment for your graphic, as well as the graphic size and any alternate text to be displayed. For better control over the placement of images and the surrounding text, consider placing your graphic into a table. This allows you to evenly space the images and text using the rows and columns provided.
Working with Tables
So far, this chapter has looked at entering data into individual fields on your form that have a 1:1 relationship with the form itself. For example, in the Expense Report form that you have been working with, the fields at the top of the form only appear once, as shown in Figure 3-9.
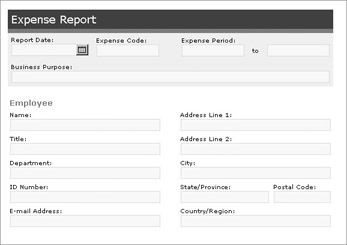
Figure 3-9: 1 relationship with the form
This is by design, because an expense report is usually submitted by an individual who has a single e-mail address, manager, and so forth. But what about fields that you want to repeat on a form? For example, in the Itemized Expense section of the form, you would want to put all of your expenses—you may have one expense item or 20. To help create flexible forms that can accommodate multiple items, InfoPath developers sometimes create forms with repeating tables, like the one shown here.
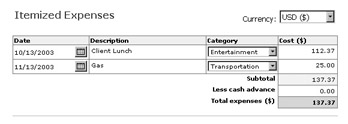
Most repeating tables have a drop-down menu that appears on the left side of the form and allows you to add or delete rows to your table. This allows you to enter additional lines as required.
Working with Repeating Sections
In addition to repeating tables, you can also have repeating sections within an InfoPath form. repeating sections allow developers to create a section of the form that can be duplicated when required. For example, in the Project Plan sample form shown in Figure 3-10, there is a repeating section for adding tasks, with a set of fields associated with the task.
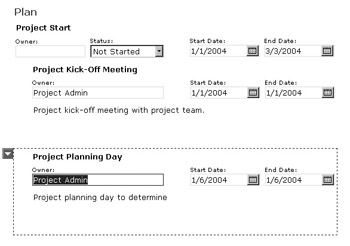
Figure 3-10: A typical repeating section
To add another task, you can use the drop-down menu on the left to add another section immediately below the current task. The new section will repeat the fields in the section and allow you to enter the required information for the next task.
| Note | Like tables, you control repeating sections through the drop-down menu, which has options to insert or remove additional sections. |
Working with Optional Sections
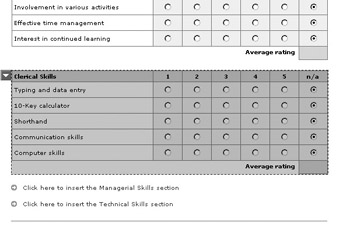
Another InfoPath feature allows you to mark sections as optional when designing the form. This allows InfoPath developers to place additional sections in your form—when filling out the form, these sections appear collapsed as a single line with a small arrow icon, as shown here.
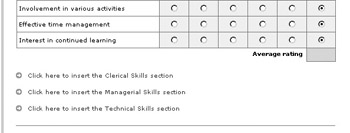
If you want to complete the optional section, you can click the icon or line to open the section and enter data as you normally would, as shown here.
EAN: 2147483647
Pages: 142
- Chapter V Consumer Complaint Behavior in the Online Environment
- Chapter VI Web Site Quality and Usability in E-Commerce
- Chapter IX Extrinsic Plus Intrinsic Human Factors Influencing the Web Usage
- Chapter XIII Shopping Agent Web Sites: A Comparative Shopping Environment
- Chapter XIV Product Catalog and Shopping Cart Effective Design