Clustering Exchange 2003

Now that you have been through some of the prerequisites, it is time to look at the steps required to create a new server cluster and install and configure Exchange 2003 on the same. This process has three steps:

  1. Create a new server cluster.

  2. Install Exchange 2003.

  3. Configure required resources.

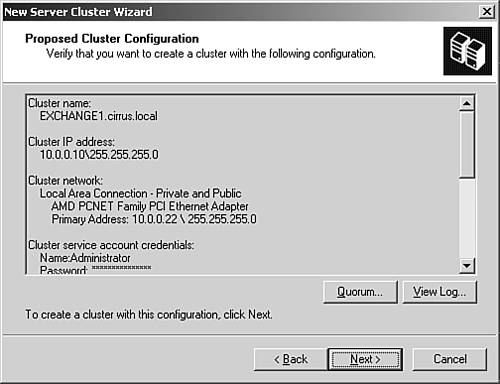
The following section examines the first step: creating a new cluster at the operating system level.

Creating a New Server Cluster

By default, the clustering components are installed with Windows Server 2003; therefore, all that is required to create a new server cluster is a few configuration steps. To create a new server cluster, follow these steps:

  1. Open the Cluster Administrator from the Administrative Tools program group and select File, New, Cluster to open the dialog box shown in Figure 7.1.

    Figure 7.1. Open Connection to Cluster dialog box.

    graphics/07fig01.gif

  2. Select the option from the drop-down list to Create New Cluster, which opens the New Server Cluster Wizard shown in Figure 7.2. This wizard is a set of dialog boxes that analyze your network and server configurations and allow you to create a new cluster.

    Figure 7.2. New Server Cluster Wizard.

    graphics/07fig02.jpg

  3. The first step of the wizard, shown in Figure 7.3, is used to select the domain where you want to create the cluster and to specify a name for your cluster. The name you enter must be unique on the network (no other server or workstation should have the same name) and it must be a valid computer name (you can't use special characters).

    Figure 7.3. Cluster Name and Domain dialog box.

    graphics/07fig03.gif

  4. In the next step, shown in Figure 7.4, you need to enter the name of the server that is going to be the first node in your new cluster. You can enter the name of the computer or use the Browse button to search for the server you want to use.

    Figure 7.4. Select Computer dialog box.

    graphics/07fig04.gif

    ADVANCED OPTIONS

    By default, the New Server Cluster Wizard automatically scans this server and identifies any storage that is attached to it. The wizard then makes this storage available to the cluster. If you don't want this to occur or if you want to configure this option manually, click the Advanced button on the dialog box shown in Figure 7.4 and set your options for Basic configuration.

  5. The wizard then displays the dialog box shown in Figure 7.5 as it analyzes your existing hardware and network configuration. As the wizard goes through the process, it marks any areas or configurations that are suspect and allows you to view the errors or warnings that this process generates. You can also use the View Log option to view the log that is generated as this process runs.

    Figure 7.5. Configuration analyzer.

    graphics/07fig05.gif

  6. If the setup or configuration of your server or network has no critical errors, the wizard proceeds and allows you to enter a static IP address for your cluster, using the dialog box shown in Figure 7.6.

    Figure 7.6. IP address options.

    graphics/07fig06.gif

  7. Using the dialog box shown in Figure 7.7, you also need to specify an account within the domain to be used to run the cluster service account. This can be any account in the domain, but the account needs to have local administrative rights for any server that has been added to a cluster. The account also needs to have Logon as a Service rights.

    Figure 7.7. Cluster service account.

    graphics/07fig07.gif

  8. A summary of your configuration choices appears, like the one shown in Figure 7.8. Here you can verify the settings you have selected. Click Next to begin the cluster creation process.

    Figure 7.8. Proposed cluster configuration.

    graphics/07fig08.jpg

  9. Next, the cluster creation process starts and displays a status list as it goes through the process, as shown in Figure 7.9. When this process is finished, your cluster is created, and you can move on to the next step listed at the beginning of this section (Installing Exchange 2003).

    Figure 7.9. Cluster status.

    graphics/07fig09.gif

Make sure that you pay attention to the status dialog box as your cluster is being created. Any warnings or critical errors appear as icons beside the affected step of the cluster creation process, as shown in Figure 7.10.

Figure 7.10. A cluster warning appears with the error icon.

graphics/07fig10.gif

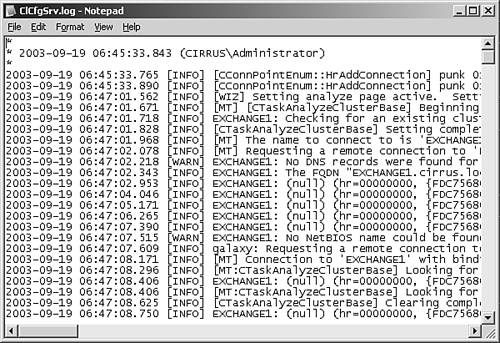
Although some of these warnings might be about issues you are already familiar with in your domain, check for any warnings or critical errors that could affect your Exchange implementation.

Also, save a copy of the log that is generated, as shown in Figure 7.11, so that you have a record of your cluster configuration and setup. When you're trying to work out problems later with Exchange or other applications, this information will be critical.

Figure 7.11. Clustering log.

graphics/07fig11.jpg

When the clustering setup process is finished, you can add the rest of your servers as nodes. To add a new server, right-click on the cluster and select New, Node to enter the server name. When you are finished, the nodes you have added appear at the bottom of the cluster folder listing, as shown in Figure 7.12.

Figure 7.12. A new cluster shown in the Cluster Administrator.

graphics/07fig12.gif

Finally, after you have installed and configured your cluster at the operating system level, you need to ensure that Microsoft Distributed Transaction Control (DTC) is installed and configured correctly on at least one of the servers/nodes where you want to install Exchange.

To install DTC on your cluster, follow these steps:

  1. Open the Cluster Administrator from Administrative Tools, and navigate to Cluster Groups.

  2. Right-click on Cluster Groups and select New, Resource to open the dialog box shown in Figure 7.13.

    Figure 7.13. New Resource dialog box.

    graphics/07fig13.gif

  3. Enter a name of Distributed Transaction Coordinator and a description of Required for Exchange clustering. From the Resource Type list, select Distributed Transaction Coordinator and click Next to proceed.

  4. In the next dialog box, check to see whether all your cluster nodes appear in the list of possible owners and click Next.

  5. From the dialog box shown in Figure 7.14, select the following two resources as dependencies:

    • Local Quorum

    • Cluster Name

    Figure 7.14. Resource dependencies.

    graphics/07fig14.gif

  6. Click Finish to return to the Cluster Administrator. Your Resource should now appear with a red "stopped" sign. Right-click on the resource and select Bring Online from the menu shown in Figure 7.15.

    Figure 7.15. Resource menu.

    graphics/07fig15.gif

You are now ready to start installing and configuring your Exchange 2003 cluster, which is what the next section details.

Installing Exchange on a Cluster

Installing Exchange on a cluster is similar to installing Exchange on individual servers. The first thing you need to do is run both the ForestPrep and DomainPrep utilities before you begin the installation.

FORESTPREP AND DOMAINPREP

You might want to turn back to Chapter 3, "Installation,"page 19 for more information on running these two utilities. The instructions are the same whether you are installing individual servers or cluster nodes.


After you have run these two utilities, double-check that the nodes where you want to install Exchange meet the minimum requirements. Again, if you have done your homework and selected the appropriate hardware and configuration for your cluster servers, this shouldn't be a problem. The requirements for clustering should be the same or greater than the minimum requirements for running Exchange.

To install Exchange on your first node, you need to be logged in to the node as a user that has Exchange Full Administrator privileges at the organizational level. You also need to be the local administrator on the server where you want to install Exchange.

The following section details how to install Exchange on the first server in your cluster. To install additional servers, just follow the same steps.

UPGRADING AN EXCHANGE CLUSTER

The installation instructions that follow assume that you will be installing a new Exchange organization on your cluster. If you plan to upgrade an existing Exchange implementation that has been clustered, see the online article on upgrading that appears a little later in this chapter.


To install your first (and subsequent) Exchange server on your cluster nodes, follow these steps:

  1. Log in to the cluster node, and from a command prompt, run D:\setup\i386\setup (if D: is your CD-ROM drive) to run the Exchange Installation Wizard. Click Next to continue after each step.

  2. Accept the license agreement and enter your Exchange product key.

  3. Using the Component Selection dialog box, select the Exchange components you want to install by changing the drop-down list to Install.

  4. In the Installation Type dialog box, select the Create a New Exchange Organization option.

  5. Enter a new name for your organization by using a combination of letters, numbers, spaces, dashes, or hyphens.

  6. Verify the components you want to install, accept the final license agreement, and click Finish at the end of the Installation Wizard to start installation of the components you selected earlier.

Note that when you're installing Exchange on a node, all the subsequent nodes that are installed use the same file location. For example, if you specify that the installation should place all the files on a directory on the C: drive, this same location is used with subsequent installations on other nodes. Pick your installation location carefully and consider making the hardware and configuration uniform on all the servers within your node.

Configuring Exchange on a Cluster

After you have repeated the installation process on all your cluster nodes, it is time to finish the configuration to get your Exchange cluster up and running. To complete the configuration, you need to establish a cluster group and a number of resources.

The easiest way to think of your cluster is as a "virtual" server or front end that represents all the nodes in your cluster. When you configure "resources," it is like you are configuring different aspects of that virtual server. For example, instead of using the individual IP addresses for all the nodes, you can establish a resource that associates a single IP address with the entire cluster.

To configure Exchange in a clustered environment, you need to create four resources within your cluster. They resources are as follows:

  • IP Address Resource

  • Network Name Resource

  • Disk Resource

  • Exchange 2003 System Attendant Source

This section illustrates how to create and configure all these resources. Before you start, you might want to review the information on creating and administering clusters found in the Windows Server 2003 help file.

WINDOWS 2000 SERVER

The instructions that follow walk you through how to set up these resources on Windows 2003 only. If you are using Windows 2000 Server, you need to consult its documentation for instructions on how to configure cluster resources.


To configure the required resources on Windows Server 2003, follow these steps:

  1. Open the Cluster Administrator from the Administrative Groups program group and locate the Groups node. Right-click on this node and, from the right-click menu, select New, Group to open the dialog box shown in Figure 7.16. Enter a name for your group, and in the dialog box, select an owner.

    Figure 7.16. New Group dialog box.

    graphics/07fig16.gif

  2. Right-click on the group and select New, Resource to open the dialog box shown in Figure 7.17.

    Figure 7.17. New Resource dialog box.

    graphics/07fig17.gif

  3. Enter a name and description for your resource. Select a resource type of IP Address and, in the TCP/IP Address Parameters dialog box, enter a static IP address and subnet mask for your cluster using the corresponding fields in the dialog box shown in Figure 7.18.

    Figure 7.18. New IP Address dialog box.

    graphics/07fig18.gif

  4. Repeat this process to create a new resource for the network name. Select a dependency of Cluster IP Address. Enter a network name, noting that this is the name the network will associate with your cluster.

  5. Repeat this process to create a new disk resource. Using the disk parameters, select the disk within your nodes that will host your Exchange information store.

  6. Repeat this process to create a new Exchange 2003 System Attendant resource. Select dependencies of Network Name and Physical Disk and enter the correct administrative and routing groups for your installation.

ABOUT MOUNTED DISKS

The configuration procedures outlined earlier are for unmounted disks. If you are using a Windows Server 2003 mounted disk, you must add this disk to the dependencies that are associated with the virtual server you just configured.


After you have completed these steps, you should be able to connect to and work with your Exchange implementation using either the network name or IP address provided. From an end user perspective, this appears to be a single server when, in fact, it is actually a cluster of servers all working together.

graphics/weblink_icon.gif WEB RESOURCE

If you are using clustering with Exchange 2000 and Windows 2000, there is a pathway to upgrade your cluster to Exchange 2003. For more information on requirements for the upgrade and upgrade procedures, go to the Delta Guide series Web site at http://www.deltaguideseries.com and enter article ID A030701.


Microsoft Exchange Server 2003 Delta Guide
ISBN: 0672325853
EAN: 2147483647
Year: 2003
Pages: 109

flylib.com © 2008-2017.
If you may any questions please contact us: flylib@qtcs.net