Section 16.3. How do you create a service consumer using Web Dynpro for Java?
16.3. How do you create a service consumer using Web Dynpro for Java?Many enterprise services, including those provided by SAP in the Enterprise Services Inventory described in Chapter 8, will be implemented in ABAP. Since web servicesand therefore enterprise servicesare loosely coupled, the consumer of the service can be written in ABAP or Java. This section explores using Java to consume the ABAP web service created in Chapter 15. Service consumers can be created in a variety of ways and visualized using Web Dynpro, JSPs, or ASPs, for example. In this section, we'll create a UI using Web Dynpro for Java. As mentioned earlier, Web Dynpro for Java is integrated into SAP NetWeaver Developer Studio as an Eclipse perspective. Web Dynpro for Java uses the model-view-controller (MVC) paradigm, which clearly separates business logic and presentation logic. Its capabilities far exceed what we can discuss in this brief section; we will use many defaults in our example, and we will not show every screen in this process for the sake of brevity. Nonetheless, this example gives a basic feel for creating a service consumer in Web Dynpro. To set the stage for this example, we open the SAP NetWeaver Developer Studio, choose the Web Dynpro perspective, and start a new Development Component Project (by choosing File Double-clicking on the component we created brings up a diagram view where we can see the MVC framework visually. This diagram view divides the screen in thirds, with a portion for the model at the bottom of the screen, a view (at the top), and the controller (in the middle). The model is where the business logic will reside; as a result, no default model is placed on the screen. The controller interacts with the model, reading and writing data, and the view determines what the end user sees. A single Web Dynpro project might have many models. A single model might have many controllers, and a single controller might have many views (for example, for different versions of an application for PDAs, cell phones, and web browsers). In our simple example, we will have a single model, a single controller, and a single view. Creating the new Web Dynpro application generated a controller and a view, but now we need to import a model instead of creating one. To do so, we right-click in the model portion near the bottom of the screen and select Create Model. A dialog appears that asks us to specify the type of model. Although Web Dynpro is an SAP application development tool, you can use it to develop many types of client applications. SAP-related choices include adaptive RFC models and enterprise services models. Note that there are also options for non-SAP specific models such as web services models (which we will use here) and JavaBean models. For this example, we choose Import Web Service Model and click Next to display the screen shown (filled in) in Figure 16-13. On this screen, we specify a model name and a package and select a WSDL source to answer the question every web services consumer must answer: where we will get the WSDL file? The WSDL might be located on the local server or on the local filesystem, or discovered using a Universal Description, Discovery, and Integration (UDDI) server (a UDDI server is included with SAP NetWeaver). Figure 16-13. Importing a web services model in Web Dynpro for Java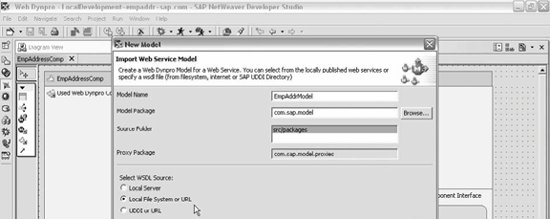 In this case, we select Local File System or URL and click Next to display the screen shown in Figure 16-14. Figure 16-14. Entering the URL for the WSDL file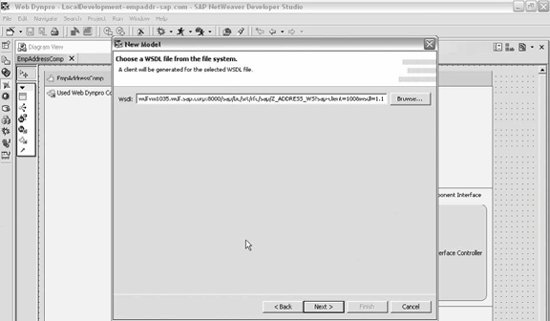 On the screen shown in Figure 16-14, we entered the URL for the WSDL file, cutting and pasting it from the tools in the ABAP environment. We can examine the WSDL file to review what inputs and outputs this service expects and what security options have been selected. We click Next and then Finish. An informational message appears about reloading the project so that the changes we've made will be incorporated. We click OK. The newly created EmpAddrModel appears, as shown in Figure 16-15. Figure 16-15. The newly created model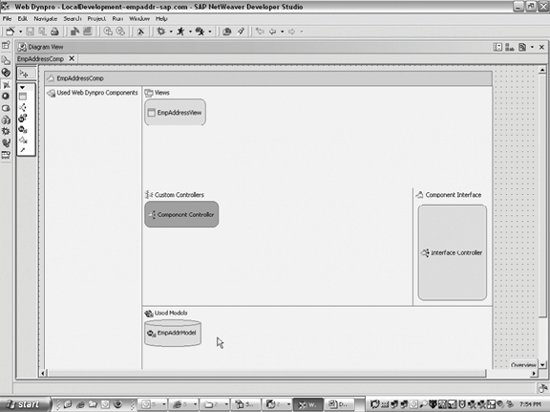 At this point, we rebuild the project so that the changes are incorporated. To do so, we right-click on the development component project in the Web Dynpro Explorer, then choose Development Component The next step is to set up the controller to interact with the model. The controller will read and write data to the model. We apply a template by right-clicking on the controller. We choose Service Controller and click Next to display the screen shown in Figure 16-16. It lists the models for this project (in this case, a single model). Figure 16-16. Binding the controller to the model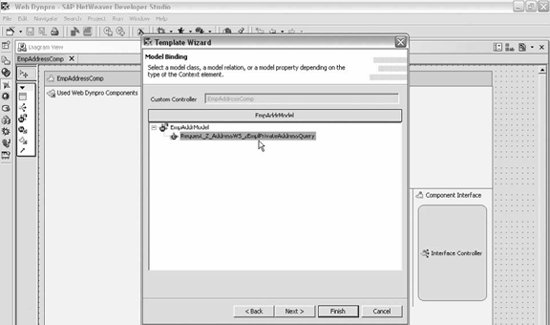 We select the model and click Next to display the screen shown in Figure 16-17. This screen shows all the data supplied by the model; in this case, we chose to use everything, but we could filter what data we want to read and write. Figure 16-17. Choosing the data elements for the controller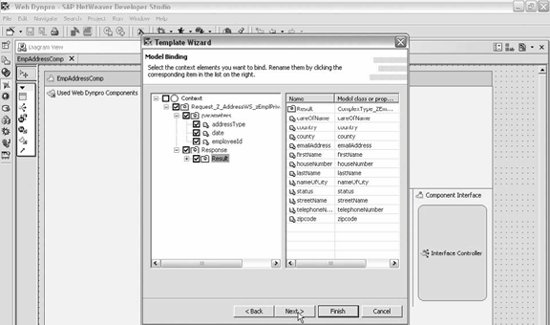 We click Next to display the screen shown in Figure 16-18. On the last screen, we selected the data we want to use; on this screen, we will generate the method call for the controller to invoke the web service. Figure 16-18. Generating the method call for the controller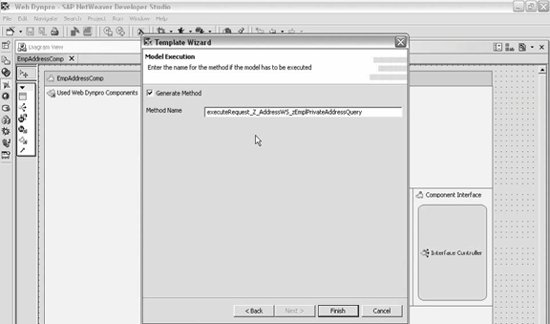 We click Finish to generate the method. A line now appears, binding the controller to the model. The next step is to make an association between the view and the controller. To do so, we use a line tool to draw a line from the view to the controller. Completing this line causes the Edit Context Mapping screen to appear. The data on the righthand side of this screen is the component controller; the data on the left side is the view controller. Initially, the left side is blank, and the right side shows the data that was made available through the connection between the model and the controller. We select the data on the right and drag it to the left side to populate the view. After doing so, the screen should look like Figure 16-19. Figure 16-19. Populating the view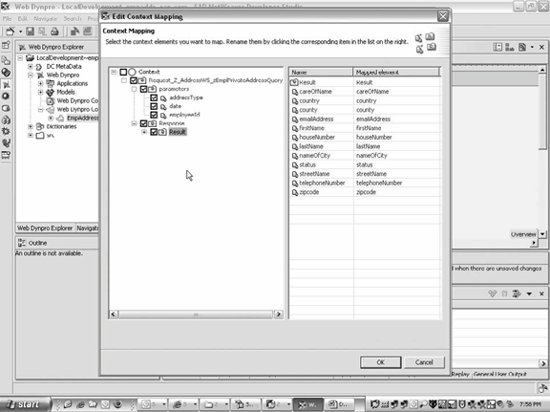 We select all the data elements on the left side and click OK to display a screen like the one shown in Figure 16-20. The system has mapped the data elements in the view controller's context to the data elements in the component controller's context. Since we chose all elements, this process is straightforward, but we could be selective here. Figure 16-20. Mapping data between view controller and component controller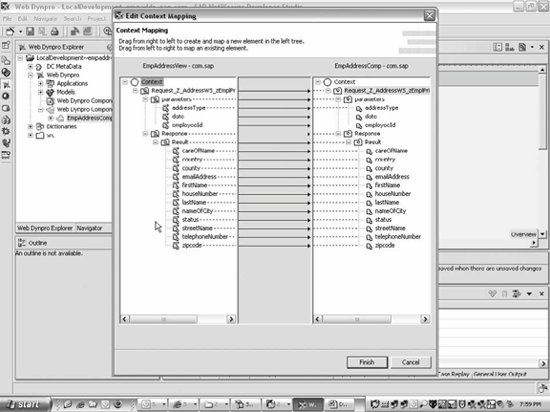 This screen shows graphically the mappings from the view controller to the component controller. We click Finish and a line will appear, connecting the view to the controller. You could go to the view designer to create the interface; it offers the ability to create a complex GUI simply by dragging and dropping UI elements. To simplify the example, we simply right-click on the view and choose Apply Template. Since the web service requires input, we create a form by selecting Form and clicking Next. The Form View appears, as in Figure 16-21, where you can select elements. For this example, we select them all. Figure 16-21. Selecting elements for the form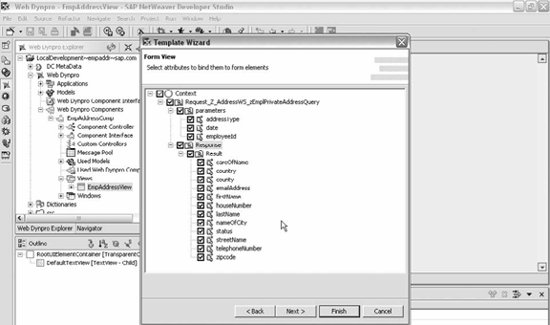 The elements appear in alphabetical order. You can rearrange them by selecting an option and using the up and down arrows on the right to move them up or down through the list. For example, it makes sense to move the input elements to the top of the list and to move the elements into the expected order for addresses. After they are arranged, we click Finish to display the Form view shown in Figure 16-22. Figure 16-22. The Form view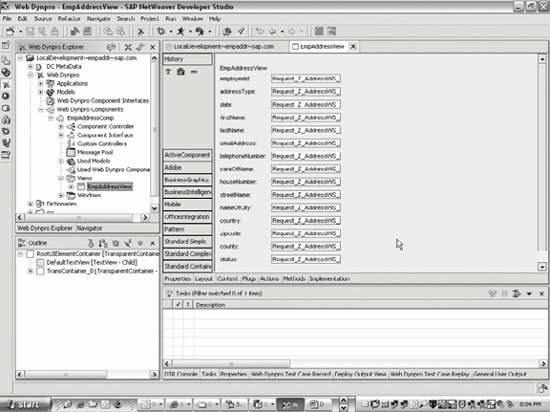 Clicking on a UI element such as an input field lists its properties and values. Now you need a way to invoke the web service. It makes the most sense to add a command button for the user to submit the request. We right-click on the view again and select Apply Template, then choose Action Button and click Next to display the screen shown in Figure 16-23. Figure 16-23. Adding a button to the form We type a label for the button (in this case, Search) and click Next to display the Event Handler Properties screen shown in Figure 16-24. Figure 16-24. Specifying an event handler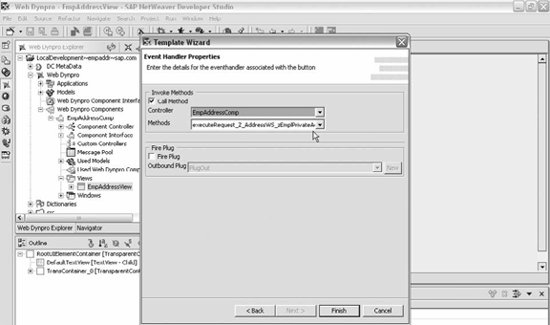 We choose the component controller and specify a method (in this case, there is only one). We click Finish and the button appears. We rebuild the project. At this point, you could rearrange the UI elements, add images, or do some Java coding on the implementation if desired; the IDE is based on Eclipse, as mentioned earlier. You can write your own action elements. In this case, no additional coding is needed; we simply deploy the project. We choose the application under Application in the Web Dynpro Explorer, right-click on it, and select "Deploy New Archive and Run." The task view at the bottom of the screen shows messages about the progress of the deployment. After the deployment is complete, the client application displays in a browser window. The inputs are the first three fields; Figure 16-25 shows this form after pressing Search to retrieve the results of the query. Figure 16-25. The Web Dynpro client application for consuming the ABAP web service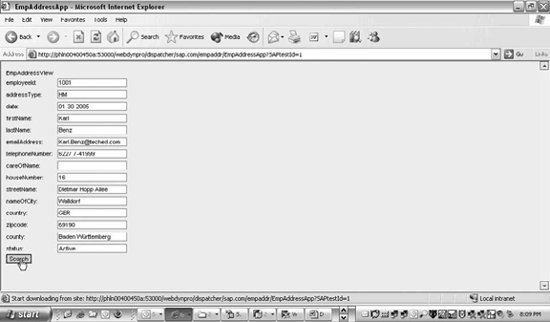 In this chapter, we examined how to create and consume services in Java using SAP NetWeaver Developer Studio and its many development facilities both for UI development and for coding projects. At various points in this process, you can glimpse the principles of ESA at work: we've seen abstraction that hides the complexity of XML from the developer, reuse of data types, and modeling as a development methodology. In presenting these examples, we have not even scratched the surface of the capabilities these tools offer Java developers. We refer you to the SAP Developer Network (SDN; http://sdn.sap.com) for documentation, articles, webinars, and courses as well as the opportunity to join a virtual community of Java developers using SAP tools and technologies. |
 New
New EAN: 2147483647
Pages: 265