Inserting and Deleting Rows and Columns


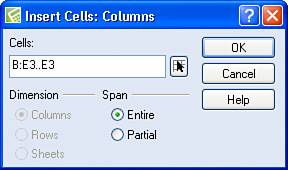
Sometimes, after setting up information in a spreadsheet, you realize that you left something out. For example, in the spreadsheet shown in Figure 4.10, suppose that you want to add information for April. Ideally, you'd like to insert a row or column to add the information. No problem; you can add a row or a column wherever you need.

Figure 4.10. You can insert a column to add April sales to this spreadsheet.


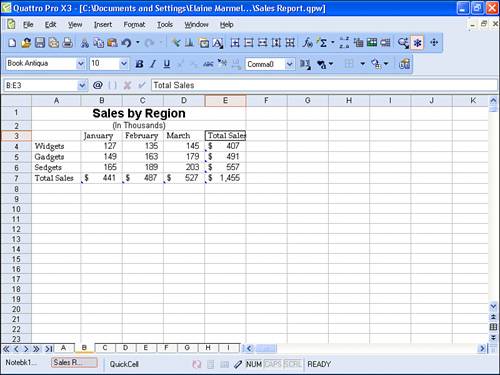
Follow these steps to insert a row or column:

1.

Place the cell selector in the proper row or column to insert a row above the cell selector or a column to the left of the cell selector.

2.

Open the Insert menu and click the appropriate command: Insert Row or Insert Column. When you select Insert Column, Quattro Pro displays the dialog box shown in Figure 4.11; only the title bar and the unavailable Dimension options are different when you select Insert Row.

Figure 4.11. Use this dialog box to insert a column or row into a spreadsheet.


When inserting a column, Quattro Pro inserts the column to the left of the column containing the cell selector. When you insert a row, Quattro Pro inserts the row above the row containing the cell selector. So make sure you initially position the cell selector properly to insert the row or column in the proper location.


3.

Click OK. Quattro Pro inserts a column to the left of the column containing the cell selector (see Figure 4.12); if you inserted a row, Quattro Pro inserts the row above the row containing the cell selector.

Figure 4.12. Quattro Pro inserts columns to the left of the column containing the cell selector.


Absolute Beginner's Guide to Quattro Pro X3
Absolute Beginners Guide to Quattro Pro X3
ISBN: 0789734265
EAN: 2147483647
Year: 2007
Pages: 128
Authors: Elaine Marmel

flylib.com © 2008-2017.
If you may any questions please contact us: flylib@qtcs.net