| Now that you've set your initial levels, it's finally time to start mixing. All of Reason's Mixer controls can be recorded or automated just like Reason's instruments. In cases where you want to make just a few adjustments, the easiest method is to set up a single Sequencer track to record all your Mixer movements. To set up your Sequencer to record mix moves 1. | In the Sequencer, select Edit > Create Sequencer Track and assign the new track to the Mixer device you want to control (Figure 10.12).
Figure 10.12. Set up a Sequencer track to record Mixer movements. 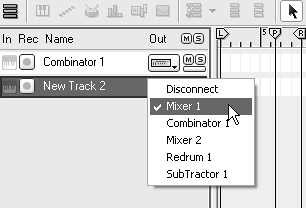
| 2. | Record-enable the track by clicking the keyboard icon in the device In column.
A red circle will appear next to the icon indicating that the Mixer track is ready to record (Figure 10.13).
Figure 10.13. Record-enable a Mixer track. 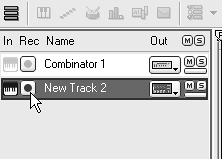
| 3. | If you want to record knob and fader movements from an external keyboard or control surface, you will also need to select the Mixer on Reason's hardware interface on the appropriate MIDI channel.
|
To start recording a mix 1. | Click record to enter Record mode.
| 2. | Click play to record and begin moving the controls.
In Arrange view, a blue strip will appear in the track, indicating that controller information is now being recorded. Dark blue patches indicate controller data (Figure 10.14).
Figure 10.14. A Sequencer track with control data displays a blue bar in Arrange mode. 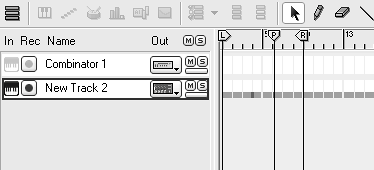
| 3. | When you are done, press stop.
| 4. | Open the Mixer track in Edit mode to see the controller data (Figure 10.15).
Figure 10.15. Mixer control information recorded from the Rack can be fine-tuned in Sequencer Edit mode. 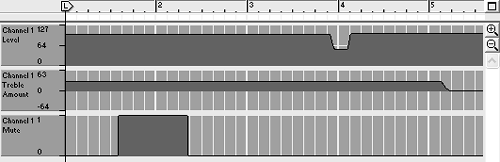
In the Rack, the Mixer front-panel controls with automation data will be outlined in green (Figure 10.16).
Figure 10.16. Mixer controls with automation have green outlines in the Rack. 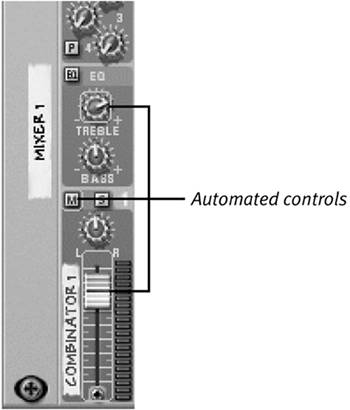
|
Automating a master Mixer If you organize your project well, with luck your final mix won't involve much more than moving the levels of a few tracks up and down over the length of the song, and maybe triggering a Mute or Solo button for some of the channels. In cases like this, a typical final mix can be managed in one Sequencer track assigned to your master Mixer. To manage a master Mixer track 1. | Record-enable the Sequencer track assigned to your Mixer.
| 2. | Set your loop length for the part of the song you wish to record.
| 3. | Set your record mode to Replace or Overdub.
| 4. | Click the Record button to enter standby mode.
| 5. | Hit play to begin recording.
| 6. | Make your Mixer adjustments, and press stop when you are done.
| 7. | Open your track in Edit mode and play it back. Make fine adjustments to your Controller lanes if desired.
|
Controlling one device with many Sequencer tracks If you plan on automating many different Mixer parameters in your Sequencer, consider using different Sequencer tracks for different controls. This allows you to edit and mute the control changes for each Sequencer track independently. It also helps keep your automated tracks organized by minimizing the number of blue lanes to manage in each track (Figure 10.17 and Figure 10.18). Figure 10.17. If a Mixer track contains many different kinds of controls, consider breaking it up into several tracks and sorting them by control type. 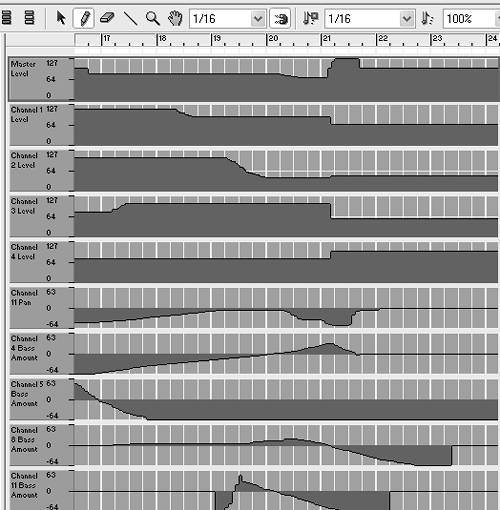
Figure 10.18. This Mixer track is dedicated just to making level adjustments and is much easier to edit. 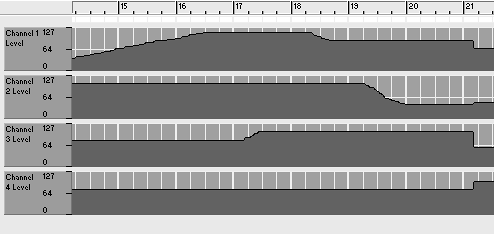
To set up multiple control tracks 1. | In your Sequencer, select Edit > Create Sequencer Track for each Mixer control you want to record (Figure 10.19).
Figure 10.19. You can assign more than one Sequencer track to a single Mixer device. 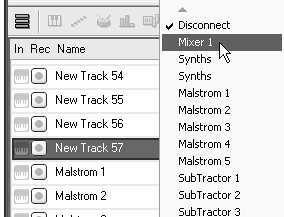
| 2. | Assign the new Sequencer tracks to your master Mixer and rename each track: for example, Mixer 1_pan, Mixer 1_level, Mixer 1_auxsend (Figure 10.20).
Figure 10.20. Give your Sequencer tracks new, descriptive names to avoid confusion. 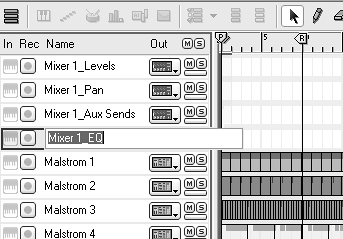
| 3. | Record-enable the new track, click record then play, and move the desired parameter.
Reason 3.0 can record on multiple tracks simultaneously, so make sure you have record-enabled only one track.
| 4. | You can focus on each control track individually during playback by muting the other control tracks (Figure 10.21).
Figure 10.21. The track Mute buttons work on controller data just as they do on notes. Simply click Mute to bypass the controller changes. 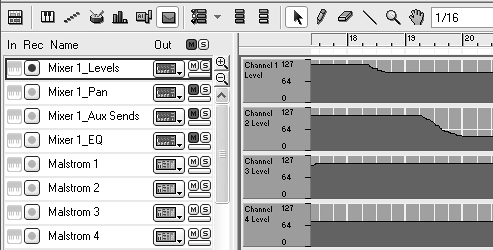
|
 Tip Tip
Saving multiple mixes Once you feel you are getting close to the mix you want, start saving each mix as a separate song. These can all be burned to CD and tested on many different systems. It is also a good idea to take descriptive notes when saving each mix, while it is fresh in your mind. That way, when you return to it later, you'll know exactly what was unique about the mixwhat elements you were focusing on, correcting, or altering. To add and save mixing notes with a song 1. | Press Ctrl+I (Win)/Cmd+I (Mac) to open the Song Information window.
| 2. | Type in the relevant information (Figure 10.22).
Figure 10.22. To track mix information and changes between versions, make notes in the Song Information window before saving your song. 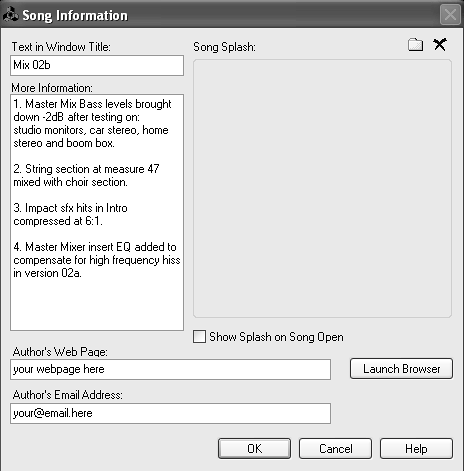
| 3. | Save the song with a descriptive name so you can tell it from other versions.
|
|