Changing the Location of a Master
| At times, you may want to move some master images to a new location outside your Aperture Library. For example, let's say that you have finished your edits to the Lesson08 project and now want to archive the project on a CD-ROM for long-term storage. You don't have enough space to keep the masters in your Library, but you don't want to throw them away. Consequently, CD or DVD archiving is a great way to go. You could simply export the project, burn it on a disc, and delete it from your Aperture Library, but in this case you want to keep it in your Library so you can continue to search and browse the images. Note You'll need a blank CD to perform this exercise.
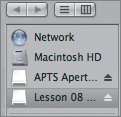
A mounted image is virtual disk. As far as the computer is concerned, Lesson 08 Masters is just like any other writable volume (hard drive, USB drive, etc.) that you might attach to your Mac. Now let's write some data to this virtual disk.
Return to Aperture and explore your project. Note that all the images are now listed as references. If you check the original location of any of the images, you'll see that Aperture lists them as being stored on the virtual disk you just copied them to. Note that you have successfully moved your master data to another volume (you could have also used a DVD if your images were too big to fit on a CD), and yet they're still visible in your Aperture Library because Aperture preserved the necessary links. You can rate them, add metadata, sort them, even view full-resolution previews. The ability to move your masters around in this way gives you a tremendous level of power and control. You can arrange your Library to suit your storage capabilities, offloading some masters to CDs, DVDs, or hard disks, and keeping others on your local hard disk. No matter where they are, though, you'll always have a full-resolution preview and a record of where the original is. However, note that it is possible to break the link to a file. |
EAN: 2147483647
Pages: 190
