| Whether an organization allows new users to register themselves is, of course, a key decision. On the plus side, this policy takes an enormous workload off the administrative staff; however, there are security concerns at work. This application strikes a balance by allowing self-registration but initially restricting those registered to the lowest level of access. A standard Dreamweaver Insert Record server behavior is used to create the record. Step 1: Build the Application Design We start with a basic page, inserting all the form elements needed. Create a basic dynamic page either by hand or from a template.  In the UserLogin folder, locate the folder for your server model and open the register_user page found there. In the UserLogin folder, locate the folder for your server model and open the register_user page found there.
Add a table to the content region of your page to contain the interface elements for the application. From the Snippets panel, drag the Recipes > UserLogin > Wireframes > Register User - Wireframe snippet into the Content editable region. Within the table, insert the form and any necessary form elements for the application. You'll need five text fields one for each of the fields (First Name, Last Name, User Name, Password, and Email Address) as well as a submit button. Place your cursor in the row below the words REGISTER USER in the second cell and insert the Recipes > UserLogin > Forms > Register User - Form snippet [r1-5].
Figure r1-5. 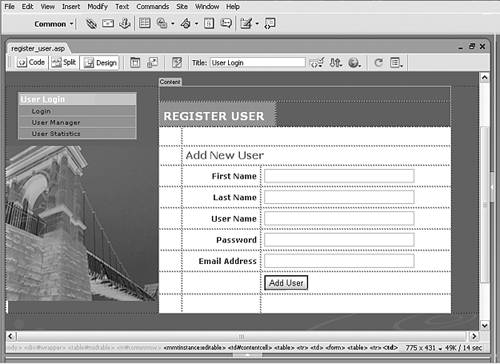
Enhancing Cookie Production Our recipe just scratches the surface of what you can do with cookies. The real power of cookies lies in personalization. With sufficient planning, you can personalize the Web experience for each and every one of your visitors. Although you can certainly use the recipe code as a starting point for working with cookies, you might find it more productive to use a dedicated extension. WeAssist has created and extension that greatly simplifies creating, accessing, and deleting cookies. With WA Cookies, you can quickly add functionality to remember users when they come back to your site and easily customize their user experience according to stored cookie data. For more information, visit http://www.webassist.com/Products/Recipes/WACookies.asp. |
Step 2: Add Insert Record Server Behavior After the framework for the page is in place, we'll apply the first server behavior Insert Record. In the process of applying this behavior, you might notice that not all fields have matching form elements. Several columns UserID, UserAccess, and UserRegDate are automatically populated by the data source when the new record is created. The UserID is an autonumber field that increments by one for each new user, whereas UserRegDate stores the current date through the use of a special function Now() in Access, for example set as the default value. The UserAccess field defaults to the lowest level of access; it's up to the administrator to raise the level if warranted. For ASP From the Server Behaviors panel, choose Add (+) and select Insert Record to display the dialog [r1-6].
Figure r1-6. 
Select the connection to the data source. Choose Recipes from the Connection list. Choose the table in your data source to hold the new records. From the Insert Into Table list, choose the Users table. In the After Inserting, Go To field, enter the page you want the users to see after successfully registering. Select the Browse button and locate the login page for your server model. Declare from which form on the page the data should be taken. Set the Get Values From field to the form name, registerUser. For the form elements shown in the list, set each one to its equivalent in the data source. All form elements should be submitted as text: Set form element FirstName to field UserFirstName. Set form element Lastname to field UserLastName. Set form element UserName to field UserName. Set form element Password to field UserPassword. Set form element EmailAddress to field UserEmail.
When you're done, click OK to close the dialog and insert the behavior. Save your page.
Note To accomodate the different dialogs for the various server models, the steps are presented separately here and when necesary throughout this recipe.
For ColdFusion and PHP From the Server Behaviors panel, choose Add (+) and select Insert Record. In the Insert Record dialog, choose the current form. Select RegisterUser from the Submit Values From list. Select your data source from the list. Choose Recipes from the Data Source list. ColdFusion users should enter their username and password, if needed. Select the table in the data source to insert into from the list. Choose Users (users for PHP) from the Insert Into Table list. Set the data source fields to their corresponding form elements. Make sure the UserID data column is set to be an unused Primary Key. UserAccess should not get a value from the form. Set UserFirstName to the FORM.FirstName form element and submit as Text type. Set UserLastName to the FORM.LastName form element and submit as Text type. Set UserName to the FORM.UserName form element and submit as Text type. Set UserPassword to the FORM.UserPassword form element and submit as Text type. Set UserEmail to the FORM.EmailAddress form element and submit as Text type. UserRegDate should not get a value from the form.
In the After Inserting, Go To field, enter report_projectsummary.cfm or report_projectsummary.php depending on your server model, and click OK to close the dialog. Save the page.
Step 3: Store New User Info in a Cookie As we did on the login page, we'll now store the just-supplied username in a cookie. The cookie will then be read when the user returns to the login page, automatically filling in the values. This additional bit of code smoothes the user experience. Note Because of the different requirements for PHP as compared to the other server models, the next steps are presented for ASP and ColdFusion users first before the application of the Check New Username server behavior. The related PHP steps must be applied after the server behavior is added to the page.
For ASP and ColdFusion In Code view, search for a comment that contains the phrase Insert Record: set variables using Dreamweaver's Find and Replace. This comment is the first line in a code block; we want to insert another code block just above this one. Add a paragraph return between the two existing server-side code blocks. Insert the following code: From the Snippets panel, open the Recipes > UserLogin > Custom Code folder for your server model and insert the Register - Save Login in Cookie snippet. 
| <% if (cStr(Request("AddUser"))<>"") then Response.Cookies("UserName") = Request.Form("UserName") today = DateAdd("d",30,Date()) Response.Cookies("UserName").Expires = today end if %> | 
| [View full width] <% if (String(Request("AddUser"))!="undefined") { Response.Cookies("UserName") = Request.Form("UserName"); var today = new Date(); today.setDate(today.getDate()+30); Response.Cookies("UserName").Expires = (today.getMonth  ()+1)+"/"+today.getDate()+"/"+today. getFullYear(); } %> ()+1)+"/"+today.getDate()+"/"+today. getFullYear(); } %> | 
| <cfif IsDefined("FORM.UserName")> <cflock scope="Session" timeout="30" type="Exclusive"> <cfset Session.MM_Username=FORM.UserName> </cflock> </cfif> |
Save your page.
Step 4: Verify Username Is Unique One other Dreamweaver server behavior is necessary for the user registration page. To make sure that the username entered is unique in the data source, we'll employ the Check New Username server behavior. Should a duplicate username be found, the server behavior will resubmit to the current page with a query string argument that, in turn, triggers the display of an error message. From the Server Behaviors panel, select Add (+) and choose User Authentication > Check New Username. The Check New Username dialog displays [r1-7].
Figure r1-7. 
Select the form field containing the username. In the Username Field list, choose UserName. Choose the page you want the application to present if the username is not unique. In the If Already Exists, Go To field, enter the filename for the register_user page for your server model followed by the query string ?repeat=true.
| register_user.asp?repeat=true |
| register_user.asp?repeat=true |
| register_user.cfm?repeat=true. | 
| register_user.php?repeat=true |
Click OK to close the dialog.
The query string variable technique is useful for displaying conditional text without loading another page. Now we'll add the code that controls what effect the query string variable repeat has on the current page. In Design view, place the cursor where you'd like the error message to appear. Put the cursor in the row above the Register User label. Add the error message code. From the Snippets panel, open the Recipes > UserLogin > Custom Code folder for your server model and insert the Duplicate User Name - Display Text snippet.
| [View full width] <%if (cStr(Request("repeat"))<>"") then Response.Write("That Username is already taken. Please choose a new name and try again.<br>(Use your browser's back button to update your previous entry.)")%> |
| [View full width] <%=(String(Request("repeat"))!="undefined")?"That Username is already taken. Please choose a new name and try again.<br> (Use your browser's back button to update your previous entry.)":""%> |
| [View full width] <cfif IsDefined("URL.repeat_user")><cfoutput> That Username is already taken. Please choose a new name and try again.<br> (Use your browser's back button to update your previous entry.)</cfoutput></cfif> |
| [View full width] <?php echo (isset($_GET['repeat']))?"That Username is already taken. Please choose a new name and try again.<br>(Use your browser's back button to update your previous entry.)":""; ?> |
If you entered the code by hand in Code view, be sure to remove the nonbreaking space character, . Save the page.
You can test the Register User page right within Dreamweaver. Select View > Live Data and, in the URL parameter field on the Document toolbar, add the query string repeat=true. Press Tab, and the error message should appear [r1-8].
Figure r1-8. 
PHP Only In addition to adding code to set the cookies, PHP also requires that you temporarily store or cache its processing. Without doing so, the act of setting the cookie would supercede the redirection and prevent it from occurring. PHP activity is cached with the code ob_start() and restored with ob_end_flush(). Note It is often necessary to insert code in a particular sequence for everything to work as it should. In this case, we needed to include the caching functions after the Insert Record and Check User Name server behaviors were inserted. Had we made our modifications earlier, the Insert Record server behavior would not have been recognized by Dreamweaver, and therefore the Check Username server behavior could not have been inserted.
First, however, we'll add the code to create the cookies. In Code view, use Dreamweaver's Find and Replace to search for $insertGoTo = "login.php";. Insert a paragraph return after the found code and enter the following code: From the Snippets panel, open the Recipes > UserLogin > Custom Code_PHP folder and insert the Register - Save Login in Cookie snippet. setcookie ("UserName", $_POST['UserName'],time()+60*60*24*30); setcookie ("Password", $_POST['Password'],time()+60*60*24*30); Now let's wrap a slightly larger code block with our caching commands. Again using Find and Replace, search for the code that starts $insertSQL = sprintf. Select all the code from the found code line up to and including the code line that begins header(sprintf. The entire code block will look like this:
| [View full width] $insertSQL = sprintf("INSERT INTO users (UserFirstName, UserLastName, UserName, UserPassword, UserEmail) VALUES (%s, %s, %s, %s, %s)", GetSQLValueString($_POST['FirstName'], "text"), GetSQLValueString($_POST['LastName'], "text"), GetSQLValueString($_POST['UserName'], "text"), GetSQLValueString($_POST['Password'], "text"), GetSQLValueString($_POST['EmailAddress'],"text")); mysql_select_db($database_Recipes, $Recipes); $Result1 = mysql_query($insertSQL, $Recipes) or die (mysql_error()); $insertGoTo = "login.php"; setcookie ("UserName", $_POST['UserName'],time()+43200); setcookie ("Password", $_POST['Password'],time()+43200); if (isset($_SERVER['QUERY_STRING'])) { $insertGoTo .= (strpos($insertGoTo, '?')) ? "&" : "?"; $insertGoTo .= $_SERVER['QUERY_STRING']; } header(sprintf("Location: %s", $insertGoTo)); |
Enter the following code before and after the selected code block: From the Snippets panel, open the Recipes > UserLogin > Custom Code_PHP folder and insert the Register Cache Activity snippet. Before:
| ob_start() |
After: ob_end_flush() Save your page.
Test your new page by entering values you expect to fail as well as those you're sure will work. |