Problem You want to export an image and an HTML page in which the HTML page contains an image map that allows the user to click on various portions of the image. Solution Change the publish settings so that Flash will export a single-frame image and an HTML page using the image map template. Then publish. Discussion Flash can export not only single-frame images and HTML pages, but also simple button functionality as an image map. An image map in HTML is a way of defining rectangular regions over an image that are clickable. A classic example is a map in which different regions can be clicked to hyperlink to another page with details about the region. Flash provides you with a simple and convenient way to create such image maps with built-in templates. First of all, let's consider the simplest example, in which your Flash document has a single frame. On that one frame, you have artwork that you'd like to export as a single-frame image. For example, perhaps you have artwork for a world map, as shown in Figure 2-3. Figure 2-3. Artwork to export as a single-frame image 
However, you also want to export an HTML page that will contain clickable regions over the map. The following steps outline the basic procedure: Create a button symbol. In the button symbol, draw a filled rectangle on the Hit frame. This step will create an invisible button. Although you can create Flash buttons that have nonrectangular hit areas, image maps allow for only rectangular areas in the HTML. Therefore, even if you defined a nonrectangular hit area for the button, in the exported image map, the corresponding rectangular bounding box would be used to map the region. If you have any questions about creating buttons in Flash, you may want to consult Chapter 9. Also, note that the buttons that can be used for image maps must be Button instances, and they cannot be movie clips that handle button events. Return to the main timeline and create a new layer above the layer or layers containing the artwork. On the new layer, drag an instance or instances of the button symbol over the corresponding region or regions of the artwork. You can use the authoring tools, such as the free transform tool, to resize the button instances. The invisible buttons will show in Flash as a translucent cyan, so that you can see them on the stage. In the exported files, however, the buttons will not be visible. Figure 2-4 shows an example in which invisible buttons have been placed and resized for the world map. In Flash, it is generally recommended that you use a style of ActionScript code called event handler methods to apply actions to buttons, because it has several advantages over the other option, simply called an on( ) event handler. However, when you export an image map, Flash will only recognize actions applied using on( ) event handlers. Furthermore, the only HTML event that the exported image map can detect is when the user clicks and then releases on a region. That means that regardless of which ActionScript button event you specify (press, release, rollover, etc.), the effect in the exported image map is the same. For the sake of clarity and simplicity, therefore, you might as well specify that the buttons should handle the release event. In order to apply actions to the buttons, complete the following steps: Figure 2-4. Invisible buttons will define the clickable regions 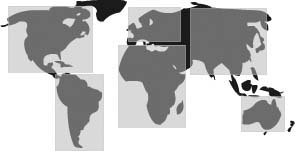 Select a button instance and open the Actions panel by pressing F9. In the Actions panel, you should see that the title bar says ActionsButton. In the Script pane (the portion of the Actions panel on the right), add the ActionScript code that you want to call when the button is clicked. When exporting image maps, you have two basic options: add a hyperlink to another URL or add a JavaScript function call. In either case, the ActionScript code should be within a getURL( ) function. An example of a standard hyperlink within an on( ) event handler (as you would assign it to a button instance) is as follows: on(release) { getURL("index.html"); }
An example of code that calls a JavaScript function is as follows: on(release) { getURL("javascript: alert('You clicked on the region');"); }
The preceding code calls the built-in JavaScript function called alert( ). The alert( ) function opens a new message box and displays a message to the user. You can also call custom JavaScript functions if they are defined within the HTML page or in an imported .js file.
If you haven't yet saved your file, do so, then open the publish settings (File  Publish Settings) to the Format tab, and select HTML (which requires that SWF is also selected, even though you dont really need to export an .swf file in this case) and either JPEG, PNG, or GIF. The image format you choose is up to you, depending on what is most appropriate for your artwork. Figure 2-5 shows an example of what your Publish Settings Format tab should look like. Publish Settings) to the Format tab, and select HTML (which requires that SWF is also selected, even though you dont really need to export an .swf file in this case) and either JPEG, PNG, or GIF. The image format you choose is up to you, depending on what is most appropriate for your artwork. Figure 2-5 shows an example of what your Publish Settings Format tab should look like. Click the HTML tab in the Publish Settings dialog box, and select the Image Map option from the Template menu as shown in Figure 2-6. Figure 2-5. The Publish Settings Format tab 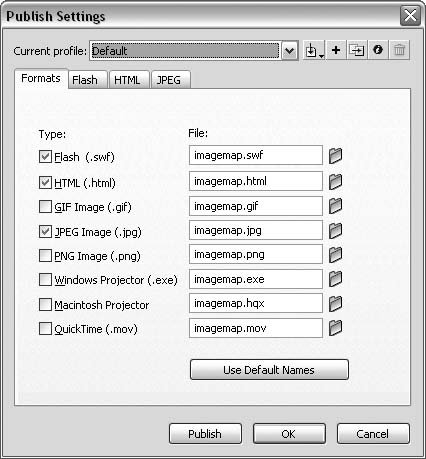 Click the Publish button to publish the HTML file. Because of a bug in Flash, the JPEG, PNG, or GIF will not publish simultaneously. Instead, the HTML (and SWF) file will publish. When it opens in a browser, you'll see a broken link in place of the image. Still in the Publish Settings dialog box, click the Format tab again and deselect HTML, but leave JPEG, PNG, or GIF selected. Publish again. Then, when you open the HTML page in the browser, your image map should function correctly.
 | You can find an .fla file that contains everything necessary to export a sample image map included in the download of files associated with this book. The file is named imagemap.fla. |
|
Should you, for some reason, want to export an image map from a Flash file that contains more than one frame, then some additional considerations may come into play. The frame in which the image appears and the frame in which the buttons appear must be considered. By default, as you learned in Recipe 2.6, Flash exports PNG and GIF files based on the artwork in the first frame, unless one of the frames on the main timeline has been assigned a frame label of #Static. With JPEG files, it exports the content from the currently selected frame regardless of whether a #Static label has been assigned to a frame. Images are exported according to the same rules when exporting image maps. However, Flash looks for the buttons that define the clickable regions in the final frame of the main timeline. You can explicitly instruct Flash to export the image map using buttons from another frame by adding a frame label of #Map to the frame. Figure 2-6. Select the Image Map template 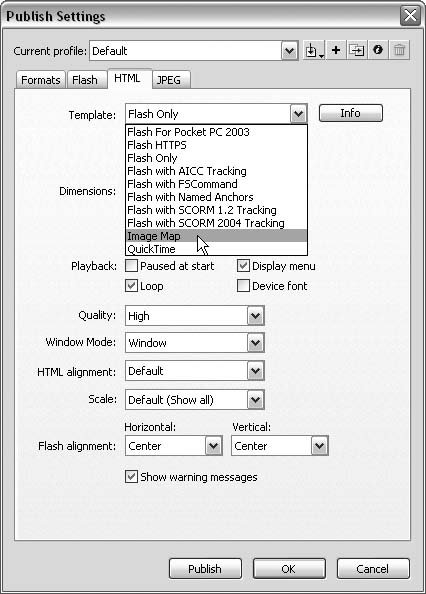
When you have only one frame in your Flash movie, these issues of artwork and button placement are unnoticed. But when you have multiple frames in the Flash file, these minor details can greatly impact whether your image map will function. For example, Figure 2-7 shows an example of a timeline in which the buttons are defined in the first 10 frames and the artwork is defined in the last 10 frames. When such a file is exported as an image map, you will get an image file that contains none of the artwork (because the artwork is not in the first frame) and none of the interactivity (because none of the buttons are defined on the last frame). Figure 2-7. A timeline for an .fla file that will not export correctly as an image map 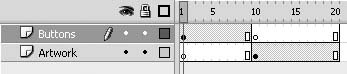
What you can do is (assuming you are exporting a PNG or GIF) add frame labels of #Map and #Static as shown in Figure 2-8. Figure 2-8. A timeline with frame labels so that it will export correctly as an image map 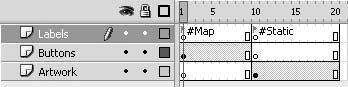
|