XMP: The Key to Camera Raw Editing
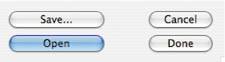
| In addition to the fancy cameras, lenses, and lights, one of the most important tools that a professional film photographer owns is a grease pencil. When reviewing images, a photographer can easily use a grease pencil to make notations directly on proof sheets or slides. In addition to circling selections, the photographer can make notes about how to print or adjust the image. Later, the photographeror whoever prints the picturecan refer to these notes to print the image accordingly. In a way, Camera Raw is like an extremely sophisticated grease pencil. When you adjust the sliders in Camera Raw, as you saw in the examples provided in Chapter 4, you don't actually change any image data inside your raw file. Instead, when you move Camera Raw's sliders, you define a set of parameters that gets stored for later use. When you're finally ready to perform the conversion to create a finished image, Camera Raw reads these specifications and processes your image accordingly. (While you're editing in Camera Raw, your raw file is processed according to your settings to create the preview that you see in the main Camera Raw window.) NOTE If you're using Camera Raw in Elements 3 or Photoshop CS, then you'll see only two buttons: OK and Cancel. Clicking OK processes the image and opens the resulting file. Cancel does just what you'd expect: it closes the Camera Raw dialog box without performing any action. If you hold down Alt (Windows) or Option (Mac), the OK button changes to an Update button, which stores your parameters and closes the raw file without processing. Holding down Alt or Option also changes the Cancel button to a Reset button, which restores your settings to their defaults. Update gives you the same functionality as CS2's Done button. It allows you to specify settings and store them and then process your images later. Recall that the Camera Raw dialog box presents four options: Save, Open, Cancel, and Done (Figure 5.2). Figure 5.2. When running Photoshop CS2, Camera Raw presents four options for handling your raw images once you're done configuring your conversion parameters.
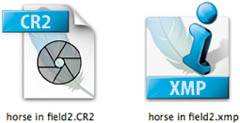
When you click Save, Camera Raw takes your list of parameters and uses them to process your raw file and save it in the format you specify (Photoshop, JPEG, TIFF, and so on). When you click Open, Camera Raw takes those parameters, processes the raw file, and opens the result in Photoshop. If you click Done, Camera Raw does no processing of your raw file; instead, it stores the parameters that you've defined, so that you can process your image later. This ability to set parameters and perform raw processing later means that you can go through a batch of images and set their parameters and then tell Camera Raw to do the actual processing and saving on its own, all at once. In fact, you can even tell Camera Raw to process images in the background, while you do other things. What's more, you can easily copy raw parameters from one image to another. This allows you to quickly apply raw settings to entire batches of similar images. XMP: The metadata that bindsAny time you make an adjustment to an image, all of the information that you define in the Camera Raw dialog boxcropping, rotation, straightening, white balance and exposure adjustment, and everything elsegets saved. Even if you choose to open or save an image, Camera Raw saves your conversion parameters so that you can go back later and adjust them further. (At any time while you're in Camera Raw, you can hold down Alt in Windows or Option on the Mac to change the Cancel button into a Reset button, which will return all of your settings to their original defaults.) Camera Raw never tries to write any data into your original raw file. No matter what edits you elect to make, your original data will remain completely untouched. So where does Camera Raw store all of these parameters? By default, Camera Raw running in Elements and Photoshop CS and CS2 stores all of its image parameters in an internal database. The parameters for every raw file that you edit with Camera Raw get added to this database. Camera Raw grabs these stored parameters from its database any time you open a previously edited image. Even if you move the raw file to a different location on your system, Camera Raw will still grab the right parameters. However, because the parameters aren't stored with the raw file, they won't travel with that file as you move it around. So if you move the file to another computer and open it in Camera Raw there, you'll be back to your default parameters. If you work on only one computer and don't ever plan to send your images to someone else, then this may not be a problem. However, if you back up adjusted raw files to a CD-ROM and then later restore the image to your computer, you will have lost all of your conversion parameters. Similarly, if you delete the Camera Raw cache (perhaps in the process of upgrading your OS or your copy of Photoshop), then you'll lose your raw file parameters. To work around this limitation, Camera Raw provides a second option when running under CS and CS2. When it's hosted by these applications, you can tell Camera Raw to store all conversion parameters in a sidecar file, sometimes referred to as a sidecar XMP file, or just an XMP file. A sidecar file is nothing more than a small text file that contains all of your image conversion parameters in XMP format. Developed by Adobe, XMP is an open standard created for the express purpose of storing image metadata. As you've already seen, your camera stores certain types of metadata with your image. In addition to the date and time the image was shot, all relevant exposure datashutter speed, aperture, ISO rating, and so onis stored in the file. This exposure data conforms to the EXIF (Exchangeable Interchange Format) standard. Your image editor, meanwhile, may allow you to store additional types of metadata in your image. IPTC metadata is a standard for specifying ownership, copyright information, searchable keywords, and many other important tags. The XMP standard supports and includes all of these formats and even lets you add your own data (the X stands for eXtensible). All of this information is readable by Photoshop, and editable using either the CS File Browser or Adobe Bridge. When you tell Camera Raw to store parameters in a sidecar file, Camera Raw creates a separate text file in the same directory as your raw file. It's given the same name as the raw file, but appended with the .xmp extension (Figure 5.3). Any time you move the file to another computer, you can simply send the XMP file along with it. As long as the files are in the same directory, you need open only the raw file, and Camera Raw will automatically read the associated XMP data and set the raw file's parameters accordingly. Figure 5.3. If you configure Camera Raw to store its XMP metadata as sidecar files, then Camera Raw will create a separate XMP file for every raw file that you process.
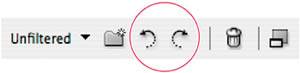
To tell Camera Raw to store data in XMP files rather than in its own internal database, you simply change a preference in Camera Raw itself. When running in Photoshop CS2, you access the Preferences dialog box from the pop-up menu next to the Settings pop-up menu in Camera Raw. In the Preferences dialog box, from the Save Image Settings In pop-up menu, choose Sidecar ".XMP" Files. When running under Photoshop CS, you must first put Camera Raw in Advanced mode by selecting the Advanced radio button. The pop-up menu will then give you access to the Preferences dialog box. From the Save Image Settings In pop-up menu, choose Sidecar ".XMP" Files. As you'll see, keeping a list of processing parameters separate from the image data itself (whether in the internal database or a separate file) allows a much more streamlined workflow. File Browser and XMPThe Adobe File Browser also makes substantial use of the XMP metadata that's stored with your raw files. When you adjust the parameters of an image in Camera Raw, the Adobe browsers read this information to construct a new thumbnail and preview reflecting your edits. Because of this, if you view your images in either browser, you will see an accurate representation of the raw conversion that you've configured using Camera Raw. But Bridge and the File Browser also let you configure a few parameters of their own. For example, the Rotate tools provided in both browsers (Figure 5.4) don't actually rotate any image data. Instead, they simply store a parameter that says that, when processed, the image is to be rotated in a particular way. Figure 5.4. The Rotate tools in Bridge. The File Browser in Elements and Photoshop CS also provides Rotate tools.
As with Camera Raw, if you've elected to store your image data in a sidecar XMP file, then rotating an image in either Bridge or the File Browser will create an XMP file (if one doesn't already exist). As you'll see later in this chapter, Bridge and the File Browser also let you change and edit the IPTC metadata that is stored with your image. So what should you choose?Though it means having to hassle with a lot of extra little files, you should use sidecar XMP files rather than the internal cache. Though you may not ever move an image to another computer or send it to anyone else, you will want to back up and archive your images. As you'll see, in the process of moving your images through your workflow, you'll assign a lot of handy organizational and cataloging information, and as your image collection grows, this information will become even more useful. Ensuring its preservation will make any future work with your images much simpler. |
EAN: 2147483647
Pages: 76
- Challenging the Unpredictable: Changeable Order Management Systems
- ERP System Acquisition: A Process Model and Results From an Austrian Survey
- The Effects of an Enterprise Resource Planning System (ERP) Implementation on Job Characteristics – A Study using the Hackman and Oldham Job Characteristics Model
- Context Management of ERP Processes in Virtual Communities
- Healthcare Information: From Administrative to Practice Databases