Modifying an Existing Form Library
To modify an existing form library, you can change the form template on which the library is based. Care must be used when changing a form template because your changes might result in the loss of data within the existing forms stored in the form library that are based on this template. For example, if you remove a field from a form template, this field no longer appears in the existing forms that are based on that form template; consequently, the data in this field is lost. However, if you are making additions to the form or changing its appearance, you shouldn’t lose any data.
| Tip | If in doubt, do not modify the existing library. Instead, publish the changed form template to a new form library. |
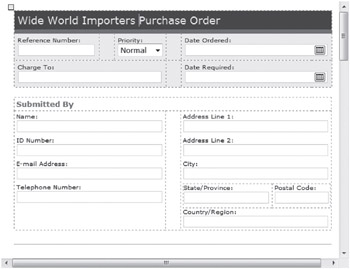
In this exercise, you will modify the existing form library from InfoPath 2007. In the Purchase Orders form library template, you will change the form title to Wide World Importers Purchase Orders and then add the Charge To column to the table layout of the Form Library page.
OPEN the SharePoint site in which your existing form library is located. If prompted, type your user name and password, and click OK.
1. In the left navigation panel, click View All Site Content.
2. Under Document Libraries, click the Purchase Orders library.
3. On the Purchase Orders form library page, from the Settings menu, choose Form Library Settings.
4. On the Customize Purchase Orders page, in the General Settings area, choose Advanced Settings.
5. On the Form Library Advanced Setting page, in the Document Template area, under Template URL, click (Edit Template).

6. If prompted, type your user name and password for the SharePoint site, and click OK.
7. If a dialog box appears that asks whether you want to continue, click Yes.
The Purchase Orders form template opens in InfoPath 2007 in Design mode.
8. Position your cursor to the left of the Purchase Order heading. Type Wide World Importers so that the heading reads Wide World Importers Purchase Order.

9. From the File menu, choose Publish. The InfoPath Publishing Wizard opens.
10. On the page that lists the options for publishing location, select the first bullet point: To a SharePoint server with or without InfoPath Forms Services, and click Next.
11. On the next page, in the Enter the location of your SharePoint or InfoPath Forms Services site, type the URL of the SharePoint site on which you want to create the form library, such as http://wideworldimporters. Click Next.
12. On the next page, choose Document Library, and click Next.
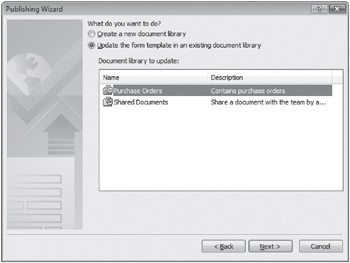
13. On the next page, click Update the form template in an existing document library, and then choose the Purchase Orders library from the list of existing libraries. Click Next.

You will now modify the table layout for the form library page by adding a Charge To column.
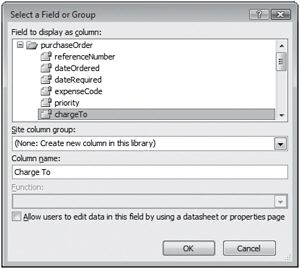
14. On the page that lists column names, click Add. The Select a Field or Group dialog box appears.
15. Select the chargeTo field. In the Column name box, edit the field so that it reads Charge To. Click OK.

Charge To is added to the list of column names.
16. Click Next.
17. On the next page, verify that the form information is correct, and then click Publish. The modified template has been published to the SharePoint site.
18. On the confirmation page, click Close.
CLOSE InfoPath 2007, and then close the browser.
EAN: N/A
Pages: 201