Web User Controls
| Server-side controls all derive from System.Web.UI.WebControls. ASP.NET offers another group of controls, though, which fall into the category of HTML controls. HTML controls are simply server-side representations of standard or normal HTML elements. Any HTML element that is contained in an .aspx page and is marked with a runat="server" attribute becomes an HTML control on the server. These controls all derive from the System.Web.UI.HtmlControl class. If you use an HTML element that has functionality that can't be represented with anything that has server-side functionality, such as <div> or <span> has, it is represented as an HTML generic control instance. These HTML controls are designed to have direct equivalences from normal HTML instances. This pairing means you can more easily transfer your classic ASP applications to ASP.NET applications by changing their HTML elements and adding a runat="server" attribute. Then you can simply change the file extension from .asp to .aspx. This combination gives you an ASP.NET page with a complete set of server-side controls.
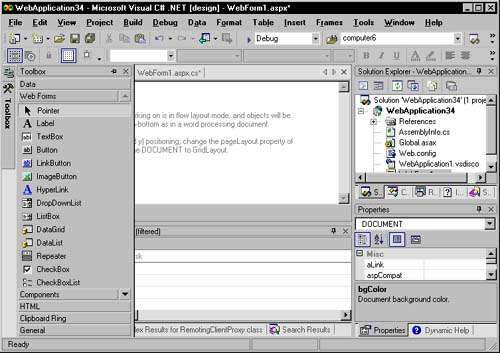
NOTE: I mention the HtmlControls only for completeness. We won't be using them in the Resumé application. Placing ControlsWhen you first create an ASP.NET application in Visual Studio, you'll see a blank form onto which you can place controls. You can find the controls we'll be using in the Toolbox under the Web Forms category, as shown in Figure 2.1. If for some reason the Toolbox can't be seen somewhere on the screen (by default, it's on the left side of Visual Studio), go to the View menu and select Toolbox, which will cause it to appear. Figure 2.1. By Default, the Toolbox Is Seen at the Left Side of Visual Studio. Hovering Your Cursor over the Toolbox Reveals the Controls.
To place Web Form controls, simply grab the one you want and drag it onto the form. Once the controls have been placed on the form, they can be moved around, aligned, and edited.
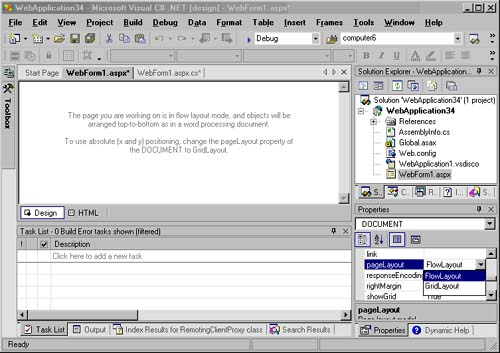
TIP: The Label control simply displays HTML text in the browser. This control is a server-side control that executes and then renders by outputting HTML code. If you don't need to programmatically alter or access the label or its contents, you should use simple HTML text instead of a Label control. That's because simple HTML text doesn't have to execute as a server-side control but is simply sent to the client without any processing. Using HTML text instead of Label controls when you don't need the flexibility that Label controls offer can improve the performance of your Web Form application. When I develop the interface for ASP.NET applications, I find FlowLayout easier to use for the page than GridLayout. GridLayout gives you the capability to place controls using absolute coordinates. But I have found that GridLayout actually makes creating clean and well-organized screens more difficult. By default, ASP.NET pages are set to GridLayout. You can change the settings with the DOCUMENT Properties window, as shown in Figure 2.2. Figure 2.2. To Develop ASP.NET Application Interfaces, FlowLayout Might Be Easier to Use than GridLayout.
Control PropertiesOnce a control has been placed on the form, its properties can easily be edited. To do so, simply single-click on the control with the left mouse button, which will select the control and reflect the control's properties in the property window. What kinds of properties can you set for controls? That depends on the control and what is appropriate. Label controls let you set properties having to do with the display of text, such as color, font, size, and the text content. TextBox controls let you set other properties that relate to text editing, such as columns, rows, type (single line, multi-line, or password), and other similar characteristics. Many controls, such as the DropDownList control, let you enter the data items using the Properties window. Alternatively, you can just type in the data items with HTML View selected. As a matter of fact, you can edit a control's properties while in HTML view simply by typing in the property and its value. The following example shows a Label control that is set to render as yellow text, with the text content being "Some Text Here". <asp:Label runat="server" ForeColor="Yellow">Some Text Here</asp:Label>
NOTE: You might have noticed that the Visual Studio edit window has two tabs Design and HTML. The Design tab opens by default and lets you graphically edit your page. The HTML tab lets you access the raw HTML, which gives you more control. The Web Form controls, however, are included with the raw HTML. You won't see the rendered HTML when these controls are present, but you'll see the server control that eventually will render the HTML. Control EventsMost Web Form controls have events that can fire in response to user interaction. Buttons, for instance, can fire off an event handler, to which you can add code and perform some tasks. All the controls that have events have a default event. This default is the event that developers will use 99 percent of the time in conjunction with a control. For example, a Button control has as its default event a Click event. The default event fires in response to users clicking the button. But the Button control also can respond to other events, including a Command event. I have used the Button's Command event only once since I've been developing ASP.NET applications, but it is there for those rare cases when it's needed. Command events give developers an opportunity to specify events other than the default event. Default events are so important because handler methods are easily created for them by simply double-clicking on the control in the Design window. This means you can quickly create an application that responds to a button click. I've created a simple application named SimpleWebFormDemo by doing the following:
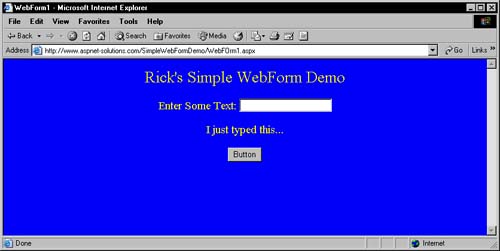
You can see this simple application in Figure 2.3. Figure 2.3. The Button Event() Method Puts the TextField Data into the Label. The TextField Is Then Cleared.
AutoPostBackNot all events automatically fire an event. A good example of this is the CheckBox control. By default, this control simply allows its state to benignly toggle on and off. Even if you double-click a CheckBox control and create an event handler, the event handler will never get called. The trick to calling the event is to set the control's AutoPostBack property to true. This setting will cause the page to post back (more on post backs in the next section, "Page Execution Sequence") to the server; then, if you created an event handler, the event will be invoked. I created a simple program named CheckBoxEvent. You can find this program from the Chapter 2 page on the ASPNetSolutions.com Web site. This program shows how you can use the AutoPostBack property to cause CheckBox controls to immediately respond to user interaction with a post back. Radio buttons are also prime candidates to use for setting AutoPostBack to true when the application needs to respond immediately to a selection. |
EAN: N/A
Pages: 175