Managing Plugins


The Plugin Management administration panel (Figure 10) is your primary interface for working with plugins. You can use this panel to activate or deactivate plugins and get more information about a plugin. For some plugins, the Plugin Management panel also offers links to configure a plugin.

Figure 10. The Plugin Management administration panel shows all installed plugins. This illustration shows the three plugins that are part of a WordPress installation (Akismet, Hello Dolly, and WordPress Database Backup) as well as the one we installed in Figure 8 (Adhesive). One plugin (Akismet) is enabled.


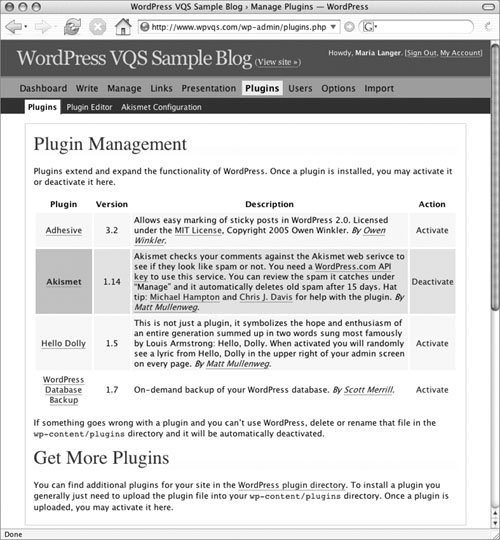
In this part of the chapter, we introduce the Plugin Management administration panel and explain how you can use it to manage your installed plugins.

Tips

  • A plugin will not appear in the Plugin Management administration panel unless it is properly installed.

  • If a plugin malfunction prevents you from accessing your blog or the Plugin Management administration panel, use FTP to remove or rename the problem plugin. Doing so will deactivate it so you can access your blog or the Plugin Management panel again.


To display the Plugin Management administration panel

1.

If necessary, log in to your WordPress blog and display the Dashboard.

2.

Click the Plugins button. The Plugin Management administration panel appears, displaying a list of all installed plugins (Figure 10).

To get information about a plugin

In the Plugin Management administration panel (Figure 10):

  • Click the name of the plugin in the Plugin column to visit its home page (Figure 11).

    Figure 11. Clicking the Akismet link takes you to the plugin's Web site.


  • Read information in the Description column to learn more about what the plugin does and follow links to the developer's Web site and other information.

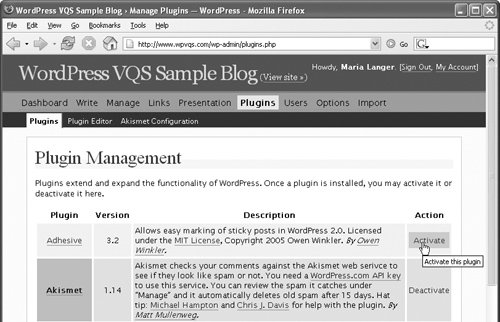
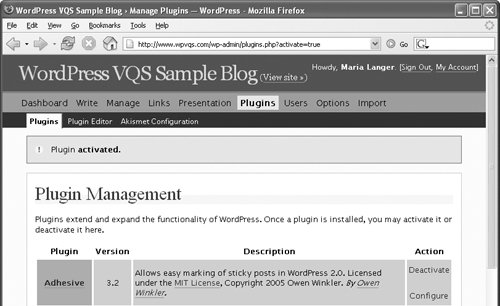
To activate a plugin

1.

Open the Plugin Management administration panel (Figure 10).

2.

Click the Activate link beside the plugin you want to activate (Figure 12).

Figure 12. Click the Activate link.


3.

The page refreshes and a note near the top of the page indicates that the plugin has been activated (Figure 13).

Figure 13. WordPress confirms that the plugin has been activated.


4.

Perform any other installation tasks required by the plugin. Consult the plugin's documentation for detailed instructions.

5.

Visit your blog to make sure everything is working as you intended.

Tips

  • An active plugin is displayed in the Plugin Management administration panel with a green background.

  • If an installed and activated plugin does not work as you expected, deactivate it. You can use the plugin's documentation or contact the plugin developer to troubleshoot and fix the problem.


To deactivate a plugin

1.

Open the Plugin Management administration panel (Figure 10).

2.

Click the Deactivate link beside the plugin you want to deactivate (Figure 14).

Figure 14. To deactivate a plugin, click the Deactivate link.


3.

The page refreshes and a note near the top of the page indicates that the plugin has been deactivated.

4.

Perform any other deinstallation tasks related to the plugin. This includes, but is not limited to, deactivating related plugins and reverting modifications to theme files. Consult the plugins documentation for details.

5.

Visit your blog to make sure everything is working as intended.

Tip

  • If you don't plan to use a plugin again, you can remove it. We explain how earlier in this chapter.


WordPress 2. Visual QuickStart Guide
WordPress 2
ISBN: 0321450191
EAN: 2147483647
Year: 2004
Pages: 142

flylib.com © 2008-2017.
If you may any questions please contact us: flylib@qtcs.net