| In the Default template, the index.php file includes The Loop. As discussed earlier in this chapter, The Loop contains PHP code to insert blog database content, such as a post's title, date, author name, content, and comments. You can modify The Loop to rearrange, remove, or add components, even if you don't know PHP. All you need to know is which PHP commands display each componentand how you can safely move, remove, or add them. Figure 41 shows a typical post as it appears on the home page in the Default theme. In Code 4 on the next page, the PHP code that actually displays this information is in black while the additional PHP and HTML that make up links and formatting are in gray. Here's a quick look at the PHP that's doing all of the display work: <?php the_title(); ?>
displays the post title. Because it's surrounded by <a> and </a> HTML tags, the text appears as a link. The URL for the link is determined by more PHP code that retrieves the permanent link for the post; clicking the link displays the post on its own page using single.php. <?php the_time('F jS, Y') ?>
displays the post date. Although it uses a the_time template to get the information from the database, the formatting instructions within the parentheses tell WordPress to display the date as shown in Figure 41. <?php the_content('Read the rest of this entry »'); ?>
displays the post itself. If the post is split using a <!--more--> tag, a link will appear (Figure 42) so the reader can click it and read the rest of the post. Figure 41. Example of a post as it appears on the Default theme's home page. 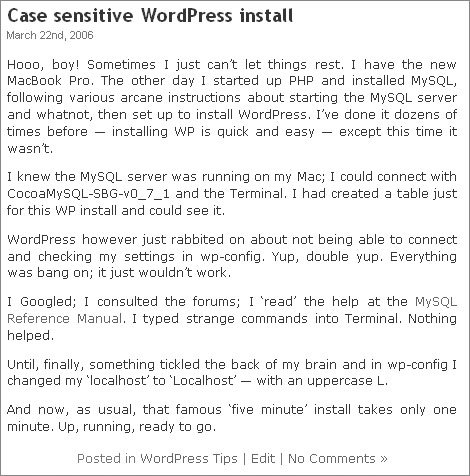
Figure 42. In this example, the entry is split using a <!--more--> tag after the first paragraph. WordPress automatically creates a link for viewing the entire entry. 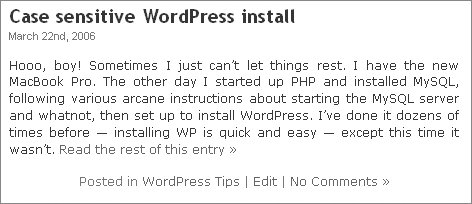
<?php the_category(', '); ?> displays the category assigned to the post. If there is more than one category, each category name is separated by a comma and a space. <?php edit_post_link ('Edit', '', ' | '); ?> displays a link you can click to edit the post. This link only appears to site visitors who are logged in and have either authored the post or have administrative access. Code 4. Post-related PHP code in the Default theme's index.php file <?php if (have_posts()) : ?> <?php while (have_posts()) : the_post(); ?> <div > <h2><a href="<?php the_permalink() ?>" rel="bookmark" title="Permanent Link to <?php the_title(); ?>"><?php the_title(); ?></a></h2> <small><?php the_time('F jS, Y'); ?> <!-- by <?php the_author() ?> --></small> <div > <?php the_content('Read the rest of this entry »'); ?> </div> <p >Posted in <?php the_category(', '); ?> | <?php edit_post_link('Edit', '', ' | '); ?> <?php comments_popup_link('No Comments »', '1 Comment »', '% Comments »'); ?></p> </div> <?php endwhile; ?> <div > <div ><?php next_posts_link('« Previous Entries') ?></div> <div ><?php previous_posts_link('Next Entries »') ?></div> </div> <?php else : ?> <h2 >Not Found</h2> <p >Sorry, but you are looking for something that isn't here.</p> <?php include (TEMPLATEPATH . "/searchform.php"); ?> <?php endif; ?>
|
<?php comments_popup_link('No Comments »', '1 Comment »', '% Comments »'); ?> displays a link that indicates the number of comments. A reader can click the link to display the post on its own page, along with its comments and a comment entry form. As you can see, it isn't difficult to dissect and analyze the contents of a PHP file. Just look up the template tags you find in the file to see what they do. Your best reference is the WordPress Codex's Template Tags Web page, codex.wordpress.org/Template_Tags. On the following pages, we show you how to change post-related blog content: the date, author, category, comment line, and text linking to the remainder of a longer post. There are plenty more ways to customize your blog, but these examples should give you a practical starting point and help you understand how to modify the theme files without breaking anything. Tips  | We tell you more about PHP and HTML in template files earlier in this chapter. If you skipped that part of the chapter, you might want to go back and review it now. The Loop is not always included in index.php. In many themes, it is part of a post.php file that is not included in the Default template. To see how PHP coding translates into what you see on your blog, view the source of the page in your browser. You can usually do this by choosing a Source or View Source command from browser's View menu. Related PHP commands can be separated by stretches of HTML (Code 4). When cutting and pasting, be careful to retain all related PHP code. Use comments to keep notes and reminders in the file. These can help you remember how or why you included specific code.HTML comments take this form: <!-- comment goes here -->. It's a good idea to validate the XHTML of an edited template to make sure it conforms to W3C recommendations. We explain how near the end of this chapter.
|
To change the date format 1. | Open Main Index Template with Theme Editor or index.php with a text editor.
| 2. | Locate the following code: <?php the_time('F jS, Y'); ?>
| 3. | Edit the date format between the parentheses and single quote marks. Table 3 provides a list of commonly used characters for the date format parameter. Note that these characters are case-sensitive and can be combined with punctuation and other characters to format the date.
Table 3. Partial List of PHP Date & Time Format CharactersCharacter | Description | Example |
|---|
j | 1- or 2-digit day of month | 3 | d | 2-digit day of month | 03 | D | 3-character day name | Wed | l | Full-text day name | Wednesday | S | Ordinal suffix for day of month | rd | n | 1- or 2-digit month | 6 number | m | 2-digit month number | 06 | M | 3-character month name | Jun | F | Full-text month name | June | y | 2-digit year number | 07 | Y | 4-digit year number | 2007 | g | 1- or 2-digit hour number (12-hour clock) | 5 | h | 2-digit hour number (12-hour clock) | 05 | G | 1- or 2-digit hour number (24 hour clock) | 8 | H | 2-digit hour number (24-hour clock) | 08 | i | 2-digit minute number | 09 | s | 2-digit second number | 32 | a | Lowercase am/pm | am | A | Uppercase AM/PM | AM |
| 4. | Save or upload the modified file to replace the original.
| 5. | View your blog to make sure the new format is what you expected (Figures 43a and 43b).
Figures 43a & 43b. These two examples use the following format codes: l, F j, Y (top) and j-M-y (bottom).  
|
Tips | WordPress uses standard PHP date formatting. You can find a complete list of PHP date formatting options at us2.php.net/date. The part you edit is inside the parentheses and surrounded by single quotes. Both are important. Make sure you retain both the brackets and the quotes. Make your blog more user-friendly by spelling out the month as a word and the year with 4 digits. Blogs are viewed by people from all over the world. Some will understand 7/5/06 to be the fifth of July while others will read it as the seventh of May.
|
To add the author's name 1. | Open Main Index Template with Theme Editor or index.php with a text editor.
| 2. | Locate the following code: <!-- by <?php the_author(); ?> -->
| 3. | Delete the comment tags (<!-- and -->). The new code should look like this: by <?php the_author(); ?>
| 4. | Save or upload the modified file to replace the original.
| 5. | View your blog to make sure the author name appears the way you expected (Figure 44).
Figure 44. Displaying the author name for a post in the Default theme is as easy as removing a pair of comment tags. 
|
Tips | As you can see in this example, the author name code is already in the index.php file in the Default template. The comment tags around it simply deactivate it. You can use comment tags to deactivate any code you like without actually deleting it from the file. The way the author name appears depends on settings for the author's user profile. We tell you about user profile options in Chapter 5. You can take this example a step further by switching the author name and date so it looks like the example in Figure 45, change the code from: <?php the_time('F jS, Y'); ?> by <?php the_author(); ?>to: Written by <strong><?php the_ author(); ?></strong> on <?php the_time('F jS, Y'); ?> at <?php the_time('g:i a'); ?>Get the idea? Figure 45. This example switches the date and time and adds additional information and text. 
|
To change the "more" link text 1. | If a recent blog post does not include a <!--more--> tag, edit a post to insert one.
| 2. | Open Main Index Template with Theme Editor or index.php with a text editor.
| 3. | Locate the following code: <?php the_content('Read the rest of this entry »'); ?>
| 4. | Modify the text between the single quotes so it says what you want it to say. For example:
<?php the_content('Read more...'); ?>
| 5. | Save or upload the modified file to replace the original.
| 6. | View your blog to make sure the more link text for a post with a <!--more--> tag appears the way you expected (Figure 46).
Figure 46. A more link can say anything you want. 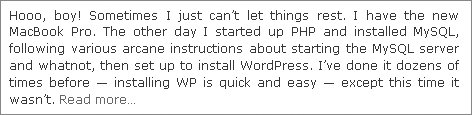
|
Tip
To change the post footer's link separator character 1. | Open Main Index Template with Theme Editor or index.php with a text editor.
| 2. | Locate the following code: <?php the_category(', '); ?> | <?php edit_post_link('Edit', '', ' | '); ?>
| 3. | Replace the two pipe ( | ) characters with the character you prefer. The first is between the the_category and the edit_post_link tags, each of which create links. The second is a parameter for the edit_post_link tag.
| 4. | Save or upload the modified file to replace the original.
| 5. | View your blog to make sure the new link separators appear the way you expected (Figure 47).
Figure 47. In this example, the link separators have been changed to bullet characters. 
|
Tips | The edit_post_link tag includes its own separator parameter because the Edit link only appears under certain circumstances, as discussed earlier in this chapter. If the link does not appear, the separator shouldn't appear either, right? To use a special character as a separator, you must enter its HTML code. For example, • is the code entered to display a bullet character like the ones shown in Figure 47. You can find a list of character codes on the Web at www.web-source.net/symbols.htm.
|
To change the category separator 1. | Open Main Index Template with Theme Editor or index.php with a text editor.
| 2. | Locate the following code: <?php the_category(', '); ?>
| 3. | Replace the text within the single quotes (a comma and a space) with whatever separator characters you prefer.
| 4. | Save or upload the modified file to replace the original.
| 5. | View your blog to make sure the new category separators appear the way you expected (Figure 48).
Figure 48. Here, the category separator has been changed from a comma to an ampersand. 
|
Tips | Category separators are only visible for posts which have more than one category assigned to them. To use a special character as a separator, you must enter its HTML code. For example, & is the code entered to display an ampersand character like the ones shown in Figure 48. You can find a list of character codes on the Web at www.web-source.net/symbols.htm. Make sure you separate links on your Web pages with more than just space characters. Otherwise, multiple links will appear to run together as one long linked phrase.
|
To change the edit post link text 1. | Open Main Index Template with Theme Editor or index.php with a text editor.
| 2. | Locate the following code: <?php edit_post_link('Edit', '', ' | '); ?>
| 3. | Replace the word Edit with whatever text you prefer.
| 4. | Save or upload the modified file to replace the original.
| 5. | View your blog to make sure the edit post link text appears the way you expected (Figure 49).
Figure 49. In this example, we changed Edit to Edit Post. The result: undesirable word wrap when there are two categories. 
|
Tips | The edit post link text is only visible if you have editing rights and are logged in. The edit_post_link tag has three parameters separated by commas: the text that appears as a link, the text that appears before the link, and the text that appears after the link. You could also place the edit post link on a separate line. Figure 50 shows how it would look if you changed: Posted in <?php the_category(', '); ?> | <?php edit_post_link('Edit', '', ' | '); ?> <?php comments_ popup_link('No Comments »', '1 Comment »', '% Comments »'); ?>to: Posted in <?php the_category(' & '); ?> • <?php comments _popup_link('No Comments »', '1 Comment »', '% Comments »'); ?><?php edit_post_ link('Edit this Post', '<br />', ''); ?>
Figure 50. Here's a better solution: putting the edit post link text on its own line. 
|
To change the comment link text 1. | Open Main Index Template with Theme Editor or index.php with a text editor.
| 2. | Locate the following code: <?php comments_popup_link('No Comments »', '1 Comment »', '% Comments »'); ?>
| 3. | Change the text within the single quotes as follows:
- To change the text that appears if there aren't any comments (Figure 51), replace the text within the first set of single quotes.
Figures 51, 52, & 53. You can change the text that appears when there are no comments, one comment, or more than one comment.   
- To change the text that appears if there is only one comment (Figure 52), replace the text within the second set of single quotes.
- To change the text that appears if there is more than one comment (Figure 53), replace the text within the third set of single quotes. Be sure to include the % character if you want the number of comments to appear; it will be replaced by the number of comments.
Figures 51 through 53 illustrate what the following code might look like with zero, one, and two comments:
<?php comments_popup_link('Would you care to make a comment? ', 'There is 1 Comment', 'There are % Comments'); ?>
| 4. | Save or upload the modified file to replace the original.
| 5. | View your blog to make sure the comment link text appears the way you expected (Figures 51, 52, and 53).
|
|