| Font Book is a Mac OS X utility that enables you to install, preview, search, activate, and deactivate fonts with an easy-to-use interface. Font Book organizes all of your fonts into libraries and collections. Libraries, which appear above the split line in the Collection column, are groups of fonts organized by where they are installed. Collections, which appear below the split line, are groups of fonts organized to meet your needs. Font Book comes preconfigured with several libraries and collections, but you can add, remove, or modify others as desired. Within each library or collection is one or more fonts, each of which may contain one or more typefaces. Each typeface is a slightly different version of the fontfor example, bold, italic, or condensed. Font Book makes it possible to turn fonts on or off. This helps keep your applications' font menus and lists neat by letting you display only those fonts that you want to display.  Tips Tips
Font Book is integrated with the Font panel, which I discuss later in this chapter. With Font Book, you can create libraries of fonts insalled other than as discussed in the section titled "Font Locations" earlier in this chapter. This new feature offers more flexibility for managing fonts.
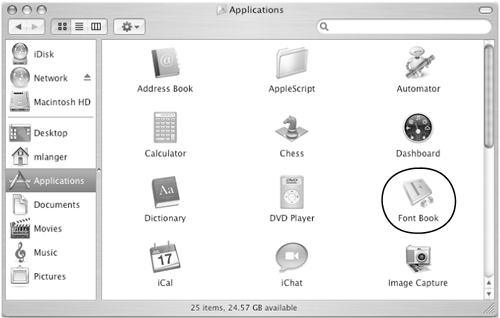
To launch Font Book Use one of the following techniques: Font Book's main window appears (Figure 9). Figure 9. The main Font Book window lists libraries, collections, and fonts and displays a font preview. 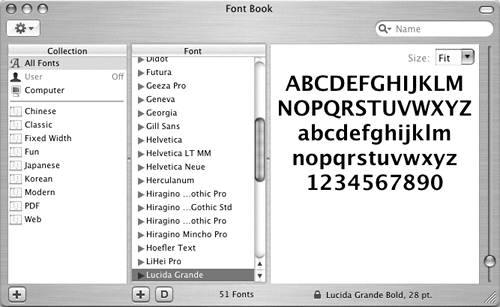
Tip
To install a font 1. | Insert the disc containing the font files you want to install or copy the font files to your hard disk.
| 2. | Launch Font Book.
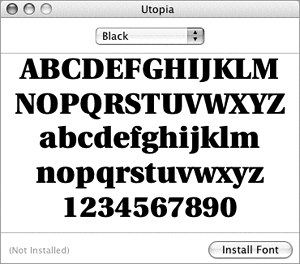
| 3. | Double-click one of the Font files (Figure 10). A font window like the one in Figure 11 appears.
Figure 10. A folder containing the font files for a PostScript font, all ready to install. 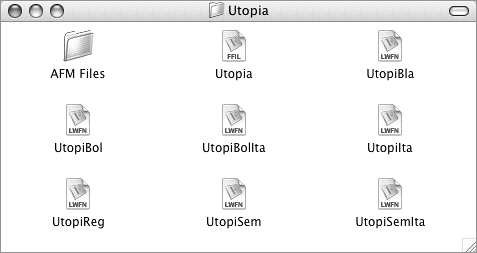
| 4. | Click the Install Font button.
The font files are copied or moved to the Fonts folder inside the Library folder for your account, thus making it available to you only. The name of the Font appears selected in the main Font Book window (Figure 12).
Figure 12. The font is installed and appears in the main Font Book window. 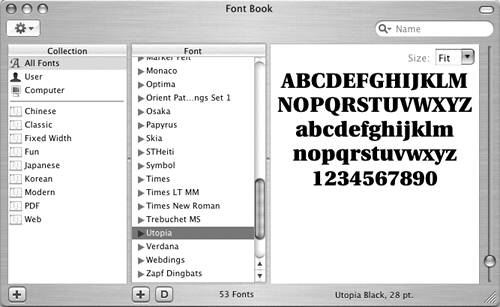
|
Tips You can change the default location for newly installed fonts. Choose Font Book > Preferences to display the Preferences window (Figure 13). Choose a library name from the Default Install Location pop-up menu and close the window to save your settings. Figure 13. The Preferences window enables you to specify a default location for installing font files. 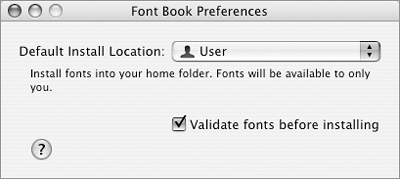
You can also install a font by dragging the font's file icon(s) onto a collection name in the main Font Book window.
To uninstall a font 1. | Select the name of the font in the Font column of the main Font Book window (Figure 11).
| 2. | Press  . .
| 3. | A dialog sheet like the one in Figure 14 appears. Click Remove.
Figure 14. A confirmation dialog like this one appears when you attempt to uninstall a font. 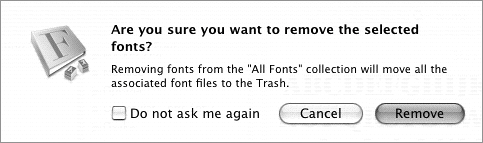
The font's files are moved to the Trash. Emptying the Trash removes them from your computer.
|
To view fonts by library In the Collections column of the Main Font Book window, select the name of the library you want to view. The fonts in that library appear in the Font column (Figure 15). Figure 15. When you select a fontlocation, the Font list displays all of the fonts installed in that location. 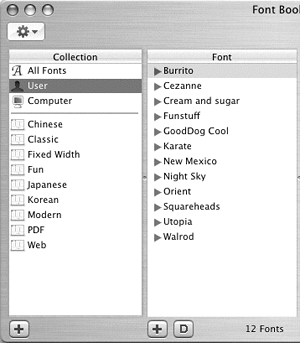
Tips There are two default libraries: User and Computer. I explain how to add a library later in this section. The User library is only enabled after at least one font has been installed in it. A font's library determines where the font is installed and how it can be accessed, as discussed near the beginning of this chapter. You can copy a font from one location to another by dragging it from the Font list to the name of another library. For example, to make a user font available to all users, select User in the Collection list and drag the font from the Font list to Computer in the Collection list (Figure 16). Figure 16. You can move a font from one location to another by dragging it within the Font Book window. 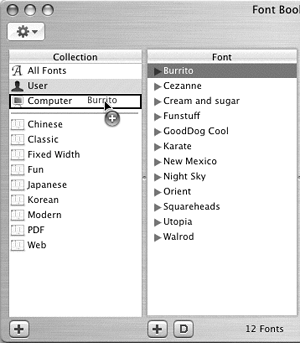
To view fonts by collection In the Collection column of the main Font Book window, select the name of the collection you want to view. The fonts in that collection appear in the Font column (Figure 17). Figure 17. To see the fonts in a collection, select the name of the collection in the Collection list. 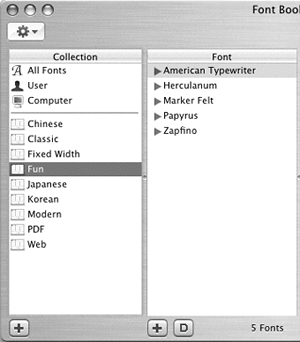
To preview font or typeface characters 1. | In the Collection list of the main Font Book window, select All Fonts or the name of the collection that the font is part of (Figure 17).
| 2. | In the Font list, select the name of the font you want to preview. The characters for the regular typeface of the font appear on the right side of the window (Figure 18).
Figure 18. Select the name of a font to view the typeface characters of that font. 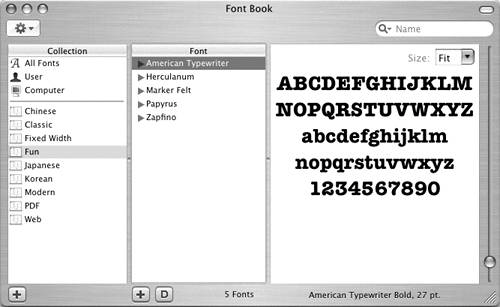
| 3. | To see a specific typeface for the font, click the triangle to the left of the font name to display all typefaces. Then click the name of the typeface you want to see. Its characters appear on the right side of the window (Figure 19).
Figure 19. Select the name of a typeface to view that typeface's characters. 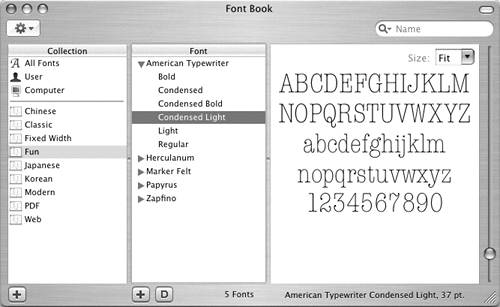
|
Tips To change the size of characters in the preview part of the window, enter a value in the Size box, choose a value from the Size drop-down list (Figure 20), or drag the slider on the far right side of the window. Figure 20. You can choose a font size from the Size drop-down list. 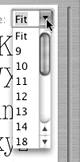
To change the text that appears in the preview part of the window, choose one of the first 21 options on the Preview menu (Figure 22): Sample ( ) displays the characters shown throughout this chapter. ) displays the characters shown throughout this chapter. Repertoire ( ) displays all characters in ASCII order. ) displays all characters in ASCII order. Custom ( ) enables you to specify your own sample text. ) enables you to specify your own sample text.
Figure 22. Font Book's File menu. 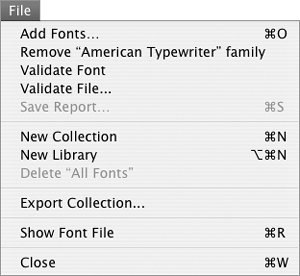
Figure 21. The Preview menu enables you to set preview area options. 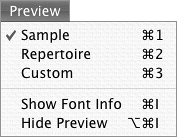
To add a library 1. | Choose File > New Library (Figure 22), or press  . An untitled library appears in the Collection list with its name selected (Figure 23). . An untitled library appears in the Collection list with its name selected (Figure 23).
Figure 23. An untitled library is added to the Collection list. 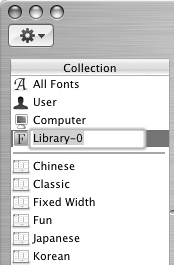
| 2. | Enter a new name for the collection and press  (Figure 24). (Figure 24).
Figure 24. Enter a name for the library and press . 
|
Tip
To add fonts to a library 1. | In the Collection list, select the library you want to add fonts to (Figure 24).
| 2. | Choose File > Add Fonts (Figure 22) or press  . .
| 3. | Use the Open dialog that appears (Figure 25) to locate and select the folder containing the font(s) you want to add.
Figure 25. Use the Open dialog to locate and select a folder containing the fonts you want to add. 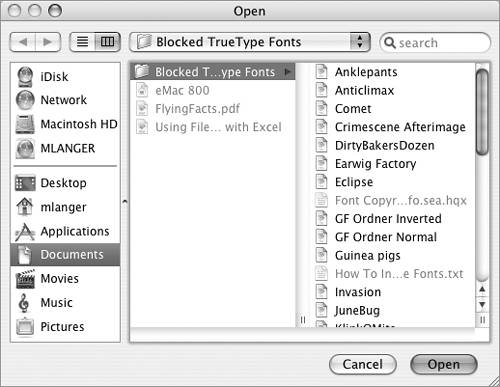
| 4. | Click Open.
Font Book adds the fonts to the library (Figure 26).
Figure 26. The fonts in the folder you selected are added to the library. 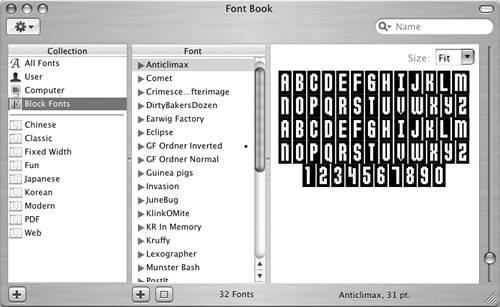
|
Tips Adding fonts to a library you created does not copy or move the font from the folder you added it from. This makes it possible to use fonts stored in any folder on diskeven folders accessible via network. I tell you more about using the Open dialog in Chapter 7.
To add a collection 1. | Click the Create a new collection (+) button at the bottom of the Collection list in the main Font Book window.
| 2. | A new untitled collection appears with its name selected (Figure 27). Enter a name for the collection, and press .
Figure 27. An untitled collection appears in the Collection list with its name selected. 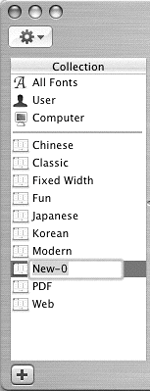
The collection name appears in the list (Figure 28).
Figure 28. When you name the collection, it appears in alphabetical order in the Collection list. 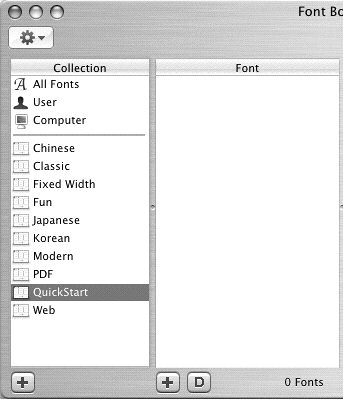
|
To add a font to a collection 1. | In the Collection list, select All Fonts (Figure 12) or the name of the library or collection that a font you want to add is part of (Figure 17).
| 2. | Locate the font in the Font list.
| 3. | Drag the font from the Font list onto the name of the collection you want to add it to (Figure 29). When you release the mouse button, the font is copied to that collection.
Figure 29. Adding a font to a collection is a simple drag-and-drop operation. 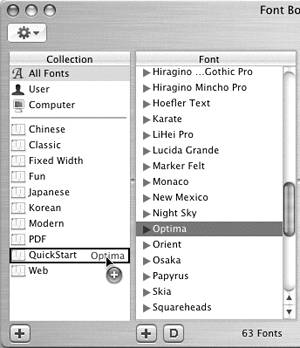
|
Tip
To remove a font from a library or collection 1. | In the Collection list of the main Font Book window, select the name of the library or collection you want to modify.
| 2. | In the Font list, select the font you want to remove.
| 3. | Press . A dialog like the one in Figure 30 or 31 appears. Click Remove.
Figure 30. When you remove a font from a library, a confirmation dialog like this one appears. 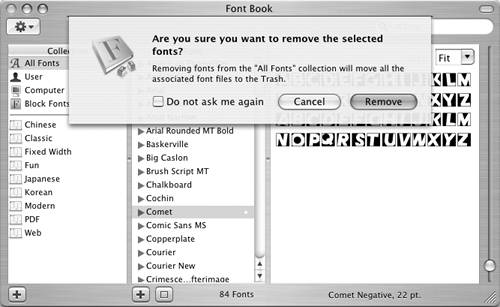
Figure 31. When you remove a font from a collection, a confirmation dialog like this one appears. 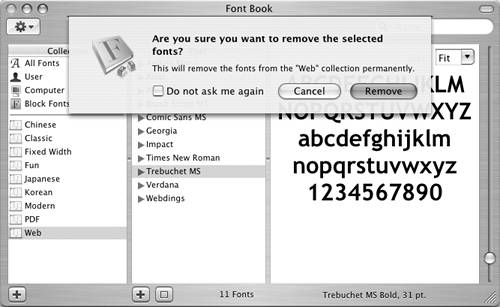
|
Tip Removing a font from a library removes the font from Font Book, thus making it unavailable for use in applications. Removing a font from a collection removes it from that collection but does not remove it from Font Book, so it is still available for use in applications.
To remove a library or collection 1. | In the Collection list, select the library or collection you want to remove (Figure 24).
| 2. | Choose File > Delete "Library Name".
| 3. | Click Remove in the confirmation dialog that appears (Figure 32).
Figure 32. When you remove a library or collection, a confirmation dialog like this one appears. 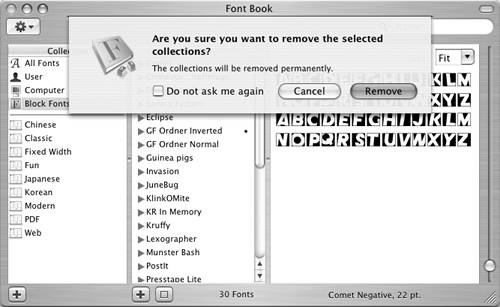
The library or collection is removed.
|
Tips Removing a library you created or a collection does not delete font files from disk. When you remove a library, its fonts are no longer available for use in applications. When you remove a collection, the collection name no longer appears in the Font panel, but the fonts it contains are still available for use in applications. You cannot remove the All Fonts, User, or Computer libraries.
To disable a library or collection 1. | In the Collection list, select the name of the library or collection you want to disable (Figure 24).
| 2. | Choose Edit > Disable "Collection Name" (Figure 33) or press  . .
Figure 33. Font Book's Edit menu. 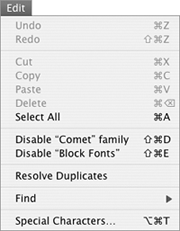
The library or collection is disabled and the word Off appears beside it in the Collection column (Figure 34).
Figure 34. The word Off appears beside a disabled library and all of its fonts. 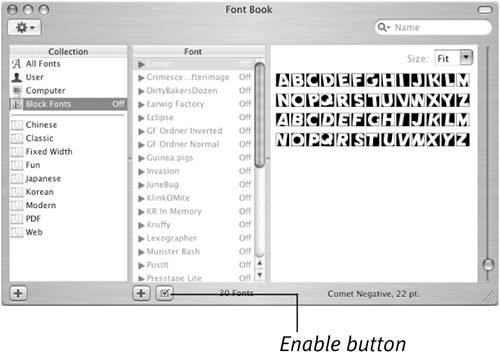
|
Tips When you disable a library, you disable all of its fonts (Figure 34). A disabled collection will not appear in the Font panel. If a font appears in only one collection and that collection is disabled, the font is also disabled.
To disable a font 1. | In the Collection list, select the name of the library or collection containing the font you want to disable.
| 2. | In the Font list, select the font you want to disable.
| 3. | Choose Edit > Disable "Font Name" Family (Figure 33) or press  . .
| 4. | In the confirmation dialog that appears (Figure 35), click Disable.
Figure 35. This dialog appears when you disable a font within a collection. 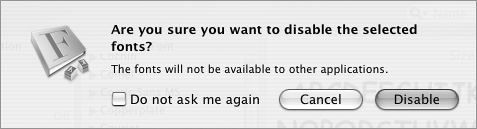
|
Tips When you disable a font in a collection, that font will not appear in the Font panel when the collection is selected. When you disable a font in a library, that font is not available for use in any application. Font Book displays a dialog like the one in Figure 36 when you try to disable a font that is used by the System. Figure 36. As this dialog warns, disabling a system font may adversely affect some applications. 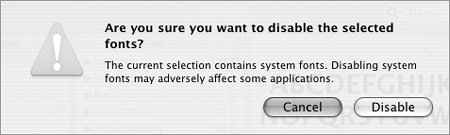
To enable a library or collection 1. | In the Collection list, select the name of the disabled library or collection that you want to enable.
| 2. | Choose Edit > Enable "Collection Name" (Figure 37).
Figure 37. The Edit menu with a disabled library selected. 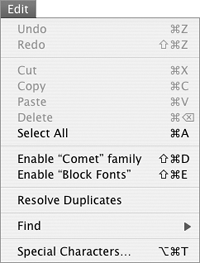
The library or collection is enabled.
|
To enable a font 1. | If the font is disabled in a collection, in the Collection list, select the collection the font is part of.
or
If the font is disabled in a library, in the Collection list, select the library the font is part of.
| 2. | In the Font list, select the font that is disabled.
| 3. | Click the Enable button beneath the Font list (Figure 34). The font is enabled.
|
To resolve font conflicts 1. | In the Collection list, select All Fonts.
| 2. | Locate and select a font with a bullet character to the right of its name (Figure 38).
Figure 38. A bullet beside a font name indicates that the font has a conflict. 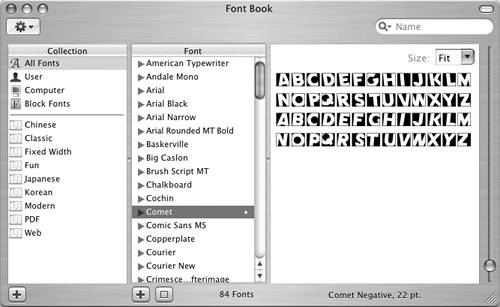
| 3. | If necessary, click the triangle to the left of the font name to display its typefaces. One or more of them should have bullet characters beside them (Figure 39).
Figure 39. When you reveal the font's typefaces, you can see the problem: duplicates. 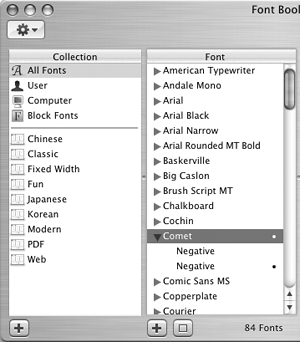
| 4. | Choose Edit > Resolve Duplicates (Figure 40).
Figure 40. Choose Resolve Duplicates. 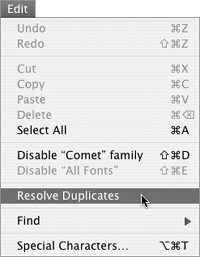
Font Book disables one of the conflicting typefaces (Figure 41).
Figure 41. Font Book resolves the conflict by disabling one of the duplicate typefaces. 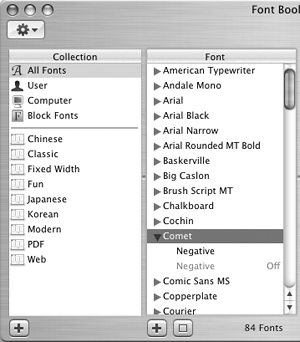
|
Tips Font conflicts like the one in Figure 39 are often caused when multiple copies of a font or typeface are installed in the same computer but in different places. Disabling one of the copies stops the conflict. If you prefer (and have the correct privileges), you can delete a duplicate typeface. Follow steps 1 through 3 above, select one of the duplicate typefaces, and press . Then click Remove in the confirmation dialog that appears. Keep in mind that if multiple users access your computer, disabling or deleting a conflicting font that is installed for the Computer (rather than for the User) may make that font unavailable for other users.
|