Elements of Photographic Quality
| What makes a good photograph? The quest for photographic quality can be elusive, in that we can identify the components that contribute to a good image, but still have the final product fall short of its potential. As is the case with all artistic mediums, there's an intangible combination of inspiration, timing, and craft that make an artistic photograph.
In fact, laying out the steps for capturing a good photograph can be almost as elusive as the photographic muse itself. This book tries to assist you in that endeavor by teaching technical knowledge and showing inspirational images. Although it might be difficult to specify the exact path to photographic excellence, it's pretty safe to say that this path passes through the technical domain defined by sharpness, exposure, and composition. It's important to understand how these three components combine to create a quality image.
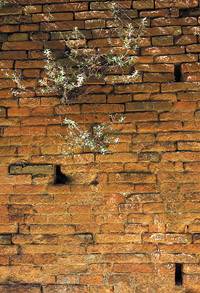
Sharpness and DetailSharpness refers to the areas of the image that are in sharp focus. When evaluating your images for sharpness, the two main questions you need to ask are whether the subject of the shot is in focus, and whether the focus area is sharp enough. When locking on a focus point, many autofocus cameras look for parallel lines or distinct edges in specific zones of the viewfinder. As a result, the camera often misses the mark, focusing in front of or behind your subject, leaving the desired subject soft and blurry. Each time you examine a shot, you should look for the focus point that the autofocus system decided on. Is the sharpest area of focus positioned appropriately in relation to your subject, or is it a bit soft? Generally speaking, you want the subject as sharp as possible, so you may want to consider reshooting the image if the subject isn't as sharp as you'd like. It's easier to soften sharp objects in Photoshop, so you should always try to get the sharpest image possible. Even if you're going for a soft hazy effect, capture all the detail you can in the original shot. Post-processing in Photoshop is a great place to add back a bit of blur if that's what you're after. Using quality lenses, putting the camera on a tripod, and using a cable release are great ways to increase the overall sharpness of your images. Don't rely on Photoshop to save the day, because even though Photoshop can do some amazing things to sharpen images, there's still no replacement for shooting a tack-sharp image through the lens.
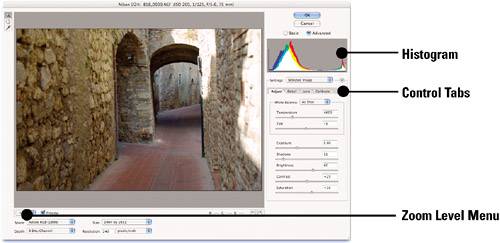
ExposureGood exposure is so important to photography that you could easily devote a couple volumes to it. In fact, I devote the entire next chapter to the art and science of proper photographic exposure and barely scratch the surface. Within the context of image quality, exposure determines whether you have enough tonal variation and information to properly describe your subject. The operative words here are "properly describe." It might be enough to show the subject in full silhouette, or it could be that the entire scene needs even illumination. Each subject is different, and the "proper" way to render the subject is subjective. Experiment with exposure variations and think through the best way to describe the subject. See Chapter 2 for details.
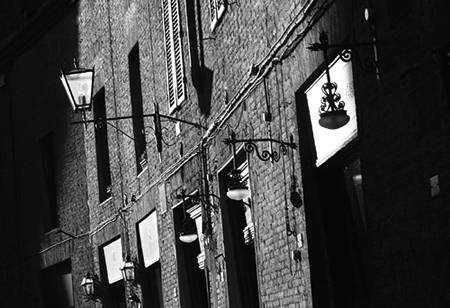
Composition and CroppingThere are two ways to approach composition and cropping, and I admit that I use both approaches as the situation dictates. One approach is to treat the viewfinder as the final image and compose accordingly. The advantage to this method is that you capture the image at the camera's maximum resolution. When you crop, you obviously reduce the overall pixel size of the image, limiting its enlargement possibilities. The problem with composing the final image through the viewfinder is that the optimum composition isn't always evident. Perhaps the shot works better in a vertical (portrait) orientation rather than a horizontal (landscape) orientation; perhaps the object should have more space around it. In addition, there will be times when you have to react quickly and get the shot without thinking too much about composition. Take the shot and make sure that it's sharp and well exposed; cropping and composing can be addressed later in Photoshop. See Chapter 4 for details on composing and cropping images. |


EAN: 2147483647
Pages: 141