| The History Brush allows you to selectively paint an iteration of an image from a previous state, as displayed in the History palette. Recall that as you work on an image, previous image states are recorded in the History palette. The History Brush lets you access these previous states as a source file, brushing them back into an image. The History palette stores only a limited number of states as specified with the General Preferences box (select Edit, Preferences, General). As you add states to the palette, you can convert a state to a snapshot to preserve that state. The basic rules of working with the History palette are outlined in Part 2, Task 5, "How to Undo with the History Palette." Select the History Brush Tool With the image file you want to modify open onscreen, select the History Brush tool from the toolbox. Note that all history states are erased when a file is closed; for this task, make sure that you are working with a file that has been modified from its original state since it was opened. 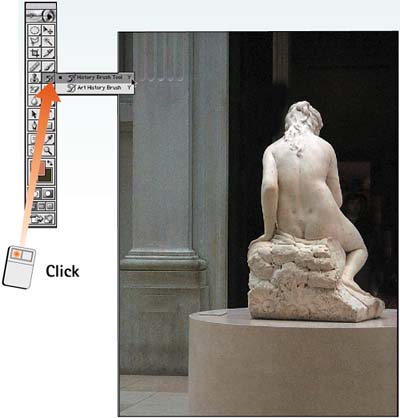
Set the Opacity In the Options bar, set the Opacity slider to determine the transparency or opacity of the brushstroke. For example, set the Opacity slider to 100 to add the history state as a solid area. Lower the value on the Opacity slider to increase the transparency of the brushstroke. 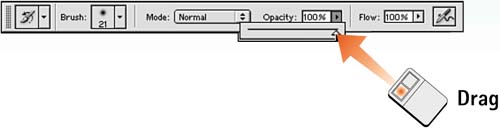
Select a Brush Select a brush size and a feathered effect from the Brush menu in the Options bar. 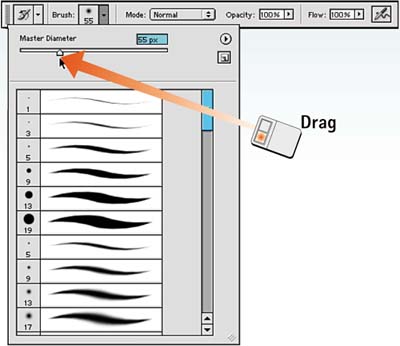
Set the Source Choose Window, History to open the History palette. Compare the various available history states and snapshots, and click the left column to place the source icon (a paintbrush) next to the state or snapshot you want to use as a source. 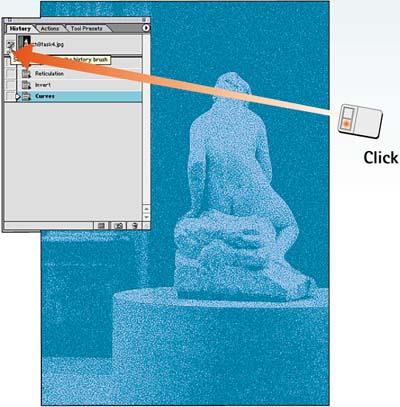
Paint the Image Move the cursor into the image window and click and drag to paint in the source image as it exists in the state you selected from the History palette in Step 4. 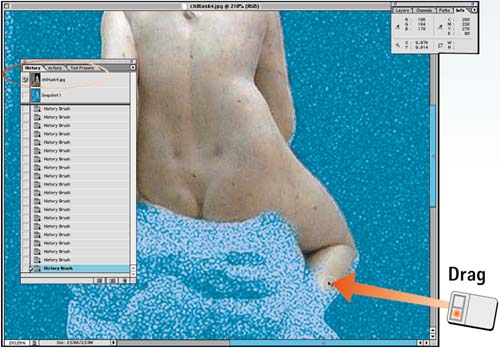
Look at the Results In this example, the image was modified with a filter; the original image was used as the source to paint back the figure of the statue. The before and after images are shown here side by side so that you can see the differences. 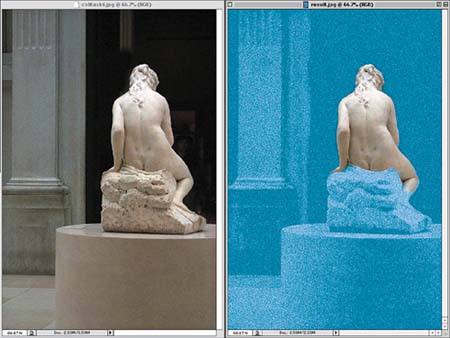
How-To Hints Painting in Corrections The History Brush is a great tool for brushing color corrections into an image. Apply any of Photoshop's color-correction commands and then select the previous state from the History palette, undoing the effect. While still in the History palette, click in the left column next to one of the color-correction commands to set the History Brush source icon, as described in Step 4 (even though the tile is grayed out, you still can set the icon). Select the History Brush and brush the correction into the exact areas you want within the image. As a wild alternative, you can paint a history state back in with the Art History brush. Located in the History Brush pop-out menu, this tool paints with expressive brush-stroke patterns that echo the initial history state. With the Art History brush selected, modify Style, Fidelity, Area, and Spacing options to create a wide range of effects. |
|