| If you're not familiar with color correction and color theory, variations is the place to start. The Variations dialog box is an intuitive color-correction tool that lets you correct color visually instead of using sliders, curves, and numbers. The dialog box features thumbnails of your image, with visual previews of how various color and tone corrections will look. The thumbnails are arranged to follow the standard color wheel, with primary colors opposite each other. As you work in this mode, notice how adding one color subtracts from the opposite color. For example, adding red subtracts from cyan. Open the Variations Dialog Box With the image file you want to affect open, choose Image, Adjustments, Variations to launch the Variations dialog box. At the top left of the box are two images; they help you compare your original image and the current variation you have created. At the beginning, these images are identical, but they will deviate from each other as you work. 
Select a Tonal Area Although all the controls in the Variations dialog box modify the entire image to some extent, the controls allow you to focus on one area of the tonal range at a time. Click the Highlights, Midtones, Shadows, or Saturation radio button to focus the correction on this one area. 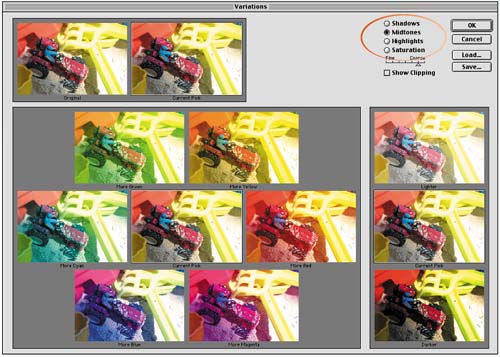
Modify the Color Click any of the thumbnail images in the color wheel array of thumbnails to add the corresponding color to the original image. As you do, notice that the original image takes on the selected color cast; all the surrounding thumbnails reorient themselves to the new current image. As you continue clicking thumbnails, the color corrections continue to be applied in an additive way. 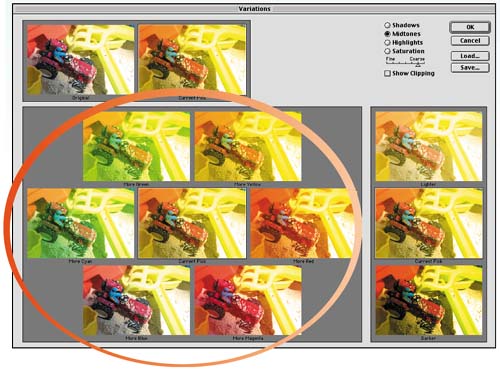
Modify the Coarseness Slider As you get closer to the desired color, you may find that the variations between color choices are too broad. You may want to add a red that's somewhere between the current shade of the image and the More Red thumbnail. To create more subtle color shifts, move the Coarseness slider toward the Fine end of the scale. This adjustment makes all the color variations more subtle, allowing you to select the variation that looks the best. 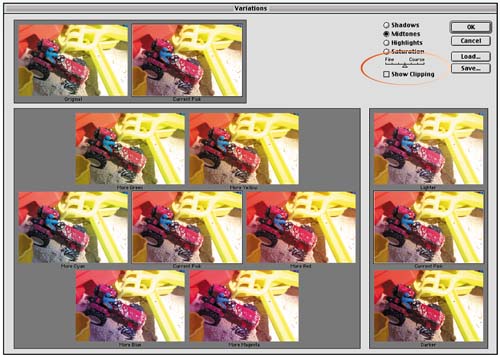
Modify the Tone The three thumbnails on the right of the dialog box control the overall tone of the image. Click the top thumbnail to lighten the image; click the dark thumbnail to darken the image. 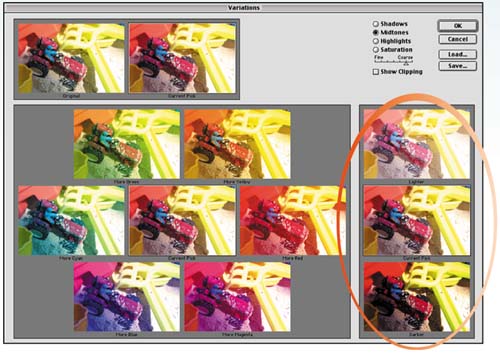
Save Settings If you are working with a group of similar images, you may want to save your settings so that you can reload them at a later time with one mouse click. Click the Save button. When the Save dialog box opens, type a name for the settings file you are creating and click Save. 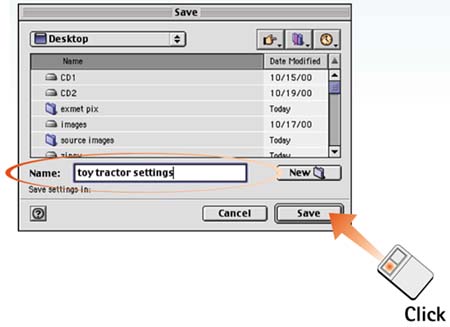
Apply the Color Correction To reload the saved settings, open the image, open the Variations dialog box, click the Load button, and select the desired settings file. Click OK to apply the correction to the image. How-To Hints Checking the Clipping If you enable the Show Clipping check box in the Variations dialog box, Photoshop applies a mask to areas of the image that will not convert to CMYK. This mask lets you monitor whether your corrections will work for print. |
|