Task 4 How to Use Quick Mask
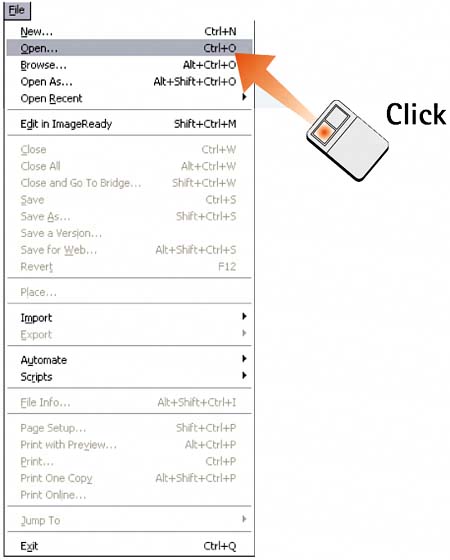
| Quick Mask is an intuitive way of selecting complex image areas using Photoshop's paint tools to define the selection area. The area is painted in as a mask, and you can erase or add to the mask to define the exact area you want to select. After you define the area, you exit Quick Mask to select the area. When you use Quick Mask with Photoshop's other painting tools (such as the Brush tool), you can literally paint a mask or selection using the actual image as a guideline. In fact, you don't have to worry about staying within the lines because you can easily reverse the painting by switching the color you're painting with. 1. Open the FileSelect File, Open to launch the desired file.
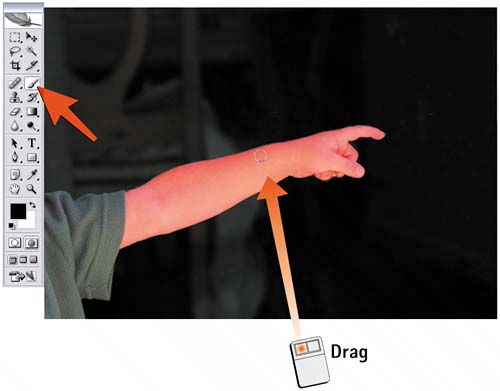
2. Make a Basic SelectionAlthough you can start the selection process with Quick Mask, I find it's easier to make an initial selection first, just to set up a relationship between the mask and the rest of the image. Use any of Photoshop's selection tools and select the general area you want to define. Here, I used the Magic Wand tool to select a portion of the boy's arm.
3. Set Quick Mask OptionsDouble-click the Quick Mask button in the toolbox to launch the Quick Mask Options dialog box. Select Masked Areas or Selected Areas to specify whether the mask represents the selection or the protected (masked) area. I find Selected Areas the more intuitive choice because the area you paint is the selection. If you use Masked Areas, you paint everything that won't be included in the selection. The default mask color is red, but you can click the color swatch and select another color. You can also increase or decrease the opacity of the mask by increasing or decreasing the Opacity percentage. Click OK to see the results of your settings. Reopen the dialog box at any time to change these options. 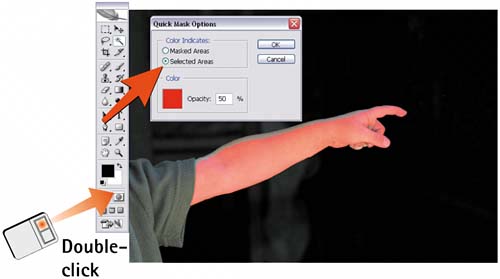 4. Draw or Paint the SelectionUse the Photoshop paint tools to fine-tune the mask. See Part 7, "Drawing and Painting with Color," for details. Use the default colors for painting: Black paints more mask and white removes (or undoes) the mask. You can select smaller or larger brushes or zoom in to follow the lines of your image more closely. As you'll see in the next step, you also can easily erase any areas where you painted outside the lines.
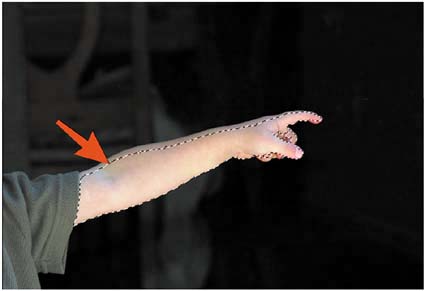
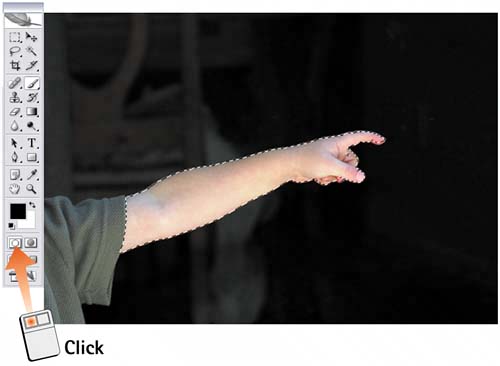
5. Erase Unwanted AreasPress the X key to make white the foreground color (to switch foreground and background colors), and paint with white to erase the mask or reduce the selection area as necessary. When finished correcting unwanted areas, press X again (if necessary) to make black the foreground color once more and continue to fine-tune the Quick Mask selection area. 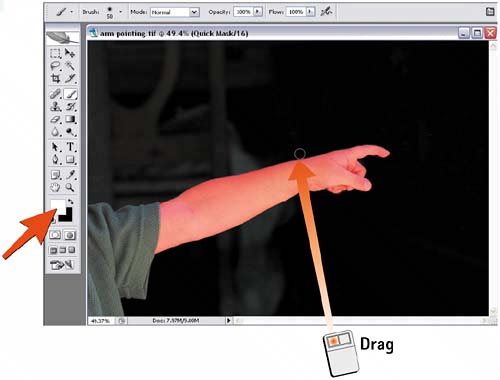 6. Exit Quick MaskClick the Standard Mode button in the toolbox to exit Quick Mask and convert the mask to a selection. Alternatively, press the Q key to toggle between standard mode and Quick Mask mode to ensure that the selection is correct for the work you're doing to the image.
|
EAN: 2147483647
Pages: 184