Test 1: On-demand Streaming
Test #1: On-demand Streaming
Your testing phase should simulate all of the possible scenarios that you will be supporting in your streaming environment. Because this section of the book has focused on on-demand streaming, we limit our discussion to on-demand testing. Recommended tests for live broadcasts, including multicast and unicast delivery, are provided in other sections of this book.
You should plan to use several files during the testing phase. Ideally, these files should be encoded at various bit rates and contain different kinds of content, such as high-motion, voice-overs, and even audio only. The Coho Winery Webmaster decided to encode five test files. The tests she runs on these files will accomplish the following tasks:
-
Confirm that the encoder, server, and Player are communicating as expected.
-
Simulate a large request for streams.
-
Simulate authentication in a high-demand environment.
-
Analyze test results and make configuration changes, if necessary.
Encoding the Test Files
To encode the five files for the load simulation test, the Coho Winery Webmaster followed these steps:
-
Open Windows Media Encoder 9 Series. In the New Session dialog box, click the Convert a file wizard. In the wizard:
-
Enter c:\encoding\test1.avi as the name and path for the first input file.
-
Enter c:\encoding\test1.wmv as the name and path for the first output file.
-
Select Windows Media server as the content distribution method.
-
Select Multiple bit rates for video and audio, and select the 28, 43, and 58 Kbps check boxes for the first file. For the other four test files, she’ll use different bit rates, such as 109 Kbps, 148 Kbps, 282 Kbps, and higher and make sure that each file contains at least two or three bit rates.
Note Even though Coho Winery is encoding from file, it’s a good idea to test device capture on live broadcast as well, just to see how performance is affected on the encoder, server, and player.
-
-
Encode 30 to 60 seconds of the video source. As the encoder ran, she kept an eye on CPU Load in the Monitor panel. When monitoring the CPU load, especially during device capture or live broadcast, watch for a load that consistently exceeds 60 to 70 percent. When this happens, the quality of the encoded video could be affected. You can decrease the CPU load by closing other applications, especially background programs such as screen savers. You can also close or reduce the size of the video input panel on your encoder or encode single rather than multiple-bit-rate streams. If CPU load is still high, you will have to lower the encoding bit rate.
-
Open the file in Windows Media Player to check the playback. She then went back and encoded the remaining four test files.
-
Copy all of the files to the Windows Media server. The Webmaster copied the files to the %systemdrive%\WMPub\WMRoot folder on her Windows Media server. This folder is the default location for all Windows Media content and also contains additional sample files that you can use for testing.
Configuring the Server for Testing
Once your test content is in the default content directory, \WMPub\WMRoot, you can configure your server for the load simulation. To configure your server, follow these steps:
-
Open the Windows Media Services snap-in for MMC. Your server is listed in the console tree on the left side of the screen. Figure 8.1. shows the MMC as configured for the Coho Winery site. Coho01 is the server.
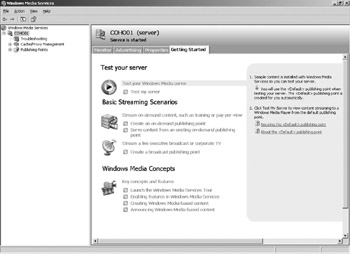
Figure 8.1: Coho Winery server in the Windows Media Services console tree. -
Expand the Publishing Points node and select the default on-demand publishing point. Click the Source tab in the details pane to verify that your source files are listed.
-
By default, the <Default> publishing point is set to deny new connections as a security measure. Click the Allow New Unicast Connections button on the row below the list (shown in figure 8.2).

Figure 8.2: The Allow New Unicast Connections button. -
With the publishing point node highlighted, click the Properties tab, right-click the Logging plug-in, and then click Enable. Although the Coho Winery Webmaster will not use this log during her test, she turns on logging because it increases the load on the server and gives a more accurate picture of server performance in a live environment.
-
Create five users, and name them User1, User2, User3, User4, and User5. Give them read access to the server that will be tested with Windows Media Load Simulator. Because Coho Winery has only one server, the Webmaster ensures that each user account has read access on Coho01. These users will attempt to authenticate during the test, which places an additional load on the server.
-
Open Windows Media Performance Monitor. The performance monitor gives you a good view of the health of your server and the streams it is sending to the clients. You can view the performance of the server or individual publishing points, and you can customize the view by adding or removing individual performance counters. To open Windows Media Performance Monitor, click your server in the console tree, click the Monitor tab, and then click the View Performance Monitor button at the bottom of the screen (as shown in figure 8.3).

Figure 8.3: The View Performance Monitor button.
Streaming the Test Files
The server is now ready for the test, so it’s time to prepare the client computer or computers that will be used to simulate multiple client requests for streams. This preparation is simple: just make sure the client can connect to the server and receive the stream.
-
On each client computer that will be used in the test, open Windows Media Player 9 Series.
Note If you expect that some of your users will be using earlier versions of the Player, you might want to repeat this test with those versions. Since you encoded your test files with the Windows Media 9 Series codecs, the Player will first attempt to download the codecs before playing the content. Alternatively, you could re-encode one or more of your test files to use an earlier codec.
-
Open and stream one of the test files. Click File, and then click Open. In the Open URL dialog box, type the URL of the file (for example, mms://Coho01/test1.wmv). If the file streams correctly, go on to the next step. If there is a problem, retrace your steps to resolve it. Here are some troubleshooting suggestions:
-
File or path not found. Make sure the file is in the default root folder, and the file name and path are correct in the URL. Make sure the publishing point is accepting new connections.
-
Server not found. There are many reasons why the Player might not find a server, including a mistyped URL or a problem with the network cable.
-
Access denied. Authorization and authentication have been added to the server or publishing point, and the user who is logged on to the client computer does not have access.
-
Codec. The Player attempted to stream a file for which there was no codec installed. It attempted to download the codec, unless the download codec feature was disabled, but could not locate the codec site to install it.
-
EAN: 2147483647
Pages: 258