Getting Started with OpenOffice.org Writer
| Start OpenOffice.org Writer by clicking the Applications menu on the top panel, navigating to the Office submenu, and selecting OpenOffice.org2 Writer (see Figure 13-1). Figure 13-1. OpenOffice.org Writer and its components are in the Office submenu.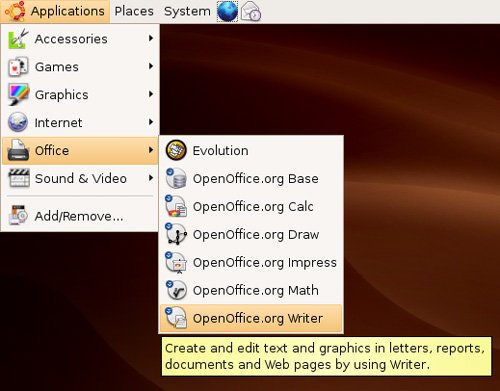 Shell Out
OpenOffice.org Writer starts up with a blank page, ready for you to release that inner creative genius (see Figure 13-2). At the top of the screen, you find a menu bar where commands are organized based on their categories, including the friendly sounding Help submenu (more on that shortly). Figure 13-2. OpenOffice.org Writer on startup.At this point, Writer is open, and you are looking at a blank screen. Let's write something. Write Now!As any writer will tell you, nothing is more intimidating than a blank page. Because I opened this chapter with a reference to the famous phrase, "It was a dark and stormy night," why don't we continue along that theme? That phrase is often pointed to as an example of bad writing, but the phrase in itself is only so bad. The paragraph that follows is even worse. Type this into your blank Writer page, as shown in Figure 13-3.
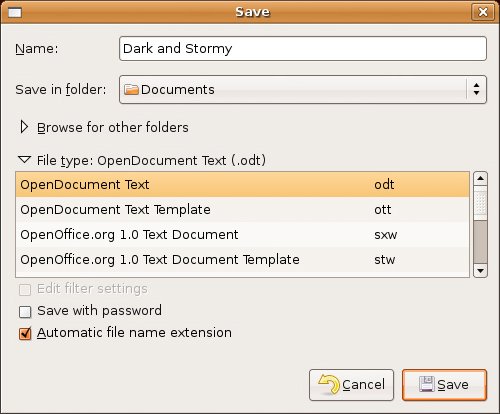
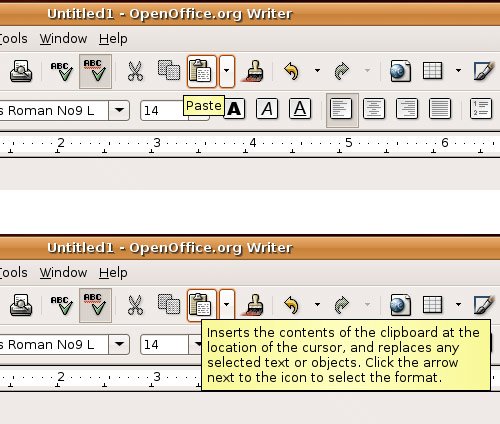
Figure 13-3. Your first document, dark and stormy.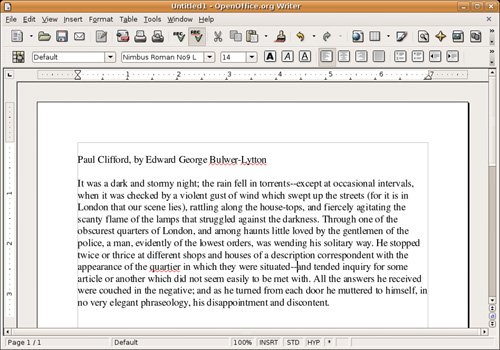 Okay, you can stop there. Isn't that wonderful stuff? If you feel the need to read more, I've got links to the story and the famous Bulwer-Lytton fiction contest at the end of this chapter. The Hunt for TyposFor years, I've been including the following tag line in the signature section of my emails: "This massagee wos nat speel or gramer-checkered." Given that I continue to use this line, I am obviously amused by it, but never running a spell check is far from good practice when your intention is to turn in a professional document. OpenOffice.org Writer can do a spell check as you type without actually correcting errors. With this feature, words that don't appear in the dictionary show up with a squiggly red line underneath them, which you can then correct. Many people find this a useful feature, but some, like me, prefer to just check the whole document at the end of writing. This feature is activated by default but you can deactivate it if you prefer. Here's how. Click Tools on the menu bar, and then select Options. This is a multipurpose dialog that allows you to configure many of OpenOffice.org's features (see Figure 13-4). For the moment, we concentrate on the auto spell check. To the left of the dialog is a sidebar with many categories. Click the plus sign beside Language Settings. This drops down a submenu from which you choose Writing Aids. Look to the right and you see a section called Options, at the top of which is the check box Check Spelling as You Type. To turn off the auto spell check feature, un-check this box, and then click OK to close the dialog. Figure 13-4. Turning off the spelling-as-you-type feature.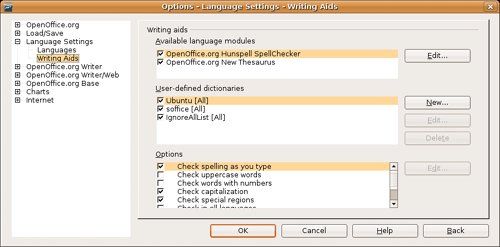 To start a full document spell check, click Tools on the menu bar, then Spellcheck to begin. You can also press <F7> at any time to start a spell check. What Language Is That?OpenOffice.org supports many different languages, and depending on where you picked up your copy, it may be set for a different language than your own. To change the default language, click Tools on the menu bar, then click Options, Language Settings, and Writing Aids. Look familiar? The dialog that appears should have OpenOffice.org MySpell SpellChecker checked (refer to Figure 13-4). You can then click the Edit button next to it and select your language of choice under the Default Languages for Documents drop-down box. When you have made your choice, click OK to exit the various dialogs. Saving Your WorkNow that you have created a document, it is time to save it. Click File on the menu bar and select Save (or Save As). When the Save As window appears, select a folder, type in a filename, and click Save (see Figure 13-5). When you save, you can also specify the File type to be OpenOffice.org's default Open-Document Text format (.odt), RTF, straight text, Microsoft Word format, and a number of others. You can even save in Palm doc format so you can take it with you on your Palm device. Figure 13-5. It is always good to save your work. If you want to create a new directory under your home directory, you can do it here as well. Click the icon that looks like a folder with a star or globe in front of it (the middle icon near the righthand corner), and then enter your new directory name in the Create New Folder pop-up window. Should you decide to close OpenOffice.org Writer at this point, you can always return to your document at a later time by clicking File on the menu bar and selecting Open. The Open File dialog appears, and you can browse your directories to select the file you want. You can specify a file type via a fairly substantial drop-down list of available formats. This gives you a chance to narrow the search to include only text documents, spreadsheets, or presentations. You can also specify a particular document extension (for example, only *.doc files) or a particular pattern. Printing Your DocumentInvariably, the whole point of typing something in a word processor might be to produce a printed document. When you are through with your document, click File on the menu bar and select Print. The Print dialog has several options (see Figure 13-6). The easiest thing to do after selecting your printer is just to click OK. The print job is directed to your printer of choice and, in a few seconds, you have a nice, crisp version of your document. You can select a page range, increase the number of copies (one to all your friends), or modify the printer properties (paper size, landscape print, and so on). Figure 13-6. Printing your Writer document.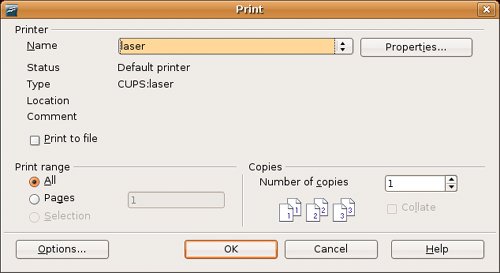 You can also print to a file. By default, this generates a PostScript document, a kind of universal printer language. A number of tools can view PostScript documents including the Evince PS/PDF viewer included with Ubuntu Linux. Just navigate to any PostScript document with Nautilus, double-click the document, and Evince opens the document for viewing. You can also save to PDF, something I'll cover a little later in the chapter. Toolbars of Every Kind . . .Now that you are feeling comfortable with your new word processor, let's take a quick tour of the various toolbars, icons, and menus in Writer. The icon bar directly below the menu bar is called the Standard bar, and it contains icons for opening and creating documents, cutting and pasting, printing, and other tasks. The Standard bar is common to all the OpenOffice.org applications (Writer, Calc, Impress, and so on). Below the Standard bar is the Formatting bar. It provides common editing options, such as font selection, bolding, italics, centering, and so on. Select words or phrases in your document with the mouse (hold, click, and drag across the desired text), then click B for bold or I for italic. This bar changes from application to application, depending on what type of formatting is most needed. At the bottom of the editing screen is the Status bar. There, you see the current page number, current template, zoom percentage, insert (or overwrite) mode, selection mode, hyperlink mode, and the current save status of the document. (If the document has been modified and not saved, an asterisk appears.) In all cases, pausing over each of the icons with your mouse cursor makes a tooltip appear, describing the functions of the individual icons. Help!Under the Help heading on the menu bar, you find plenty of information. By default, tooltips are activated so that when you pause your mouse cursor over an item, a small tooltip is shown. These tips are terse, usually no more than a couple of words. It's also possible to get a little more information by turning on extended tips. Before I tell you how to do that, have a look at Figure 13-7 for a sample of the difference. The image at the top shows the default tip for the Paste icon, whereas the image on the bottom shows the extended tip for the same function. Figure 13-7. What a difference extended tips makes. For that little extra help, click Tools and select Options. Under the OpenOffice.org menu on the right, you find a subsection labeled General. Click there and then look over on the right. You see a check box for Extended Tips near the top. Turning that on gives you slightly more detailed tooltips. If you are looking for help on a specific topic, there's always the included manual. Click Help on the menu bar and select OpenOffice.org Help (you can also press <F1>). The various tabs at the top left of the help screen let you search for topics by application with the Contents tab, alphabetically using the Index tab, and by keyword using the Find tab. You can even set bookmarks under the Bookmarks tab for those topics you regularly access. To Word or Not to Word?Ah, that is the question indeed. OpenOffice.org's default document format is the OASIS OpenDocument XML (eXtensible Markup Language) format, an open standard for document formats (it is saved with an .odt extension). As of the beginning of May 2006, the OpenDocument format is an ISO standard. The OpenDocument format is the closest thing to document freedom you can get (short of plain text). The format is vendor and application neutral. You are guaranteed support and portability because it is an open standard. Many organizations such as the European Commission and the State of Massachusetts recommend the OASIS OpenDocument format for the very reasons I've mentioned. In fact, Massachusetts requires the use of open document standards by law. For more on this emerging standard, check the resources section at the end of this chapter. Alternatively, the main reason for sticking with Word format is, quite frankly, that Word is everywhere. The sheer number of Word installations is the very reason that OpenOffice.org was designed to support Microsoft Office format as thoroughly as it does. That said, if you do want to switch to the OASIS OpenDocument format, Writer provides an easy way to do that. Rather than converting documents one by one, the Document Converter speeds up the process by allowing you to run all the documents in a specific directory in one pass. It also works in both directions, meaning that you can convert from Word to OpenOffice.org format, and vice versa. The conversion creates a new file but leaves the original as it is. From the menu bar, select File, move your mouse to Wizards, and then select Document Converter from the submenu. To convert your Microsoft Office documents (you can do the Excel and PowerPoint documents at the same time), click Microsoft Office on the menu, and then check off the types of documents you want. The next screen asks whether you want both documents and templates or just one or the other. You then type in the name of the directory you want to import from and save to (this can be the same directory). After you enter your information and go to the next screen, the program confirms your choices and gives you a final chance to change your mind. Click Convert to continue. As the converter does its job, it lists the various files that it encounters and keeps track of the process. When the job is done, you have a number of files with an .odt extension in your directory. If you change your mind, don't worry. Your original files are still there, so you've lost nothing. If working with Word documents in Word format is important, then read on. Ah, heck. Even if it isn't, you should read on. Personalizing Your EnvironmentEvery application you use comes with defaults that may or may not reflect the way you want to work, and this is true with OpenOffice.org Writer, as well. Click Tools on the menu bar and select Options. There are a lot of options here, including OpenOffice.org, Load/Save, Language Settings, OpenOffice.org Writer (including HTML/Web documents), OpenOffice.org Base (the built in database), Charts, and Internet. Each of these sections has a submenu of further options. Because there are so many options here, I certainly can't cover them all, and besides, I don't want to bore you. Instead, I'll mention a few things that I think are important and let you discover the rest. The main OpenOffice.org dialog covers a lot of general options regarding the look and feel of the applications. Take a moment to look at the Paths settings. If you keep your documents in a specific directory, you want to set that here. Under Type, choose My Documents, click Edit, and then enter the new path to your directory of choice. Let's move on to the very important Load/Save settings menu (see Figure 13-8). If you are constantly going to move documents back and forth between systems running Microsoft Word and your own Linux system running OpenOffice.org Writer, you want to pay special attention here. Click the plus sign to the left of the Load/Save menu item, and then click Microsoft Office. Figure 13-8. Load/Save defaults for Microsoft documents.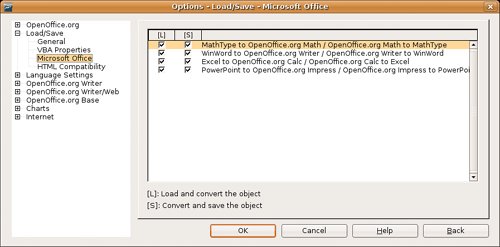 Check the Convert on Save (and load) check boxes (labeled [S] and [L] at the top), and your OpenOffice.org Writer documents are saved in Word format by default, whereas your Calc sheets wind up in Excel format. We're almost there. Although the conversion is pretty automatic here, when you try to resave a document that you have been working on, Writer may still disturb you with the occasional pop-up message informing you of the minuses of saving in Word format. You get around this with one other change. In the same menu section, click General. Notice the section Default File Format toward the bottom of the dialog (see Figure 13-9). For the Document type of Text document, select Microsoft Word 97/2000/XP from the Always Save As drop-down list to the right. While you are here (assuming you are making these changes, of course), you probably want to change the Always Save as format for Spreadsheet to be Microsoft Excel, and so on. Figure 13-9. Defining the standard file format to be Microsoft Word.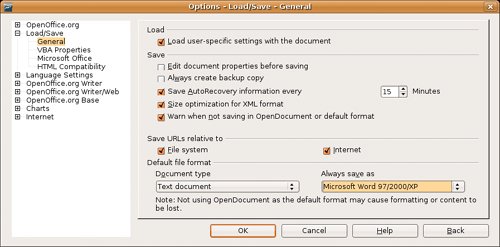 Click OK, and you are done. Note
Let's move on to the OpenOffice.org Writer category (in the left-hand sidebar menu) for changes related specifically to the Writer application. Whenever you start a new document, OpenOffice.org assigns a default font when you start typing. This may not be your ideal choice, and you don't have to accept it. Sure, you can change the font when you are writing, but why do this with every document when you can change it once? Click Basic Fonts, and you have the opportunity to change the default fonts your system uses. When you are done with the Options menu, click OK to return to the OpenOffice.org application. A Wizard of WordsOpenOffice.org comes with a number of templates that are available throughout the suite. The document Wizards feature helps you choose and walk through the setup of some basic documents. The easiest way to understand what these wizards can do for you is to dive right in and try one. On the menu bar, click File, and move your mouse over to Wizards. You see a number of document types here, from letters to faxes to presentations. We use Letter as an example. When the Letter Wizard starts up, it offers you three kinds of letters: business, formal, and personal (see Figure 13-10). Each of these may have different styles depending on the letter type. As you progress through the various steps, you are asked to enter some basic information related to the type of document that you chose. In the case of a letter, this involves an opening and closing greeting, a sender and recipient name and address, and so on. The wizard also lets you save the document as a template so you can use it at a later date. Figure 13-10. Writing using the Letter Wizard.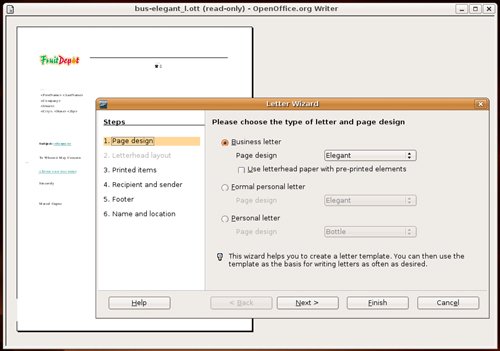 The wizard also displays a graphical preview of what the document looks like directly behind the design selection window. You shouldn't look at this as a perfect example of what you will wind up with, but it does help in visualizing the final product. Navigating StyleWith Writer open, click Format on the menu bar, and then select Styles and Formatting. A window labeled Styles and Formatting appears, floating above your document. Pressing <F11> also brings up the stylist. Clicking the X in the corner of the window banishes it. I'd like to give you some idea of how useful this little tool can be in formatting your documents. If you've banished the stylist, bring it back by clicking its icon or pressing <F11>. Great Time-Saving Tip
Figure 13-11. Styles make paragraph formatting easy and consistent. Note that the stylist is docked on the right.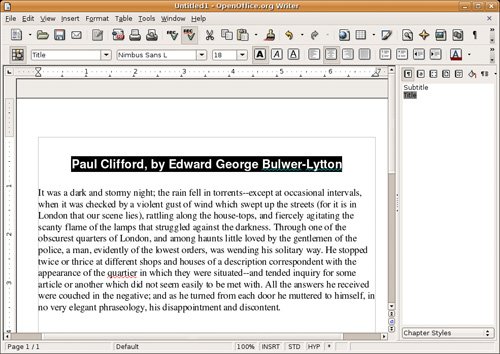 Whenever you start a new document, it loads with a default style. That style is actually a collection of formatting presets that define how various paragraphs will look. These include headings, lists, text boxes, and so on. All you have to do is select a paragraph, double-click a style, and your paragraph's lookincluding font style and sizeis magically updated. As an example of how to use this, try the following. Start by reloading your dark and stormy document, and then highlight your title text to select it. The bottom of your stylist shows the text Automatic. With your title highlighted, double-click Heading 1. The heading changes to a large, bold, sans serif font. Now click the arrow at the bottom of the list, and change from Automatic to Chapter Styles. Double-click Title, and your title is suddenly centered with the appropriate font applied (see Figure 13-11). The stylist is pretty smart. Look to the bottom of the list at those categoriesHTML Styles, Custom Styles, List Styles, and so on. Depending on the document type that you are working on, the stylist comes up with a pretty sane list for that Automatic selection. If you call up an HTML document, HTML formatting shows up in the Automatic list. Quick Undo Tip
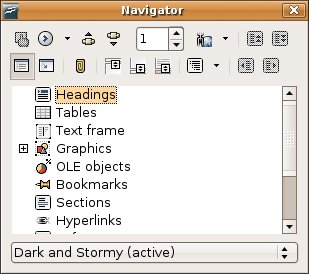
Navigating the Rivers of TextThe second floating window is called the Navigator. This is a great tool for the power user or anyone who is creating long, complex documents. When you start up the Navigator by clicking Edit and then Navigator (or by pressing <F5>), you see a window listing the various elements in your document (see Figure 13-12). These are organized in terms of headings, tables, graphics, and so on. Figure 13-12. The Navigator gives you access to all your document elements. Quick Tip
What makes this a great tool is that you can use it to navigate a document quickly. Let's say that (as in this chapter) there are a number of section headings. Click the plus sign beside the word Headings, and a treed list of all the headings in the document is displayed. Double-click a heading, and you instantly jump to that point in the document. The same goes for graphics, tables, and other such elements in your document. Speaking of Document Elements . . .Take a look over at the far right of the Standard bar. See the little icon that looks like a picture hanging on a wall (to the right of the Navigator star)? That's the gallery of graphics and sounds, decorative elements that can be inserted into your document. When you click the picture (or select Gallery from Tools on the menu bar), the gallery opens up with a sidebar on the left, listing the various themes. Wander through the collection until you see something that suits your document, and then simply drag it into your document, just as I did with that rather bright ruler below the Paul Clifford title in Figure 13-13. To banish the gallery, just click the icon again. Figure 13-13. Writer with the gallery open above the document, and with a docked stylist and Navigator to the right.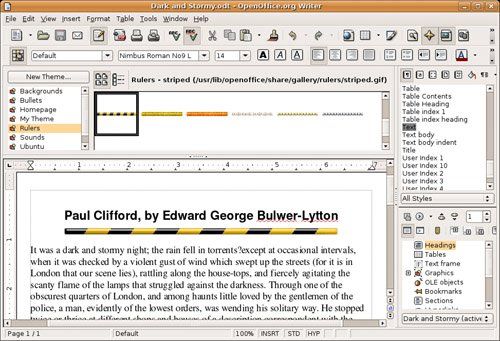 While you were using the gallery, did you notice the words New Theme at the top of the category sidebar? Click those words (which is really a button), and you can create a new category of images, clipart, or sounds. If you have a directory of images you've collected, enter the path to that directory, pick a name for this collection, and you are done. Next time you bring up the gallery, you can select from your own custom collection. Tip
More! Give Me More!OpenOffice.org comes with a limited number of templates, graphics, and icons. That's one of the advantages of its commercial (nonfree) cousin, StarOffice from Sun Microsystems. However, if you find yourself in need of more templates than you already have or a richer gallery, take careful note of the following Web sites. The first is called OO Extras, and it contains more than two hundred templates for OpenOffice.org Writer, Calc, and Impress. In addition to individual macros, icons, and templates, this Web site (created by Travis Bauer) aims to provide downloadable packages to enhance OpenOffice.org's suite. You should also pay a visit to the OpenOffice Documentation Project site (run by Scott Carr), which offers much more than extra templates and macros. There are also tutorials, setup guides, user guides, and even some video presentations. Links for both projects follow in the Resources section. |
EAN: 2147483647
Pages: 201